5 Steps To A Healthier Bowl Of Vegetarian Instant Noodles

P1210043P1210037 P1210044

____________

Step 01. Ditch the seasoning pack.

Step 02. Use fresh vegetables (e.g.lettuce, napa cabbage, bok choy) or mushrooms (enoki , shitake, shimeji)

Step 03. Choose a meatless protein (e.g. firm/silken tofu, egg).

Step 04. Season with some soy sauce and a dash of pepper.

Step 05. Garnish with some chopped coriander leaves, wolfberries or fried shallots.

____________

Szechuan Peppercorns Braised Tofu

szechuan peppercorns braised tofu // mono+co tofu001 tofu003

This was supposed to be a Korean dish (Dubu Jorim), but I substituted the Korean Red Pepper Flakes in the recipe with Szechuan peppercorns, as I have been fixated by these fiery seeds in my cooking lately.

It’s still as tasty, and goes just as well with steamed white rice.

RECIPE : SZECHUAN PEPPERCORNS BRAISED TOFU
/ Adapted from this Source

____________

1 large firm tofu (about 280gram)
1 tablespoon peanut oil

Sauce:
2 tablespoons soy sauce
4 tablespoons water
1 tablespoon sesame oil
1 teaspoon sugar
1 teaspoon Szechuan peppercorns
1 teaspoon sesame seeds
1 clove garlic, minced
1 stalk scallions, finely chopped

____________

01. Cut firm tofu into large pieces.

02. Combine the sauce ingredients in a small bowl, set aside.

03. Add 1-2 tablespoons of cooking oil in a hot skillet or wok.

03. Place tofu pieces on the wok, sear till light golden brown on both sides.

04. Pour the sauce mix over the cooked tofu, turning heat down and simmer for a few minutes.

05. Before the sauce dries up, turn the cooked tofu and allow the other side to cook in the sauce as well.

06. Place tofu on serving plate, topped with more sesame seeds and scallions if preferred.

07. Served immediately, with steamed white rice.

Easy Belgium Waffle

easy belgium waffles // mono+co

Some time early last year, I was fervently making ice cream with recipes from this gorgeous book.  The egg-less recipes are oh-so-easy to follow, even without an ice cream machine.  Since then, I have not used any other method for homemade ice cream.  I only stopped making them because I wanted to curb my desire to add an ice cream machine in my kitchen pantry.  But I am still consuming ice cream, of course.

A Belgium Waffle maker might change the game.  I managed to produce some pretty good looking waffles with a loaned waffle maker, and just like that, my desire to own an ice cream maker returned once again.

Keeping this recipe, just in case.  …just in case.

RECIPE : EASY BELGIUM WAFFLE
/ Source

____________

1 3/4 cup plain flour
1/4 cup corn starch
2 tablespoon sugar
1 tablespoon baking powder
1/4 teaspoon salt
2 eggs
1 3/4 cup milk
1/2 cup cooking oil (I used macadamia nut oil)
1 1/2 teaspoon vanilla a pinch of nutmeg (optional)
1/2 teaspoon cinnamon (optional) butter , for greasing waffle iron before making each waffle

____________

01. Preheat waffle iron.

02. In a large mixing bowl, whisk all the ingredients together until smooth.

03. Grease waffle iron generously with butter.

04. Pour batter onto the hot waffle iron and cook according to equipment instructions.

05. Serve immediately with favorite ice cream flavor.

Caramel Sauce for Popcorn

homemade caramel popcorns // mono+co

After knowing how to prepare these easy peasy homemade popcorn, indulge in caramel sauce covered ones once a while!  I chose a recipe that does not use corn syrup, and does not require bakingJust pour and toss.

++ Notes001 // Make the popcorn first before preparing the caramel sauce. Popcorn instructions here.  Sauce enough for 1/2 cup unpopped corn kernels.

RECIPE : CARAMEL SAUCE
/ Source

____________

125 grams unsalted butter
3/4 cup white sugar
2 Tablespoons honey

____________

01. Put butter, sugar and honey in a saucepan, stir over medium heat until the sugar has melted completely.
02. Bring to boil, and switch off fire once the mixture turns golden brown.
03. Pour caramel sauce over popcorn, stir until the sauce coat popcorn evenly.
04. Spread popcorn over baking tray to cool.  Serve.

Dark Soy Chicken

darksoychicken // makingitblissful

If my “stir fry everyday” dishes seem skewed towards pleasing the palates of young children, that’s because I picked up cooking for my two young girls.  This recipe is adapted from Billy Law’s Dark Soy Pork Spare Ribs (老抽炒排骨).  The dark soy gravy teamed with jasmine white rice is a hit with my kids, but they have not picked up the taste for spare ribs; fats, bones and all.  That’s why I use skinless chicken breasts for this dish instead.

++Notes.001 // Original recipe uses 3 tablespoons of white sugar, I reduced it to 2.

++Notes.002 // Original recipe uses 3 tablespoons of water, I increased it to about 5-6, so that I can yield more gravy to go with rice.

RECIPE : DARK SOY CHICKEN
/ Source

____________

1 piece of skin+boneless chicken breast, diced
2 Tablespoons cooking oil
1 Tablespoon dark soy thick caramel sauce
2 Tablespoons light soy sauce
2 Tablespoons white sugar
5-6 Tablespoons water
1 clove of garlic, sliced (optional)
1 stalk of spring onion, cut into 5 cm length (optional)

____________

01. Mix the dark soy sauce, light soy sauce, sugar, water together in a small bowl, and give it a good stir to loosen up the thick caramel sauce in the mixture.  Set aside.

02. In a heated wok, add oil.

03. Once the oil starts to smoke,  add diced chicken meat, and stir fry quickly till meat is cooked and turns white and opaque.

04. Pour the sauce mixture in, keep stirring for about 2-3 minutes, ensuring every piece of meat gets covered by the dark sauce.

05. The sauce should start to thicken and caramelize.  At this point, turn off the fire, add the optional sliced garlic and spring onion, give it another good stir, before transferring to a plate.  Serve hot.

Homemade Pandan Extract

homemadepandanextract001 homemadepandanextract003

Method adapted from here.

Items needed : pandan leaves, some water, a food processor, and a fine mesh filter or a cheese cloth.

____________

01. Discard the dried and dark green outer layer leaves, use only the softer, bright green leaves inside.
02. Trim off the roots and cut up the leaves into small pieces (the smaller the better, pandan leaves are very fibrous and are impossible to blend without cutting them up first), and place them in a food processor.
03. Depending on how much leaves you use, add water bit by bit as you blend, just to make the blending easier.  Adding too much water will dilute and make the extraction of the pandan paste difficult, see my notes below.
04. Filter the blended leaves through a wire mesh/cheese cloth.  Squeeze to the very last drop, even if using your bare hands if necessary!
05. Let filtered pandan juice sits in the fridge for a few days till the pandan extract sink to the bottom of the container.
06.  Remove excess liquid on top and store the pandan extract in a covered container in the fridge, use up within 2 weeks.

++ Notes 001 // I am going to try this extraction method using a coffee filter next time round.   Letting the pandan juice sits a few nights in the fridge works very well for the pandan extract to settle at the bottom of the juice.  However, it was difficult to scoop out the clearer liquid on top without mixing it up with the separated dark green pandan extract below.  The extract is so fine and light; any slight movement, such as the lowering down of the spoon, would inevitably mix up the solution again, though the sediments now take a faster time to sink.  I had no choice but to accept that a little of the top liquid (actually pandan flavored water) will be going into my pandan cake.

Onion Chicken Stir Fry

sweetonionchickenstirfry003 sweetonionstirfry002This recipe from AllRecipes.com is rated 4.5/5 stars.  I simplified it by stir-frying just the chicken meat and onion with the seasonings.

RECIPE : ONION CHICKEN STIR FRY
/ Source

____________

1 piece chicken breast, about 250g, diced
1/2 onion, sliced thinly
2 tablespoons peanut oil
1/2 cup water
1 tablespoons soy sauce
1 tablespoon sugar
1 tablespoon cornstarch
1 stalk spring onion , for garnish (optional)

____________

01. Mix water, soy sauce, sugar and cornstarch well in a small bowl, set aside.

02. In a heated wok, add peanut oil.  Once the oil starts to smoke, add onion slices, and fry till they turn translucent.

03. Add chicken meat, and continue to fry till they turn white.

04. Stir the bowl of sauce to mix well again (cornstarch will settle to the bottom when set aside) and pour into the wok.

05. Keep stirring till the sauce is reduced and thickened to coat the chicken meat.

06. Transfer onto a plate, garnish with spring onions, and serve immediately with steamed white rice.

Muah Chee

muahchee003a muahchee009 muahchee008 muahchee005 muahchee006 muahchee007 muahchee001 muahchee002
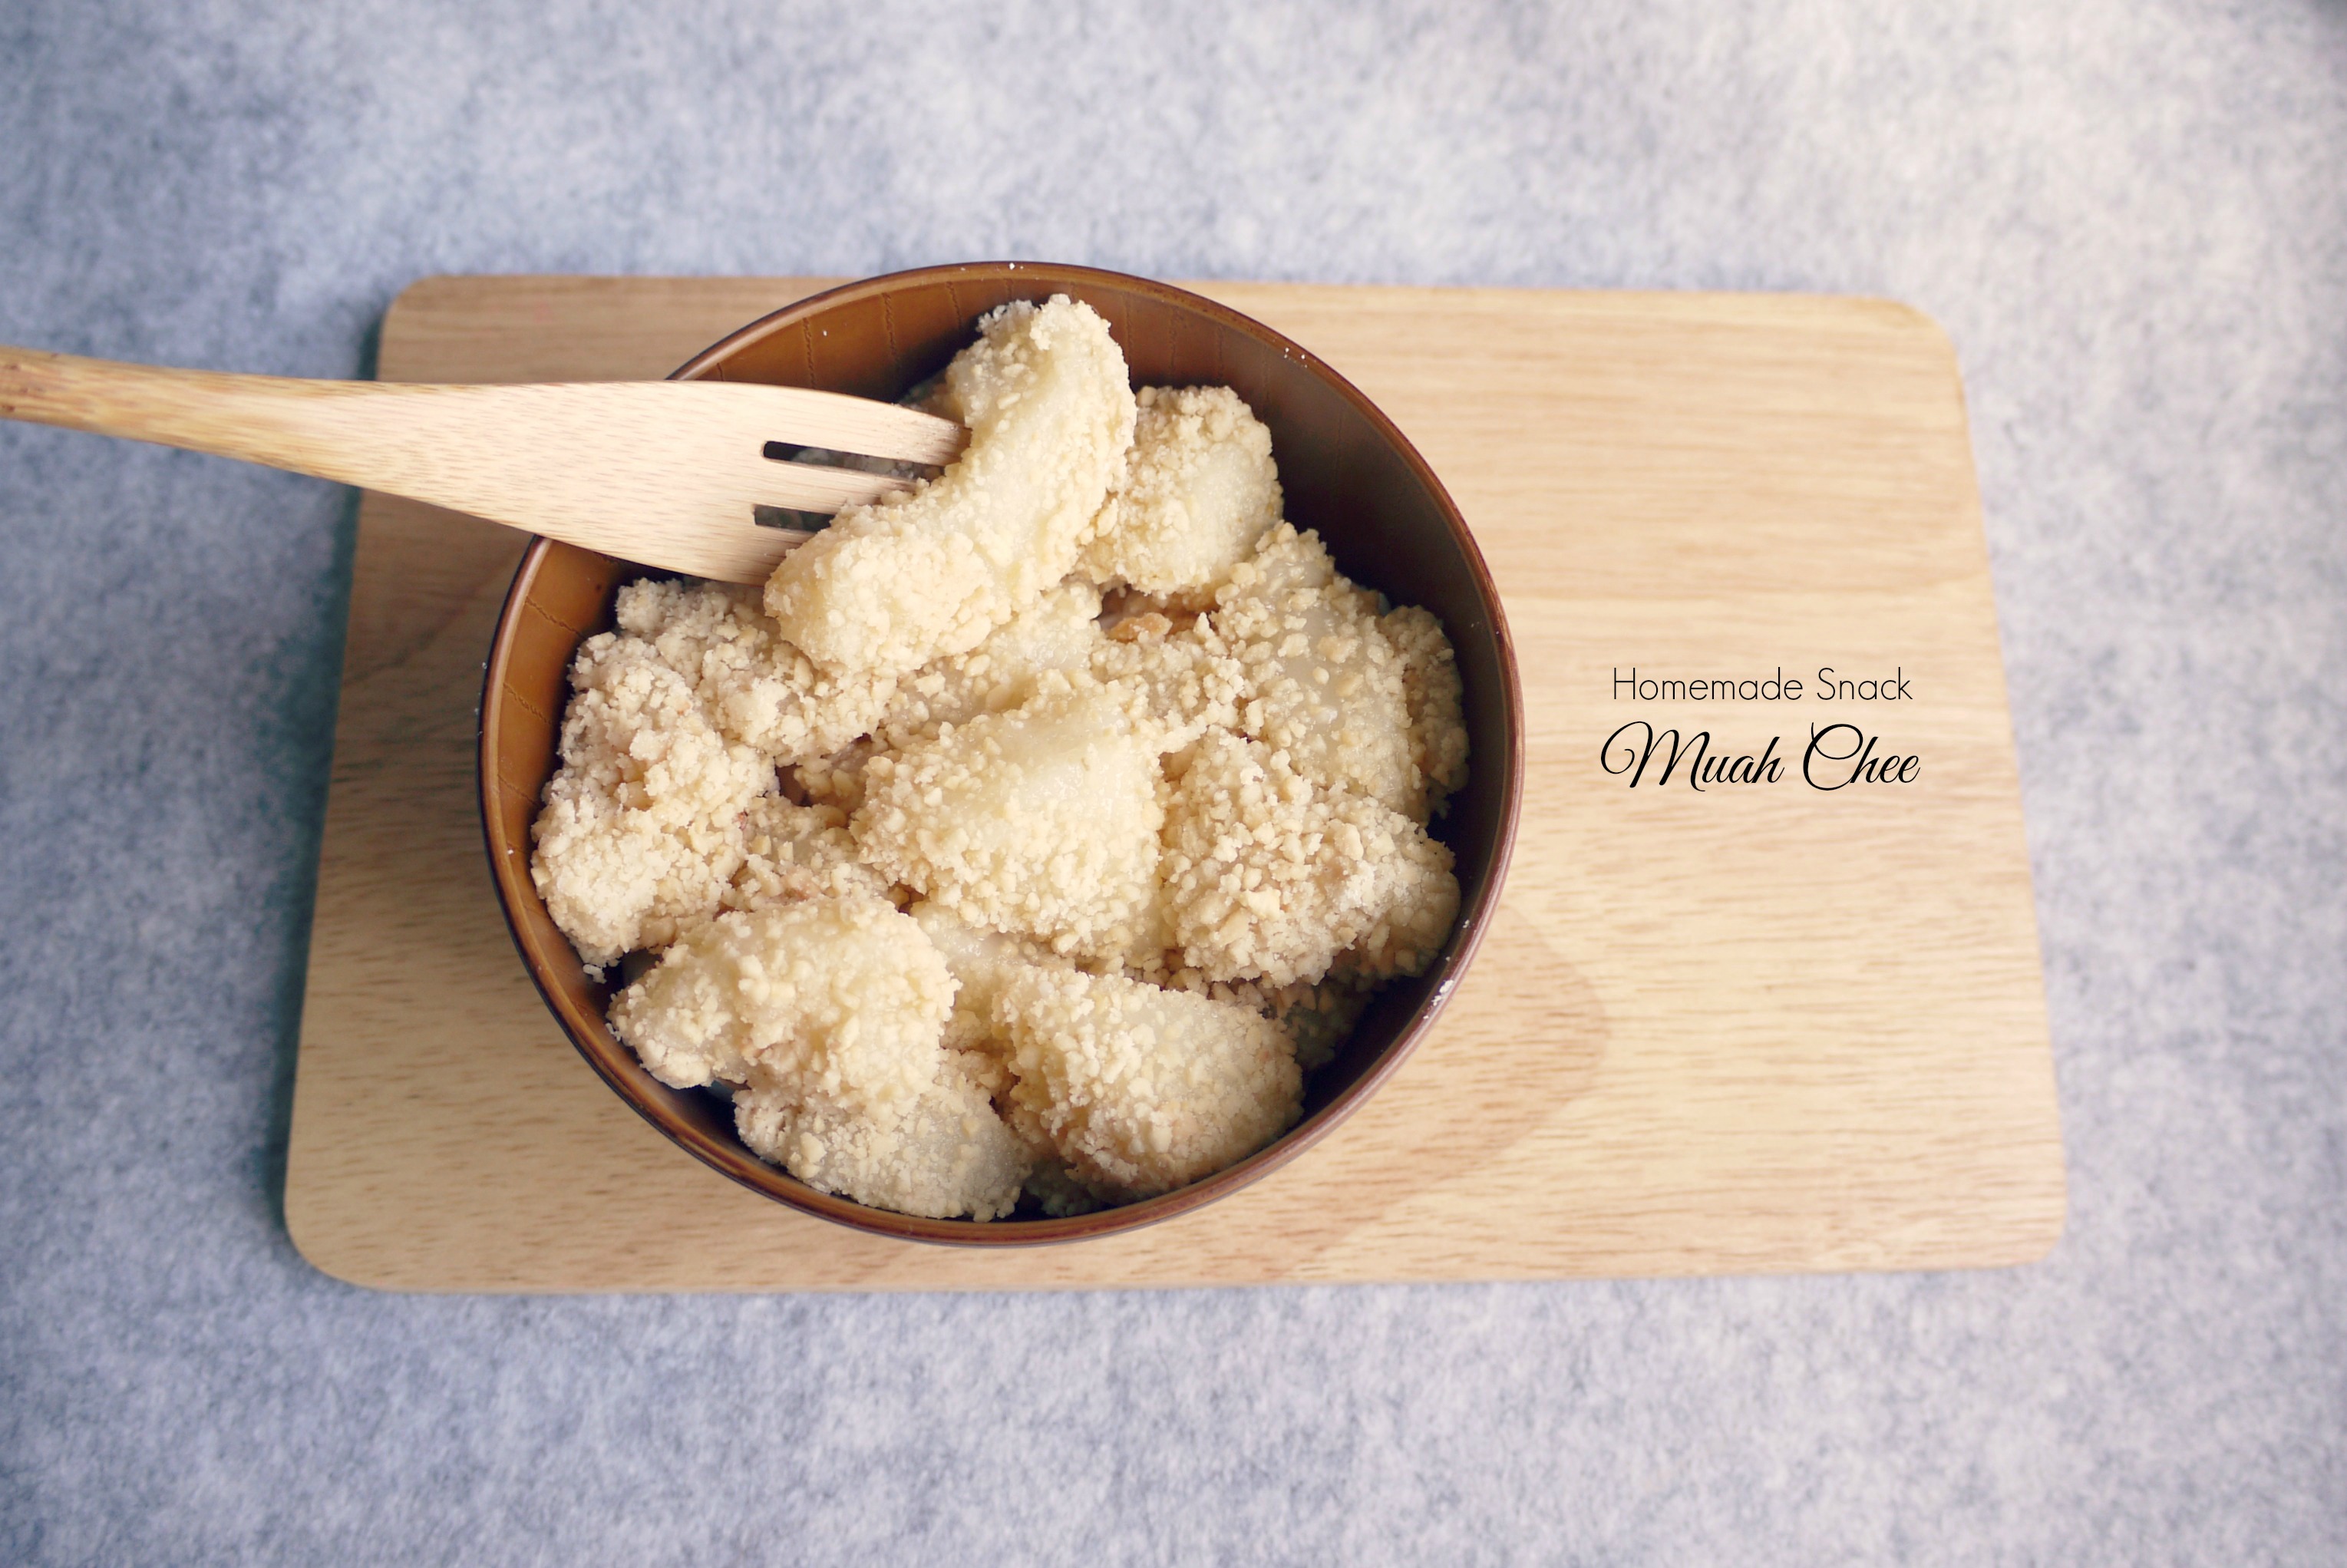
Every time I order muah chee, I wish that the seller would snip off from the white slab, a bigger piece of the steamed glutinous rice cake for me.  But it’s always the same miserable portion, it could have even gotten smaller over the years with inflation, but I’m not sure.

She would then proceed to cut it further into smaller and smaller (and smaller!) pieces, before finally coating them with peanut grounds (Good thing that they are still pretty generous with the peanuts).  All these, packed into the tiniest palm sized clear plastic box, and I am off to enjoy my 2 minutes of heaven.  Yup, that’s how fast I can chomp them down.

My wish for a larger serving, with bigger chunks, was finally granted after I found the numerous Muah Chee recipes online.  There is the Happy Call Pan method, the Microwave method, the Pan Fry method, and finally, the traditional Steamer method, which I adapted below.

Here’s how:

RECIPE : MUAH CHEE
/ Source

____________

For Dough:

200g glutinous rice flour
1 tablespoon shallot oil
2 teaspoons fine sugar
1/2 teaspoon salt
250 ml water

For Peanut Ground Mix:

150g roasted unsalted peanuts
75g fine sugar

____________

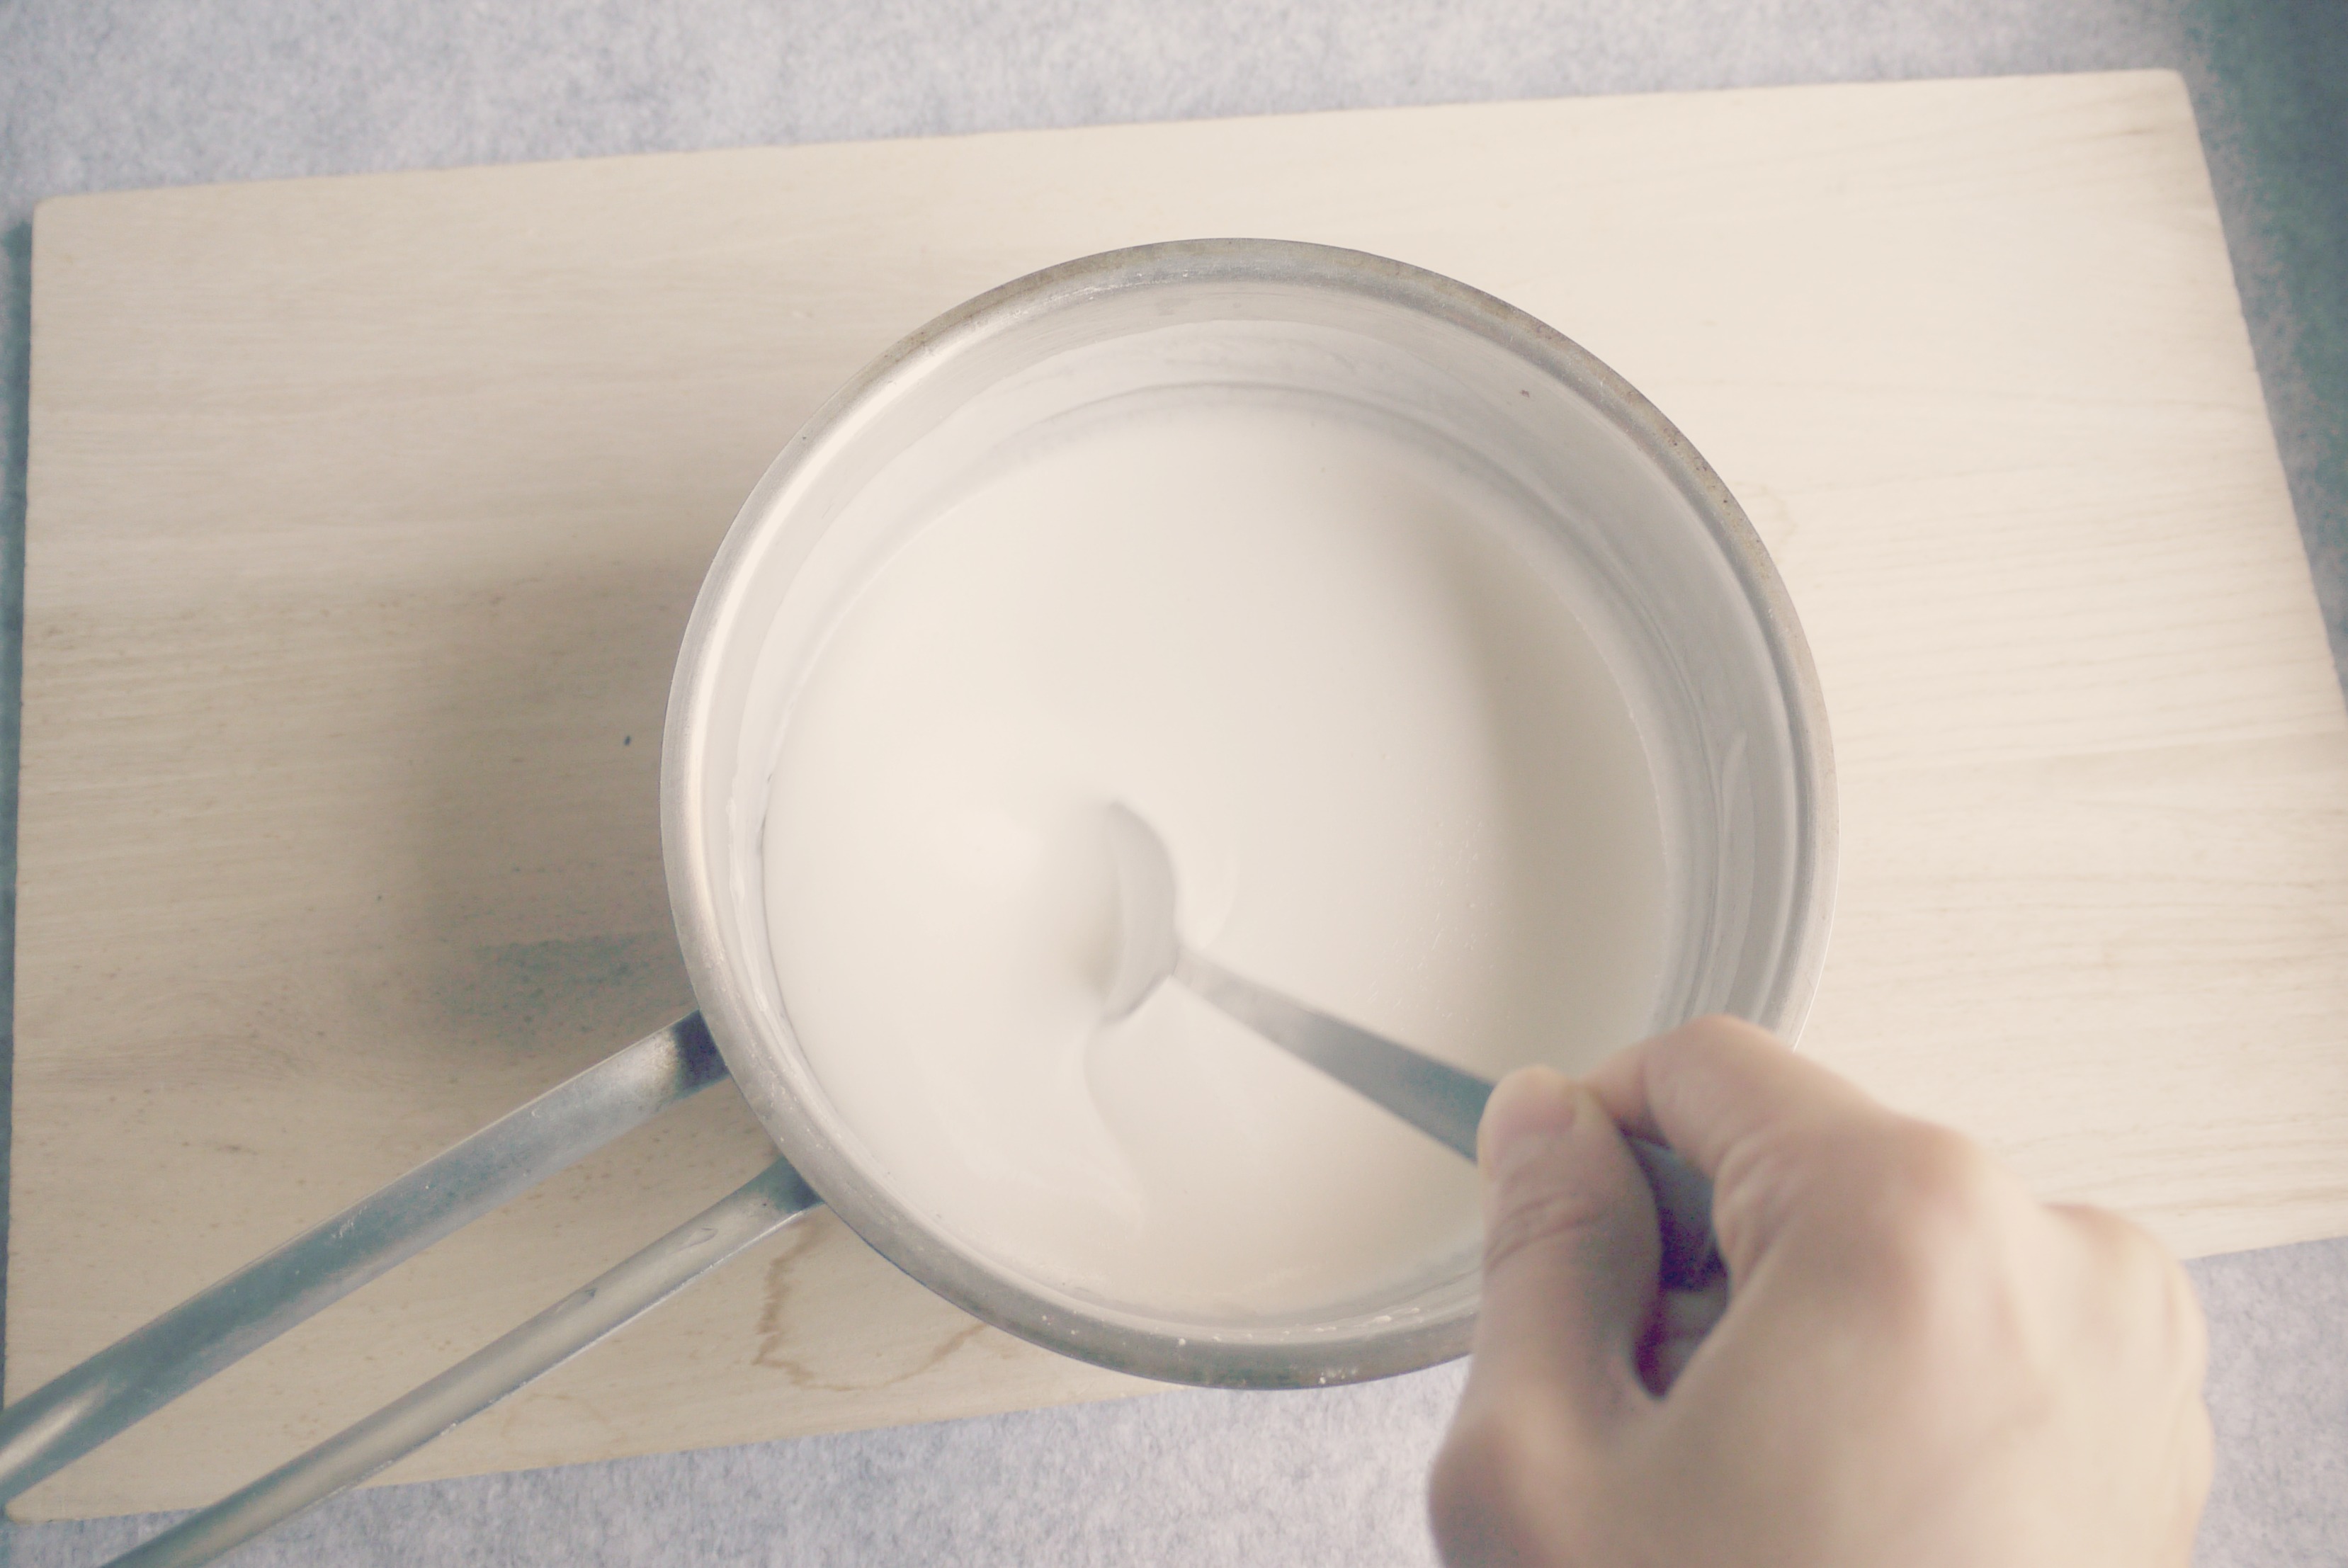
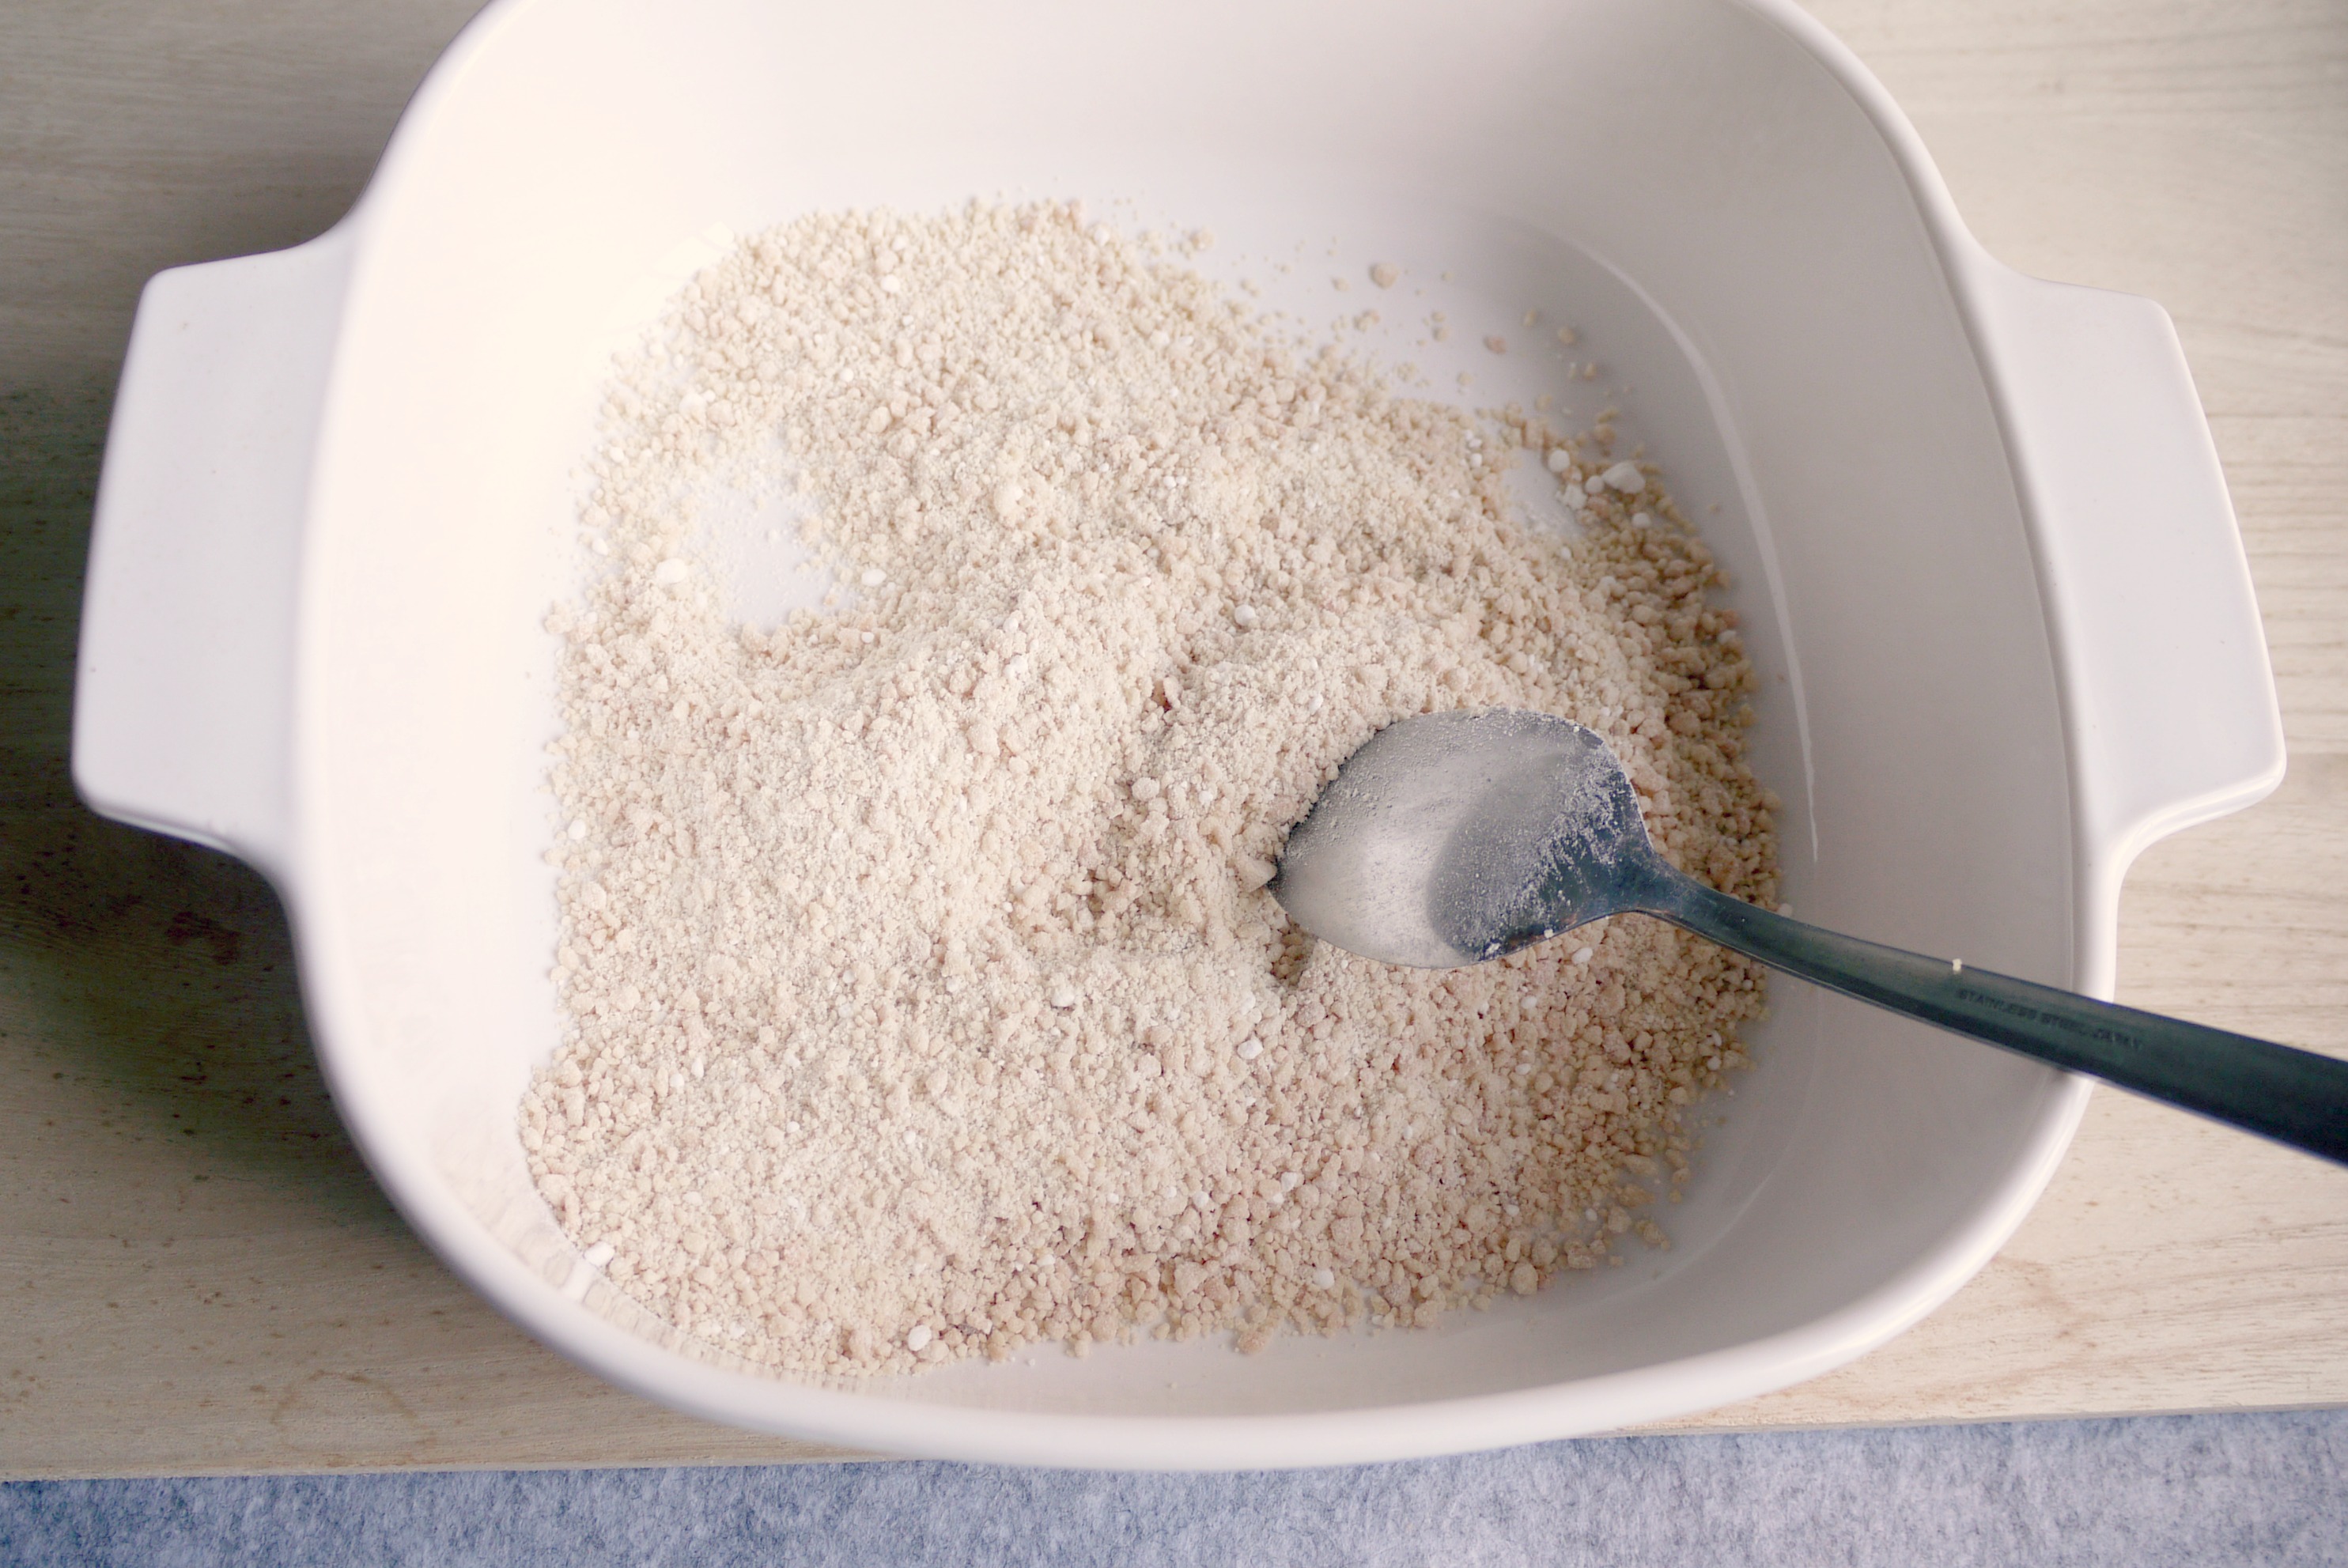
01. Mix the flour, shallot oil, sugar, salt and water in a big mixing bowl.  Stir well to make sure that there are no lumps.

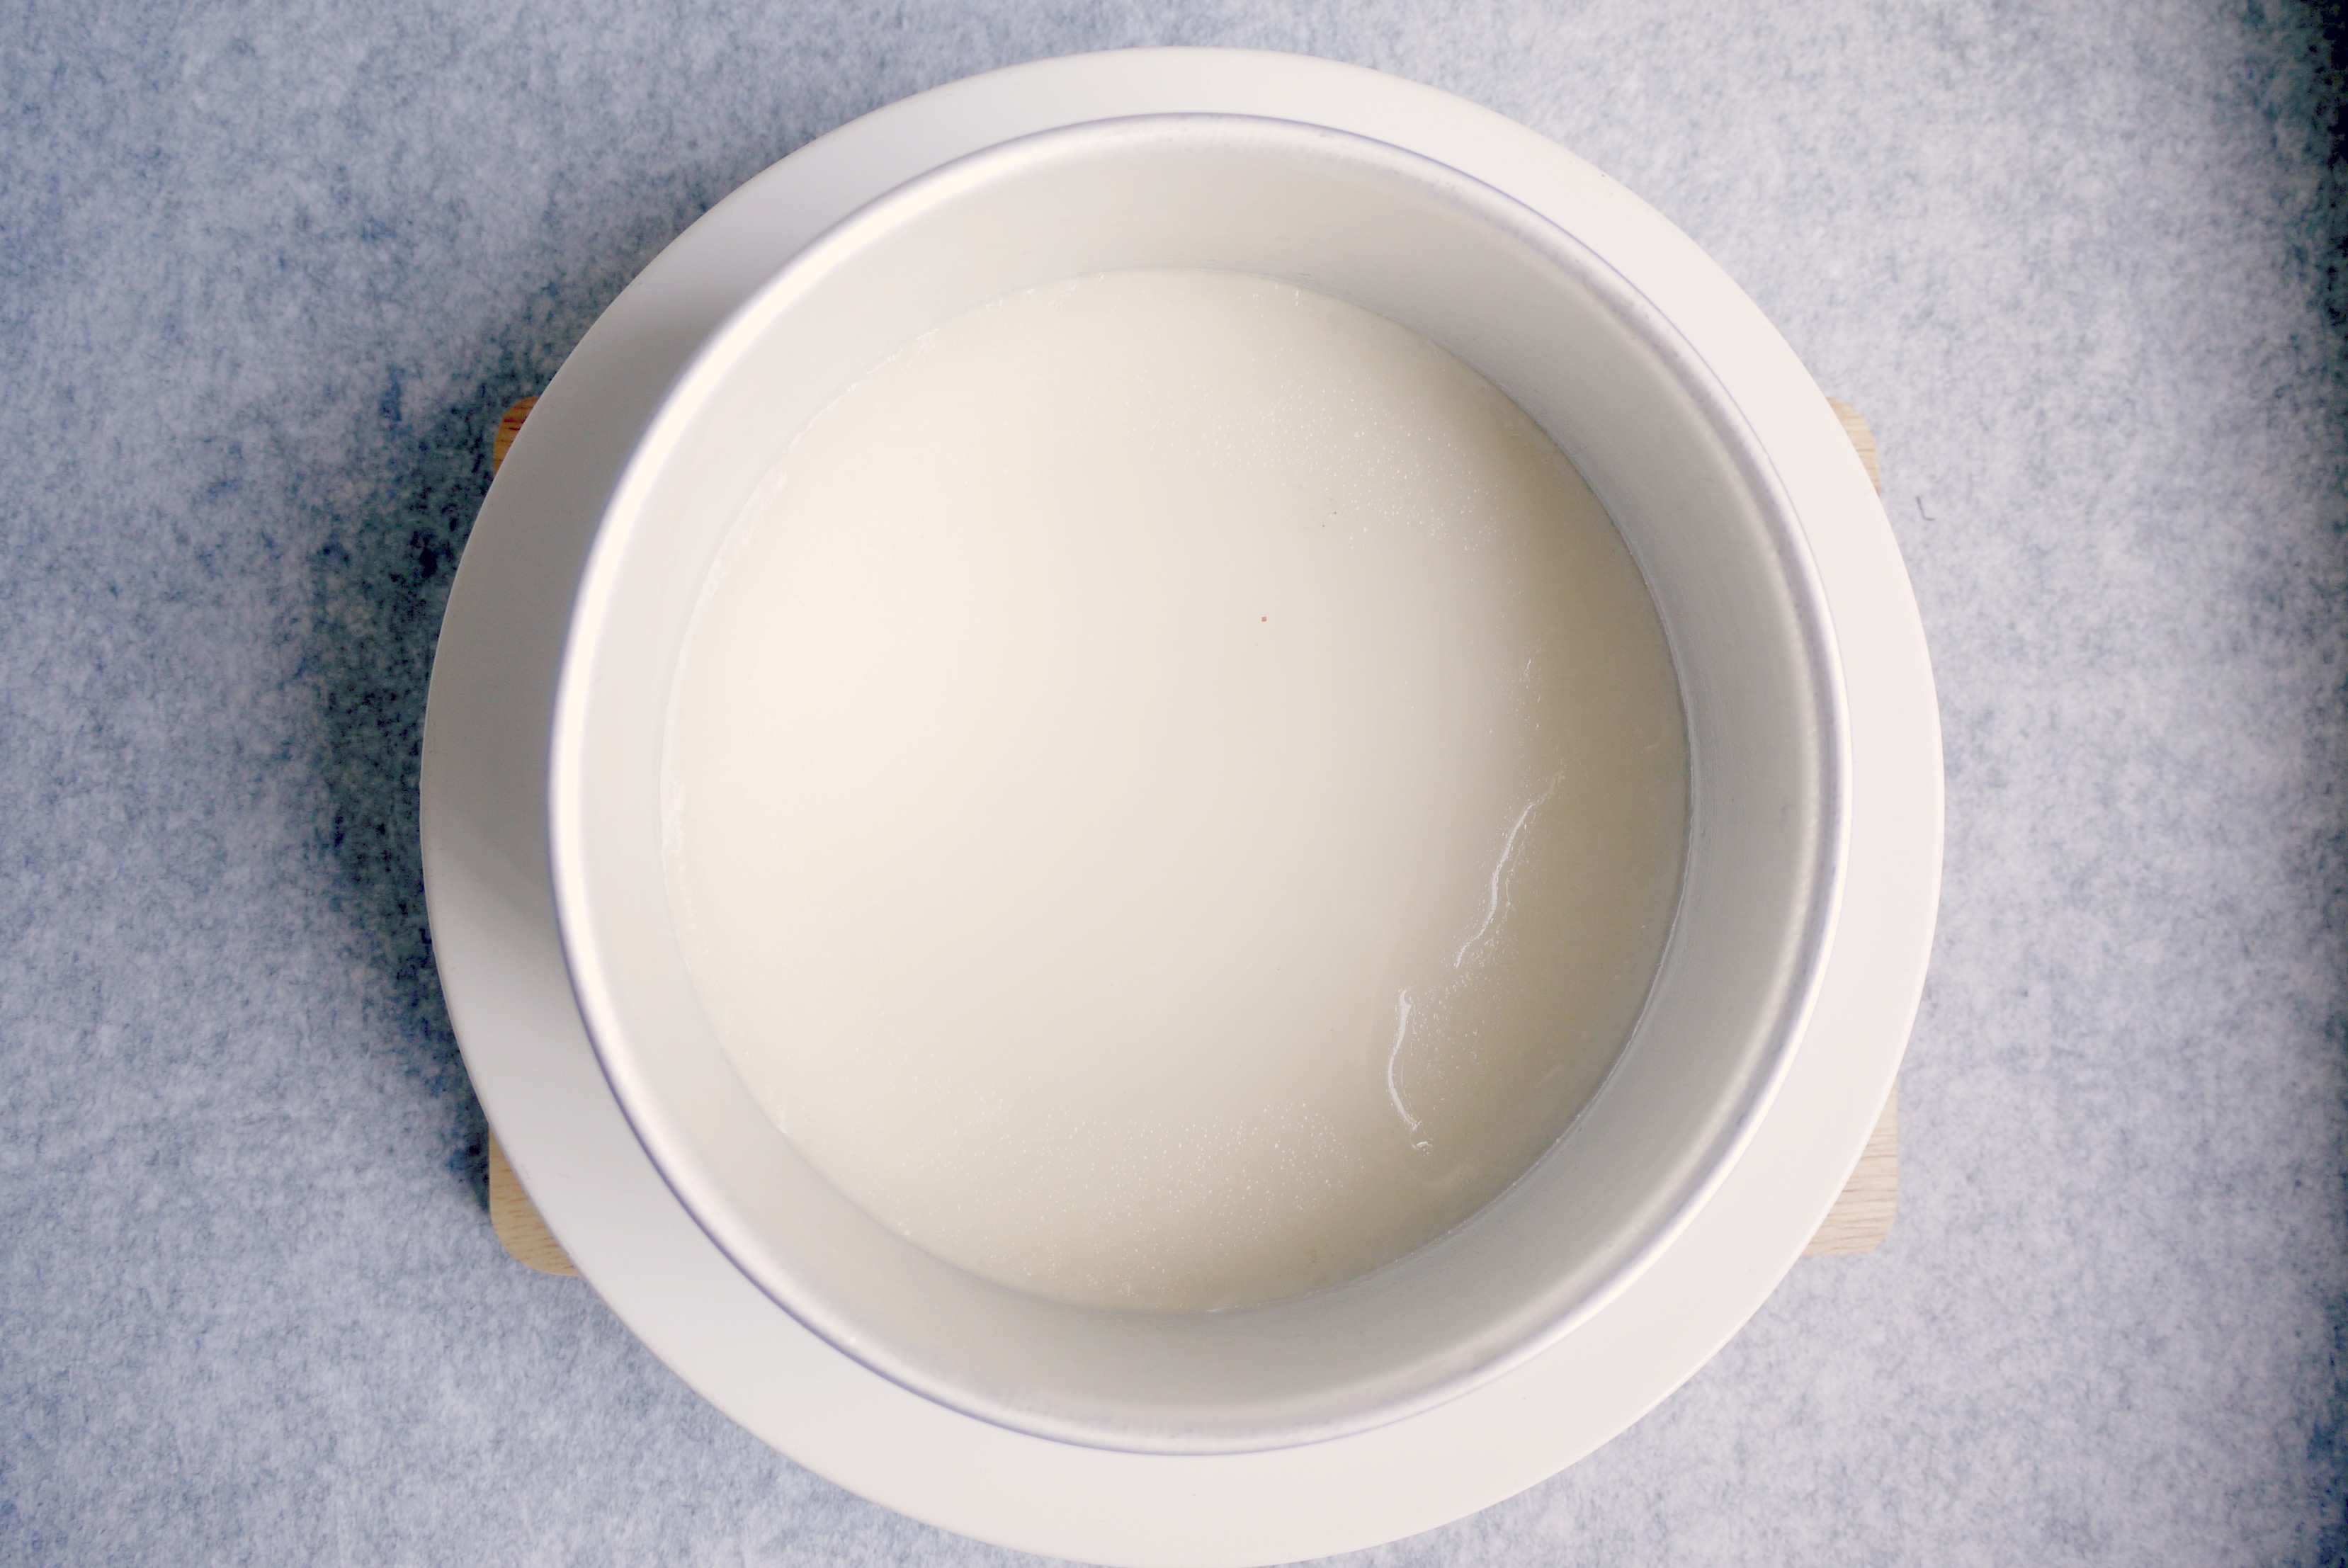
02. Pour mixture into a greased 6 inch pan, steam over medium heat for 25 minutes.

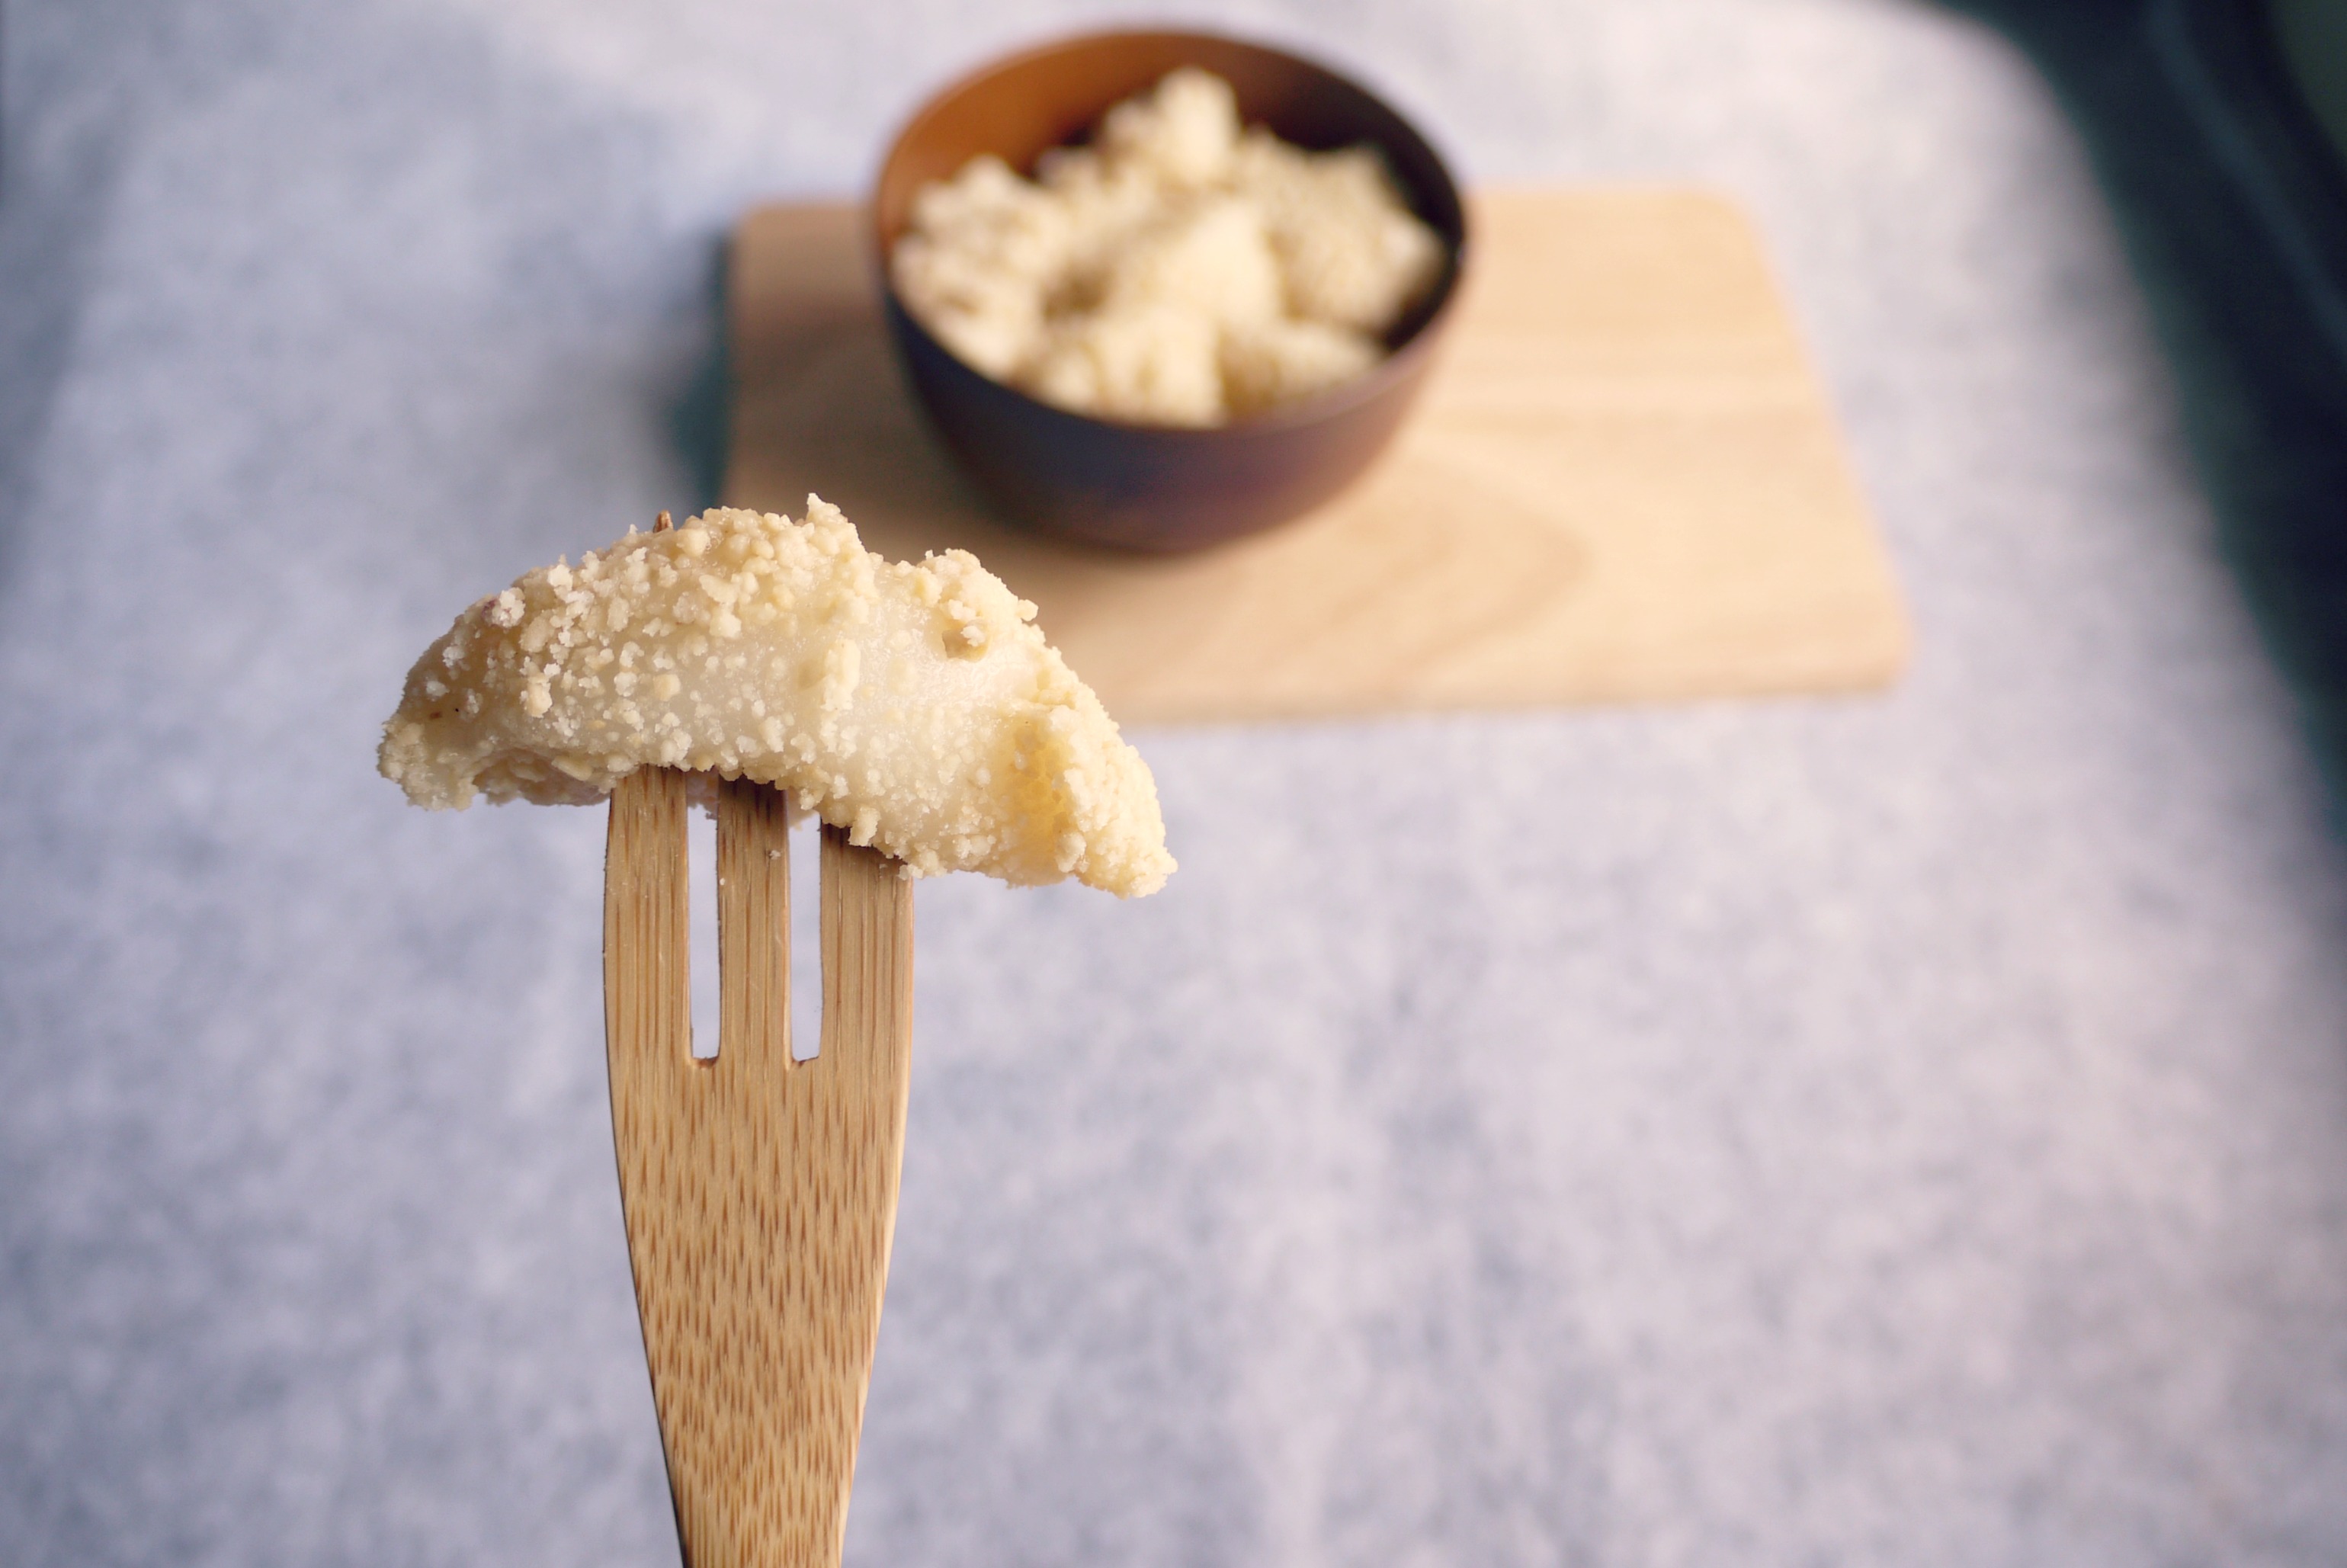
03. Once the mixture is cooked though, brush some shallot oil over the surface, and allow it to cool.

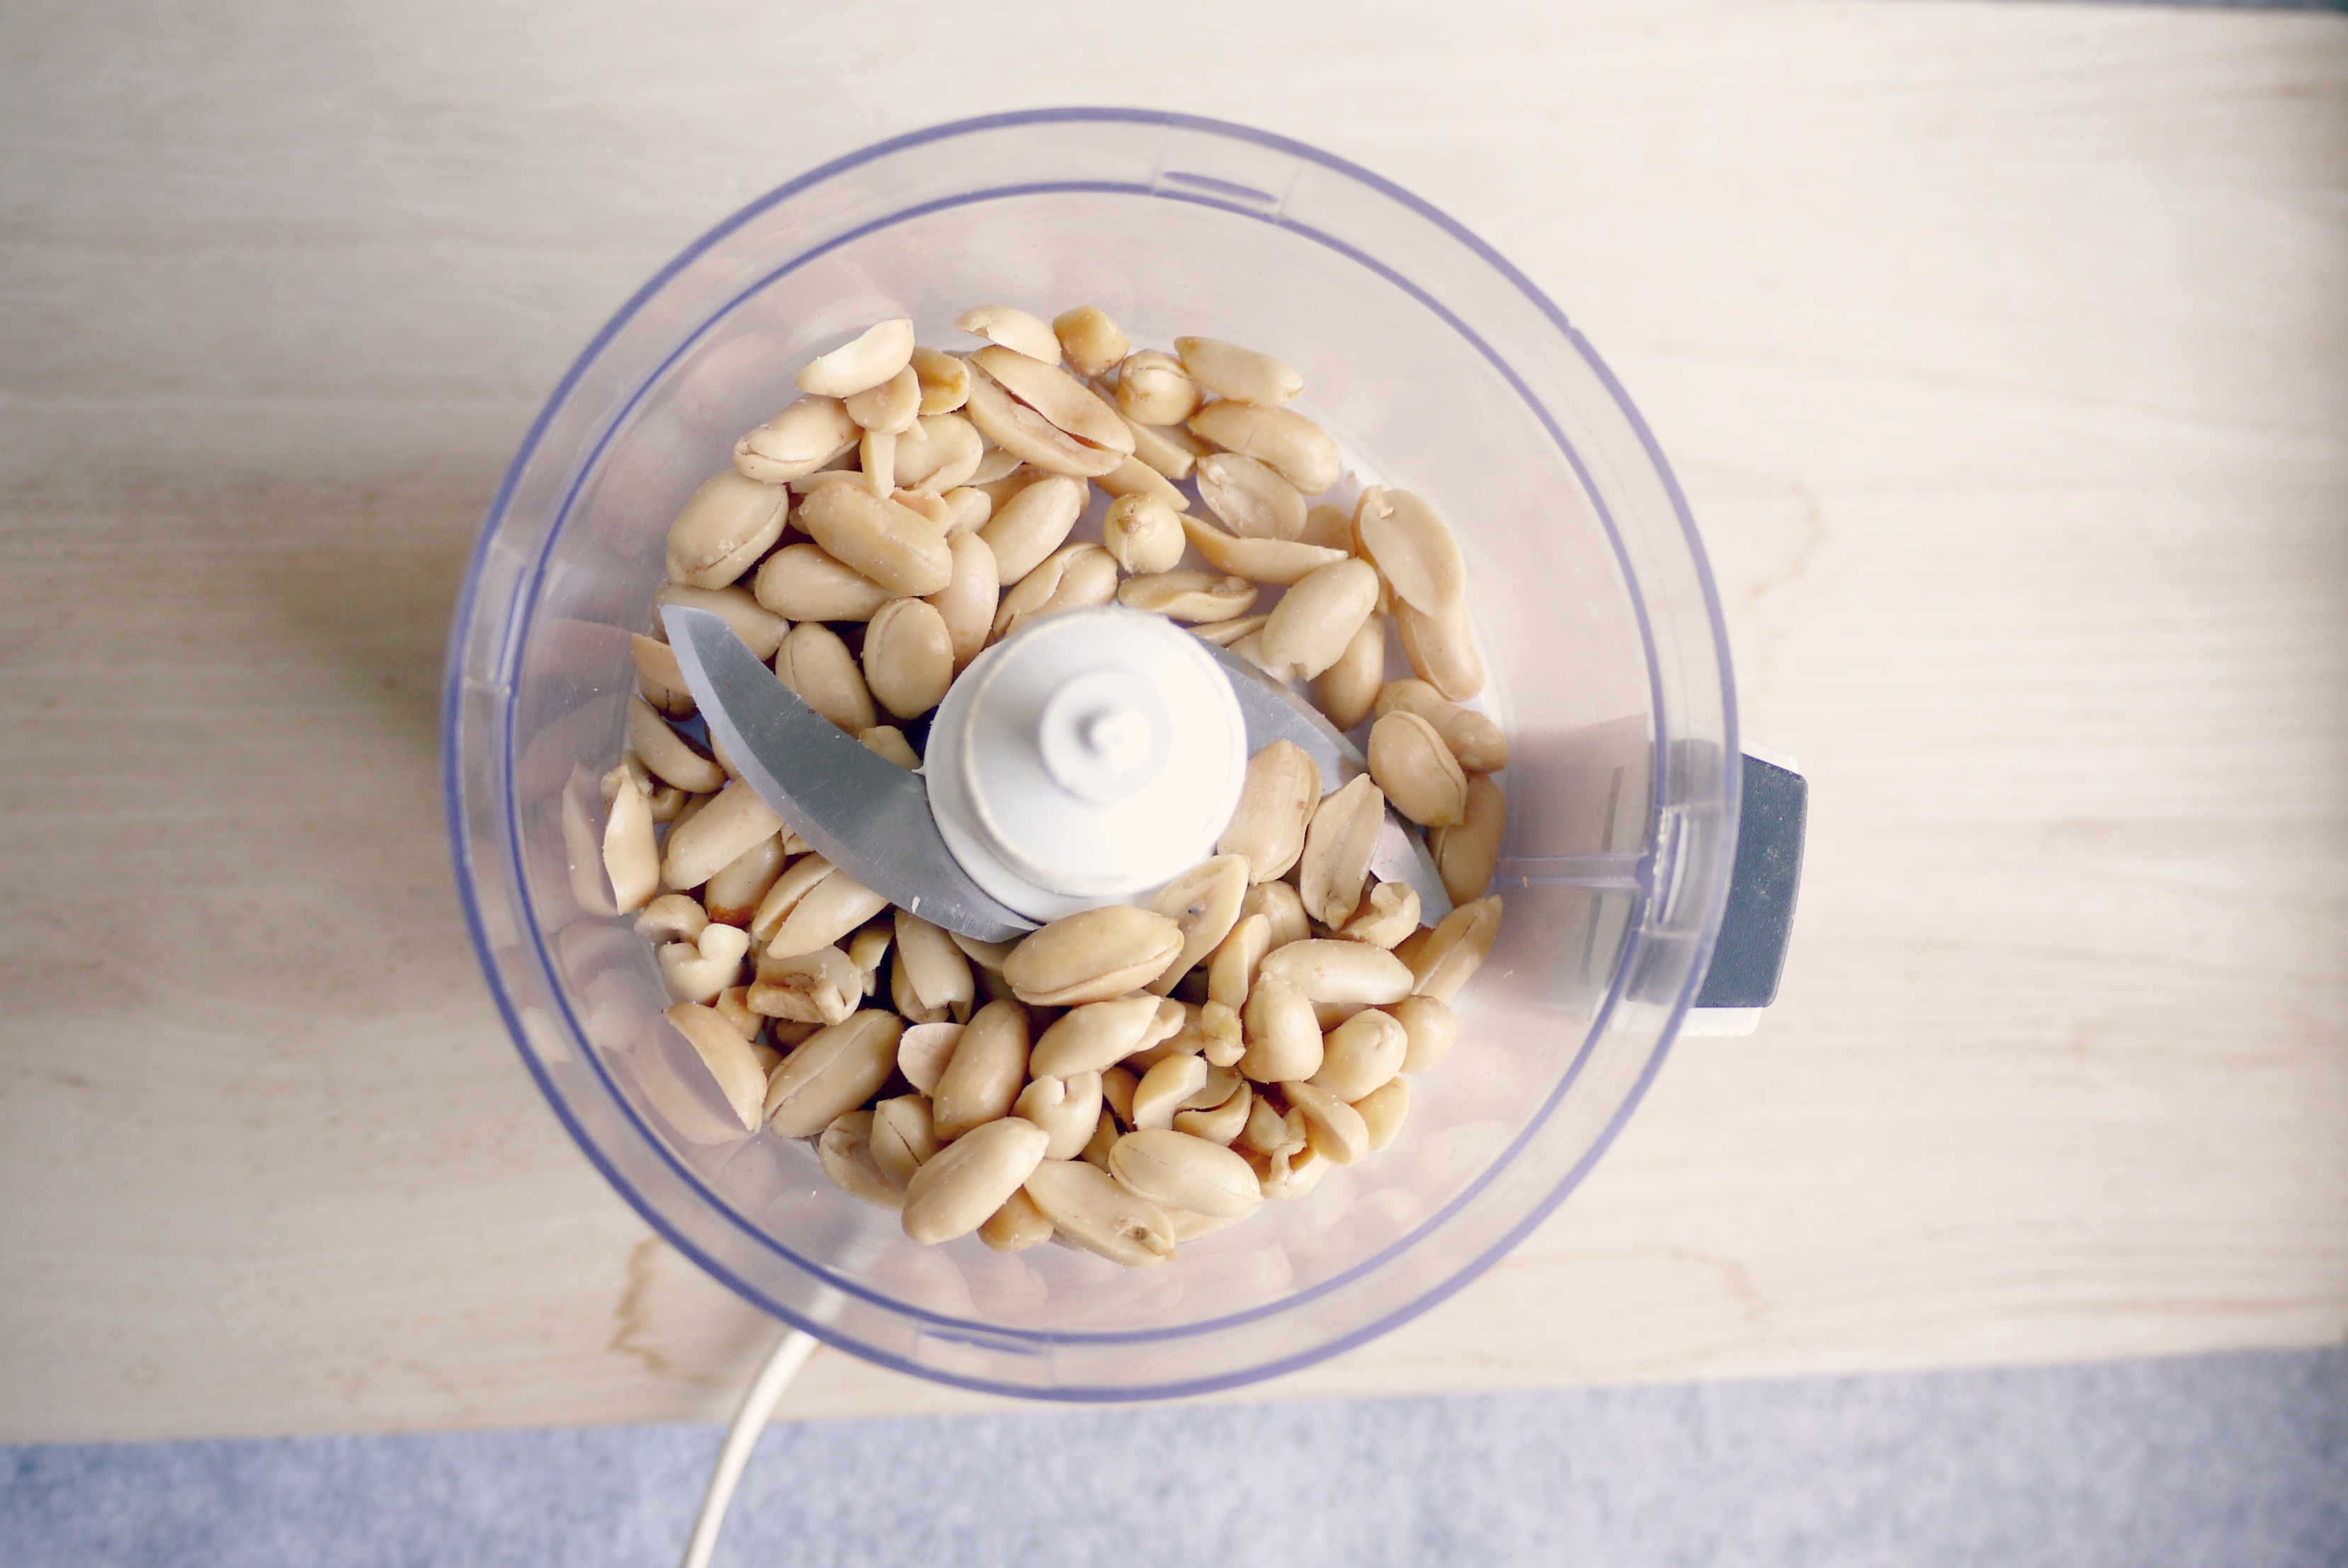
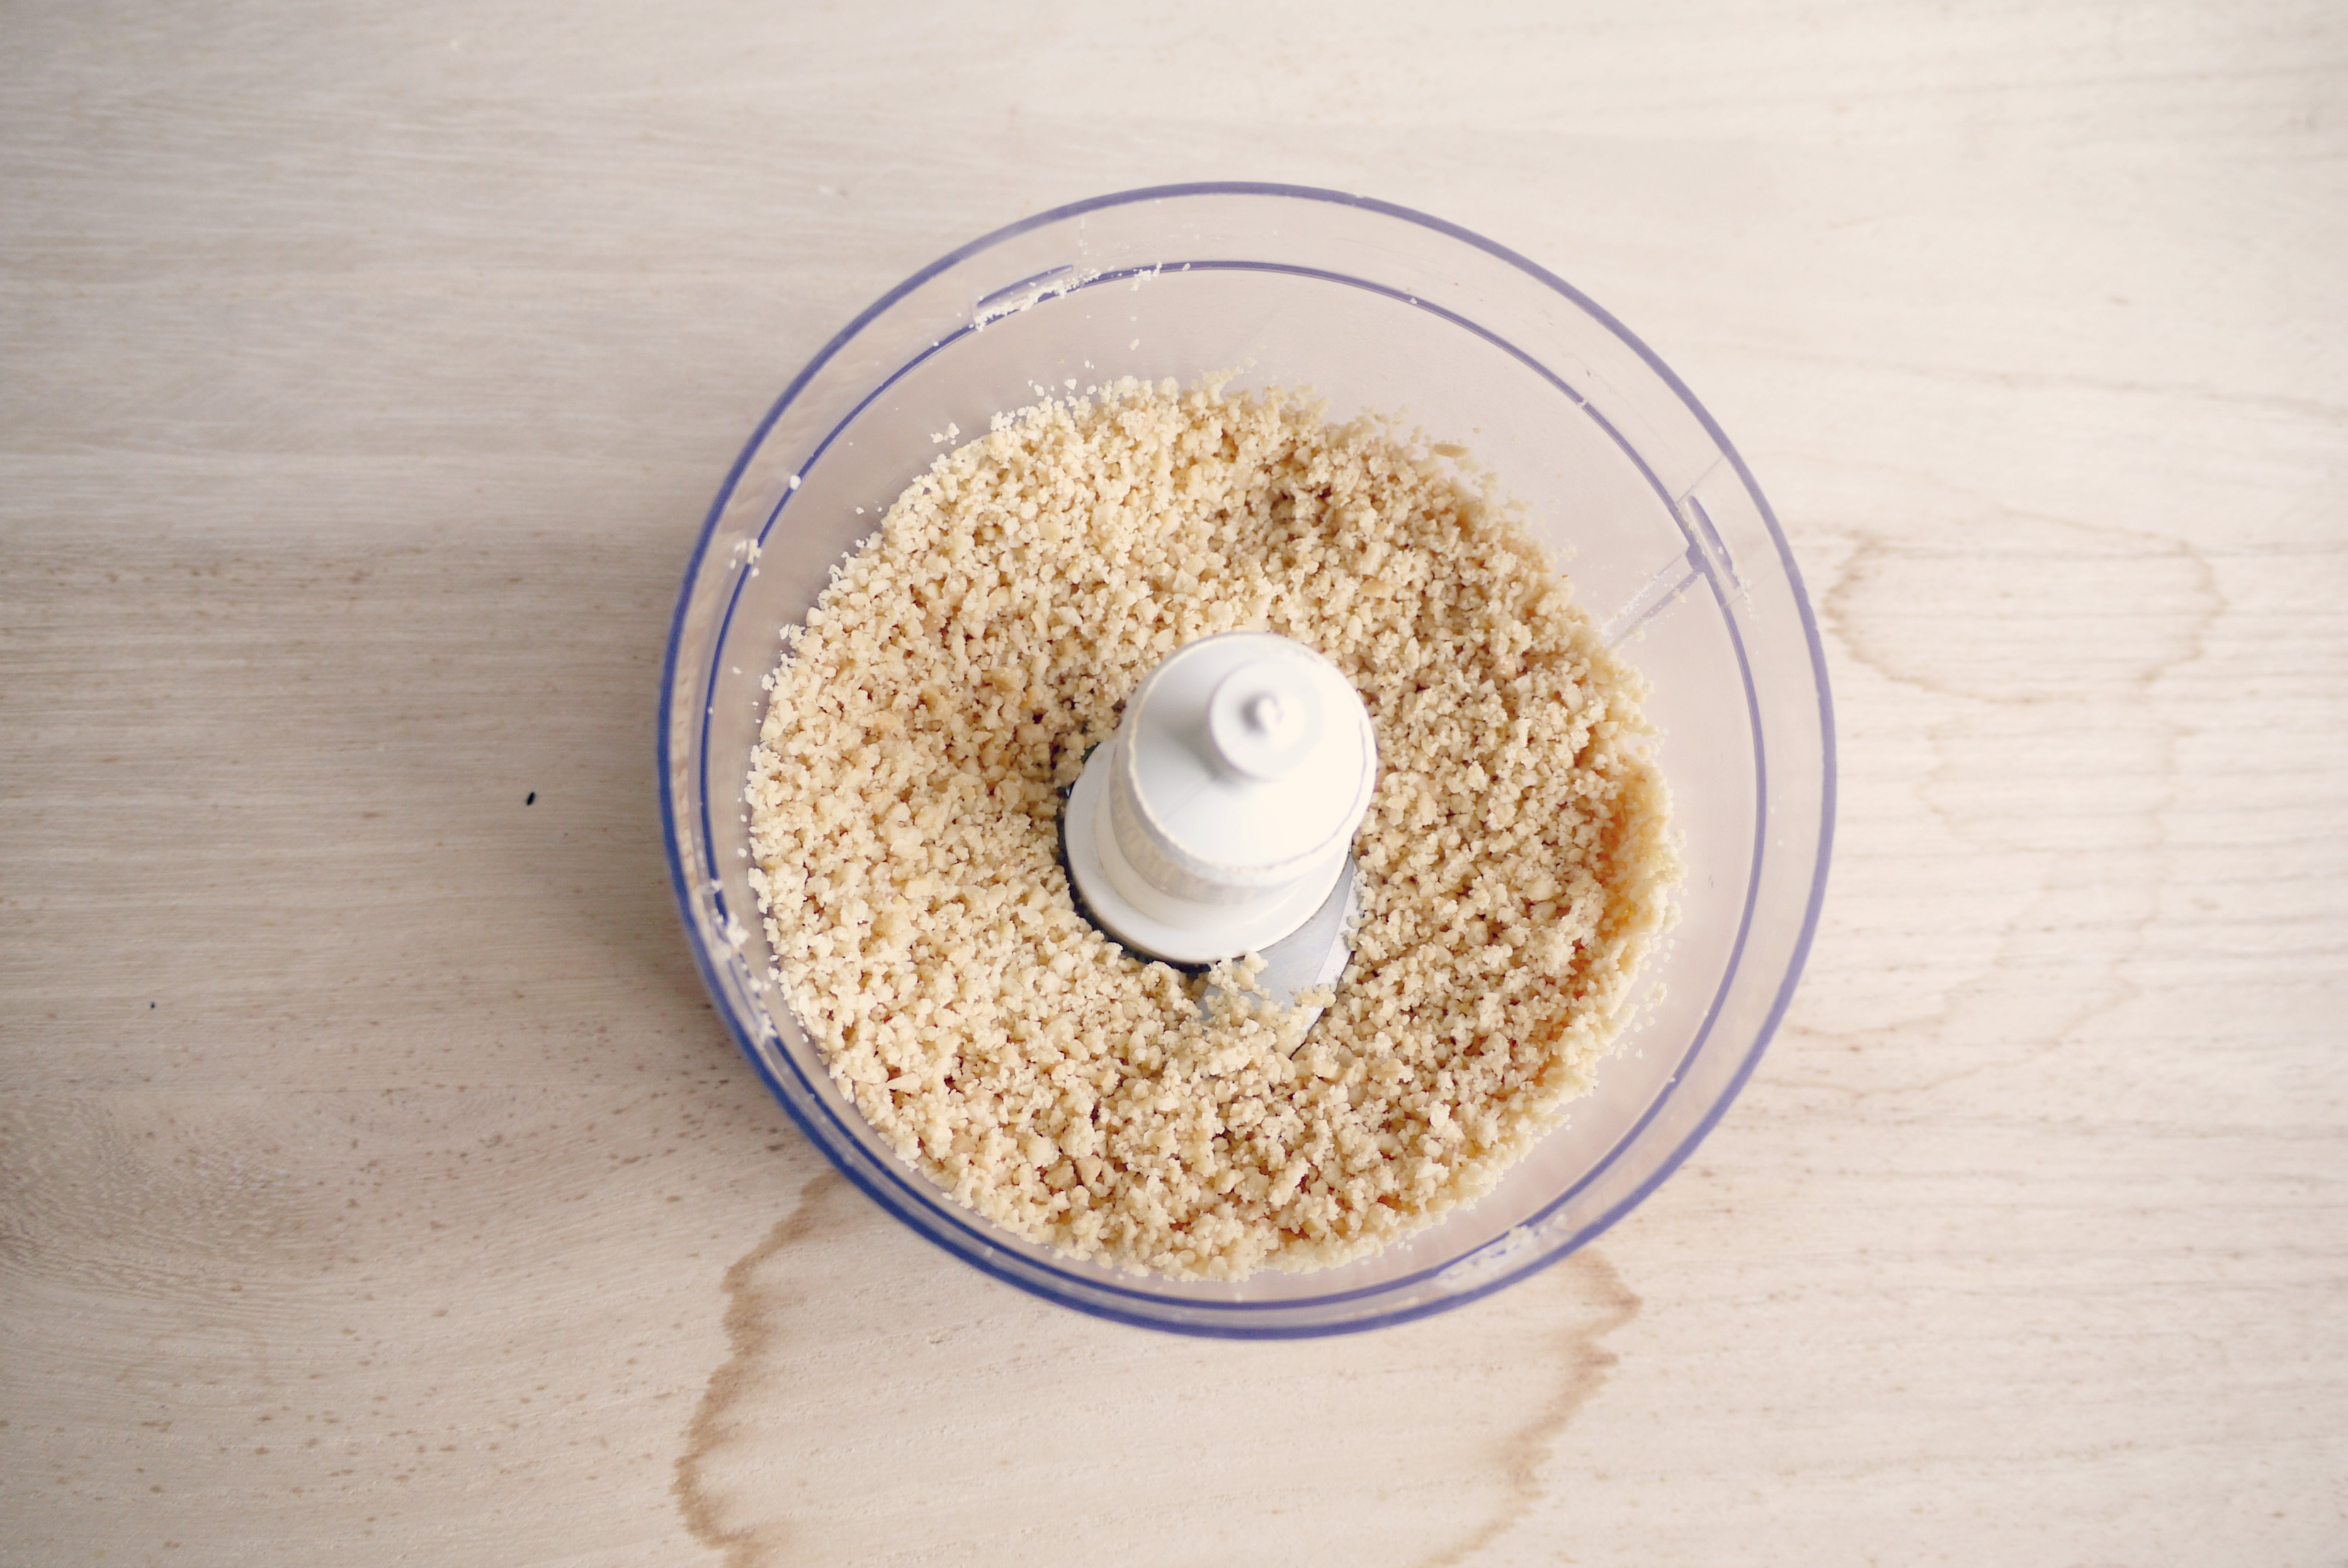
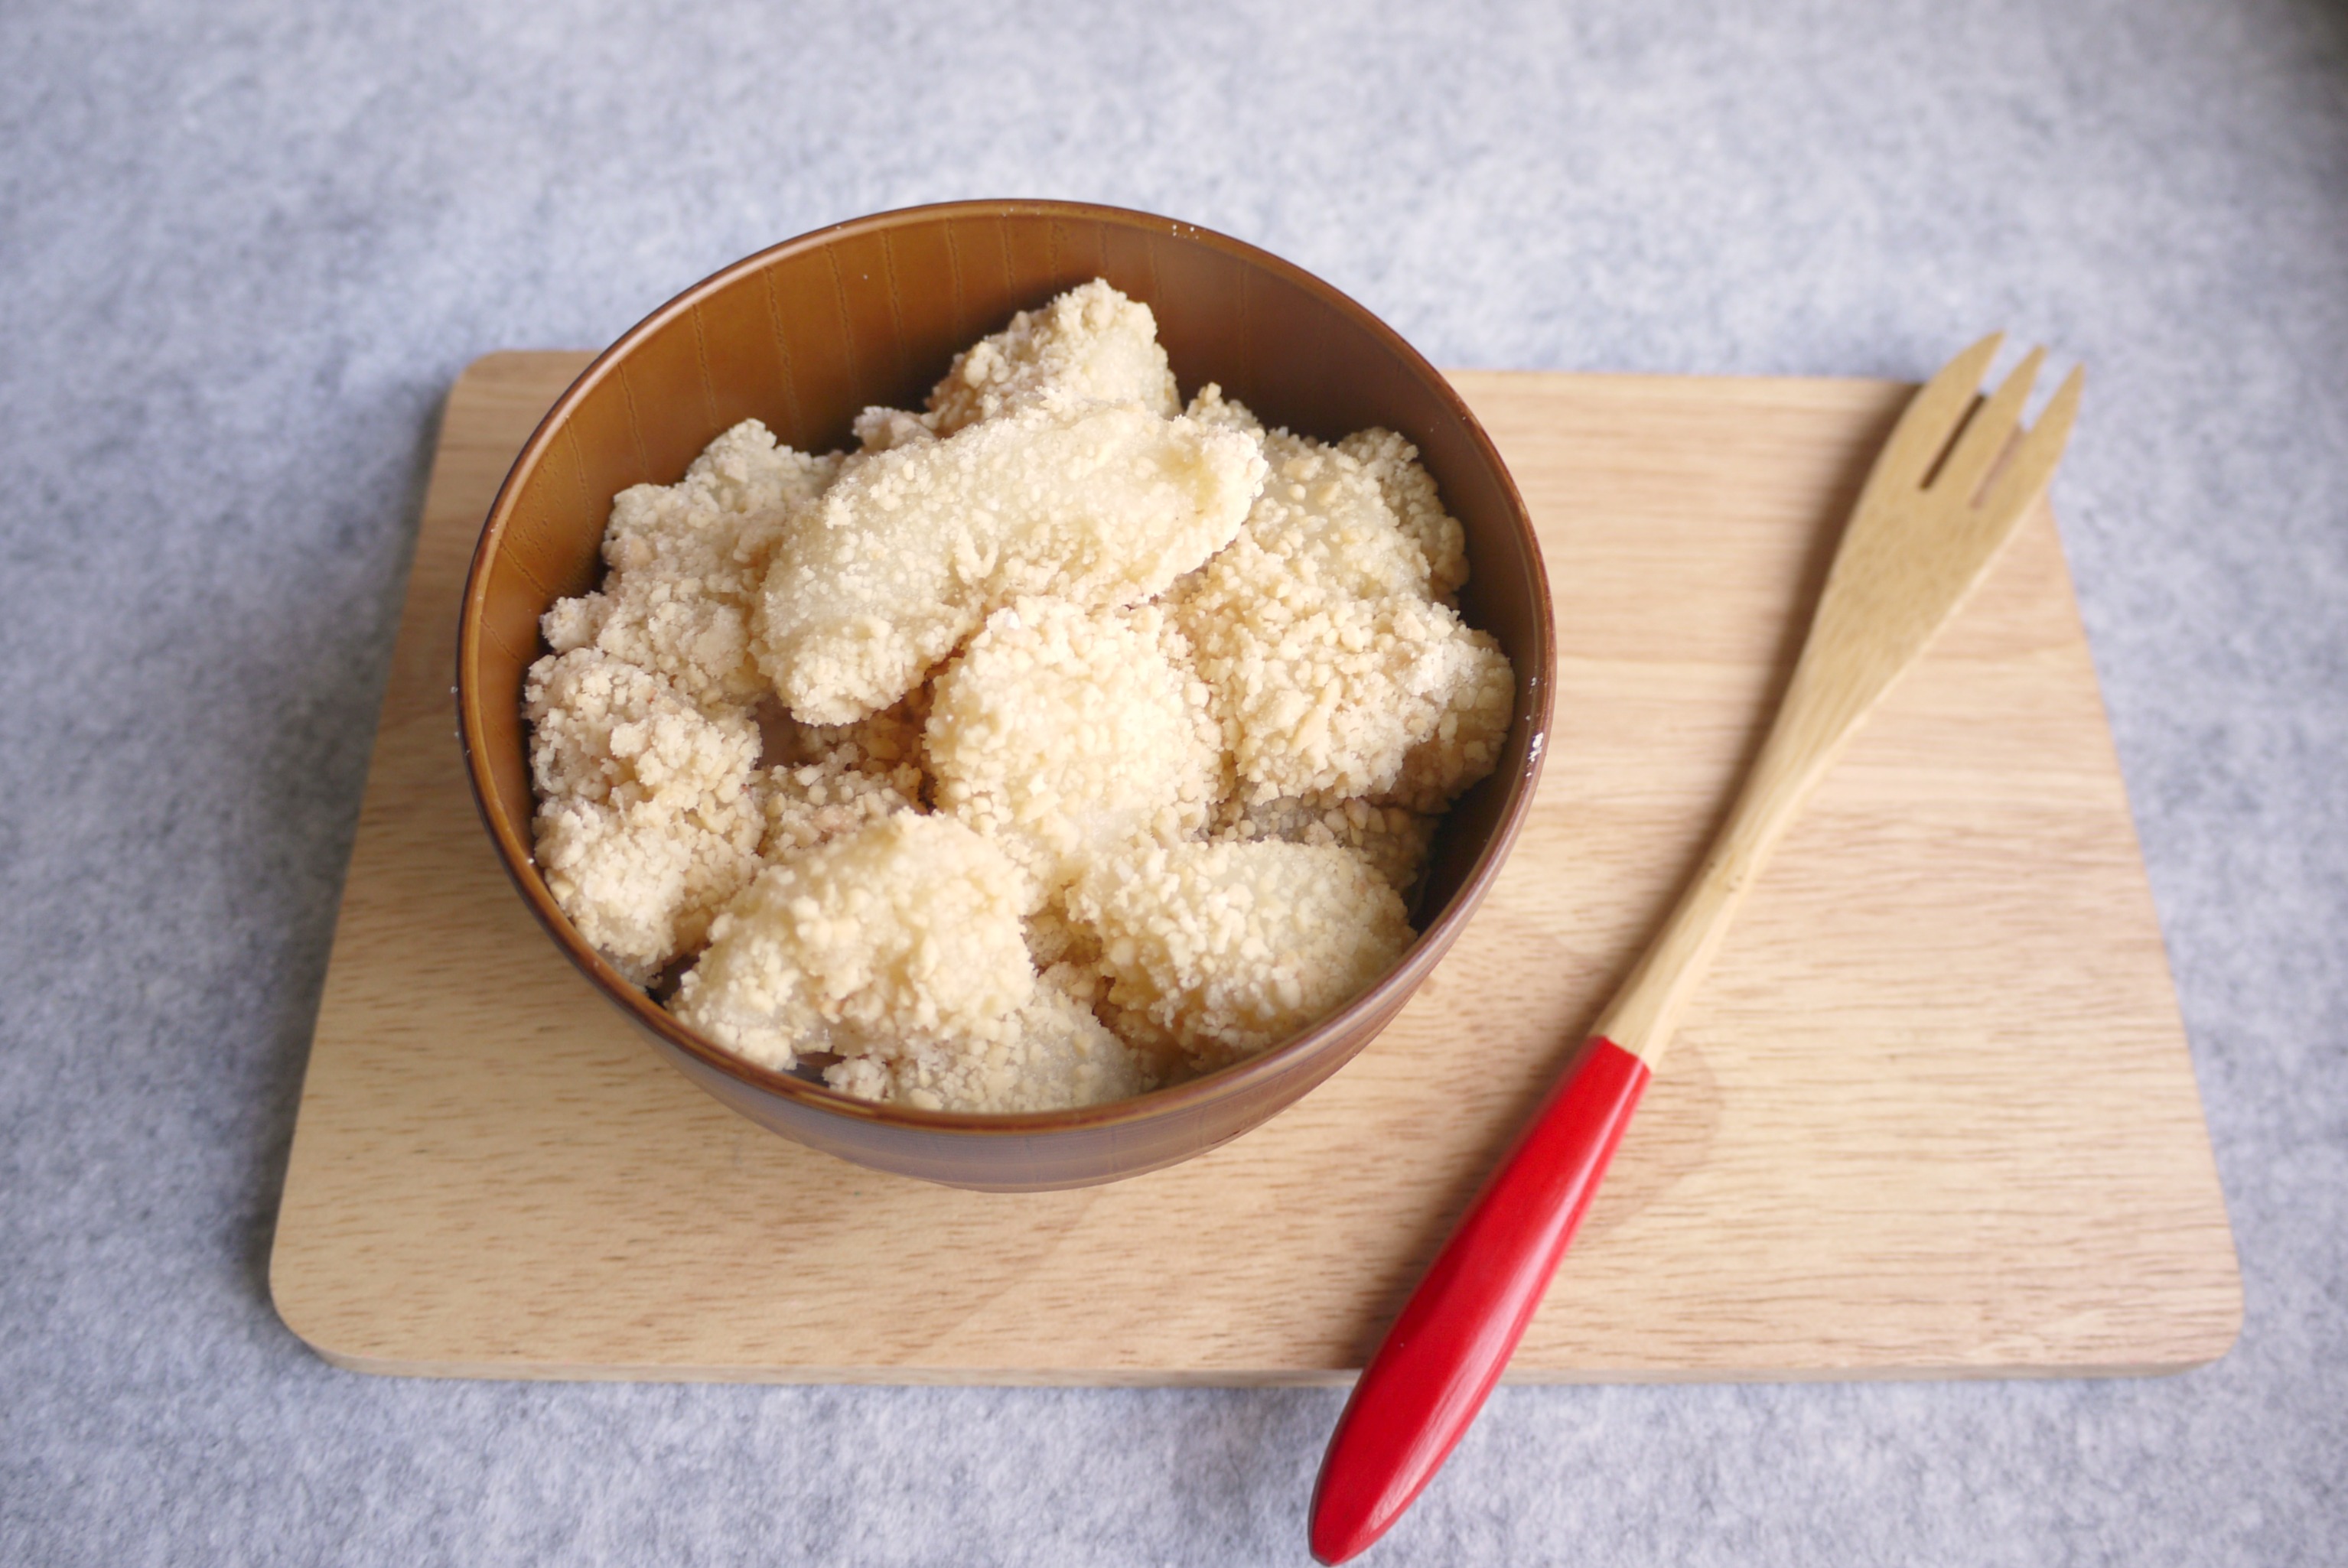
04. Prepare peanut ground mix by blending peanuts and sugar in a food processor.  Do not over blend, or you’ll get peanut butter.  Put this mixture into a food tray/pan.

05. Now the fun part.  Cut the cooked dough into bite size pieces with a pair of kitchen scissors, the dough will be sticky.  Place the cut dough bits in the peanut mixture, coat well. Once coated, these tiny morsels won’t be as sticky.  Place on plate, top with more peanut ground mix, serve immediately.