Stay Home Project: Make Ahead Meals

The ongoing Covid-19 situation has brought out the best and the worst in people.  I am fortunate to be working in a sector where I get to see the compassionate and generous side of Singaporeans.  This somewhat calms me amid the cycle of emotions fueled by the pandemic crisis; fear, uncertainty, frustrations, just to name a few.
Like many, my family has started paying more attention to personal hygiene.  We also wipe our mobile phone with 70% alcohol-based disinfectant more frequently than before.  Surface cleaning is now done with disinfectant, no longer just water or vinegar.  There is currently no evidence that natural cleaning products like vinegar or vodka (it only contains 40% alcohol) are effective disinfectants against Covid-19.  Refer to this list provided by NEA instead.  I have collected my #BYOBclean hand sanitiser which contains benzalkonium chloride as an active ingredient.  I will be using it to disinfect high touch areas; the label recommended this usage too.  According to the website, the hand sanitiser will lose its effectiveness after six months as it is filled in a recycled bottle.  Let’s make sure we use up the hand sanitiser/disinfectant by September 2020 to prevent wastage.
As social-distancing measures tightened, we have also found ourselves staying at home longer than before.  Come mealtimes on workdays, takeaways seemed a better idea, with safe-distancing laws now enforced at public areas.  Hence, I decided to step up my make-ahead meals routine to make home-cooking on weekdays a breeze.  This #stayhome project that explores the world of meal-prepping is largely inspired by the Japanese’s johbisai and the Korean’s banchan.

001. Fried shallots and shallot oil
A pantry must-have ever since I discovered Kolo Mee in Kuching.


002. Vegan Kimchi
Totally skipped the minced garlic from this recipe that was adapted from Maagchi’s, and added one whole apple instead.


003. Meat-Free Dumplings
My own recipe, inspired by the vegetarian dumplings, gyoza, xiaolongbao I have eaten!
-large firm tofu, mashed
-handful of dried shiitake mushrooms, soften in water and chopped
-1/2 yellow onion, chopped
-few stalks of green scallions, chopped
-dumpling wrapper, white, round ones
-Seasoning: sesame oil, light soy sauce, pepper, all to taste*

* Lately, I am beginning to sound like my mom when I share recipes!


004. Taro Pullman Loaf
For assembling a handy sandwich meal.
– 280g plain flour
-120g taro, steamed
-1/2t instant yeast
-1/2t sea salt
-2T raw honey
-1 egg
-70g water, pour slowly and adjust according to the hydration level of your dough
-1T neutral flavour oil
Follow the instructions here, almost same recipe except for the flaxseeds.

Soft Taro Milk Pullman Loaf

Soft Taro Milk Pullman Loaf // Mono + Co

Adapted from this recipe from almost a year ago, I have since made 2 changes to this recipe.
– using plain flour sold in bulk from the wet market
– substituting fresh milk with milk powder

With these alterations, I have done away with the need to recycle the plastic bags from bread flour as well as plastic bottles and paper cartons from fresh milk purchase.  Less time spent on rinsing and sorting recyclables, more time for a longer breakfast.


Soft Taro Milk Pullman Loaf

300g plain flour
1/2 tablespoon instant dry yeast
1/4 teaspoon sea salt
2 tablespoons organic raw sugar
2 tablespoons milk powder
135g steamed taro, mashed
1 egg **
130g water
25g cold unsalted butter, cubed

** I use egg that weighs 55g with shell

In a mixer bowl, mix well the dry ingredients: plain flour, yeast, sea salt, raw sugar, and milk powder with a hand whisk.  Add cooled mashed taro, egg, and half of the water to the dry ingredients, and knead with a dough hook attachment on the lowest speed (KA 1).  Slowly add in the remaining of the water, with the mixer running, until the ingredients come into a ball.  You might need more or less water stated in the recipe, depending on the moisture content of the taro.  Let the dough stand for 15 minutes, covered.

Start the mixer running on its lowest speed again, and knead the dough for 1 minute, before adding cubed butter, one by one.  Knead until the dough reaches window pane stage, this is when the dough becomes very smooth and elastic, and starts to pull away from the sides of the bowl.  Remove the bowl from mixer, cover and bulk rise for 50 minutes to 1 hour.

After an hour, the dough should have expanded, punch it down to release the gas, and transfer to a clean work top.  Flatten the dough to push out gas trapped inside the dough, either by hand or a rolling pin.  Shape the dough into a log and place it in a greased bread tin, seam side facing downwards.   Let this sit in a draft free place to rise for another 50-60 minutes.

Bake in a preheated oven at 170C for 30 minutes.  Remove the bread from the pan immediately after baking, and let it cool on a rack completely before slicing or serving.

Store in an airtight container if not consumed immediately, to keep the loaf soft and the crumbs from drying out.

Nutella Swirl Bread

Nutella Swirl Bread // Mono + Co

Mashed taro is my favorite thing to add to the bread recipes I bake. They never alter the bread color or flavor, simply making the bread texture softer than usual.
Nutella Swirl Bread // Mono + Co

I finally got my white flour from the market but I didn’t want to bake a white bread loaf, so I mixed some wholemeal flour into this Nutella swirl bread.  The addition of taro always makes my bread soft and fluffy even when I mix some wholemeal flour into the dough.

Nutella Swirl Bread // Mono + Co

I am kind of a Nutella fan (it’s not that hard to be one anyway,) ‘kind of’ because we are in the process of making an 850g jar to last for 4 months.  If we finish up a bottle sooner than planned, we’ll just have to wait until the next “buy-Nutella-month” comes along.  This makes us ration our Nutella treats really carefully and explore other sandwich/toast/breakfast options.
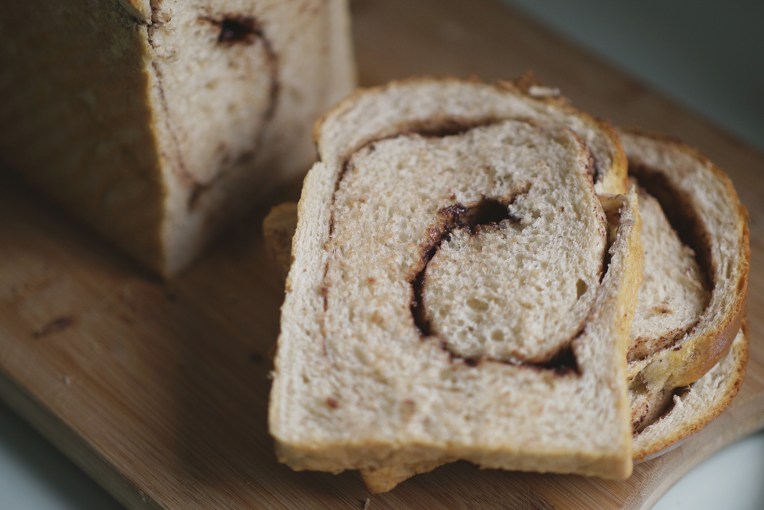
Nutella Swirl Bread // Mono + Co

This Nutella swirl loaf merely used up 3 heaped teaspoons of Nutella as I spread them as thinly as possible on the bread dough, before rolling it up for a final proof inside the Pullman bread tin.
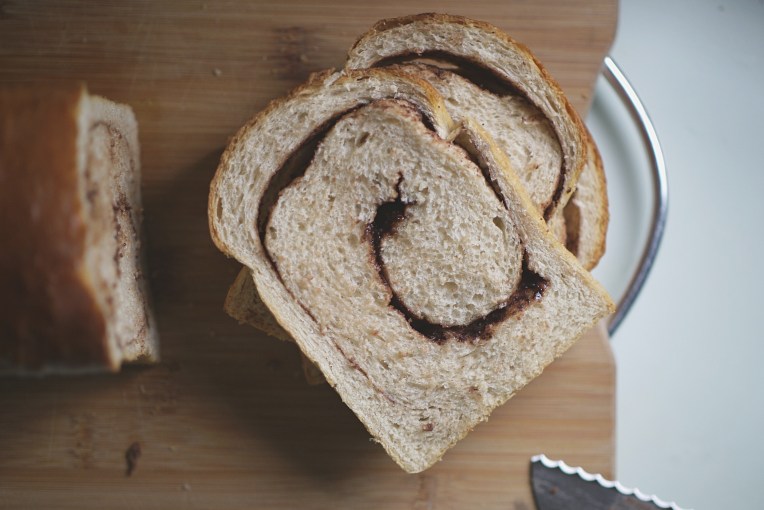
Nutella Swirl Bread // Mono + Co

It’s certainly not as luxurious as this or this, but I still managed to taste the chocolate hazelnut spread with every bite.
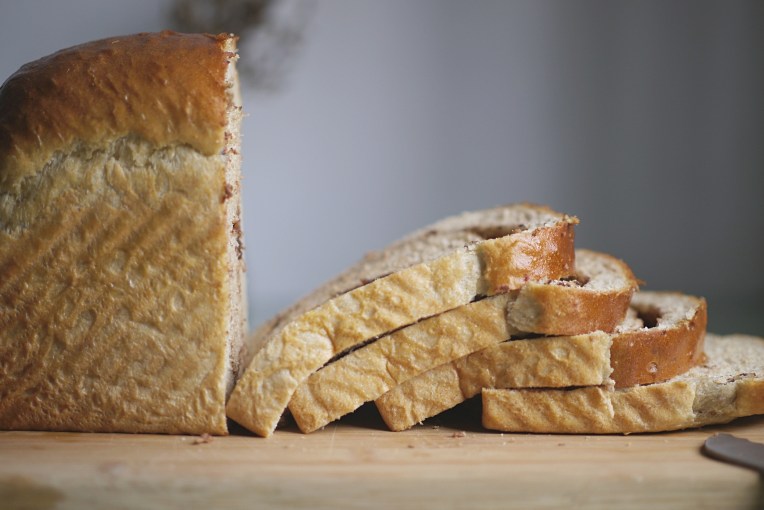
Nutella Swirl Bread // Mono + Co

The bread is best eaten on the day it’s baked, if serve while it is still warm will be even better.  Remember what I mentioned earlier about how taro produces soft fluffy bread?  I almost forgot that I added 100g of wholemeal flour to this loaf.
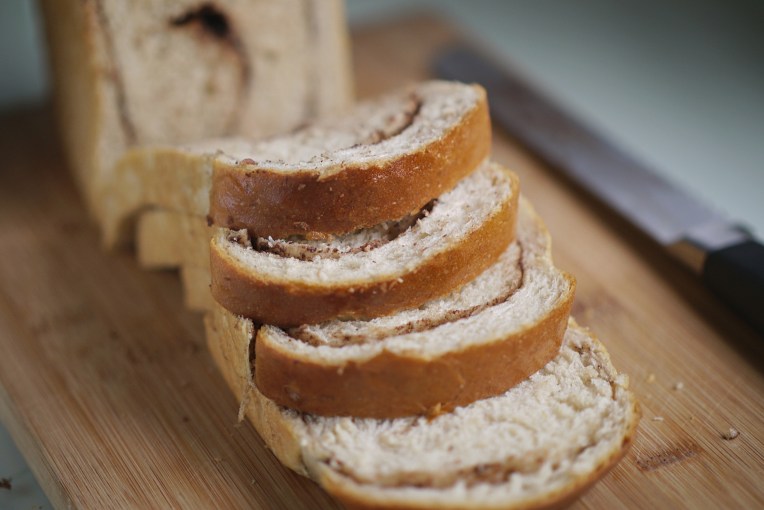
Nutella Swirl Bread // Mono + Co

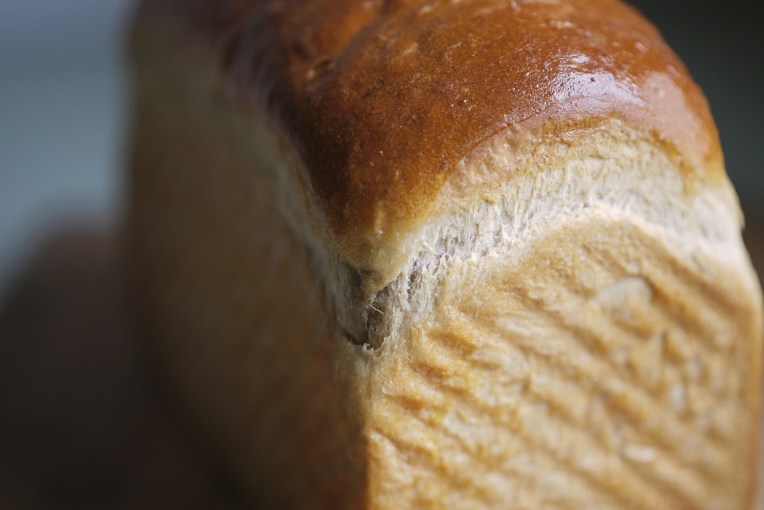
The top crust were baked to a beautiful golden brown shade. I brushed it with melted butter immediately when the bread is cooked to keep it soft instead of crusty when the bread cools completely.
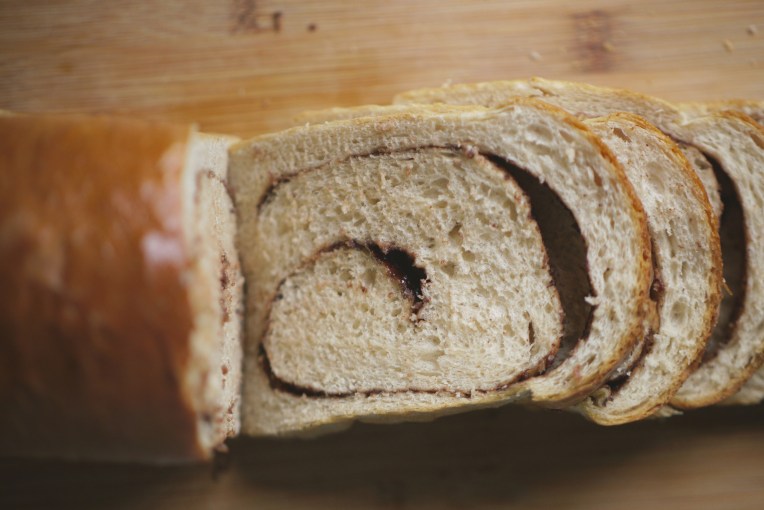
Nutella Swirl Bread // Mono + Co


Nutella Swirl Bread

200g plain flour
100g wholemeal flour
130g steamed taro, mashed
1 egg
2 tablespoons raw sugar
1/4 teaspoon sea salt
2 tablespoon milk powder **
1 teaspoon instant dry yeast
80g water
25g cold butter cubed
3 heaped teaspoons Nutella spread ***

** I use milk power to substitute fresh milk, optional.  If you prefer fresh milk, use it in place of water in the recipe.

*** I use the minimal amount of Nutella in the recipe, feel free to add more according to preference.

In a mixer bowl, combine all the dry ingredients together ( plain and wholemeal flour, raw sugar, salt, yeast,milo powder) with a hand whisk.  Then add mashed steamed taro, egg, and slowly add the water with the mixer running.  Watch the dough, when the ingredients come into a ball,  stop adding and turn off the mixer.  You may need more or less of the water stated in the recipe. Let the dough rest for 15 minutes.

After 15 minutes, start the mixer again to knead for 1 minute before adding cubed butter one by one, and knead till the dough reach window pane stage.  This is when the dough becomes very smooth and elastic, and starts to pull away from the sides of the bowl.  Stop mixer and leave dough to bulk rise for 60 minutes.

After the dough has risen, punch down the dough to deflate and transfer to a clean work top.  Sprinkle worktop and palms with flour if the dough is too sticky to handle.

Flatten the dough into a rectangular, with one end about the length of the longer side of pullman tin so that when the rolled up dough fits the baking tin.  Spread Nutella and rolling up the dough swiss roll style.  Pinch opening to seal tightly.  Place dough in a Pullman tin, seam side downwards.  Leave this aside to proof for 60minutes, covered.

Preheat oven to 170C, and bake the bread for 30 minutes.

Remove from oven immediately after baking time is up, and brush melted butter over the top crust.  Let bread cool.

If not eaten immediately, store in airtight container keep the crumbs from drying out.

Save

Save

Save

Milo Taro Pullman Loaf

Milo Taro Pullman Loaf // Mono + Co

I tried something different with this bake.  I used the water bath method to bake this bread for the first 10 minutes, but had to deconstruct the water bath structure once I realized that the bread top had risen to touch the oven’s upper heating element.  That explains the odd looking plateau you see on my bread top.  I continued to bake it the standard way for the remaining 20 minutes.

The additional steam inside the oven looks promising as a method to create taller loaves, although my table-top oven is too small for the set-up; rack + 10″ cake tin with hot water + trivet + Pullman tin.  I won’t put this in my recipe instructions below but I will try another method to create steam inside the oven by placing my smallest ramekins filled with hot water around the corners of the oven instead.  But that’s for another day.

Milo Taro Pullman Loaf // Mono + Co

As always, the addition of steamed taro makes my homemade bread moist and fluffy.  The Milo powder idea stems from this bread recipe that uses cocoa powder.  I added only 2 tablespoons of Milo powder (not the 3-in-1 type) so the loaf does not exactly whiff a strong aroma of chocolate malt, but the color reminds me of the brown traditional Hainan bread loaves : subtle.

For non-taro milo bread ideas (& for me to adapt with taro) :
this recipe with whole wheat flour
this bun recipe with milo custard filling

Milo Taro Pullman Loaf // Mono + Co


Milo Taro Pullman Loaf

280g plain flour
1 teaspoon instant dry yeast
1/4 teaspoon salt
2 tablespoon raw sugar
2 tablespoon Milo powder
100g steamed taro, cooled
1 egg
110g fresh milk
30g cold unsalted butter, cubed

In a mixer bowl, combine all the dry ingredients together ( flour, yeast, salt, sugar, milo powder) with a hand whisk.  Then add mashed steamed taro, egg, and milk to knead into a ball with a dough hook.  Stop the mixer and let the dough rest for 15 minutes.  Start the mixer again to knead for 1 minute before adding cubed butter one by one, and knead till the dough reach window pane stage.  Stop mixer and leave dough to bulk rise for 60 minutes.

After the dough has risen, punch down the dough to deflate and transfer to a clean work top.  Sprinkle worktop and palms with flour if the dough is too sticky to handle.

Divide the dough into 3 equal portions.  Flatten and shape each portion, rolling them up swiss roll style.  Arrange them in a Pullman tin, seam side downwards.  Leave this aside to proof for 60minutes, covered.

Preheat oven to 170C, and bake the bread for 30 minutes.

When done, remove bread from tin immediately and place on a rack to cool completely.

Save

Save

Save

Save

Save

Taro Raisin Buns

Taro Raisin Buns // Mono + Co

Fluffy soft pull apart bread for breakfast again, this time with raisins.

Taro Raisin Buns // Mono + CoTaro Raisin Buns // Mono + Co  Taro Raisin Buns // Mono + CoTaro Raisin Buns // Mono + Co


Taro Raisin Buns

270g plain flour
1 teaspoon instant dry yeast
120g steamed taro
1 tablespoon raw honey
60g whipping cream (38%)
1 egg
1/4 teaspoon sea salt
15g cold butter cubed
50g raisins
optional: rolled oats for garnish

** Soak raisins in a bowl of warm water for 30 minutes.  Drain and gently squeeze dry to remove excess liquid before use.

In a mixer bowl, place plain flour, instant yeast, mashed and cooled steamed taro, raw honey, cream, beaten egg and knead with a dough hook attachment on the lowest speed (KA 1).  Stop the mixer when the ingredients come into a ball.  Let the dough rest for 15-30 minutes.

After resting the dough, sprinkle the sea salt on the dough.  Start the mixer running on its lowest speed again to knead the dough for 1 minute, before adding cubed butter, one by one.  Knead until the dough reaches window pane stage, this is when the dough becomes very smooth and elastic, and starts to pull away from the sides of the bowl.  Add raisins while mixer is running and knead for about 1 minute to incorporate the raisins into the dough. Remove the bowl from mixer, cover and bulk rise for 1 hour.

After an hour, the dough will rise and increase its volume, punch it down to release the gas, and transfer to a clean work top.  Flatten the dough to push out gas trapped inside the dough, either by hand or a rolling pin.  Flour hands and worktop to help with shaping if the dough is sticky.  Divide the dough into 6 equal parts, shape each into a ball and place it in a greased tin or pan, seam side facing downwards.  Let this sit in a draft-free place to rise for another 50-60 minutes.

Bake in a preheated oven at 170C for 25 minutes.  Remove the bread from the pan immediately after baking, and let it cool on a rack completely before slicing or serving.

Store in a covered container if not consumed immediately, to keep the loaf soft and the crumbs from drying out.

Save

Save

Anpan

Anpan // Mono+Co

Pillowy soft dough with sweet red bean paste filling.  Anpan used to be a must-buy for me before the varieties of buns increased along with the number of bakeries islandwide.  Bought this packet of red bean paste from Daiso and used my favorite dough recipe with mashed taro to bake 6 buns in a rectangular pan.

Anpan // Mono+CoAnpan // Mono+CoAnpan // Mono+CoAnpan // Mono+Co Anpan // Mono+Co Anpan // Mono+Co Anpan // Mono+CoAnpan // Mono+Co Anpan // Mono+Co


Anpan

290g plain flour
1 teaspoon instant dry yeast
150g steamed taro
1 tablespoon raw honey
1 egg
50g water
1/4 teaspoon sea salt
20g cold butter, cubed
35g x 6 red bead paste **
white sesame seeds

** I use ready-made Azuki red bean paste from Daiso.

In a mixer bowl, place plain flour, instant yeast, mashed and cooled steamed taro, raw honey, beaten egg and knead with a dough hook attachment on the lowest speed (KA 1).  Slowly add the water with the mixer running, you may need more or less of the water stated in the recipe.  Watch the dough, when the ingredients come into a ball,  stop adding and turn off the mixer.  Let the dough rest for 15-30 minutes.

After resting the dough, sprinkle the sea salt on the dough.  Start the mixer running on its lowest speed again to knead the dough for 1 minute, before adding cubed butter, one by one.  Knead until the dough reaches window pane stage, this is when the dough becomes very smooth and elastic, and starts to pull away from the sides of the bowl.  Remove the bowl from mixer, cover and bulk rise for 1 hour.

After an hour, the dough will rise and increase its volume, punch it down to release the gas, and transfer to a clean work top.  Flour hands and worktop with flour to help with shaping if the dough is sticky.  Divide the dough into 6 equal parts.  Flatten a piece of dough on the work top and place 1 x 35g red bean paste in the middle.  Wrap the azuki bean paste inside the dough and shape it into a ball.  Place it in a greased tin or pan, seam side facing downwards.  Repeat for the remaining 5 pieces of dough.  Let them sit in a draft-free place to rise for another 50 minutes.

Just before baking, sprinkle some white sesame seeds on top of each bun.  Bake in a preheated oven at 170C for 23 minutes.

Remove the bread from the pan immediately after baking, and let it cool on a rack completely before serving.

Save

Save

Save

Save

Save

Save

Save

Save

Save

Taro Hot Cross Buns

Hot Cross Buns // Mono + Co Hot Cross Buns // Mono + Co Hot Cross Buns // Mono + Co Hot Cross Buns // Mono + Co Hot Cross Buns // Mono + Co

Jumping on the hot cross bun bandwagon with my taro enriched bread recipe.  I realized that my 6″x9″x3″ rectangle pan is perfect for baking this recipe!

This hot cross bun is made plain, without raisins and mix spice.  So I serve it with butter and kaya, local style.


Taro Hot Cross Buns

270 plain flour
1 teaspoon instant dry yeast
120g mashed taro
2 tablespoons raw honey
1 egg
50g water
1/4 teaspoon sea salt
20g butter
for cross:
1 tablespoon plain flour
water

In a mixer bowl, place plain flour, instant yeast, mashed and cooled steamed taro, raw honey, beaten egg and knead with a dough hook attachment on the lowest speed (KA 1).  Slowly add the water with the mixer running, you may need more or less of the water stated in the recipe.  Watch the dough, when the ingredients come into a ball,  stop adding and turn off the mixer.  Let the dough rest for 15-30 minutes.

After resting the dough, sprinkle the sea salt on the dough.  Start the mixer running on its lowest speed again to knead the dough for 1 minute, before adding cubed butter, one by one.  Knead until the dough reaches window pane stage, this is when the dough becomes very smooth and elastic, and starts to pull away from the sides of the bowl.  Remove the bowl from mixer, cover and bulk rise for 1 hour.

After an hour, the dough will rise and increase its volume, punch it down to release the gas, and transfer to a clean work top.  Flatten the dough to push out gas trapped inside the dough, either by hand or a rolling pin.  Flour hands and worktop with flour to help with shaping if the dough is sticky.  Divide the dough into 6 equal parts, shape each into a ball and place it in a greased tin or pan, seam side facing downwards.  Let this sit in a draft-free place to rise for another 50-60 minutes.

Make a flour paste with plain flour with just enough water to smooth but not runny paste.  Pipe the paste on the top of each bun to make a cross.

Bake in a preheated oven at 170C for 30 minutes.  Remove the bread from the pan immediately after baking, and let it cool on a rack completely before slicing or serving.

Store in a covered container if not consumed immediately, to keep the loaf soft and the crumbs from drying out.

Save

Save

Save

Save

Save

Flaxseed Taro Loaf

Flaxseed Taro Loaf // Mono + Co Flaxseed Taro Loaf // Mono + Co Flaxseed Taro Loaf // Mono + Co Flaxseed Taro Loaf // Mono + Co

I applied a step from making sourdough bread to this yeasted recipe: only add salt to the dough after the autolyse stage.  It didn’t seem to make any difference to my taro bread recipe, but I thought my dough reached window pane stage slightly earlier than usual.  Someone else commented the same thing here so this could be making an impact on my bread just that I didn’t know. There is really no harm adding the salt later (I think) so I will be doing this for all my future bread recipes.

The flaxseeds were a last minute add-on.  Got them on a 20% offer, $5.44 for a 500g pack, and they are organic.  The bread rose tall enough after 50 minutes into its final proofing but I find the bread top too bare.  Before sending it into the oven, I mist the loaf with water and sprinkle a tablespoon of flaxseeds on top.


Flaxseed Taro Loaf

270g plain flour
1 teaspoon instant yeast
100g steamed taro
2 tablespoons raw honey
1 large egg
70g water
1/4 teaspoon sea salt
20g cold butter, cubed
1 tablespoon flaxseeds

In a mixer bowl, place these ingredients: plain flour, instant yeast, mashed and cooled steamed taro, raw honey, beaten egg and knead with a dough hook attachment on the lowest speed (KA 1).  Slowly add the water with the mixer running, you may need more or less of the water stated in the recipe.  Watch the dough, when the ingredients come into a ball,  stop adding and turn off the mixer.  Let the dough rest for 15-30 minutes.

After resting the dough, sprinkle the sea salt on the dough.  Start the mixer running on its lowest speed again to knead the dough for 1 minute, before adding cubed butter, one by one.  Knead until the dough reaches window pane stage, this is when the dough becomes very smooth and elastic, and starts to pull away from the sides of the bowl.  Remove the bowl from mixer, cover and bulk rise for 1 hour.

After an hour, the dough should rise and increase its volume, punch it down to release the gas, and transfer to a clean work top.  Flatten the dough to push out gas trapped inside the dough, either by hand or a rolling pin.  The dough is quite sticky, flour hands and worktop with flour to help with shaping.  Shape the dough into a log and place it in a greased bread tin, seam side facing downwards.  Let this sit in a draft-free place to rise for another 50-60 minutes.  When the bread has risen to the rim of the baking tin, brush some water on the surface and sprinkle flaxseeds even on top.

Bake in a preheated oven at 170C for 30 minutes.  Remove the bread from the pan immediately after baking, and let it cool on a rack completely before slicing or serving.

Store in an airtight container if not consumed immediately, to keep the loaf soft and the crumbs from drying out.

Save

Save

Save

Save

Natural Starter Taro Chia Seed Bagel

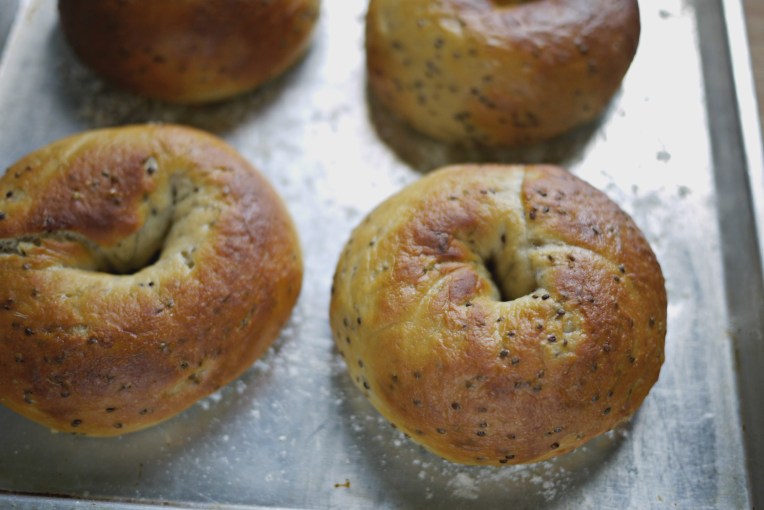
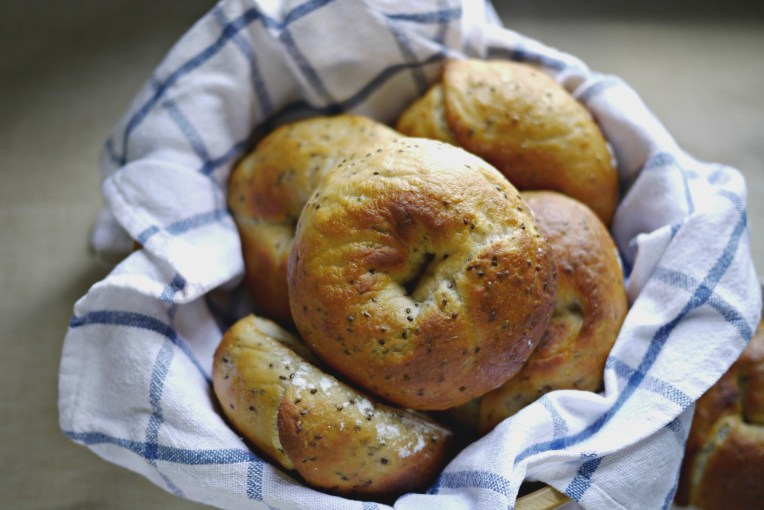
Natural Starter Taro Chia Seeds Bagels // Mono + Co

I bake bread fervently for two reasons. One. To have control over the ingredients that goes into mine, that means no artificial flavors or unfamiliar additives that I can’t pronounce.  Two.  To avoid packaging, especially the plastic ones from commercial bakeries.  I have taken an extra step to buy as many ingredients as possible without packaging by sourcing them from dry goods stores at wet markets.  I am so glad that I have found plain flour, sold in bulk.  Being the main ingredient of bread, that’s a lot of plastic bags avoided, but there is still no avail for wholemeal flour.

Natural Starter Taro Chia Seeds Bagels // Mono + CoNatural Starter Taro Chia Seeds Bagels // Mono + Co

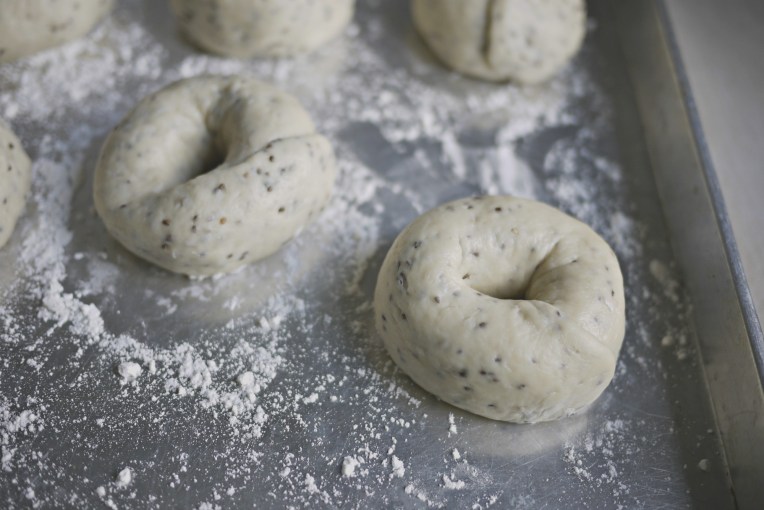
I am not a great fan of bagels but I am intrigued by that overlapping end that gives bagel its signature handmade look.  Some recipes suggest simply poking a hole through a dough ball and shape it further like a donut.  I found the method of flattening one end of a cylindrically shaped dough and wrap this end around the other end most useful.  For more shaping techniques, check out here and here.  The method I adopted is demonstrated with photos in the recipe section.

Natural Starter Taro Chia Seeds Bagels // Mono + Co

After proofing, the size of the hole became smaller as the dough expanded.  It was reduced further to resemble a belly button after boiling in water before baking.

Natural Starter Taro Chia Seeds Bagels // Mono + Co Natural Starter Taro Chia Seeds Bagels // Mono + Co Natural Starter Taro Chia Seeds Bagels // Mono + Co

I boiled these bagels in a small pot of water with honey added to get these golden brown effect after baking.  As this recipe yields 6 bagels, I boiled them one by one for 1 minute on each side, so that I won’t waste a big pot of water as well as honey, which is expensive.  Alternatively, cheaper malt syrup can be used.


Natural Starter Taro Chia Seed Bagel

160g fed starter
200g plain flour
100g steamed taro, mashed
3 tablespoon milk powder
45g water
1/4 teaspoon sea salt
30g cold butter, cubed
1 tablespoon chia seeds

In a mixer bowl, add fed starter, plain flour, cooled mashed taro, milk powder, and water. Start mixer to knead on its lowest speed with a dough hook until all the ingredients come into a ball.  Stop the mixer and let the dough rest for 15 minutes to allow the flour to absorb the liquid better.

After 15 minutes, sprinkle the sea salt on the dough and start the mixer again to knead for 1-2 minutes before adding cubed butter one by one.  Knead until the dough reaches window pane stage.  Add chia seeds to incorporate.  Stop mixer and leave the dough in the covered mixer bowl to bulk rise at room temperature for 120 – 150 minutes, until the dough expands and passes the poke test, a sure sign that the first fermentation stage is completed.

After the dough has risen to double its volume, punch down the dough to deflate and transfer to a clean worktop.  Sprinkle worktop and palms with flour if the dough is too sticky to handle.  Divide the dough into 6 portions, mine’s around 100g each.

Take one of the dough and roll it on the worktop to get a cylinder shape, about 30cm long.  Using a roller pin, flatten about 5 cm of one end, then join the two ends to make a loop with the dough and overlay the flatten end to wrap the other end.

Natural Starter Taro Chia Seeds Bagels // Mono + CoNatural Starter Taro Chia Seeds Bagels // Mono + CoNatural Starter Taro Chia Seeds Bagels // Mono + Co

Arrange on a baking tray.  Repeat with the rest of the dough balls.  Proof these for an hour.

Fill up 3/4 pot with water, I used my smallest 16 cm diameter one to save water, and add 1 tablespoon of honey.  Bring the water to boil.  Gently pick up a bagel dough, and transfer it into the pot of boiling water, with its top side facing down.  After 1 minute, flip the bagel and continue to cook for a further 1 minute.  Remove the cooked bagel from the pot, and drain on a sieve, before arranging it on a baking pan.

Bake in a preheated oven at 200C for 8 minutes. Turn the tray and bake for a further 7-8 minutes till the surface turns golden brown.

Save

Save

Save

Save

Save

Save

Save

Save

Save