It’s been more than three years since I bought this waffle maker. With this appliance, it’s become more convenient to make waffles than pancakes. I have even started making my own pancake-waffle mix, instant breakfast idea!
I have also stopped trying new waffle recipes, relying on this trusty pancake-waffle version instead. For the Christmas edition, I simply added cinnamon powder.
FLUFFY PANCAKES RECIPE
1 cup plain flour
1 teaspoon cinnamon powder
1 1/2 teaspoon baking powder
1/4 teaspoon salt
2 tablespoons (28g) raw sugar
1 egg
 1 cup (240ml) milk
1 teaspoon vanilla extract
2 tablespoon rice bran oil
In a mixing bowl, add plain flour, cinnamon powder, baking powder, salt, raw sugar. Combine well with a small hand whisk.
Make a well in the center of the dry ingredients and pour in beaten egg,milk, and vanilla extract, whisk to mix.
Add oil and whisk to mix until the batter becomes smooth and no longer lumpy. Add more milk if the batter is too thick.
Cook waffles as per waffle maker instructions. I use setting no.4.
To serve, drizzle honey and sprinkle more cinnamon powder on top of waffles.
One-ingredient banana ice cream is cheap and easy to make at home. Hence, it makes sense to keep a supply of frozen bananas to save money. Recently, I learnt that to create a new habit, we simply reduce the activation energy for the positive habits that we want to implement. This means, the less effort and energy it takes to carry out the activity, the more likely we will stick to the habit. This is known as the 20-second rule. I decided to apply the concept to make me eat less commercial sugar-laden ice cream.
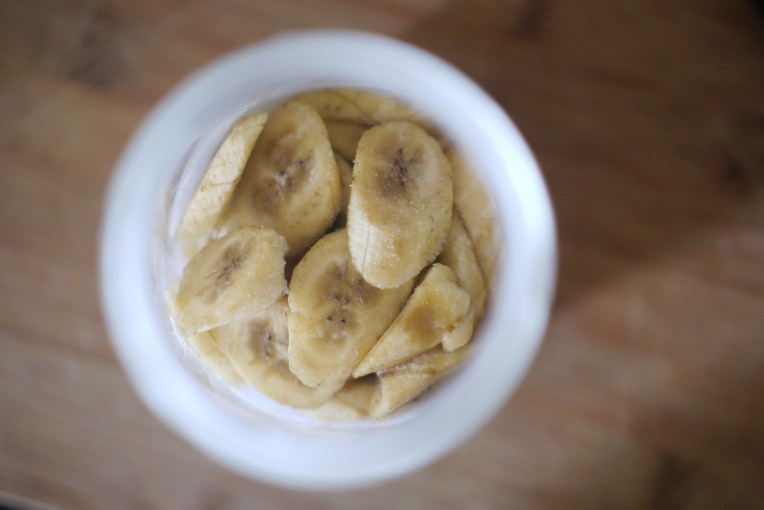
To make it easier to enjoy the ice cream, I store the bananas in large glass pasta jars by serving portions, e.g. left bottle – for three persons, right bottle – for two. By the way, that’s Korean hot pepper flakes stored inside the freezer too, just like Maangchi
// when it’s time for dessert, retrieve a jar from the freezer,
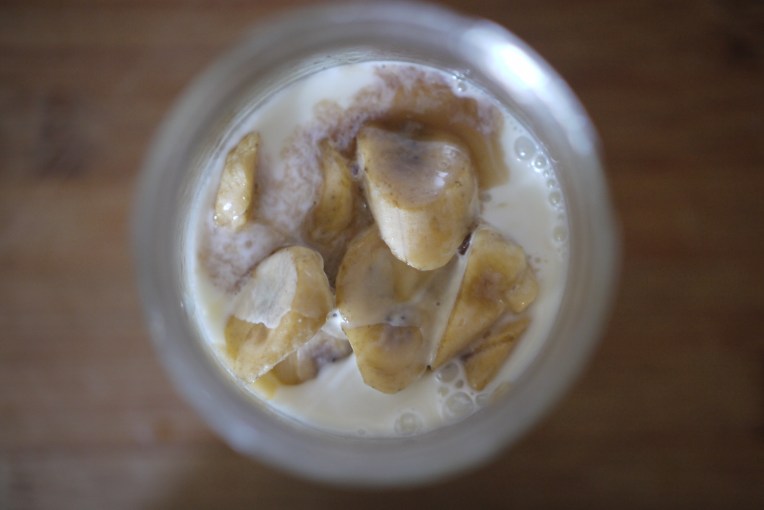
// add some dairy or coconut milk,
// for a soft-serve consistency, do not add too much liquid or it’ll turn into a banana smoothie instead.
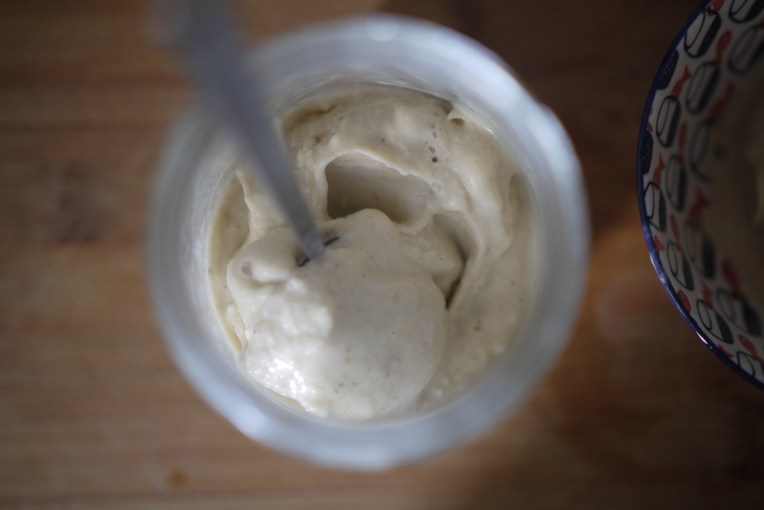
// here’s the reason why I use these pasta bottles; I use an immersion blender to puree the frozen bananas. Then, I eat the ice cream straight out of the jar! How convenient! And that’s how I apply the 20-second rule to eating homemade banana ice-cream and avoiding factory-made ones!
The “ugly” red dragon fruits my mom bought were unbelievably good-looking! According to her, fruit stores put up heavily discounted ugly or overripe fruit almost daily. My mom always buys the ones on clearance because they are such a steal; the red dragon fruits were going for $1 each that day.
The pink fruit makes great natural food colouring. Since I make bread every other day, the flesh of the fruit seems a good addition to my bread recipe.
I omitted eggs and milk to keep the recipe as basic as possible. The dough reached windowpane stage effortlessly and did a lovely bulk rise. After going through a second proofing, the bread looked very promising, tight gluten cloak and all.
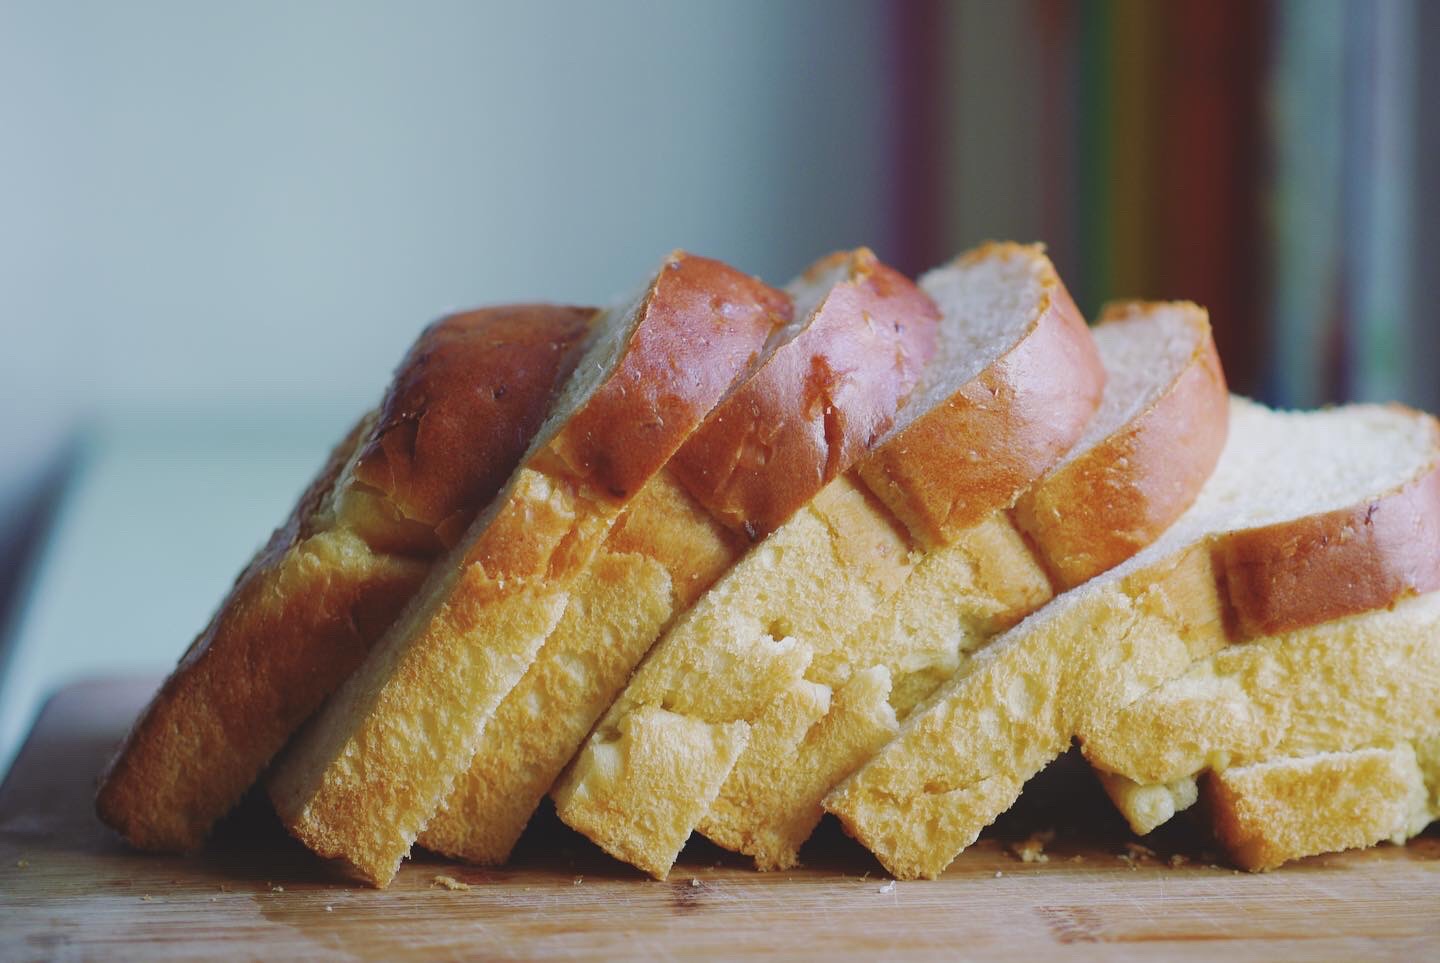
Its bright pink hue turned into a pastel shade after baking but still pretty.
The crumbs are light and airy; not a dense loaf. Specks of seeds made the bread look even more wholesome!
My daughter, who normally doesn’t eat dragon fruits loves the pink bread slices. Now that’s a pretty way to add the fruit to her diet!
Red Dragon Fruit Bread Loaf
280g bread flour


130g red dragon fruit, mashed


1/2 teaspoon instant dry yeast


1/4 teaspoon sea salt


2 tablespoons raw sugar


30g water
*
20g cold butter, cubed
* Do not pour all 30g water into the mixer bowl, add water bit by bit, watch the dough closely, stop once the ingredients form a rough ball.
In a mixer bowl, combine bread flour, red dragon fruit,instant yeast, sea salt, raw sugar, and water. Turn on the mixer with a dough hook attachment and knead these ingredients on the lowest speed (KA 1) till they come into a ball. Continue to knead for 3 minutes, then stop the mixer and let the dough sit for at least 15 minutes.
Turn on the mixer again and knead for 1 minute before adding butter cubes one by one while the mixer is running on its lowest speed. Keep kneading till there are no traces of butter left and the dough has reached windowpane stage. At this stage, the dough will be extremely pliable and baby-bottom soft.
Leave the dough in the mixer bowl for its first proof of 60 minutes. The dough will rise to double its volume, punch down to deflate and transfer it to a clean worktop.
Flatten the dough to push out gas trapped inside the dough, either by hand or a rolling pin. The dough is quite sticky, flour hands and worktop with flour to help with shaping. Shape the dough into a log and place it in a greased bread tin, seam side facing downwards. Let this sit in a draft-free place to rise for another 50-60 minutes. Optional: dust flour on bread top.
When the bread has risen to the rim of the baking tin, bake in a preheated oven at 170C for 30 minutes. Remove the bread from the pan immediately after baking, and let it cool on a rack completely before slicing or serving.
Store in an airtight container if not consumed immediately, to keep the loaf soft and the crumbs from drying out.
I have found another use for my recycled pasta sauce glass jars; storing pancake mix! When ready to cook, simply add the list of wet ingredients scribbled on the bottle, cover lid and shake to mix into batter. How convenient!
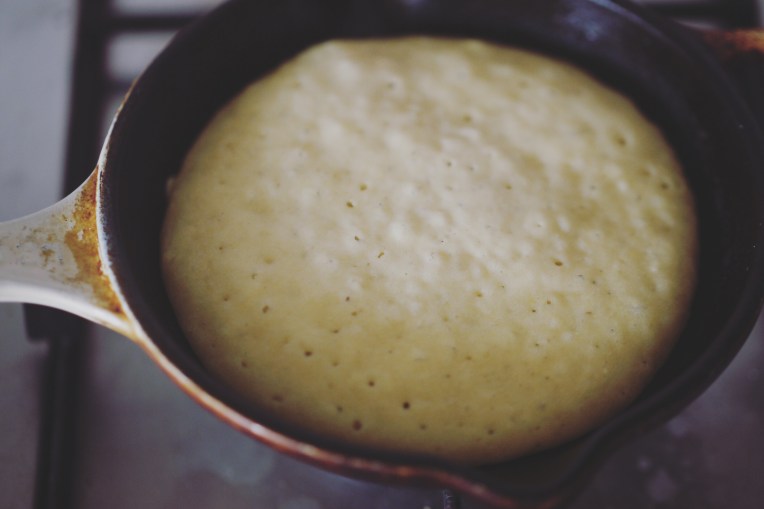
My recipe makes four fluffy pancakes. My photo showed only three pancakes because the first one always gets eaten up while I wait for the rest to get cooked.
I cook these pancakes in a covered 6-inch skillet over very low heat.
If done correctly, the bottom side of the pancake will be golden brown, while the top side is perfectly steam-cooked.
The premix makes it more convenient to cook pancakes for breakfast at 6am, now that school has reopened!
PANCAKE MIX
makes four fluffy 6-inch pancakes

1 cup plain flour

2 tablespoons oat flour
2 tablespoons milk powder, optional
1 1/2 teaspoon baking powder
1/4 teaspoon sea salt

2 tablespoons raw sugar
Mix all the dry ingredients and store in a glass jar or container.
To cook, add 1 cup water, 1 egg, 2 tablespoons oil, 1/2 teaspoon vanilla extract.
The supermarkets put up rolled oats on offer quite often. I get a 1kg-pack at around $5, which I then turn into plenty of breakfast granola because prepacked granola can be so expensive to buy! Oat flour is another pantry item that is cheaper to DIY than getting store-bought ones.
There is only one ingredient needed to make oat flour: rolled oats.
And there is only one equipment you need to make oat flour: blender/ food processor. You don’t even need to own one of those high-end blenders. Mine’s a Sharp-brand; no-frills table-top blender and here’s the oat flour I made with it.
Blend rolled oats until you get a fine powder. And that’s it! Unbelievably easy right? Transfer the flour to a container and use up in 1 month.
Use your homemade oat flour to make bread, pancakes, waffles, muffins, and cookies. I adapted my potato bread recipe by adding oat flour and shaping the dough into buns instead of a Pullman loaf.
Want to know the key to fluffy bread? Knead the dough until windowpane stage. That’s the stage when you can stretch and pull the dough thinly without tearing it easily. Achieving this is important in breadmaking because that’s how you know the bread will expand and rise with a smooth and tight crust.
The buns turned golden brown in just 15 minutes, baked at 170C.
To keep the crust soft, I brush oil on the buns immediately after they are taken out of the oven.
Oat Flour Potato Buns
200g bread flour

20g oat flour
2 tablespoons milk powder, optional

1/2 teaspoon instant dry yeast

1/4 teaspoon sea salt

2 tablespoons raw sugar

100g mashed potato

1 large egg, beaten **

30-40g potato water ***

20g cold butter, cubed
** I used large eggs that weigh 75grams with shell.
*** Potato water refers to the water that the potatoes were cooked in. Cool it down to room temperature before using.
In a mixer bowl, combine bread flour, oat flour, milk powder,instant yeast, sea salt, raw sugar, mashed potato, egg, and water. Turn on the mixer with a dough hook attachment and knead these ingredients on the lowest speed (KA 1) till they come into a ball. Continue to knead for 3 minutes, then stop the mixer and let the dough sit for 15 minutes.
Turn on the mixer again and knead for 1 minute before adding butter cubes one by one while the mixer is running on its lowest speed. Keep kneading till there are no traces of butter left and the dough has reached windowpane stage. At this stage, the dough will be extremely pliable and baby-bottom soft.
Leave the dough in the mixer bowl for its first proof of 60 minutes. The dough will rise to double its volume, punch down to deflate and transfer it to a clean worktop.
Shape into 12 x 40g buns and arrange them on a greased baking tray, proof for 50-60 minutes.
Bake in a preheated oven at 170C for 15 minutes until the buns are golden brown.
Remove bread from oven and let them cool completely on a rack before storing in an airtight container.
The soft and fluffy buns shown at the end of this video recipe looked unbelievable. Really, how do you make steamed buns that look so golden-brown, like those baked in an oven? My first attempt produced pale-looking steamed buns.
There is no water in the dough recipe; four eggs and 30ml of oil are the only liquids holding the rest of the dry ingredients together.
The bread dough rose very well, and the steam-cook process produced an excellent Mantou texture.
Soft fluffy crumbs, like those baked with tangzhong (roux) recipes! But the colour of the crust is so different from the one in the video. Was it because I did not use a cling-film to cover the dough when steaming?
I tried again, this time by baking the dough in the oven.
The colour is nice for a baked loaf.
When the base looks this good, you know the bread will be yummy as well.
My third attempt was to make slider buns with this recipe. The specks you see on the buns are oat pulp that I added to the recipe. I make oat milk at home and often need to recycle the oat pulp residue in baking projects. If I am not baking, then I simply make oat porridge, which is the fast way to use up the pulp!
Bake them at 170C for 20 minutes, and you get squishy slider buns.
Add your favourite fillings, or enjoy them plain.
I store them in a covered cast iron pot. The pot makes great bread containers!
So there you go, I have tried this recipe three times, each time making a different type of bread.
My verdict: I will use this recipe for steamed Mantou only, simply because I already have my preferred recipes for baking bread and buns. But now I am getting curious if my favourite bread recipe can be steamed to become fluffy Mantou!
Steamed Mantou/ Oven-Baked Bread or Slider Buns
adapted from here
300g plain flour

4 eggs

1/2 teaspoon instant dry yeast

30g sugar

30g cooking oil
*Optional: I added 100g of oat pulp to the dough for my slider version.
In a mixer bowl, combine plain flour, eggs,instant yeast, and sugar. Turn on the mixer with a dough hook attachment and knead these ingredients on the lowest speed (KA 1) till they come into a ball.
Adding oil and keep kneading till the dough reaches window pane stage. At this stage, the dough will be extremely pliable and baby-bottom soft.
Leave the dough in the mixer bowl for its first proof of 60 minutes. The dough will rise to double its volume, punch down to deflate and transfer it to a clean worktop.
Shape the dough to your liking (mantou, loaf, buns etc.) and place in a steam basket, bread tin or baking pan, depending on what you are making with the recipe.
Leave the shaped dough to rest for another 50-60 minutes.
To steam Mantou: Fill a pot with enough cold water for a 50-minute steaming process, as you should not interrupt the process by opening the cover halfway through to top up the water. Place the buns in the pot and start steaming on high heat, once the water begins to boil, set timer to steam for another 40 minutes. Mantou is best served warm, no need to cool down. Store the balance in a sealed container.
To bake bread loaf: Bake in a preheated oven at 170C for 30 minutes. Remove bread from bread tin immediately after baking and let it cool completely on a rack before slicing. Store in a sealed container.
To bake slider buns: Bake in a preheated oven at 170C for 20 minutes, let it cool completely before storing in a sealed container.
I am surprised that I have never tried cooking lentils before. I must have been intimidated by recipes that call for a long list of herbs and spices; I used to discard plenty of these, forgotten and expired. This happened a lot in the past when I tried out recipes for the novelty; cook once and never again.
It is actually my daughter’s idea to try a plant-based lentil stew recipe. It came with a long shopping list of seasoning and spices: garlic powder, onion powder, cumin powder, coriander powder, sweet paprika powder, ginger powder; none of which I have at home. It irks me to think that these ingredients might end up as food waste if we are only making the dish once.
To prevent wastage, I selected only two types of spices to buy: cumin and coriander, while substituting the rest with either fresh ones (garlic, ginger, onions) or skip them altogether. I am adding turmeric powder as I always have it at home. We have been making this stew dish at least four times, each time with different ingredients, but always with cumin, coriander and turmeric powder.
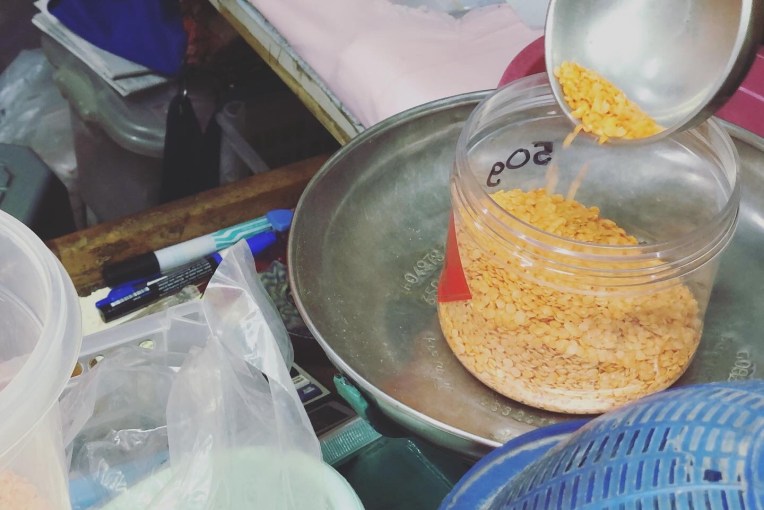
Recently, I have been cutting down the frequency of trips to the wet market. This means that I have to buy more fresh produce which doesn’t turn bad quickly, such as cauliflowers, sweet potatoes, potatoes, and carrots. These hardy vegetables are perfect for making lentil stews. I am also purchasing more dry food items such as beans, noodles, rice cakes from the dry provision section of the wet market. That’s how I learned that red lentils and spices (and curry paste!) are sold in bulk at the Indian provision stall. My CNY cookie container that weighs exactly 50g without its cover, makes it a breeze for the stallholder to measure my order, 200g of red lentils.
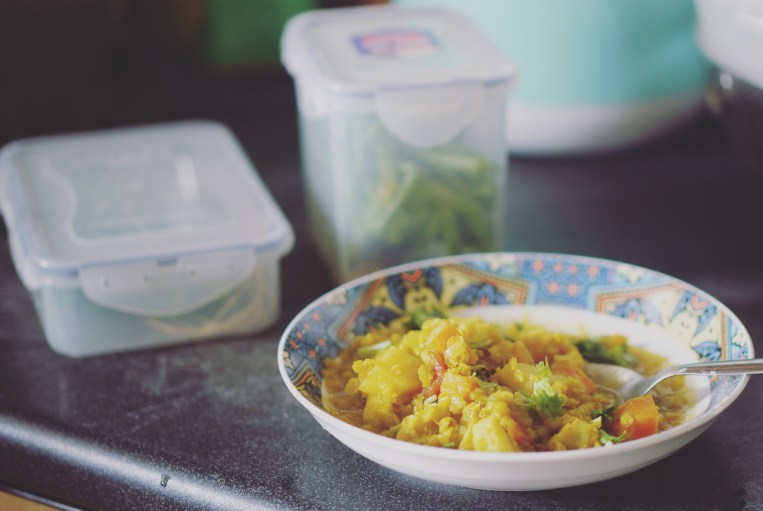
I will be exploring more vegetarian lentil stew recipes. In the meantime, here’s a quick sharing of how I make mine today, serves two:
1. Prep Ingredients:
1 small red onion, chopped
2 cloves garlic, minced
1 medium carrot, diced
1 sweet potato, diced
1 large potato, diced
2 large tomatoes, chopped
1 cup red lentils, rinsed
Olive oil, enough to cover and sweat chopped onions
2 tsp cumin powder
1 tsp coriander powder
1 tsp turmeric powder
Black pepper and salt, to taste
Cilantro, as garnish
2. Steps:
Heat up oil in a pot.
Add chopped onions and cook till softened.
Add garlic, fry till aromatic.
Add diced carrots, sweet potatoes, potatoes, and chopped tomatoes, stir to cook, around 3 minutes, add red lentils.
Add cumin, coriander and turmeric powder, stir to mix.
Add enough hot water (or broth, if preferred) to cover all ingredients and bring to boil.
Cover pot, reduce heat, and simmer to cook, around 10 minutes.
Remove cover, stir the mixture, add more hot water if it’s too dry.
Season with salt and black pepper.
Garnish with chopped cilantro and serve immediately.
Do you have cooking, seasoning tips, or must-have ingredients, spices for your favourite lentil stew recipe? Share if you have, this late-comer to the world of lentils will be very grateful!
With the circuit-breaker measures in place and all the time in the world at home, I have started to bake bread the slower way again.
I went back to kneading bread dough with a standing mixer. I also reduced the instant yeast in the recipe, from 1/2 tablespoon to 1/2 teaspoon. The final bread proofing time took longer but it still managed to rise above the rim of the bread tin. I have tried baking the recipe for a second time with a bigger Pullman loaf tin, it worked well.
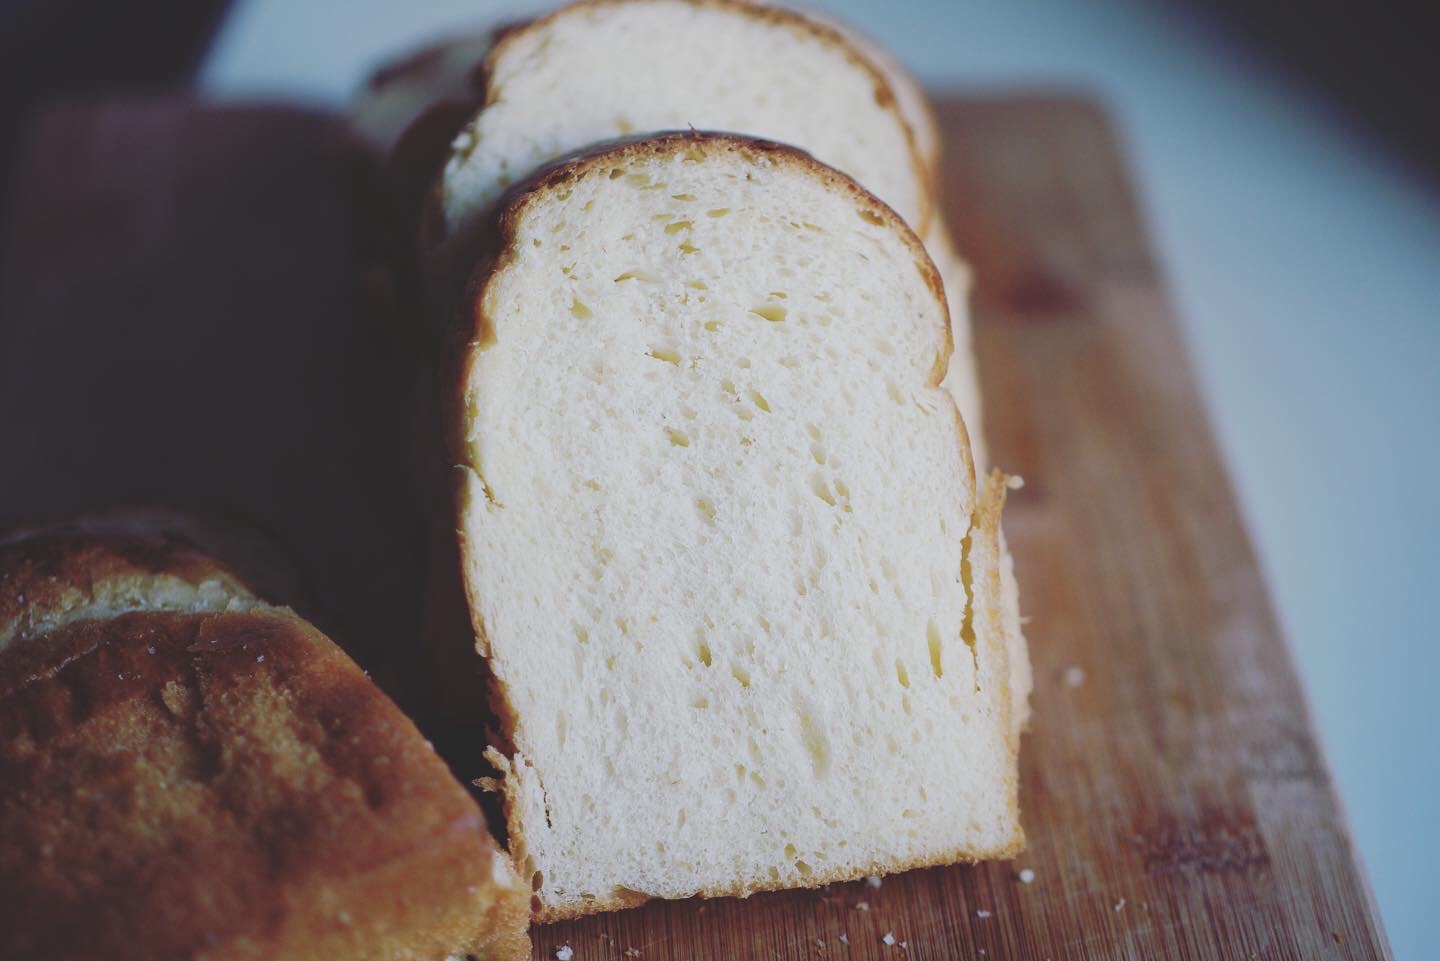
More importantly, the potato bread was soft and pillowy. Definitely the kind of breakfast to look forward to every morning.
Potato Bread Loaf
220g plain flour

2 tablespoons milk powder, optional

1/2 teaspoon instant dry yeast

1/4 teaspoon sea salt

2 tablespoons raw honey

100g mashed potato

1 large egg, beaten **

30-40g potato water ***

20g cold butter, cubed
** I used large egg that weighs 75grams with shell.
*** Potato water refers to the water that the potatoes were cooked in. Cool it down to room temperature before using.
In a mixer bowl, combine plain flour, milk powder,instant yeast, sea salt, raw honey,mashed potato, egg, and water. Turn on the mixer with a dough hook attachment and knead these ingredients on the lowest speed (KA 1) till they come into a ball. Continue to knead for 3 minutes, then stop the mixer and let the dough sit for 15 minutes.
Turn on the mixer again and knead for 1 minute before adding butter cubes one by one while the mixer is running on its lowest speed. Keep kneading till there are no traces of butter left and the dough has reached window pane stage. At this stage, the dough will be extremely pliable and baby-bottom soft.
Leave the dough in the mixer bowl for its first proof of 60 minutes. The dough will rise to double its volume, punch down to deflate and transfer it to a clean worktop.
Shape the dough and place in a bread tin. Proof for 60-70 minutes.
Bake in a preheated oven at 170C for 30 minutes. Remove bread from bread tin immediately after baking and let it cool completely on a rack before slicing.
To soften the top crust, brush melted butter over the top of the loaf while it is hot. I keep a handy small block of butter just for this purpose and run it over the crust and let the heat from the bread melt the butter as they come in contact. Save the hassle of melting butter and washing an oily brush.