Easy Handmade Pizza with ABin5 dough

abin5 dough pizza // mono+co abin5 dough pizza // mono+coabin5 dough pizza // mono+coabin5 dough pizza // mono+co

The hunger pang came after watching a pizza ad, showing a pair of pretty hands kneading the floured pizza dough, sprinkling herbs and toppings, before presenting 5 rectangular pizzas, each with a different flavor.

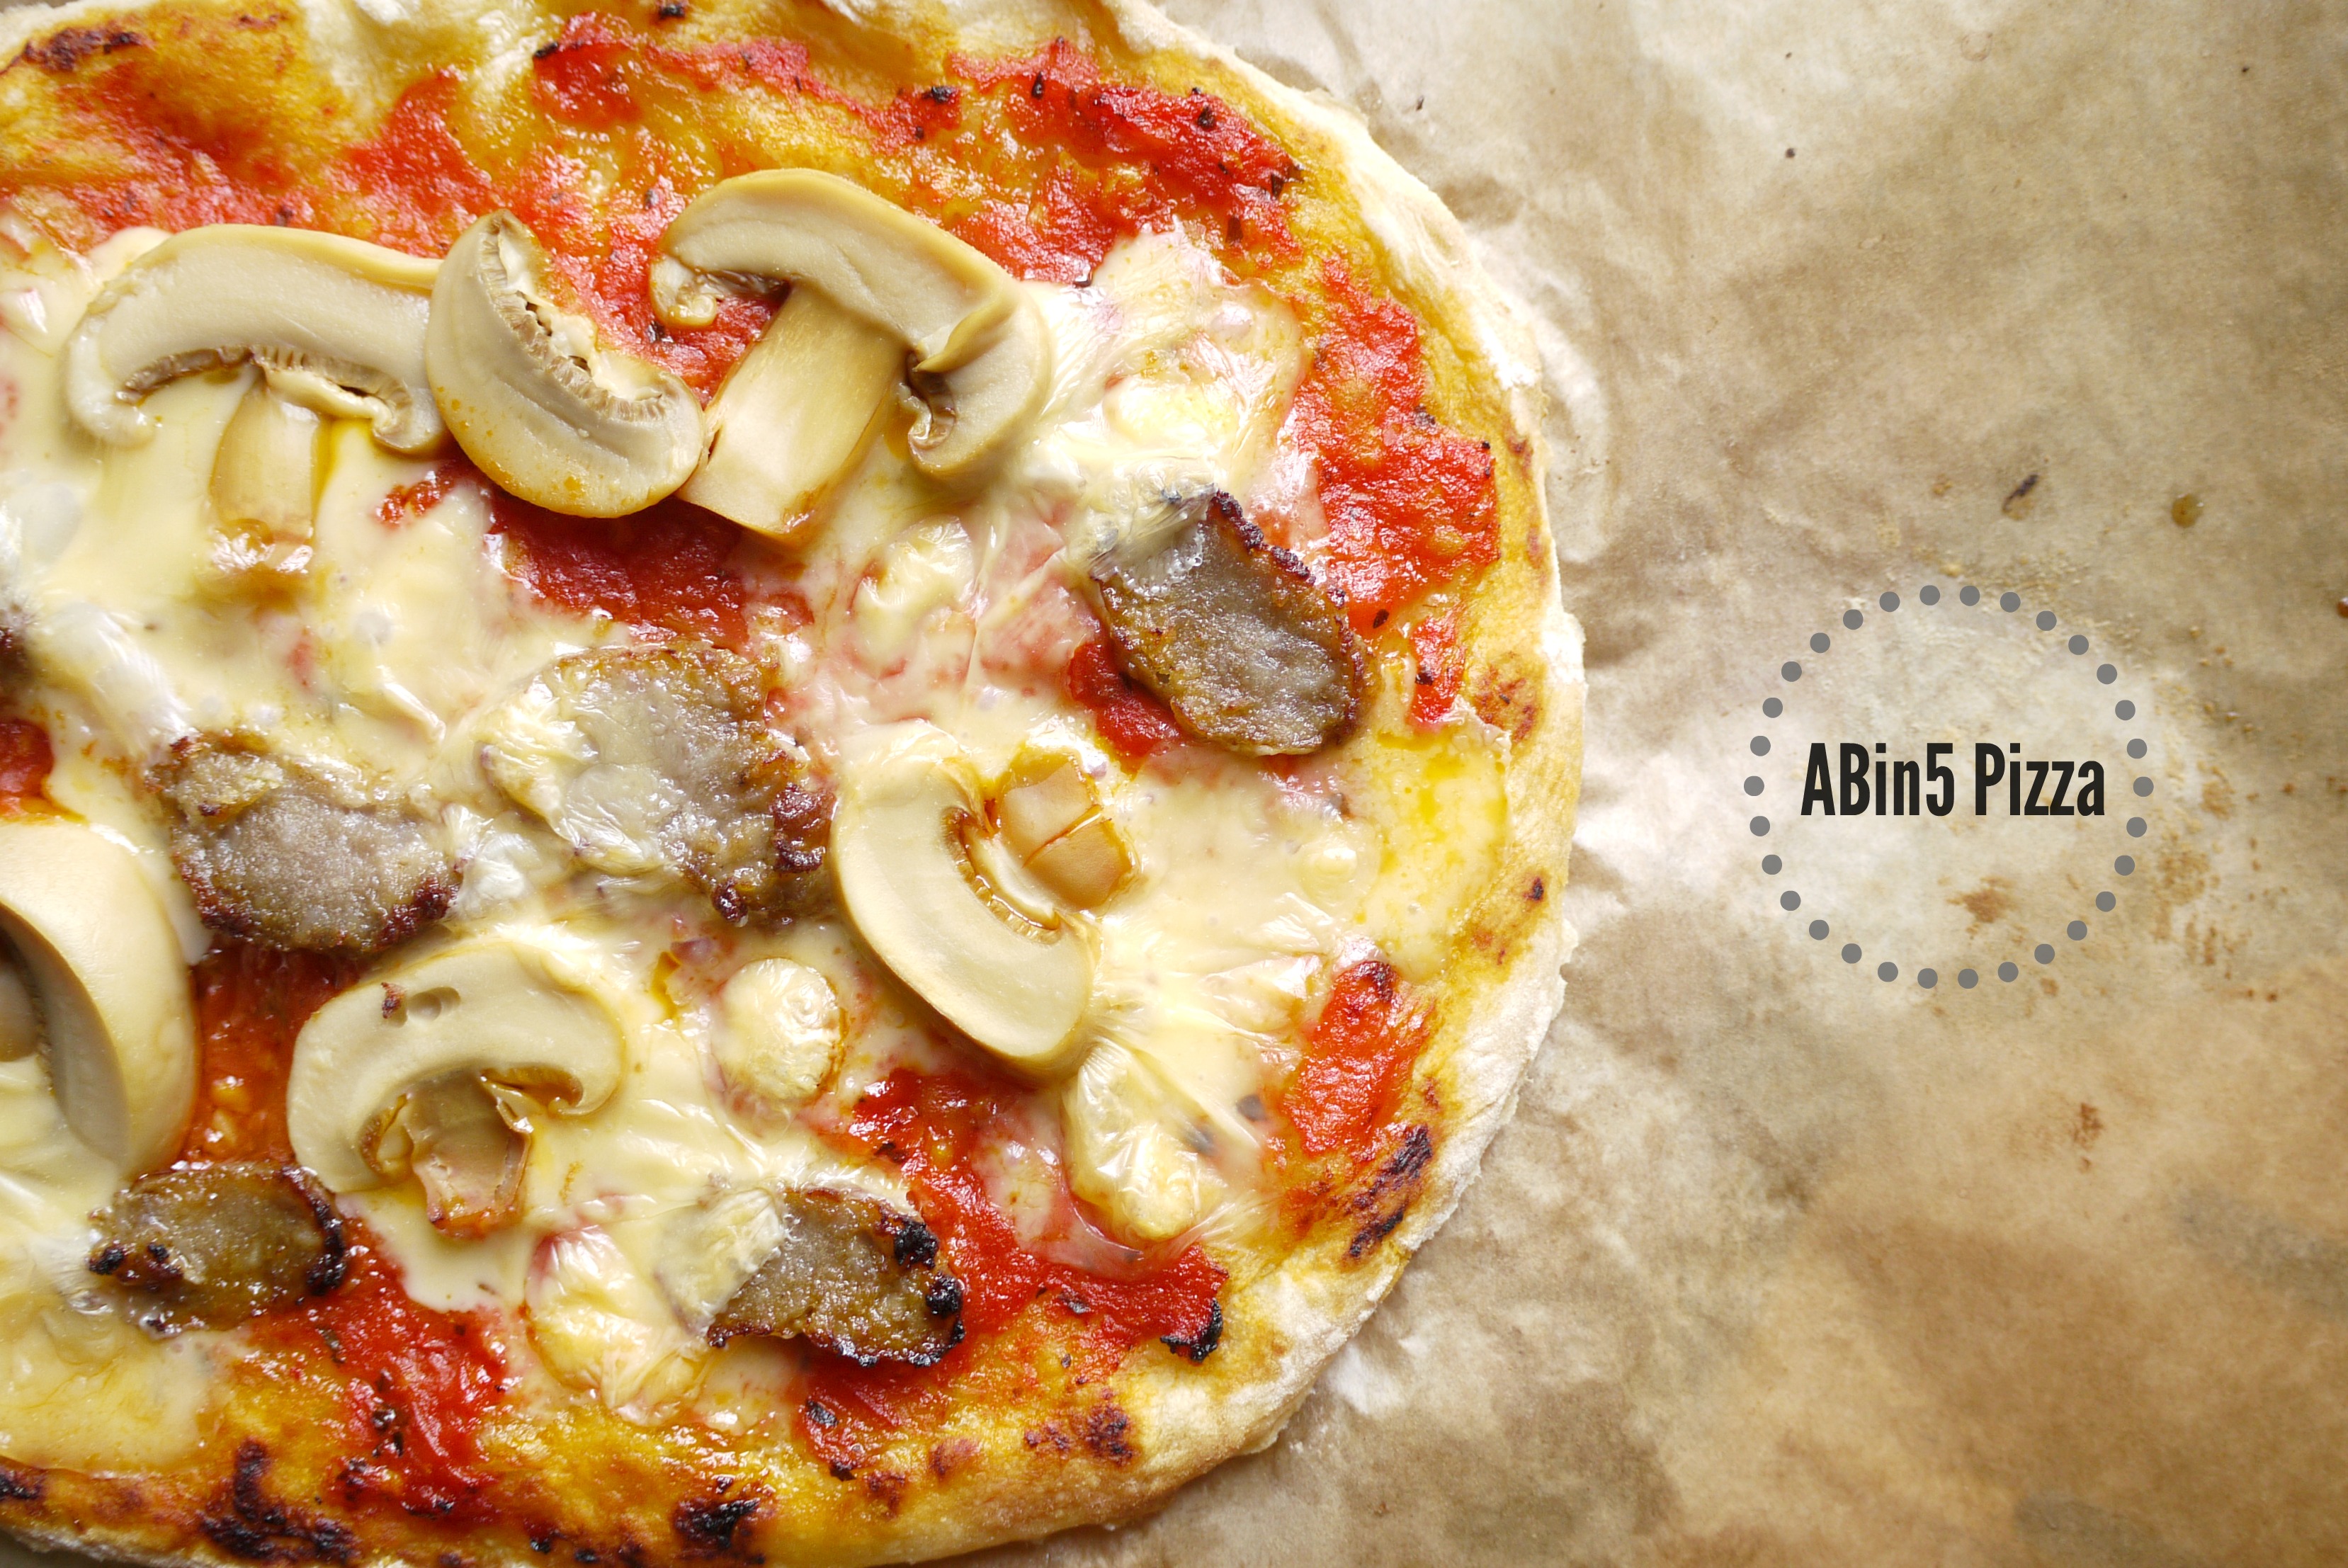
Not too difficult, if you ask me, once you have this bread dough and this tomato pasta sauce ready.  I had to settle with frozen beef meatballs, canned button mushrooms and cheddar cheese as toppings as I do not have much items in my pantry, being a Friday, aka empty fridge day; I make it a point to clear out my groceries by Fridays, and start afresh on Saturdays.  But you can easily “upgrade” with a simple switch of toppings to fresh ingredients such as mozzarella cheese and basil.

*Hint*  Those delivery menus from pizza shops have lotsa great ideas!

RECIPE FOR PIZZA DOUGH
Source


- 3 cups lukewarm water
- 1 tablespoon instant yeast
- 1 tablespoon salt
- 2lb or 910g of plain flour*

/ To Make Dough

01. Place water, salt and yeast in a plastic container that is big enough for the dough.  This container preferably with lid (if not, cover with cling wrap will do too) will also be the storage container for the dough to be placed in the fridge.  Make sure your fridge has a space for it.  A 6-quart container is recommended in the book.

02. Add in the flour all at once.  Stir until the dough comes together, it should be a wet and shapeless one.  If yours can be kneaded into a ball, you have probably used too much flour.  You can still save the dough by adding water slowly, till you get the dough to its rightful consistency.

03.  Cover the container loosely, saving a gap for the gases to escape as the dough proof.

04. Allow the dough to rise to double its bulk, anything from 2 hours to 4 hours, depending on the room temperature.

05. Once the dough has risen to its max, it will start to settle down, sink a little and form a flat top.  This dough is now ready to be used, or it can be stored in the fridge when you are ready to bake a bread or pizza.  I prefer keeping it in the chiller for a few hours so that the dough is easier to handle.

____________

/ To Bake Pizza (Get your choice of topping ready, I used sliced button mushrooms, sliced ikea beef meatballs, and cheddar cheese)

01. When you are ready to make pizza, take out the dough from the fridge, sprinkle some plain flour on top of the dough and grab a handful of it and cut it out with a pair of scissors.

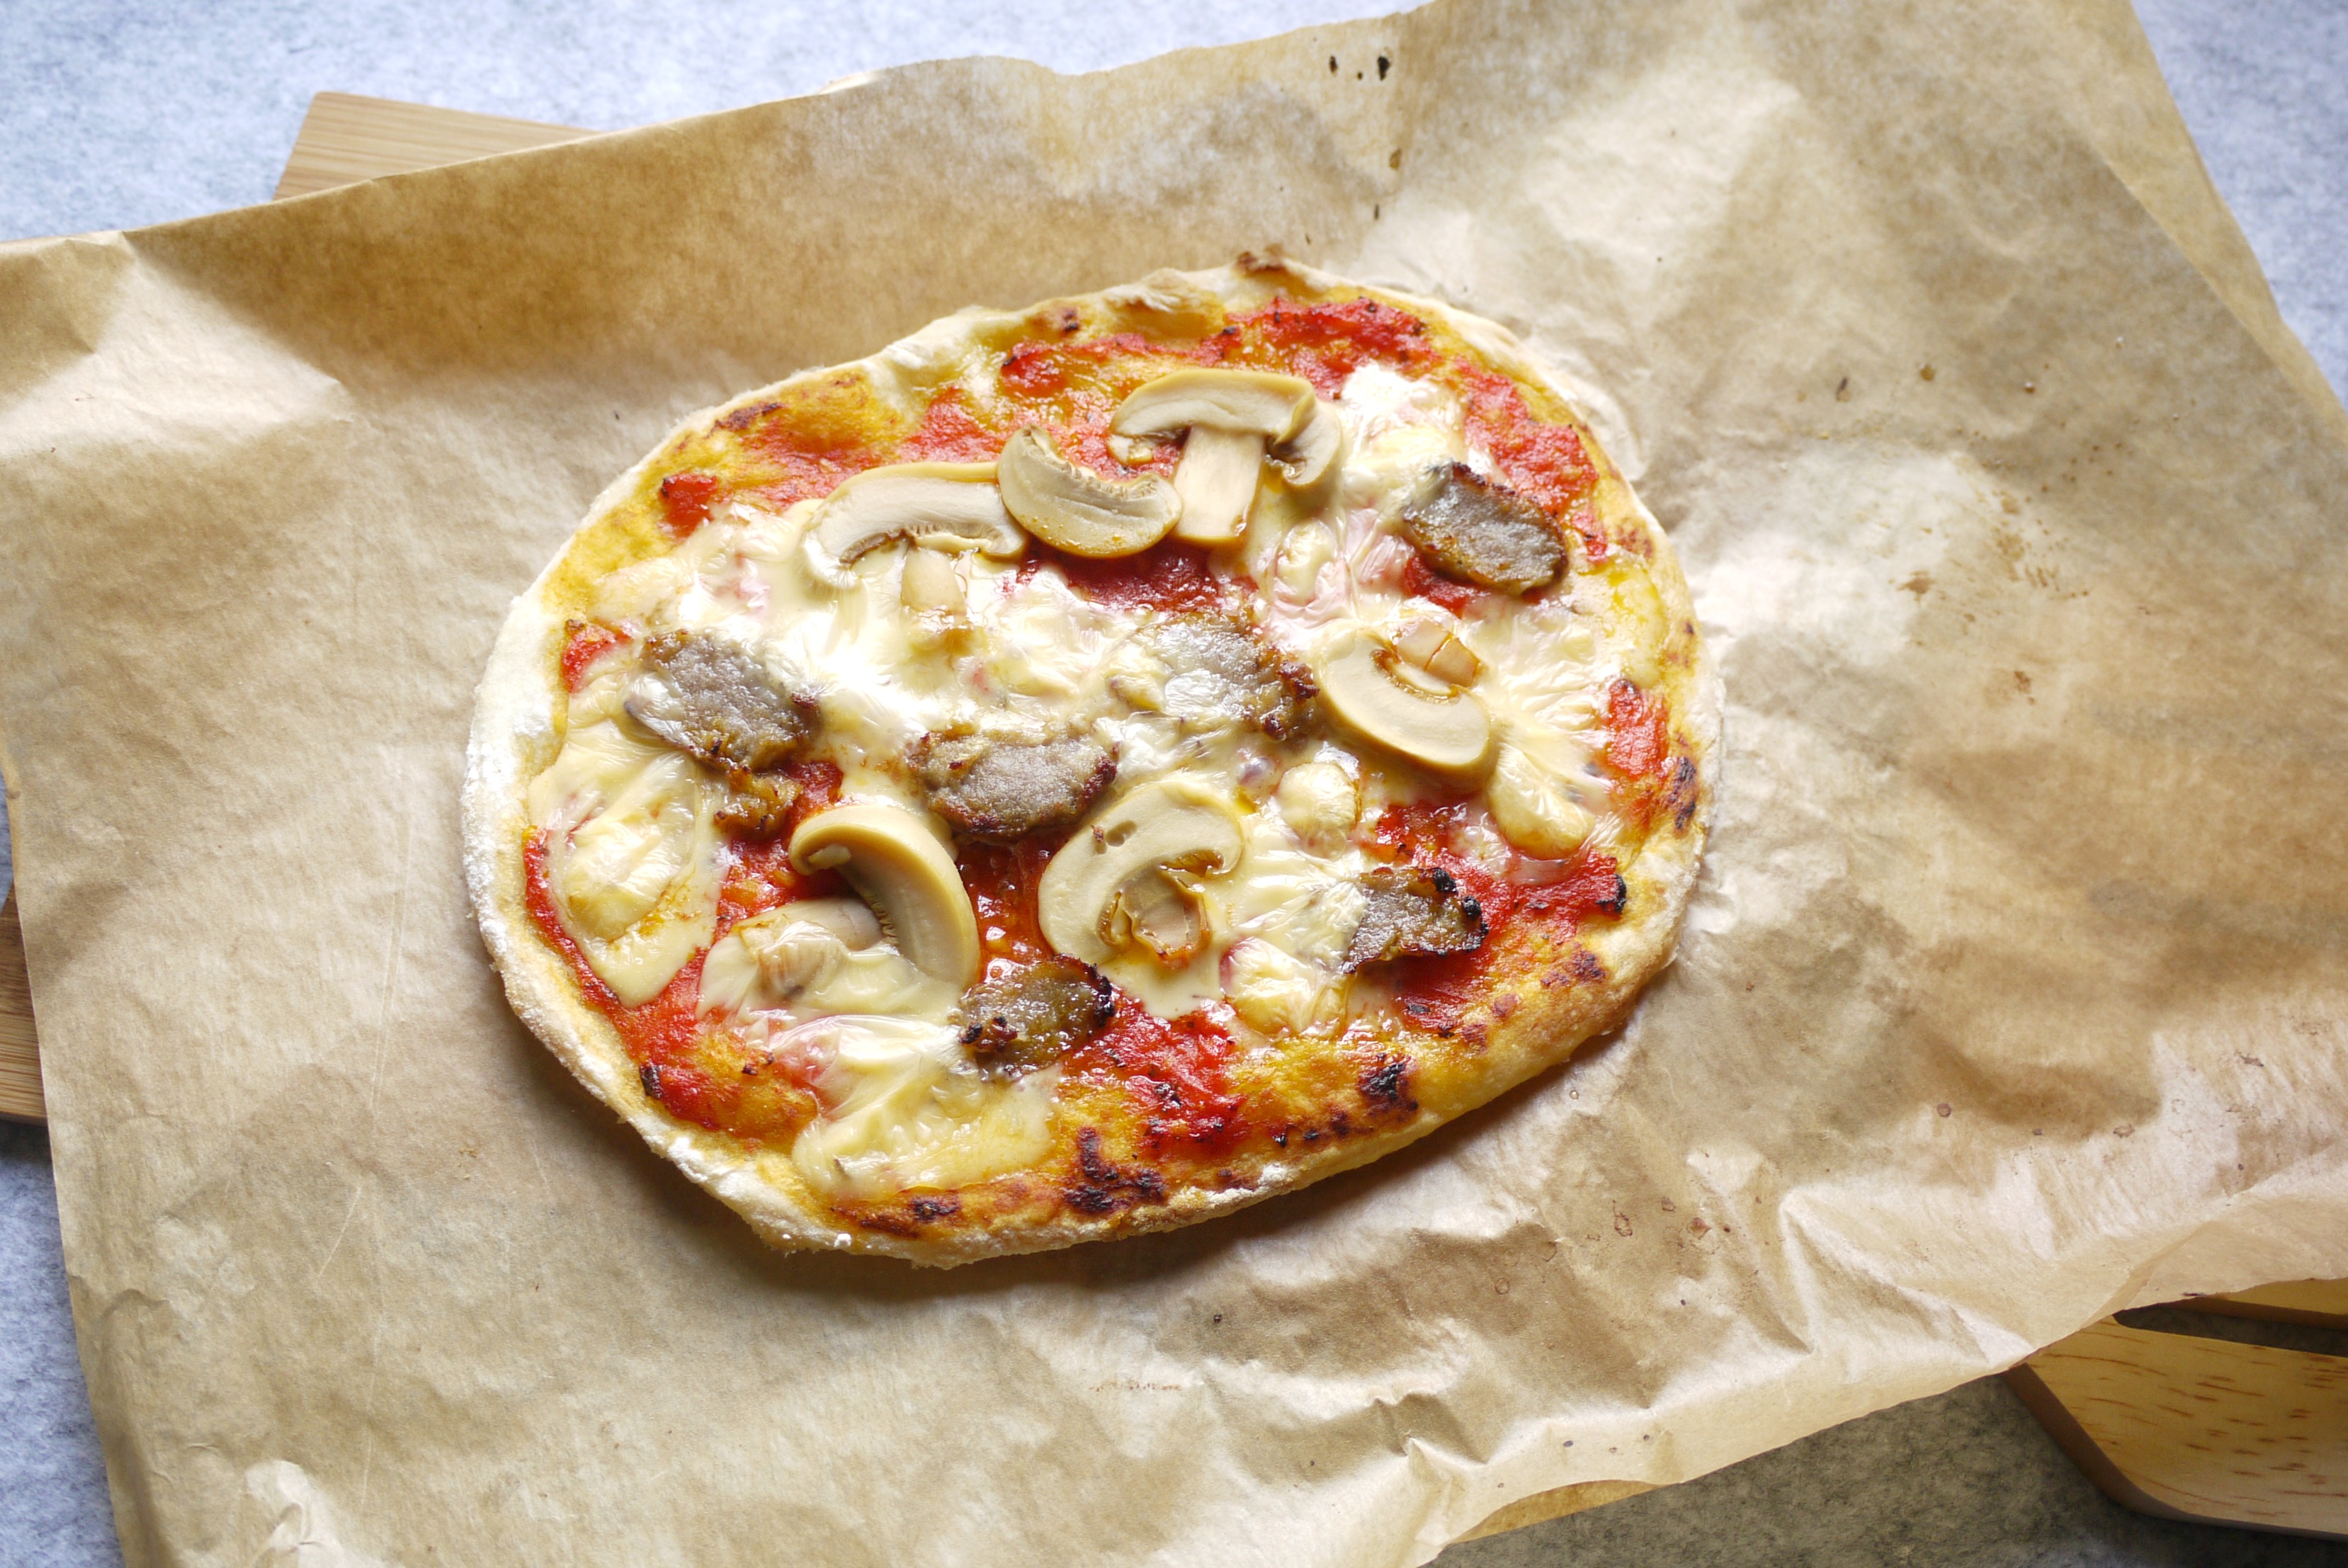
02. Roughly shape it into a ball with floured hands, and press it down on a baking parchment paper placed on a baking tray.  Stretch out the dough to create a really thin crust (the pizza crust will still rise through the baking process, so I am not worried about the dough being too thin).

03. Spread some garlic butter, or this tomato paste over the dough.

04.  Place sliced button mushrooms and meatballs on top of the butter or tomato sauce.  Drizzle with some olive oil.

05.  In a preheated oven 240C (460F), bake for 8 -10 minutes.  When pizza is cooked, placed sliced cheddar cheese on top, and leave it in the warm oven for another 1 minute to melt the cheese.  If you are using mozzarella cheese, you may add it before baking the pizza.  I ran out of mozzarella and didn’t want my cheddar cheese to brown during baking.

06.  Serve immediately.


++ NOTES TO SELF ++
///
* I have since drop the “scoop-and-level method” as I am really terrible at scooping consistently! But if you are, feel free to use 6 1/2 cup of plain flour for this recipe.
///

Baked Salty Crispy Chicken 盐酥鸡

Baked Salty Crispy Chicken Baked Salty Crispy Chicken 盐酥鸡 Baked Salty Crispy Chicken

The Taiwan street food culture is constantly evolving, with new menu items popping up all the time at the night markets.  But this snack is really evergreen : 盐酥鸡 , salted cripy chicken.  This baked version is healthier and cleaning up after cooking is easier with only the baking tray to wash.

RECIPE : BAKED SALTY CRIPSY CHICKEN
/ Source

____________

chicken meat, diced to bite-sized
1 teaspoon garlic, minced
1 teaspoon five-spice powder
1 teaspoon pepper
1 tablespoon salt
1 tablespoon sugar
tapioca starch, to coat

____________

01. Mix diced chicken meat with garlic, five-spice powder, pepper, salt and sugar.
02. Chill in fridge to marinate for at least 1 hour.
03. Coat chicken meat lightly with tapioca starch.  Arrange them on a baking tray, do not overlap.
04. Bake in preheated oven at 220C (425F) for 15 minutes, or till golden brown.

Japanese Sesame Dressing

// japanese sesame dressing // japanese sesame dressing // japanese sesame dressing // japanese sesame dressing

There is only so much space in the fridge.  So I’ll rather it’s the fresh vegetables and fruits that are taking up most of the spaces, than bottles and bottles of sauces or premixes.  This sets me thinking, which consumes more electricity : an empty or a full fridge?

After discovering that I can easily concoct sushi vinegar at home, I went on my search for more condiment recipes.  This DIY Japanese sesame dressing is great:  I make only as much as I need, with some everyday pantry items.  No need to make space for one more unfinished bottle, or go through the haste to finish it before it hits the expiry date.

RECIPE : JAPANESE SESAME DRESSING
Source
INGREDIENTS :

- 3 tablespoon roasted white sesame seeds
- 2 tablespoon japanese mayonnaise
- 2 tablespoon rice vinegar
- 1 & 1/2 tablespoon soy sauce
- 1 teaspoon sugar
- 1/2 teaspoon mirin
- 1/2 teaspoon sesame oil

INSTRUCTIONS :

01. To roast sesame seeds, put them on frying pan on low heat, remove heat immediately when sesame seeds start popping.
02. Place cooled sesame seeds in a mortar and pestle, grind into powder.
03. Whisk all ingredients in a small bowl.
04. Drizzle on noodle or salad.
05.  Store remaining unused portion in the fridge, for up to one week.

Korean Fried Chicken 韩式炸鸡

// korean fried chicken, baked // korean fried chicken, baked

Never mind the miserable tiny batch of 5 chicken wings I photographed above.  It was the chilli sauce that I’m after.

I am imagining this sauce with fried battered shitake mushrooms or maybe baked potato wedges now….


RECIPE: KOREAN FRIED CHICKEN
Source
INGREDIENTS :

/ For the Chicken

 2 lb chicken wings*
 1 teaspoon fine sea salt
 2 egg whites
 1 teaspoon baking soda

____________

01. Place egg white, baking soda and salt in a large mixing bowl, whisk till baking soda and salt dissolves completely.
02. Add chicken wings into the bowl to coat wings with egg white mixture completely.
03. Pick up the wings from the bowl, drip off excess coating, arrange on a flat plate or baking tray, do not overlap.
04. Chill wings in fridge, uncovered, preferably overnight, to dry out the coating.  Flip wings halfway through to dry both sides.
05. Preheat oven to 230C (450F).
06. Bake chicken wings for 15 minutes, flip and bake for another 10 minutes, till golden brown.  Cool slightly on rack.

____________

/ For the Chilli Sauce

 4 garlic cloves, minced
 1 inch knob ginger, finely grated
 1/4 cup gochujang (Korean chilli paste)
 2 tablespoons dark soy sauce
 1 tablespoon rice wine vinegar
 3 tablespoon dark brown sugar
 1 tablespoon asian fish sauce
 1 tablespoon toasted sesame oil

____________

01. Mix all sauce ingredients together in a saucepan.
02.  Cook over low heat for about 3-5 minutes, till sauce slightly thicken.

____________

/ Assembling

01. When the sauce starts to thicken, toss in baked chicken wings to coat.
02.  Serve immediately.


++ Notes To Self ++
///
* about 12-16 qty, separate mid wings from the drumettes
///
The sauce recipe is meant for about 12-16 chicken wings.  I made the full serving for the sauce, scoop enough to coat the drumettes, serve some as dip for the mid wings and saved the rest in the fridge for future use.
///

(Almost) Pepper Lunch

beef and broccoli casserole, inspiration from pepper lunch beef and broccoli casserole with inspiration from pepper lunch

The March School Holiday is over.

For the stay at home mums, did you find yourself eating out more often, or did you stick to home cooked meals during this holiday period?  I guess it depends on the kind of holiday schedules the children have.  I know of some kids who still spend like, three days in school, for curriculum activities or project work.  Mine was lucky, and was only required to return to school for just one day, so we got to spend FOUR FULL WEEKDAYS together.  I thought I felt a sense of relief from the children when they finally return to school this morning.  I hope they are not getting tired of me…  after all, it was not exactly just me and the kids at home all the time.  We still managed to catch 2 movies, 1 ice skating session, and a visit to the library, I’ll say not bad, for a short break like this.

The meal planning was a bit messy though.  Since most activities were carried out in the afternoons, I managed to settle most of the lunch meals at home (so that I could use up my fresh groceries: say no to food waste) and dine out in the evenings, so that there was less rushing home for meal preparation.

This “Pepper Lunch Hack” was one of the recipes I tried out with my children during one of the lunch meals.  The key is in the two sauces, or so this website claims.  Instead of serving it as a “one-plate-meal” like what Pepper Lunch do at their outlets, I prepared it as a casserole dish, with white rice served separately.  My kids commented that while it is not exactly 99% the same, it’s nonetheless delicious as a rice pairing dish.  Maybe I topped with a tad too much broccoli, and changed the flavor, but I think the vegetables bring the nutritional value of this dish a great notch up!

+++ Notes.001 / prepare the two key sauces in advance.

+++ Notes.002 / according to the source, the recipe serves two, but I have plenty of leftover for the two sauces which I pack in sauce bottles and store in chiller for future use.

RECIPE : PEPPER LUNCH STYLE BEEF & BROCCOLI CASSEROLE
/ Source

____________

/ Honey Sauce
1 tablespoon cooking oil  / i used peanut oil
2 tablespoon chopped onion
1 teaspoon minced garlic
1/4 cup honey
2 tablespoon light soy sauce / i used kikkoman
1/8 teaspoon salt
1 teaspoon cornstarch

____________

01. Mix all ingredients and cook in a saucepan until garlic and onions are cooked and turned soft, about 3 minutes.
02. Remove saucepan from heat, allow sauce to turn cool.
03. Puree in food processor and transfer to sauce bottle or container.

____________

/ Garlic Soy Sauce

1/2 cup light soy sauce / i used kikkoman
4 cloves garlic, crushed and peel removed
2 teaspoon sugar
1 teaspoon cornstarch
1/2 cup water

____________

01. In a saucepan, add the soy sauce and garlic together, let sit for 30minutes.
02. Add remaining ingredients, and bring to boil.03. Remove saucepan from heat, allow sauce to turn cool.
03. Puree in food processor and transfer to sauce bottle or container.

____________

/ Assembling

400g thinly sliced beef / i used sukiyaki or shabu shabu, completely thawed
1/4 cup canned corn
1 head broccoli, washed, cut into bite size florets, blanched in boiling water with a pinch of salt
3 tablespoon cooking oil / i used peanut oil
1 tablespoon butter
1 stalk chopped spring onion
black pepper, to taste

____________

01. Heat up cooking oil in casserole over low heat.
02. Place thawed sliced beef in the middle of the casserole.
03. Arrange cooked broccoli florets around the beef.
04. Drizzle the two sauces over the beef and broccoli.  I used about 1/3 of each sauce.  Do not stir.
05. Cover casserole. Turn up heat to high for about 30 seconds.
06. Turn off fire.  Top with spring onions, corn and cold butter.
07.  Serve immediately.  Stir around to cook beef slices and pair with steamed rice.  Season with black pepper, and more the 2 sauces if necessary.

Junko Deco Roll Attempt #001

junkoattempt001

I am trying out Junko’s recipe by making just a plain vanilla roll without any decorations.  It’s nothing close to the real thing yet, but the sponge recipe is a godsend: does not crack, not too sweet, and serving size is just nice.  Bake recipe with either a 25x25cm or 30x30cm pan.  More deco roll resources below.


____________

this , this and this video.

/ junko’s japanese blog here, and here, i think.

/ great styling examples from evan’s kitchen ramblings here and here.

Sushi Vinegar

sushiricevinegar002 sushiricevinegar001 sushiricevinegar003

For the days when I run out of sushi vinegar.

The recipe below is for 300g (2 cups) of raw short grain rice.


RECIPE : SUSHI VINEGAR
Source
INGREDIENTS :
- 60g/60ml rice vinegar
- 60g sugar
- 10g salt

INSTRUCTIONS :

01. Mix all 3 ingredients in a small pot, heat up till sugar and salt dissolve completely.
02. Allow sushi vinegar to cool slightly before using it.
03. To use, pour and mix into piping hot cooked rice, then allow rice to cool down.

Asian Cucumber Salad

asiancucumbersalad001 asiancucumbersalad002 asiancucumbersalad003

Another easy recipe found.

// To keep the cleaning job simple, I mix everything in an Ikea’s Korken glass jar, close the lid and shake the container to mix the salad.

RECIPE : ASIAN CUCUMBER SALAD
/ Source

____________

2 medium japanese cucumbers, sliced thinly
1 tablespoon honey
3 tablespoons rice vinegar
2 tablespoons soy sauce
1 tablespoon sesame oil
1 tablespoon toasted sesame seeds

____________

01. Whisk honey, rice vinegar, soy sauce, sesame oil together in a medium bowl.
02. Toss in the cucumber slices and add the toasted sesame seeds.
03.  Let salad sit for at least 30minutes before serving or chill overnight.

Egg In A Hole – Nanyang Style

egg in toast eggtoast001 P1210254

I am adding a “Nanyang” twist to this classic breakfast item, by seasoning the runny egg in the center of the bread with pepper and dark soy sauce.  The center hole cut out is not discarded, but eaten as a buttered toast, dipped in the runny egg.  Yummy!

++Note.001 // To make the egg look as pretty as possible, I first set the egg in the bread in a heated skillet over the stove.  Instead of flipping the toast to cook the other side of the egg, I transfer and cook it in a toaster oven instead.  That explains the white, smooth looking egg surface on my toast.

RECIPE : EGG IN A HOLE

____________

1 slice of bread

1 egg

butter

pepper and dark soy sauce, for seasoning

____________

01. Use a cookie cutter (any shape you like) to cut out a hole in the bread.  I use the rim of a drinking glass to make a round hole.  Toast the cut out bread, set aside.

02. Heat up skillet, place bread with hole in it.

03. Add a knob of butter inside the hole, once the butter melts completely, crack an egg into the hole.

04.  Do not attempt to move the bread, let the egg set in the hole by cooking it over medium heat.

05. The base of the egg will get cooked and turned white first, but about half of the egg white will still be transparent and runny.  At this moment, transfer the bread carefully to a toaster oven tray with a spaluta.

06. Continue to cook the bread in a toaster oven, about 3 minutes, till the surface of the egg looks cooked, (i.e.egg white turns completely white/opaque).  Just don’t let the bread become burnt. 🙂

07.  Remove from toaster oven, transfer to a serving plate, sprinkle with a dash of pepper and a splash of dark soy sauce.

08. Serve warm, with cut out bread toast, topped with butter, at the side.