Purple Sweet Potato Bread Loaf #2

Purple Sweet Potato Bread Loaf // Mono+CoPurple Sweet Potato Bread Loaf // Mono+Co

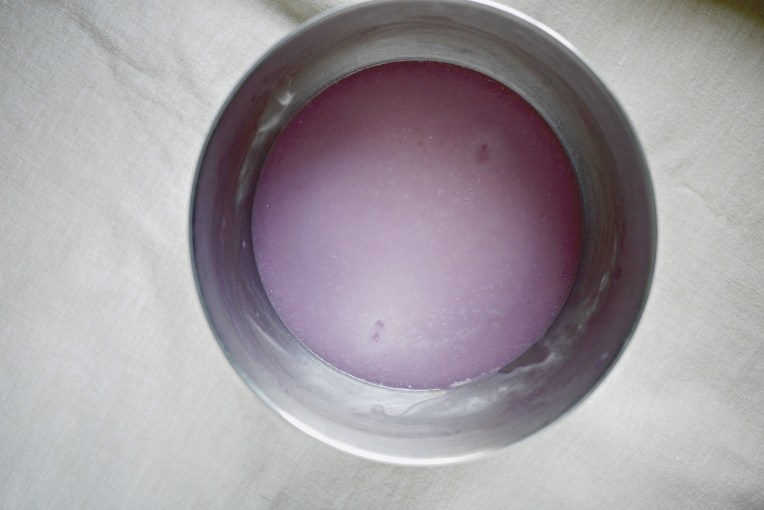
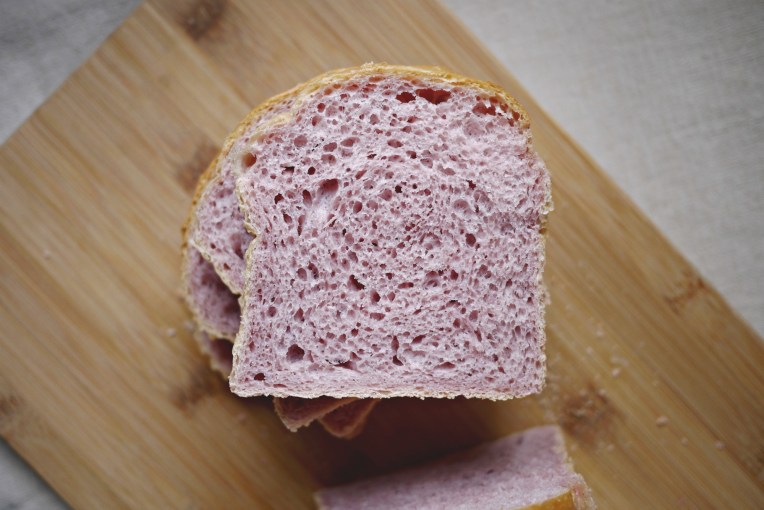
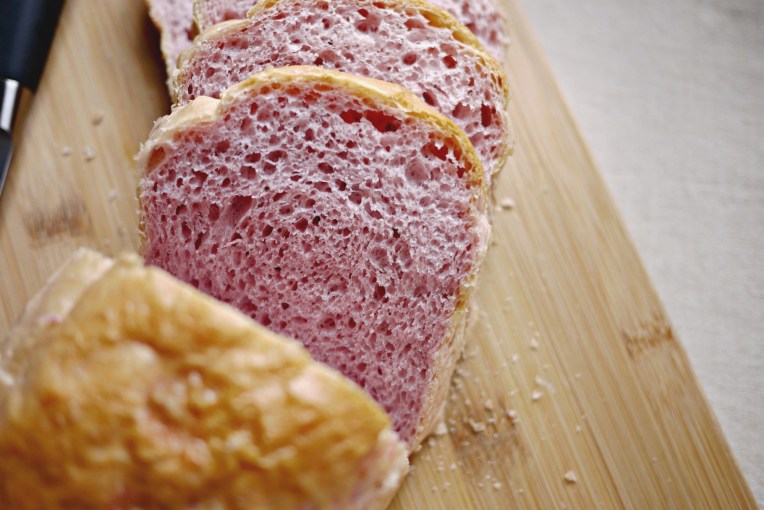
The purple sweet potato bread I baked last week was not purple enough, so I baked another version using my usual mashed potatoes recipe.  Actually the earlier version got its color from only 30 grams of sweet potatoes and 20 grams of water that I boiled the potatoes in.  This time, I made the color more intense by using 100grams of potatoes, steaming it instead of boiling to cook it.

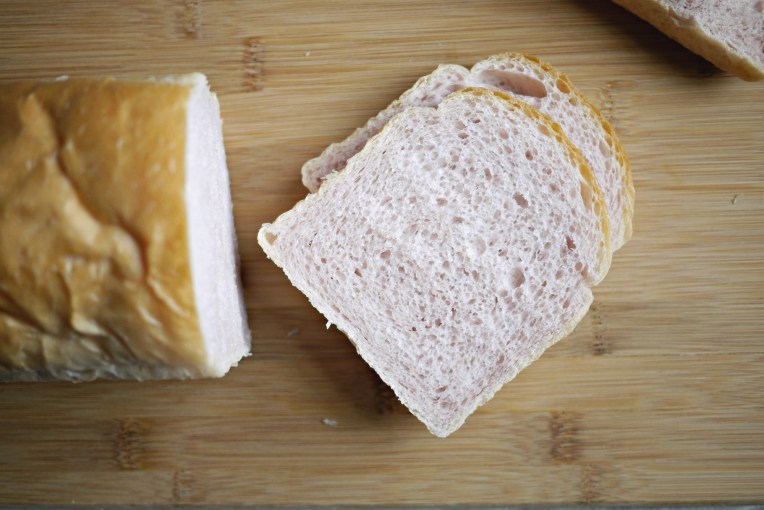
Thinking that the sweet potatoes will be sweet enough to replace the sugar, I omitted any sweeteners, and ended up with a really bland but still pillowy loaf.  Not that I mind, traditional bread recipes do not add sugar anyway.  The bread was meant to be eaten with butter and spreads, so it did not really bother me, though I did wonder if the bread would have risen higher if sugar was added, given that it was a 220g of flour recipe.  I have baked taller loaves.

I will find out when I bake this again if I see purple sweet potatoes available in the market next week.

Purple Sweet Potato Bread Loaf // Mono+Co   Purple Sweet Potato Bread Loaf // Mono+Co Purple Sweet Potato Bread Loaf // Mono+Co  Purple Sweet Potato Bread Loaf // Mono+CoPurple Sweet Potato Bread Loaf // Mono+Co Purple Sweet Potato Bread Loaf // Mono+Co


Purple Sweet Potato Bread Loaf

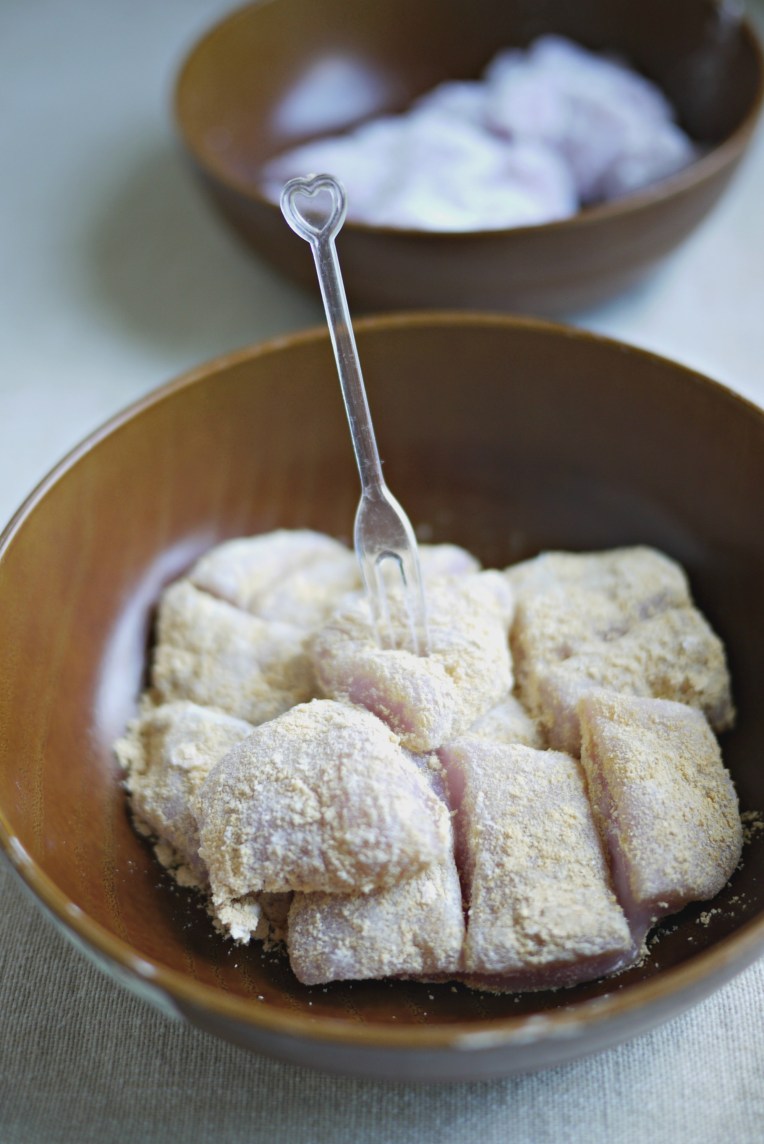
220g plain flour
1/2 tablespoon instant yeast
1/4 teaspoon sea salt
100g mashed purple sweet potatoes
1/2 egg
40g water
30g cold unsalted butter, cubed

Combine flour, yeast and salt in a mixer bowl and stir with hand whisk to mix them well.  Add sweet potatoes, beaten egg and water, turn the mixer on lowest speed (KA1) with a dough hook, and knead till the ingredients come into a ball.  Stop the mixer and let this dough stand for 15 minutes to allow liquid to be absorbed better by the flour, I find that kneading to reach window pane stage later will be easier with this additional dough resting step.

After 15 minutes, turn the mixer on again to knead the dough for 1 minute, then slowly add cubed butter one by one, and knead till dough reaches window pane stage.  Remove bowl from mixer, and let it proof for 60 minutes, covered and placed in a draft free place.

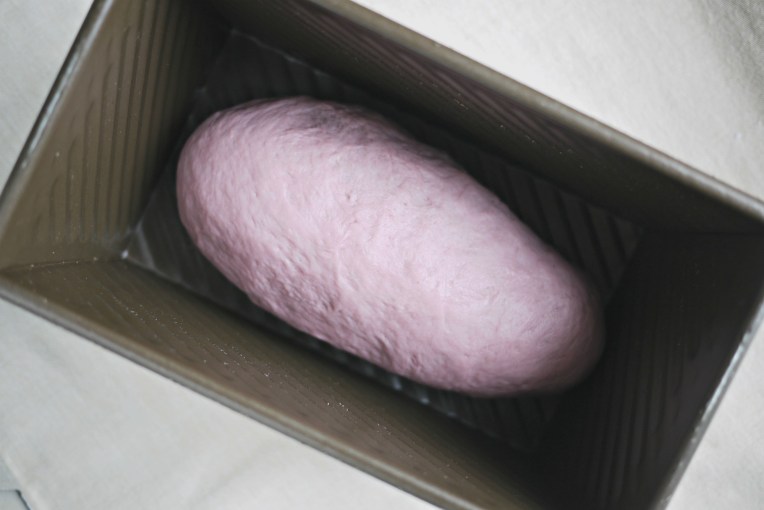
The dough would have expanded to twice its size, punch down the dough to deflate it, and transfer it to a clean work top.  With a rolling pin, flatten the dough to push out gases trapped inside the dough.  Shape the dough and place in bread tin, seam side downwards, and proof for another 60 minutes.

Bake in a preheated oven at 170C for 30 minutes.  When done, remove bread from tin immediately and let it cool completely on a cooling rack before slicing.

If you like bread loaf soft at the top, brush over the top crust with butter when the bread is freshly hot out of the oven.  The soft dome top also makes slicing the bread easier after it has cooled down.

In Save

Save

Meatfree Pumpkin Stuffed Rice

Meatfree Pumpkin Stuffed Rice // Mono+Co

Whenever I feel like preparing a healthy meal, the quickest fix is to replace white rice with a whole grain mix.  I keep a bag of 5 grains mix at home that consists of brown rice, oat, barley, buckwheat, and sorghum, a really convenient pantry item to have around when I want some vitamin-packed, fibre-enriched wholesome goodness.   Stir fry the cooked grains with chopped garlic, brown mushrooms, and red capsicum to make a quick and simple one-dish meal.   Or turn it into a really presentable one by stuffing the grains into a pumpkin, steamed for 20 minutes, and then serve it piping hot.

I cook the grains with tomatoes and sometimes pumpkin slices, so that after the grains are cooked, I stir to mix softened tomatoes and pumpkin flesh into the rice, and this is already good enough to be eaten on its own.  The ingredients are so rich in flavor that I only need to season with black pepper.  The sweetness from pumpkins, tomatoes, the umami from mushrooms, even the nutty grains are indeed good enough on their own for me to taste delicious in every bite.  But I have a very high tolerance for under-seasoned food, so go ahead and sprinkle some sea salt if you find it tasting “flat”.

Cooking the mixed grains takes up quite some time if you are in a hurry.  A great time-saving suggestion.  Make them ahead and store them in handy serving sizes in the freezer.  I cook up to 4 cups of the mix grains, then divide them into 4 portions to be kept in the freezer up to 1 month, this handy size of 1 cup per portion makes it super convenient for me to have ready-cooked grains anytime, whether I want to make a meal for 1 or 2 or 4.


Meatfree Pumpkin Stuffed Rice

1 cup uncooked 5-grains mix
1 & 1/4 cup water
8-10 cherry tomatoes
200g brown button mushrooms, sliced
1/4 red capsicum, diced**
1 clove garlic, minced
2 whole small pumpkins
1 tablespoon light olive oil
ground black pepper, sea salt, to taste

**  For this small serving recipe, I use only the red version.  If making a large serving, you might want to add more colors by adding the yellow and green capsicums.

Place 1 cup of 5 grains mix (rinsed and drained), water, cherry tomatoes, a dash of pepper in a covered pot, and cooked till all the water has evaporated.  Turn off the heat and leave this to stand for at least 10 minutes.  Uncover the pot, and stir to mix the cooked tomatoes with the grains using a wooden spoon.  Leave the pot uncovered to rid excess moisture and for rice to cool down.

Meatfree Pumpkin Stuffed Rice // Mono+Co

When the rice is cooling down, prep the pumpkins by cutting out the tops with a sharp knife to make lids.  Scoop out the seeds with a small metal spoon, creating a hollow center for stuffing the grains with later.

Meatfree Pumpkin Stuffed Rice // Mono+Co Meatfree Pumpkin Stuffed Rice // Mono+Co

Now we are ready to stir fry the mix grains.  In a heated pan, add olive oil and fry minced garlic till aromatic.  Add in diced capsicum and sliced brown mushrooms, cook till the mushrooms start to sweat.  add in the cooked grains, and stir around to mix the ingredients well.  Season with sea salt and black pepper to taste.  Remove pan from heat.

Stuff the pumpkins with cooked grains and cover with the cut-out lids, steam for 20 minutes on high heat.  The pumpkins are cooked when you can insert a skewer easily.  Remove from steamer and transfer them on a serving plate.  To keep the grains warm, do not cut the pumpkins until you are ready to eat.  Depending on what else you are serving these with, you can serve them in wedges, or halves.

Meatfree Pumpkin Stuffed Rice // Mono+Co

Meatfree Pumpkin Stuffed Rice // Mono+Co

Save

Save

Save

Save

Save

Save

Save

Save

Save

Bamboo Charcoal Potato Bread Loaf

Bamboo Charcoal Potato Bread Loaf // Mono+Co Bamboo Charcoal Potato Bread Loaf // Mono+Co

The bread recipe with root vegetable as an additive is so versatile that I continue to experiment with additional ingredients like dry fruits or nuts.  They all come out great, soft and fluffy.  But sometimes, it is nice to go back to basic plain potato bread.

I added the bamboo charcoal powder to the regular recipe because I realise that it is expiring in 4 months.  I need to make a lot more charcoal bread this month to use up the bottle.  Who knew a 40-gram bottle could last so long?

The charcoal powder imparts no flavourings at all to the bread.  So if one eats it with eyes closed, he won’t be able to tell it apart from plain white bread.  But I eat with my eyes wide open, so I turn these black bread slices into a pretty sandwich by teaming them with grilled vegetarian cheese, red lettuce, sweet basil and cherry tomatoes.

With all these vibrant colors from the ingredients, definitely a feast for my eyes.

Bamboo Charcoal Potato Bread Loaf // Mono+Co

Bamboo Charcoal Potato Bread Loaf // Mono+Co


Basic Bamboo Charcoal Potato Bread Loaf

220g plain flour
1/2 tablespoon edible charcoal powder
1/2 tablespoon instant dry yeast
1/4 teaspoon sea salt
2 tablespoons raw sugar
125g mashed potatoes
40g potato water **
1/2 egg ***
30g cold unsalted butter,cubed

** Potato water refers to the water that is left behind after cooking the potatoes with.  Cool it down to room temperature before using.

*** I use large eggs that weigh above 70g with shell, if you have smaller eggs, simply weigh out 35g for this recipe.

In a mixer bowl, stir plain flour, charcoal powder, yeast, sea salt, raw sugar with a hand whisk to mix these dry ingredients uniformly.  Next, add mashed potatoes, potato water, and egg, then knead using an electric mixer with dough hook on the lowest speed (KA 1) until the ingredients come into a ball.  Continue to knead this for about 3 minutes, then stop the mixer and leave this dough to stand for 15 minutes.

Turn on the mixer again on its lowest speed and knead the dough for another 1 minute.  After that, add butter cubes one by one carefully with the mixer running, keep kneading until no visible traces of butter can be seen in the bowl and the dough has reached window pane stage.  The dough should be extremely soft and pliable now, stop the mixer and leave the dough in the bowl, covered.  Proof this for 60 minutes.

The dough will double in volume after its first proof.  Punch down to deflate it and transfer to a clean work top.  Dust hands and worktop with a little flour if the dough is too sticky to handle.  Flatten dough either with palms or rolling pin to push out any gases trapped inside the dough.  Shape the dough and place it in the bread tin, seam side downwards.

If making a square loaf, check on the dough 50 minutes after proofing, the dough should rise to cover about 90% of the height of the tin.  Slide over the cover to enclose the bread and continue to proof for another 10 minutes before baking.  Bake the bread covered in a preheated oven at 200C for 30 minutes.

If making a dome-shaped bread loaf, proof it for 60 minutes.  If the dough has risen above the bread tin, proceed to bake.  If not, give it another 10-15 minutes to rise.  However, do not extend the proof time further than 90minutes, as this will run the risk of over-proofing the dough.  Bake in a preheated oven at 170C for 30 minutes.

Remove bread from tin immediately after baking and leave it to cool completely on a rack before slicing.

Save

Save

Save

Save

Save

Save

Dry Braised Ban Mian

Dry Braised Ban Mian // Mono+CoDry Braised Ban Mian // Mono+Co

I love preparing one pot meals on weekends.  It is a great chance to use up some of the limp vegetables in the fridge and start the beginning of the next week with fresh groceries.

Chop up a few types of vegetables, blanch the noodles, and then stir fry these ingredients together is all it takes.  If I want to braise the noodles a bit for the sauce to get absorbed, I will choose a noodle type that can withstand a slightly longer cooking time, such as these fresh ban mian balls from the market.  They are a great choice if you like noodles al dente as these don’t turn soggy as fast as the Hokkien yellow version.

The crispy bean sheet seaweed sticks sprinkled on top were balanced condiment for an earlier nasi lemak meal.  I told you I was clearing my pantry right?  Leave out this ingredient if you do not have this item at home.  Instead, I would recommend white sesame seeds for garnishing : nutritious and pretty.

Dry Braised Ban Mian // Mono+Co Dry Braised Ban Mian // Mono+Co


BRAISED BAN MIAN

this recipe serves 4

4 balls of fresh ban main , 125g each
1/2 medium carrot, julienned
5 dry chinese mushrooms, rehydrated, sliced
5 leaves napa cabbage, sliced thinnly
chives, about 20 stalks, cut to 5cm long
Water from soaking chinese mushroom with
1 small knob ginger, sliced
2 tablespoon peanut oil
1 tablespoon Shaoxing cooking wine
1+1/2 tablespoon vegetarian oyster sauce
1 tablespoon light soy sauce
dash of white pepper, to taste
white sesame seeds, garnish

Cook ban mian in a pot of boiling water, quickly remove from water once the noodles look shiny from boiling and no traces the flour coating the surface can be seen.  Leave it to drain in a sieve.

Heat up the oil in a cooking wok. Add ginger slices and fry until aromatic.  Add mushroom slices and julienned carrot next, fry around to cook.  When the smell aroma of mushrooms start to fill the air, stir-fry for another 1 minute, then add chives and shredded napa cabbage.  Toss to cook the vegetables.  Pour in cooking wine and cook till alcohol evaporates.

Combine oyster sauce, light soy sauce and “mushroom water” to form a mixture, and pour this into the wok.  Stir around to cook, top up more hot water if it is too dry, there should be just enough liquid to coat and braise the cooked ban mian, but not too much to leave the noodles soaking in gravy at the end of the cooking process.  Do a taste test to see if more soy sauce is required.  This can be slightly on the salty side it will be balanced out by the bland noodles.  Add a dash of pepper before turning the heat up to high to boil the gravy.

With the gravy on rolling boil, add in the cooked ban mian.  The ban mian will stick together after they have been set aside, gently stir around with a chopstick to loosen them and let it cook to soak up the gravy.  Once the gravy has been completely soaked up, turn down the fire to low-medium.  Do a second round of taste test and season accordingly.

Transfer to a thermal pot to keep it piping hot if not serving immediately.  Sprinkle sesame seeds on top to garnish.

Save

Save

Save

Save

Purple Bread Loaf

Purple Sweet Potato Bread // Mono+Co

With the purple mochi prepared and eaten, I went on to bake a bread loaf with the remaining “purple color extract” that I am left with after boiling purple sweet potatoes in water.

Since the mashed sweet potatoes looked too wet to handle, I skipped adding them to my dough like my other potato bread attempts and used just the purple color liquid.  I added 30g of the mashed potato later on, after gaining more confidence when I saw how the dough had come together properly after a first proof.

Purple Sweet Potato Bread // Mono+Co Purple Sweet Potato Bread // Mono+Co Purple Sweet Potato Bread // Mono+Co

The interior of the bread has a more pastel shade but the purple color is still quite obvious.  I would experiment with adding more mashed potatoes next time and see if I can bake the bread with a darker purple shade .

This recipe is largely adapted from a white loaf recipe from <<孟老师的100道面包>>, one of my favorite bread recipe book.  It uses the sponge method that I like but takes slightly more time to prepare.


PURPLE SWEET POTATO LOAF

adapted from white loaf recipe <<孟老师的100道面包>> p.90

for sponge:
220g bread flour
3/4 teaspoon instant dry yeast
130g purple sweet potato water

for bread:
30g mashed purple sweet potato
30g bread flour
1 tablespoon raw sugar
1/2 teaspoon sea salt
20g purple sweet potato water
15g cold unsalted butter, cubed

To make sponge, place 220g bread flour, instant dry yeast and purple sweet potato water in a mixing bowl.  Knead with a dough hook at the lowest mixer speed (KA 1) till the ingredients come into a dough.  Let this dough rest aside, covered, for 90 minutes.

When the first proof is completed, add mashed sweet potato, bread flour, sugar, salt, potato water and continue to knead the dough till all the ingredients come together.  Knead at the same speed for another  2 minutes till it turns smoother.  By now, you can slowly add the butter cubes, one by one, and knead till no traces of butter are left and the dough reaches window pane stage: soft, super pliable.

Remove bowl from mixer, and let this dough rise for 60 minutes, covered.

The dough would rise to double its volume when time is up, punch to deflate the dough and transfer it to a clean worktop.  Squeeze out any air bubbles trap inside the dough, then shape the dough and place it in the bread tin, seam side downwards.  Let it proof for another 50-60 minutes.

Bake in a preheated oven at 170C for 30 minutes.

After baking, remove bread from the tin immediately.  Brush top of bread with butter to make the crust soft after it has cooled down.  Leave on rack to cool completely before slicing or serving.

Save

Save

Mochi With Natural Purple Coloring

Purple Mochi // Mono+Co Purple Mochi // Mono+Co

What do you get after boiling purple sweet potatoes for 15 minutes?

I got myself a pot of mashed sweet potatoes in purple colored water.  Usually, I will sweeten it slightly for a nice afternoon dessert soup, but the creative side of me decided to adapt some of my favorite recipes with this natural purple color extract.

Mochi is the easiest since I have some 2 months old glutinous flour to clear.  Without even weighing what I have, I simply empty the bag (hand-feel estimate 120g?) into the smallest metal mixing bowl that I have, add sugar, and then pour enough of the purple soup (make sure it has cooled down completely) to make a slightly runny mixture.  If you have never made mochi before, this previous recipe will be a better guide, just replace the plain water with the water that was boiled with purple sweet potatoes.

The mochi mixture color looked a tad pastel before it was cooked, but it turned several shades darker after 15 minutes of steaming.

Purple Mochi // Mono+Co

I made two different batches, one coated with sweet potato flour, another one with kinako.  The ones coated with sweet potato flour looked prettier, but kinako coated ones tasted nicer.

Purple Mochi // Mono+Co


Save

Save

Tidy Tuesdays : Cord Mess

Taming Cord Mess // Mono+Co

Cords, cables, wires.  Where do I start and where do they end?  I am never the best person to decide power point locations around the house.  I will just hide them away for aesthetics purpose instead of considering their locations from a necessity point of view.

I wish every appliance will be wireless someday.  If that is not possible, then that device will come with its own retractable cord, like those found in the vacuum cleaners.  Extend when I use them, retract and hide the wires when they are being stored away.  Can’t help but see coils of cords around the house as a potential landing area for dust and dirt.   Thankfully, my electrical kettle comes with a design that allows the dangling cord to be coiled and hidden below the base.  Grease and dust? Yikes, you get the idea.

Right now, I am using 2 solutions to organize cords that are way too long.

Taming Cord Mess // Mono+Co

Make knots : For slim and long ones like charging cables, which I want them at a fixed length, I shorten them by making a wobble, there are plenty of Youtube guides online, just search “wobble”.

This monkey knot looks stylish for cord management too, but I have yet to use it.

Taming Cord Mess // Mono+Co

Cable Reel : For other devices that I need some flexibility in the cord’s length, I use this cable reel (photo above) from Daiso that allows me to coil up lengthy cords in a white subtle enclosure.  It comes in 2 models/sizes, but I find the large one easier to use as it coils up longer cords like those of table lamps (they are the most generous when it comes to cord lengths!) and standing/table fans (the adjustable reel allows me to alter the length of the cable depending on which part of the house I want the fan to cool down.)

I have 5 of this cable reel at various parts of my house now, they are a breeze to use and the best part is they instantly erase sight of cluttered cable mess tagging behind these appliances :

Taming Cord Mess // Mono+Co Taming Cord Mess // Mono+Co Taming Cord Mess // Mono+Co Taming Cord Mess // Mono+Co

Save

Save

Save

Save

Save

DIY All Natural Room Fragrance : Lavender Potpourri

DIY Lavender Potpourri // Mono+Co

I can never get tired of lavender infused home fragrance.  Maybe it is because the scent is so closely associated with spa-time, which I enjoy so much.  It is my go-to scent for bedrooms, while the bathrooms, kitchen and living room experiment with a different mix of peppermint, vanilla, lemongrass, recently citronella, for its mosquito repelling properties.

Come bedtime, I will unscrew the lid of my potpourri bowl recycled from a facial clay mask jar, and breathe.  The lavender scent is widely known to soothe and relax the mind, a perfect way to end a day.  Or when I need a little help to sleep, thankfully not that often.

DIY Potpourri is super easy, just a mix of dried flowers and essential oil.  I generally use these three ingredients to make mine at home:

dried flowers – only lavender buds, in this case, as I like to keep the palette simple.
salt – I use Himalayan Rock Salt for this project, the pink hue adds extra points.
essential oil – get pure lavender essential oil from a reliable source, no synthetic concoction for me, no matter how cheap.

Why add salt?  Because it is cheaper to fill up the container with salt than lavender buds, volume by volume.  My 500g pack of salt costs $2.50, while a small sachet of lavender buds costs $7.50.  Plus, the scent comes largely from the essential oil anyway.  It’s all about being practical.

But first, choose a bowl/set up that you like since it will be part of the room decor. I like the clay mask container because it is shallow and has an 8 cm wide mouth, as diffusion of scent will be more effective with a larger surface area.  Avoid deep bottles as you will need to fill it up with more content.

Another plus point of this container is that it has a lid that let me cover the potpourri during the day when no one’s inside the room, allowing the scent to last longer without topping up on the oil too often.  The lid also allows me to refresh the potpourri once a while without adding oil by giving the container a good shake with its lid on.

I updated the style of my lavender potpourri bowl by wrapping it with a cooking twine.  It can’t get easier than this, I did not even use glue, only entailed some delicate job of tucking in the twine’s ends.  After that, simply fill up the container close to its brim with salt and lavender. The proportion of salt and dried flowers is up to personal preference.  Mine’s about 4:1.

This is now sitting on my bedside table, I only need to top up with a few drops of oil whenever I find the scent getting faint.  Low maintenance, I likey.

DIY Lavender Potpourri // Mono+Co DIY Lavender Potpourri // Mono+Co DIY Lavender Potpourri // Mono+Co DIY Lavender Potpourri // Mono+Co

Save

Save

Save

Mashed Potato Buns

mashed potato filling bread 001  mashed potato filling bread 004mashed potato filling bread 003 mashed potato filling bread 002

I left out the bacon in the original recipe to make it a meatless one.

As I was baking these buns yesterday, news broke that more cases of Zika infected patients had been confirmed in Singapore.  I told myself from now on, meal preparation will be kept short and simple, so as to divert more time to keep the house dry, clean and clutter free.

More on Mozzies-Wipe-Out actions later, but let’s get back to these buns.  As usual, it was a tiny batch recipe, yielding exactly 4 buns, perfect for next day’s breakfast, no leftovers.  I also added potato to the bread recipe, whatever that was left after making the mashed potato filling, about 25 grams.  So if you have cooked a potato that is bigger than the 120g required for the filling recipe, you can easily incorporate the remainder into the bread.

I also shaped the bread the croissant way.  Feel free to shape the bread any way you like it, long rolls or round buns.


MASHED POTATO BUNS

recipe adapted from <<孟老师的100道面包>> p.85

for bread:
200g bread flour
15g raw sugar
1/4 teaspoon sea salt
1/2 teaspoon instant yeast
1 egg yolk
25g mashed potato**
100g water ***
20g unsalted butter, cubed

for filling:
120g mashed potato
15g unsalted butter
1/4 teaspoon black pepper

** Original recipe does not have potato, use any amount of potatoes that remains after making the filling.

*** Use the water from cooking the potato with, cool it down before using.  The starch present in the water is said to be great for making bread texture softer, no reason why fresh water should be used in place of what is available after cooking the potato in it.

In a small mixing bowl,  add butter to 120g of potatoes that have just been cooked and removed from the boiling water.  Mash the potato with a fork, then stir fast with a wooden spoon to whip it slightly.  Add black pepper and mix well.  Cover and set aside.

To make bread dough, mix bread flour, raw sugar, sea salt and instant yeast in a mixer bowl with a hand whisk to combine the dry ingredients together.  Next add cooled mashed potato, egg yolk and cooled potato water, and knead on the lowest speed (KA 1) with a dough hook until the ingredients form into a dough.  Leave this to autolyse for 15 minutes so that the flour absorbs the liquid properly.

After 15 minutes, run the mixer on its lowest speed for about 1 minute, then add cold cubed butter one by one, and knead until traces of butter is no longer visible and dough reaches window pane stage.  Remove mixing bowl from mixer, cover and let dough bulk rise in for 80 minutes.

Move the dough to a clean, dry worktop.  Dust worktop with as little flour as possible if it is too sticky to handle.  Roll the dough into a ball again, let it sit for 15 minutes in a draft-free place.

Flatten the dough with a rolling pin into a large round dough, like shaping a pizza base.  Divide the dough into 4 quadrants.  Take one of the quadrants and lay it down with the “circumference” side nearer to you, spread the filling horizontally to this end and roll the quadrant up towards the sharp tip.  Shape the bread slightly by bending the two ends towards the center to form an arch.  Place it on a greased baking tray.  Repeat till all the doughs and fillings are used up.

Let the buns proof for another 25 minutes, then bake them in a preheated oven at 180C for 20-23 minutes, till the buns  turn into a nice shade of golden brown.

After the buns are done and still piping hot, brush the surface generously with butter.  This step will produce buns that remain soft till next day.

RESave

Save

Save

Save

Save

Save

Save