Pineapple Tarts – Enclosed Version

pineapple tart 001 pineapple tart 003

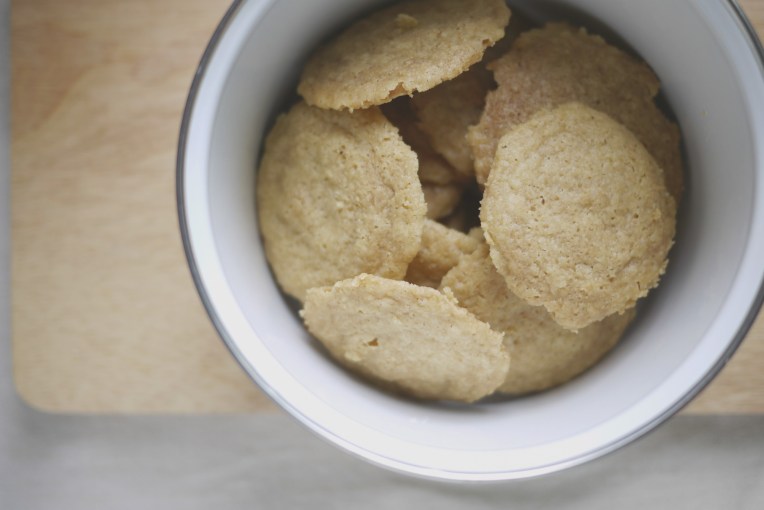
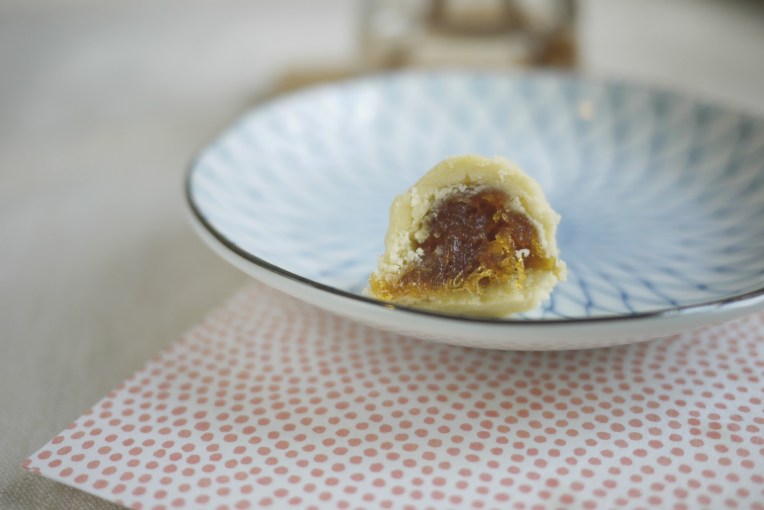
I omitted the egg from this nastar style pineapple tart recipe , and made an enclosed version this year. On hindsight, I should have give them a bright orange eggwash like this, mine are looking way too plain.  But this pastry, once again, pass my kids’ taste test with flying colors.

PINEAPPLE TARTS
// Adapted from A Spoonful Of Sugah
// Yields 27 tarts

170g plain flour
10g corn flour
1 tablespoon icing sugar
125g cold salted butter, cubed
1 teaspoon vanilla essence
1 tablespoon fresh milk, cold
½ serving of this homemade pineapple jam**

METHOD

01. Sieve plain flour, corn flour and icing sugar into a large mixing bowl. Set aside.

02. Mix vanilla extract to fresh milk and set aside. (I prepare this mixture first so that I can add this into the dough mixture straight after rubbing in the flour.  Hands would be too oily by then.)

03.  Add the cubed butter into the sieved flour and swiftly rub butter into flour with clean fingertips until mixture resembles yellow bread crumbs.

04. Fingers will be messy with butter and flour.  With a pastry scraper, scrap the bits stuck on fingers back into the bowl.  The butter is too good and expensive to be wasted!

05. Add milk + vanilla mixture, mix with a metal spoon.

06. If the dough appears dry and cannot be formed into a ball, gradually more cold milk, 1 teaspoon at a time until a soft dough ball finally forms.
07. Chill dough in the fridge for 10 – 20 minutes.  This is to make the dough less sticky and easier to handle.  Do not leave it too long in the fridge, otherwise, it will turn into a very hard block when the butter content turns total solid.

08. While the dough is chilling, roll pineapple jam into tiny balls, 8g each, and  arrange them on a plate. But I usually do this shaping step immediately after my pineapple jam has chilled to room temperature after cooking, and store them in an airtight container in the fridge.

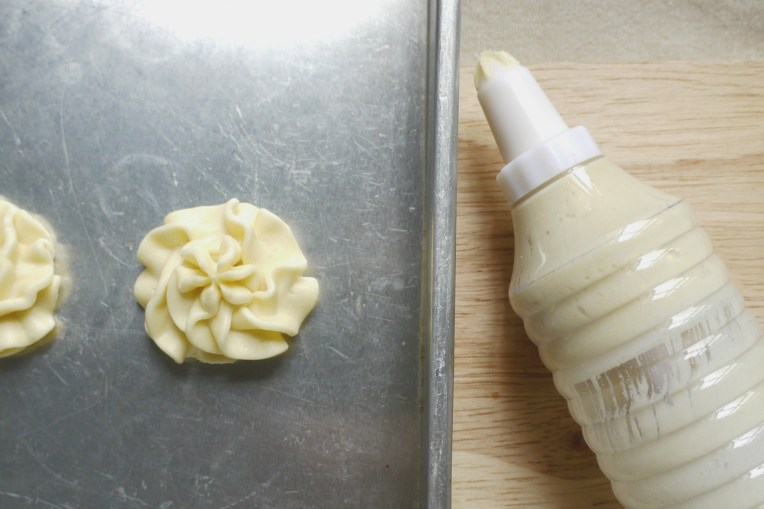
09. Remove dough from fridge.  Weigh 12g of dough, and wrap the pineapple jam with it, and roll it into a neat ball.

10. Arrange tarts on baking tray.  Apply eggwash on top.

11. Bake in preheated oven at 150C for 20minutes.

12. Cool completely before storing in an air tight container.


** The homemade jam recipe yield approx 60 x 8g jam balls (depending on how big the pineapples are), so you might want to double this pastry recipe if you want to finish up the pineapple jam.

Pineapple Jam – 4 Simple Tips

pineapplejam 002

I am really glad that I made the switch to homemade pineapple jam and it is not as difficult as I have imagined.  I always thought that I would either burn the jam or scald myself while stirring the bubbling, boiling hot jam.  But after several attempts, I am glad that none of that happened, what’s more, I have discovered 4 simple tips that make the cooking of pineapple jam not so tedious (or risky.)

01. Cut down the prepping time

Yes, the jam recipe I am using still takes at least 2 hours to cook, but what I am suggesting is to cut down the time taken to prepare the fresh pineapples before grating them.  It is extremely helpful get the fruit seller to have the crown, skin and “eyes” removed, this would take away an hour or so of preparation time, depending on how many pineapples you are using.

02. Cook the jam in a enameled dutch oven

I cook 2 medium size pineapples each time in my 20cm dutch oven pot.  Most recipes state to cook the jam in a non-reactive pot, due to the acidity of the pineapples.  Instead of stainless steel pots which are the most common non reactive cookware, I find that the enameled cast iron pot distributes heat more evenly, very important for jam recipes which require long hours of boiling and and even longer simmering.  Even after the sugar has caramelized, the jam does not stick to the pot easily, scoring extra brownie points as I prefer my jam really sticky for my enclosed pineapple tarts, which means that I tend to cook my jam much longer than stated in the recipe stated.  If you are making open face tarts, the pineapple jam can be less sticky as they will be cooked further under direct heat in the oven with the tart pastry.

03. Add sugar only after the liquid from the grated pineapples has been reduced first

Some recipes ask to combine and cook all the ingredients from the beginning, which would require the cook to stand next to the stove from start-to-end, stirring all the time, so that the jam will not burn due to the sugar.  Thanks to Wendy, I have never once burnt my jam with her tip to add sugar only when the pineapple mixture has almost dry up after the first round of boiling and simmering.

04. Core or no core?

Lastly, some recipes suggest to discard the tough core of the pineapple, and only use the juicy part to make the jam.  That may be true for making spread where you want the jam to be as jelly smooth as possible.  But for pineapple tarts, not only do I like the jam sticky, I like it fibrous as well, as evident in the photo of the end product above.  So I use the core and all, hand grated with the largest size hole on my Daiso grater, instead of the food processor way, to produce jam with a more fibrous texture.  So if you find my jam texture too tough to your liking, either omit the core in your cooking, or use food processor to blend the fruit into a finer texture.

Do you have any other tips to share?

pineapple jam 002

pineapplejam 001

PINEAPPLE JAM
ADAPTED FROM : TABLE FOR 2 OR MORE & TRAVELLING FOODIES

2 fresh pineapples (skin, "eyes" removed)
2 cinnamon sticks
5 cloves
½ star anise
150g-200g raw sugar
2-4 tablespoons lemon juice

METHOD

01. Grate pineapples including the fibrous cores using a grater with a relatively large size hole.

02. Cook the grated pineapple pulp, cinnamon sticks, cloves and star anise in a wide mouth, non reactive cooking pot till the mixture boils.  Turn down the heat to medium and let it simmer and the liquid will start to evaporate.

03. Once the runny mixture has been reduced to a thick consistency, add sugar and lemon juice, amount depending on how sweet/sour your pineapple is, and how sweet/sour you want your jam to be.  This addition will turn the sticky jam into a runny mixture again, continue cooking at medium heat to let the liquid reduce for a second time, stirring all the time with wooden spoon to prevent the sugar/jam from getting burnt.

04.  When the liquid has almost dry out, turn up the heat, this time to caramelize the jam and turn the pale yellow mixture into golden yellow paste.  Remove from heat when you are happy with the color/texture of the jam, and let it cool completely.  Do note that the jam will dry up further during the cooling stage.

Simple Golden Syrup Popcorn

simple popcorn003simple popcorn002simple popcorn001   simple popcorn004 simple popcorn005

The go-to snack for movie can’t get any easier to prepare when you have golden syrup ready at home as topping.  I used coconut oil to pop the corn kernels, which makes them even more amazing.  The 1/3 cup corn kernels took less than 5 minutes to be done, and they popped to fill up an entire pot.

SIMPLE GOLDEN SYRUP POPCORN


3 tablespoons coconut oil
1/3 cup corn kernel
Golden Syrup

METHOD

01. Place 3 corn kernels in a covered pot and heat over medium fire.

02. Once you hear the 3 kernels are popped, remove them from the pot, and add coconut oil and rest of corn kernels into the pot, covered with lid.

03. Corn kernels should start popping in a while, shake the pot back and forth intermittently, so that the popped kernels does not get charred below.  Lift the lid slightly to let steam escaped.

04. Once the popping slow down to just 1 per second, turn off fire, and pour the popcorns into a big mixing bowl.

05. Drizzle golden syrup over the popcorn, mix well with a spoon.

06. Serve immediately, or store in an airtight container.


#03 of #cookdaiso52 with corn kernels from Daiso

4 Ingredients Piped Butter Cookies Ver 2.0

block butter 4 ingredient 001 block butter 4 ingredient 002

I just could not find the Golden Churn Butter in tin form after 3 days of looking around, and decided to take matter into my own hands by baking with good old block butter.  This recipe here uses exactly the same proportion of ingredients as my previous attempt.  Plus, there are plenty who recommend to chill the piped cookies in the fridge for 30 minutes before baking so that the piped pattern stays after baking.  So I think using block butter should work, and they are cheaper than the tinned butter, no harm trying, again.

But before that, I have actually tried with …ghee.  I used the same recipe and replace the fat, and I ended up with this.block butter 4 ingredient 006block butter 4 ingredient 008block butter 4 ingredient 009 block butter 4 ingredient 010

Wafer.thin.  Maybe with ghee, more flour is required.  But I am not good at troubleshooting from scratch, so off with the block butter for my second try.

block butter 4 ingredient 013 block butter 4 ingredient 014 block butter 4 ingredient 015 block butter 4 ingredient 016block butter 4 ingredient 018

The patterns appeared fainter after baking, but still turned out better than the ghee version.  So in case the tinned butter is nowhere to be found, just use blocked butter, but chill the dough for 30 minutes before baking.  As the temperature of the dough is colder, I baked them at 180C, instead of 170C.

4-INGREDIENTS PIPED BUTTER COOKIES VER2.0
ADAPTED FROM : NASI LEMAK LOVER

200g salted block butter, melted
50g icing sugar
150g bread flour
50g corn flour/starch

METHOD

01. Mix bread flour and corn flour/starch together and sift, set aside.

02. Whisk butter till pale and fluffy with an electric whisk on medium speed.

03. Add icing sugar, continue whisking till all the powder sugar disappear.

04. Pour in the flour mixture, and fold in with a spatula.  Stop once there are no traces of flour.  Over mixing will let gluten form and end up with a harder cookie.

05. Pipe cookies onto baking tray.

06. Bake in a preheated oven 180C for 18 min, until golden brown.

07. Cool cookies completely before storing in an air tight container.

4 Ingredients Piped Butter Cookies

piped butter cookies 001

Processed with VSCOcam with a6 presetpiped butter cookies 003

If you are looking for a melt-in-the-mouth-cookie recipe for kids to bake during the coming holiday season, I would like to suggest this 4-ingredients piped butter cookies.  There are many piped butter cookies recipes online, and with HK Jenny Bakery’s recent onshore invasion, more copycat recipes are popping up.  But this seems the easiest for young kids to handle, with the least number of ingredients to weigh and measure (translate : less mess to clean up!) and the cookies holds its shape very well after baking (translate : 100% success rate, no ingredient wasted!)  The important key to success appears to be the choice of butter (Golden Churn)and type of flour (bread flour).

To make this with my kids, I bought a plastic cream piping syringe from Daiso that comes with 7 nozzles of different designs.  It fits nicely in a young child’s hands, and is so much easier to handle than a piping bag.  I end up using it to make my own batch of piped cookies as well.  Washing the greasy plastic nozzles after using it is a slight problem, as I cannot boil them in water like my metal piping nozzles.  I used cotton buds and liquid detergent to wash them in the end.  Its small capacity also means that I need to refill the piping syringe more often, compared to filling a large pastry bag with the entire batch of cookie dough.

With this recipe, the kids made cookies of many different patterns, trying out various piping nozzles and styles, none of them failed in taste test or collapse after baking!  And once the kids have mastered this basic recipe, they can tweak it to make chocolate, coffee or coconut version, but for us, the fun is really in the piping of the cookies.

4-INGREDIENTS PIPED BUTTER COOKIES
ADAPTED FROM : SUGARLICIOUS AND SUPERFOOD DIARY

200g Golden Churn tin butter
50g icing sugar
150g bread flour
50g corn flour/starch

METHOD

01. Mix bread flour and corn flour/starch together and sift, set aside.

02. Whisk butter till pale and fluffy with an electric whisk on medium speed.

03. Add icing sugar, continue whisking till all the powder sugar disappear.

04. Pour in the flour mixture, and fold in with a spatula.  Stop once there are no traces of flour.  Over mixing will let gluten form and end up with a harder cookie.

05. Pipe cookies onto baking tray.

06. Bake in a preheated oven 170C for 18 min.

07. Cool cookies completely before storing in an air tight container.


Note: My #2 of #cookdaiso52 challenge with daiso’s icing syringe

Simple Onigiri : Salmon Rice Mix And Dulse

simple onigiri 001 simple onigiri 003 simple onigiri 004 simple onigiri 005 simple onigiri 006

Onigiri makes a great rice meal that can be prepared in less than 30 minutes.  When 3 out of the 4 ingredients are instant, how long can they take to make?  They are pretty to look at and also taste good according to the kids.  Whenever I pick them up from school, they will request for finger food to munch on their ride home.  Onigiri is one of such car ride friendly snacks: no food spills!

// Some recipes call for sushi vinegar to be added to the cooked rice first, as I find the rice mix already contains sugar and salt, I skipped this step.

// I realized that with some creativity, I can actually cook quite a variety of food often using ingredients or kitchenware from Daiso.  I am starting this #cookdaiso52 challenge to see if I can hit 52 dishes with things from Daiso.  This is #1.  This could mean more onigiri variations coming.

SIMPLE ONIGIRI : SALMON RICE MIX AND DULSE
#1 of #COOKDAISO52

INGREDIENTS

2 cups cooked short grain rice
1 tablespoon salmon rice mix*
1 tablespoon dulse flakes*
nori sheets*

METHOD

01. When the cooked rice are still hot after cooking, add the salmon rice mix and dulse flakes and mix well.  The dried rice mix needs the heat from the steamed rice to hydrate.  Allow rice to cool slightly till warm to touch.

02. With wet hands (to prevent rice from sticking on working hands), take out a handful of the prepared rice and roll them into a ball, triangle or oblong shape, pressing the rice balls tightly together so that it will not fall apart.

03. Wrap rice balls with cut nori sheets according to liking.  I wrapped mine at the base of the triangle where my hand will hold the Onigiri to eat.

04.  Repeat with the rest of the rice.


* from Daiso

Muah Chee With Black Sesame Powder

muah chee_black sesame 002 muah chee_black sesame 001

Instead of the usual ground peanut powder, I used black sesame powder (leftover from making this) to coat my muah chee, inspiration drawn from dumpling balls with black sesame filling.  If you like black sesame seeds, you will like this alteration to the traditional snack.

A scant of ground peanuts is added for some nutty fragrance, but optional.  Sugar amount can also be reduced if you like it less sweet and prefer more flavor from the black sesame seeds.  Add half of the amount first, and gradually top up to taste.

I have been using peanut oil instead of shallot oil to make this, but any neutral tasting oil will do.

MUAH CHEE WITH BLACK SESAME POWDER
ADAPTED FROM MY PREVIOUS ATTEMPT HERE

for dough
200g glutinous rice flour
1 tablespoon peanut oil
2 teaspoons sugar
½ teaspoon salt
250g water

for black sesame powder mix
80g black sesame powder
20g ground peanuts
50g sugar (40g if without ground peanut)

METHOD

01. Mix the flour, peanut oil, sugar, salt and water in a mixing bowl.  Stir well to make sure that there are no lumps.

02. Pour mixture into a greased 6 inch pan, steam over medium heat for 25 minutes.

03. Once the mixture is cooked though, remove from pot and brush some oil over the surface. Allow it to cool down to a temperature warm to touch.

04. In the meantime, prepare muah chee coating by combining black sesame powder, ground peanuts and sugar in a large plate.  Mix well.

05. Once the muah chee is ready, cut the cooked dough into bite size pieces with a pair of kitchen scissors, the dough will be very sticky.  Place the dough bits in the large plate with ground black sesame and peanut mixture and coat each of them well. Transfer to serving plate, top with more coating mix, serve immediately.  Best eaten when still warm.

3D Chigiri Bread : Black Sesame Soft Rolls

chigiripanbread001 chigiripanbread009 chigiripanbread004 chigiripanbread008 chigiripanbread007 chigiripanbread006 chigiripanbread002 chigiripanbread005 chigiripanbread003

Made these Chigiri (pull apart) bread with a bear face design using a black sesame bun recipe after stumbling upon these 3D cartoon versions.  I decided to choose one of the simplest designs to try out and watched this video a few times to get the drift.  For this design, the extra time is only spent on making 12 extra tiny rolls for the “ears”, and “drawing” the facial features with melted dark and white chocolate.

For my first attempt, I spent more time deciding on which baking pan to use to fit my recipe, and had to change pan twice just to make sure that the bread dough will fit the pan well after proofing.  I finally settled with an 8 inch bundt cake pan.

The recipe I am using required 20grams of black sesame powder, you can opt them out if you prefer plain buns. I got my black sesame powder from daiso.  Once the package is opened, keep in fridge as it can get rancid pretty fast due to high fat content.  Or use it up by making black sesame paste or muah chee topping with it.

A chocolate pen would have given the bear’s facial features a “more precise” look.  In the video, it seems easier with piping bag made from parchment paper.  I tried using small plastic bag with a small corner snipped off and pass it off as a piping bag , it’s usable but not perfect, as seen from the uneven strokes.

Chirigi or not, 3D or not, these soft rolls are still worth making once a while, given the health benefits of the black sesame seeds listed here.

3D CHIRIGI BREAD : BLACK SESAME SOFT ROLLS
SOURCE :孟老师的100道面包 p.137
INGREDIENTS

250g bread flour
25g raw sugar
¼ teaspoon salt 
1 teaspoon instant yeast 
10g milk powder 
160g water 
10g unsalted butter, cubed 
20g black sesame powder 
dark and white chocolate, melted 

bakes in an 8 inch round bundt pan

METHOD

01. Combine bread flour, raw sugar, salt, yeast, milk powder and water in a mixing bowl.

02. With an electric mixer on dough hook, knead the dough on low (KA speed 1) till the ingredients come to a ball.

03. Turn up the mixer speed (KA speed 2) and continue to knead till dough appears smooth and shiny.

04. Add cubed butter piece by piece while the mixer is turning back at low speed.  When the last trace of butter disappears,  increase mixer speed a step up again (to 2) and knead till dough reaches window pane stage.  If you choose not to add black sesame powder , go to step 6.

05. Add black sesame powder and mix on low speed till the powder distributes evenly into the dough.  Wrap a towel drenched in ice cold water around the bowl as the mixer is running if the dough gets too warm from prolong kneading.  The gluten might break down if the temperature of the dough gets too high and we will end up with a puddle of sticky dough, no good for fluffy bun recipe.

06. Once the black sesame powder has incorporated into the dough, stop kneading and remove the mixing bowl from the mixer.  Cover a clean towel over the bowl and  leave it at a draft free spot to proof for 80 minutes.

07. After the dough has risen, punch it down to degas it and transfer to a clean worktop.  Slightly grease hands and worktop with some butter, this will keep the dough from sticking, and make bread shaping effortless.

08. Divide the dough into 6 equal pieces, rolling them into balls. Cover with towel and leave it aside for 15 minutes.

09. Flatten dough again to push out the gas inside.  Pinch out two equal size small balls, these will be the pair of “ears” for the bear.

10. Repeat with rest of dough and shape all into balls along the way.  We will now end up with 6 big balls for the head and 12 small ears.

11. Put the 6 dough balls, with equal spacing between, into the bundt pan.

12. Using a toothpick, push the ears of the bear into the bigger dough to attach and seal them firmly. (see this process demonstrated here at 3min37sec)

13. Proof for 30 minutes before baking it at 170C/325F for 18 minutes.

14. When the bread is completely cooked, remove the bread from the pan and cool on rack.

15. Pipe facial features with chocolate sauce when the bread is completely cooled.

16. Store in air tight container if not consumed immediately.

Sunday Kind Of Pancakes

sundaykindofpancake001sundaykindofpancake003 sundaykindofpancake002 sundaykindofpancake004

Got a little fancier and made meringue for the batter instead of adding whole egg, because I like what they do to chiffon cakes.  For the same reason, I used cake flour instead of plain flour; I really want them light and fluffy on Sundays.

Always cook pancakes over very low heat with a light brush of butter on the pan, never a puddle of fats.  This creates the smoothest pancake surface, almost cake-like.

I learned this trick from the cooking instructions stated on the box of a Japanese pancake mix.  I was intrigued by the additional step of cooling the pan down by sitting the sizzling hot pan on a soaked towel after cooking each pancake.  This is to bring down the pan temperature, making it just warm enough to cook the next pancake.  The reason for this is that the pan should never be too hot when pouring in the batter, otherwise “brown rings” will form on the pancake as the batter gets cooked immediately when it hits a hot pan.  Before knowing this, my pancakes used to have an innermost darkest brown ring, followed by 1 or 2 more in different shades of brown as the batter spreads out.  The cooking time might take a little longer with the lower heat, but the end result is worth it.  It is also important to cover the cooked ones with a clean tea towel or aluminum foil while working with the rest of the batter.  The trapped steam will keep the pancakes warm and moist, not dried out by the time the last pancake is done.

Lastly, I topped the stack of pancakes with bento picks from daiso.  It is after all a Sunday, and the pancakes still need some dressing up even if I have run out of cream and berries.

I doubled the recipe below to make the pancake stack above, just nice for 4 pancake lovers.

SUNDAY KIND OF PANCAKES
ADAPTED FROM JOY OF BAKING
INGREDIENTS

1 cup (130g) cake flour
1½ teaspoon baking powder 
¼ teaspoon salt 
2 tablespoons (28g) raw sugar 
1 egg, yolk and white separated 
1 cup (240ml) fresh milk 
28g butter, melted 
more butter, for greasing pan

METHOD

01. Add cake flour, baking powder, salt and raw sugar in a mixing bowl, combine well with a small hand whisk.

02. Make a well in the center of the dry ingredients and pour in fresh milk, whisk briefly, a lumpy batter will form.

03. Add egg yolk and whisk for a few times to mix well.

04. Finally, drizzle in melted butter, whisk again, till the mixture becomes smooth and no longer lumpy.

05.  Let the pancake batter sit aside while we whisk the egg white till stiff peaks form.

06. Gently fold the egg white into the pancake batter.

07. Heat up a pan on low fire, not too hot.

08. Brush a small amount of butter on the pan to prevent pancake from sticking and pour some batter onto the pan to cook.

09. Do not flip until bubbles start to appear on the top side of the pancake, lift a corner of the pancake slightly to check to see if the bottom has turned golden brown.  I cook my pancakes over really low heat, so that by the time the bottom gets nicely brown, the top side is also almost cooked.  Flip the pancake over and cook the other side briefly, for a few seconds.  Transfer to plate.

11. Repeat with the remaining batter. Remember to brush the pan with melted butter in between the cooking of each pancake.

12. Serve immediately with syrup.