Letting go: part 2

This is a follow-up post from here. Part two of Misheru’s book talked about caring for the items we have by enjoying or using them regularly versus stowing them away. Here are some points I find useful, see if they’ll help you better appreciate the stuff you already own, reducing the temptation to buy more stuff!

1. Make time to enjoy the things you own

This is my favourite tip from the book. Isn’t it interesting that simply using our possessions, is also a way to “care” for them? How often have we purchased something impulsively, only to use it just a few times before chucking it aside? When we pare down to the items we truly need, we’ll naturally use them more often and treasure them more. They need not be expensive, high-value items. Instead, Misheru talked about appreciating the few everyday items that put us in a good mood all day. Let me share mine here!

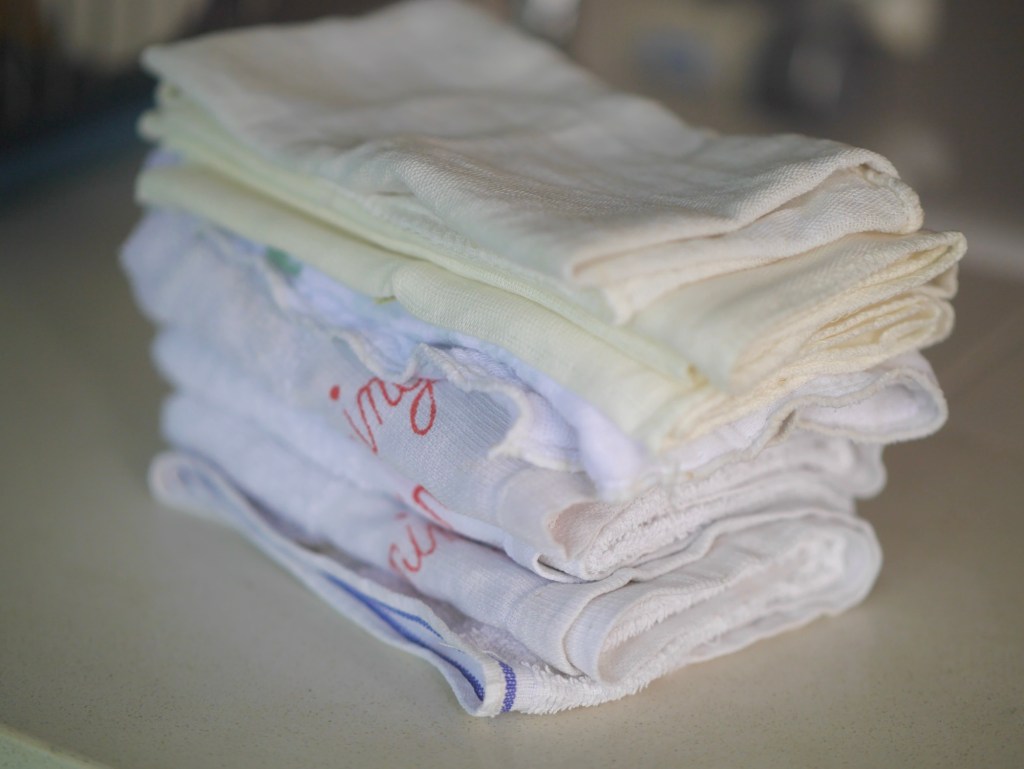
//Mornings: Misheru starts her day with a morning cuppa served in a favourite mug or enjoying breakfast meals out of pretty plates. I often rotate my collection of mugs/teapots/plates/bowls to mimic the pleasure of receiving new stuff. Here’s sharing some of my favourite slow-morning setups! None of these items cost more than $10; in fact, plenty are free promotional items!

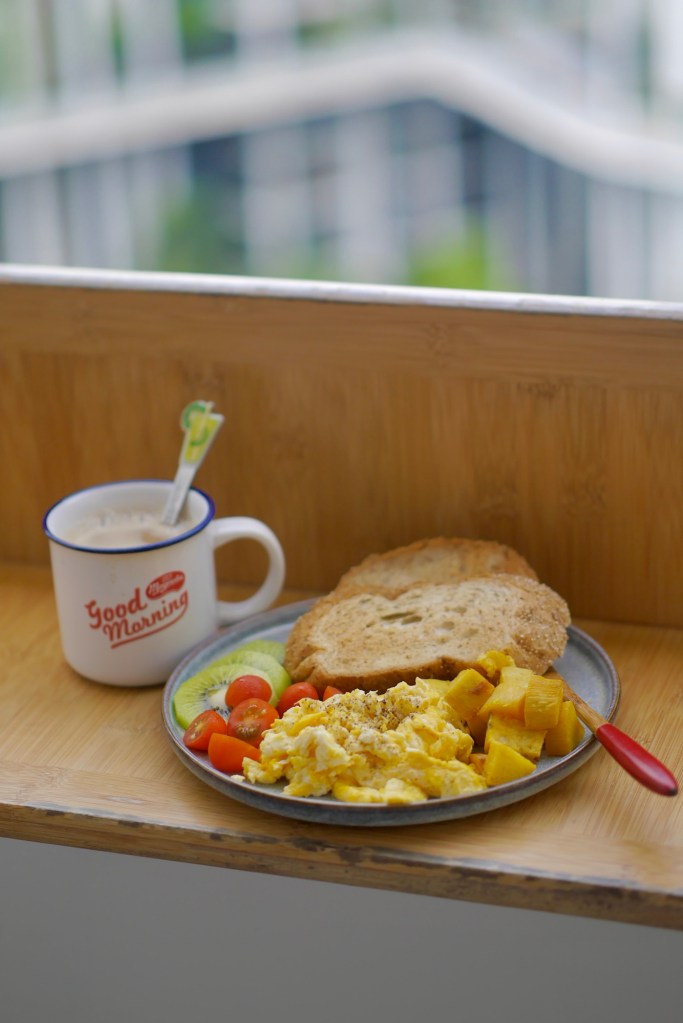
Mug and teaspoon are free promotional gifts (thanks, Magnolia and Zespri!), plate $4, wooden fork $2.

Mug, free promotional gift (thanks, Nespresso) , small wooden tray $2.

(Back) Glass bottle to make cold brewed tea, free, upcycled from this, drinking glass, free wedding favour.
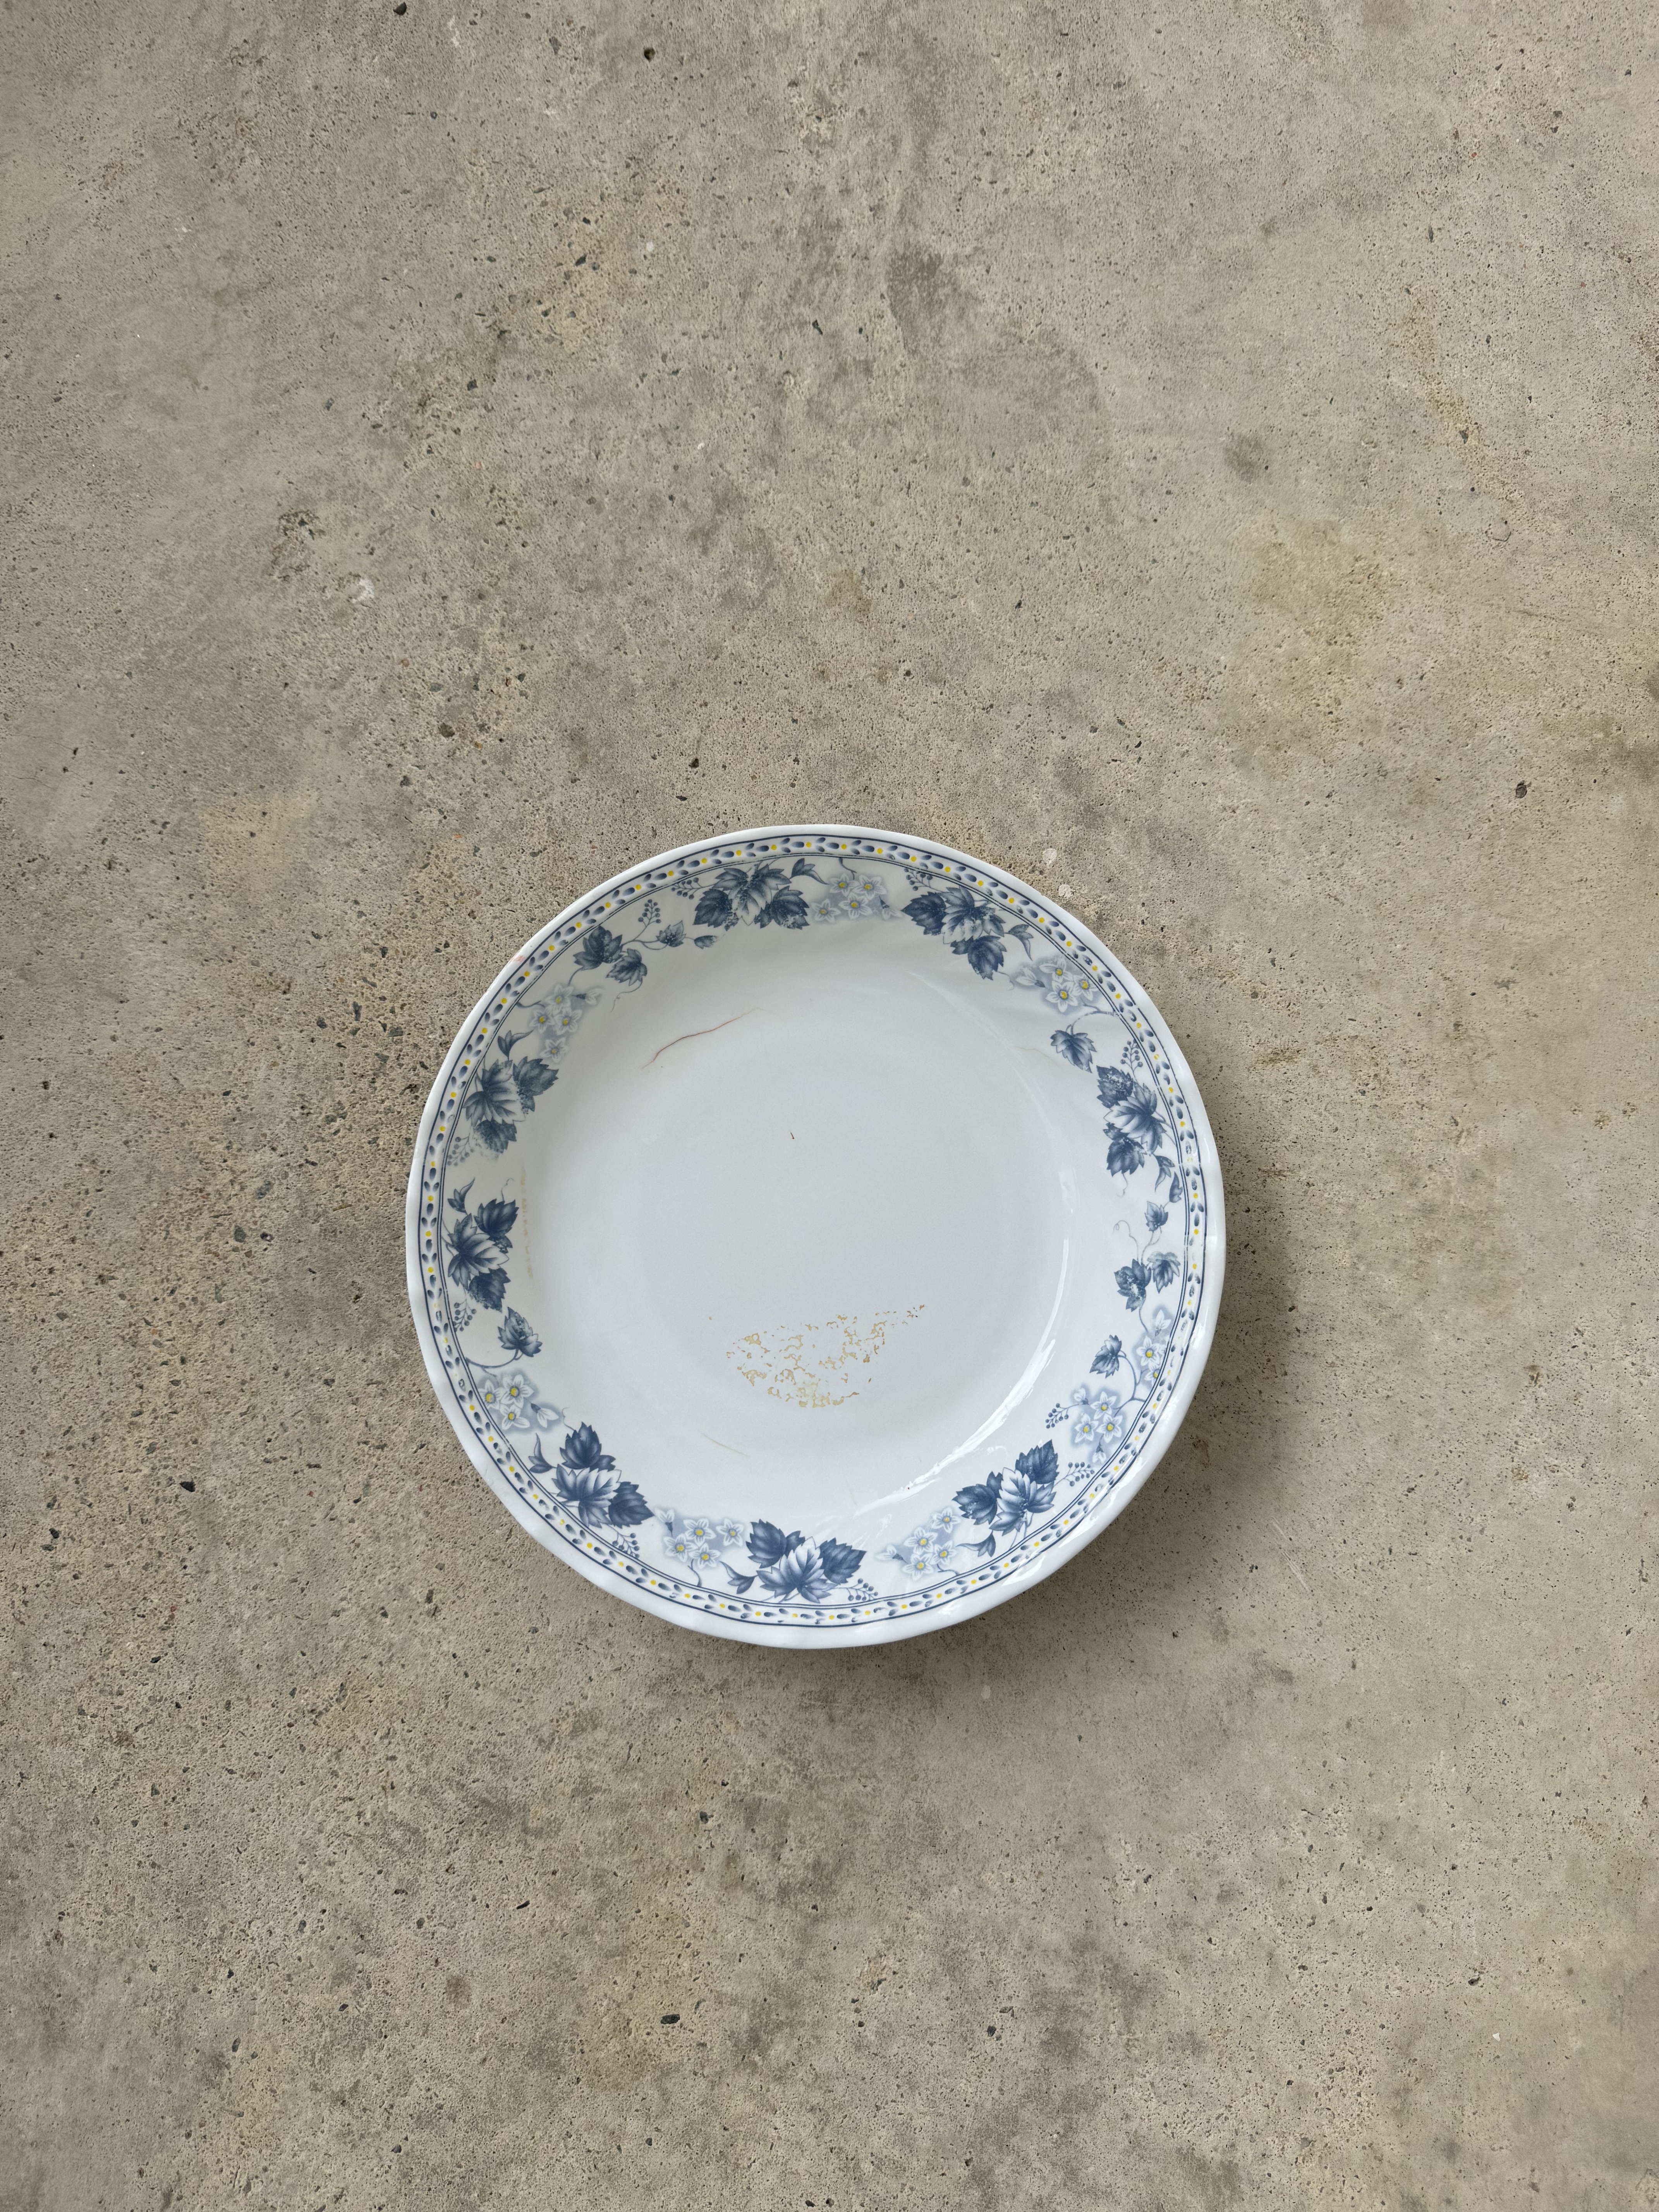
(Front) Saucer $2, dessert fork $2.

(Back) Egg holder, free, upcycled from a 30-egg cardboard tray, rattan basket with lid, free, upcycled from snack souvenir packaging.
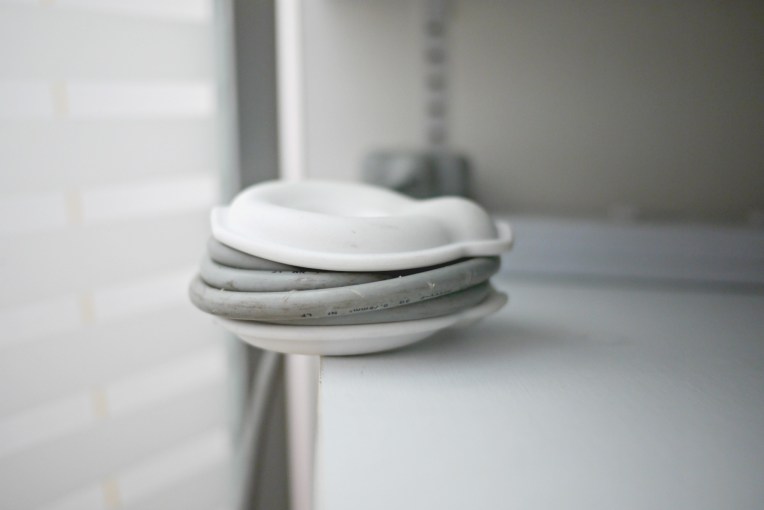
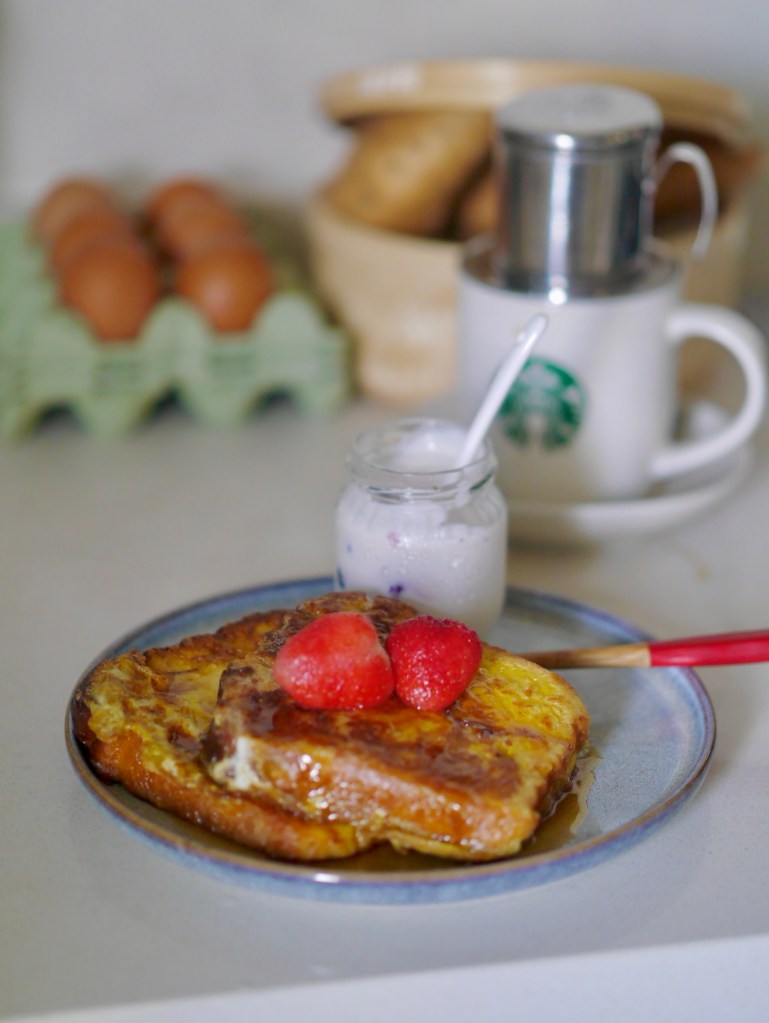
(Middle) Phin coffee filter $2, Mug, free promotional gift, saucer $3.
(Front) Yogurt served in an upcycled jam jar, porcelain teaspoon $1.50, plate $4, wooden fork $2.

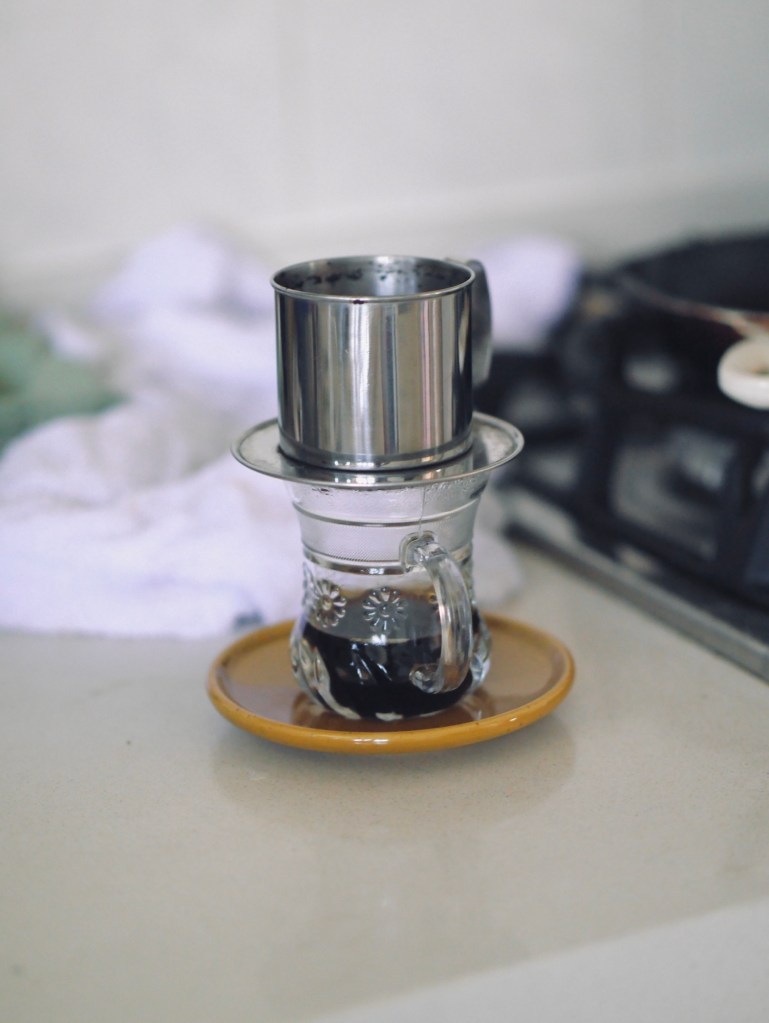
Phin coffee filter $2, drinking glass, free wedding favour, saucer $2.

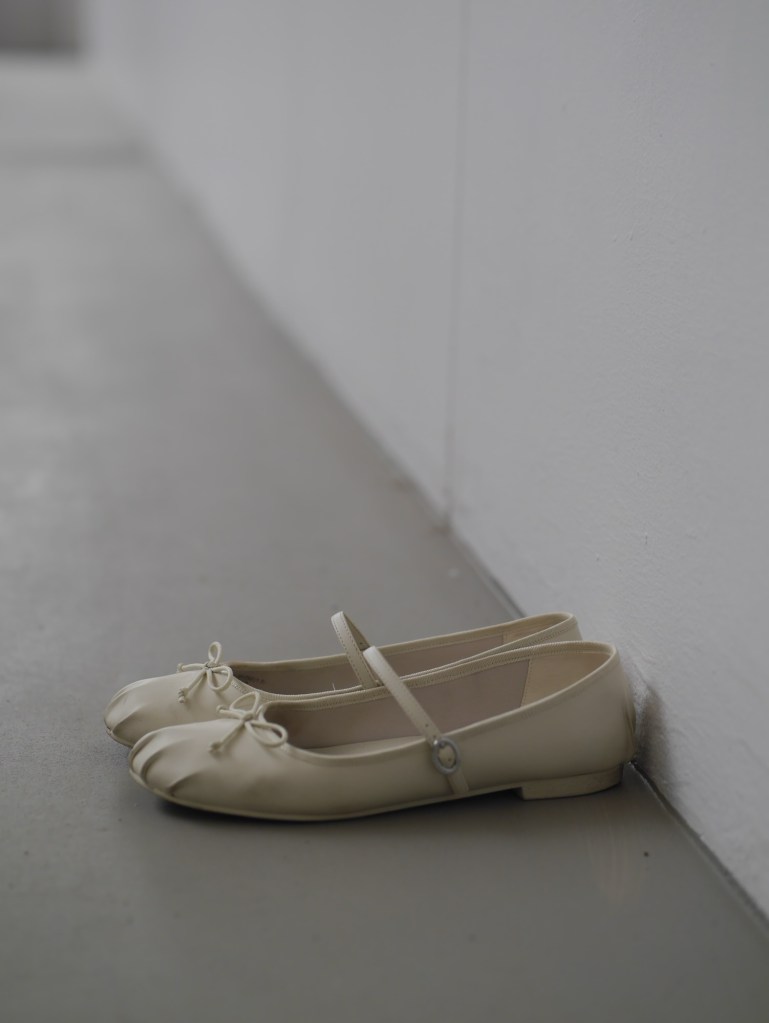
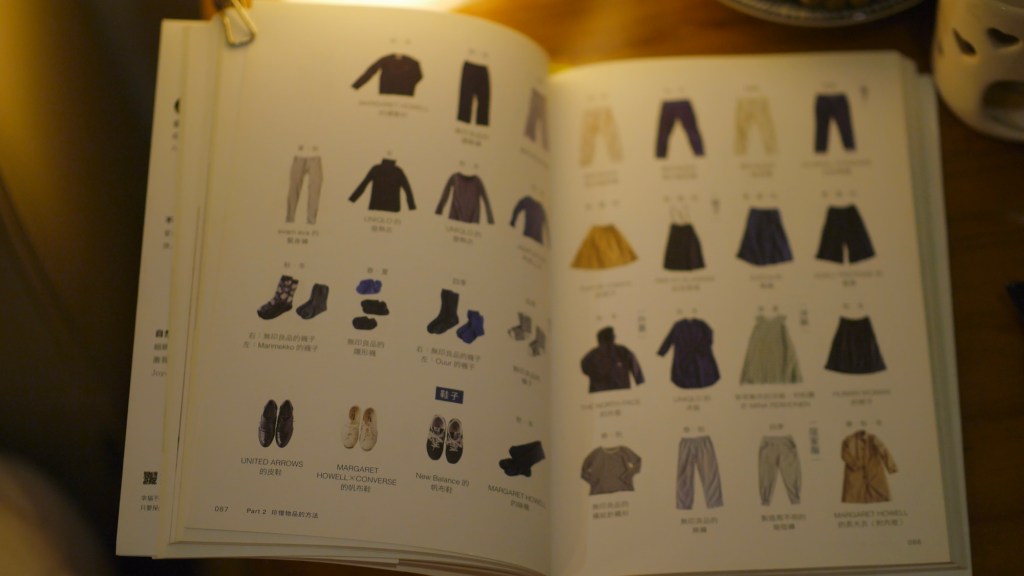
// Out and about: Misheru shared how she doesn’t have choice overload when her wardrobe consists only the items she loves, including her favourite Orcival tote bag, Marikekko umbrella, and Converse sneakers. A pared-down wardrobe also makes it easier to organise and clean!

++ Such content inspires me to go through my clothes to recreate a “new” wardrobe every few months. I’ll take out the pieces that I have not worn for a long time and start “styling” them. The process reminds me of thrifting, but in the comfort of my own home, rediscovering the items I already have. I always end up with a few new outfit ideas, all without forking a single cent!

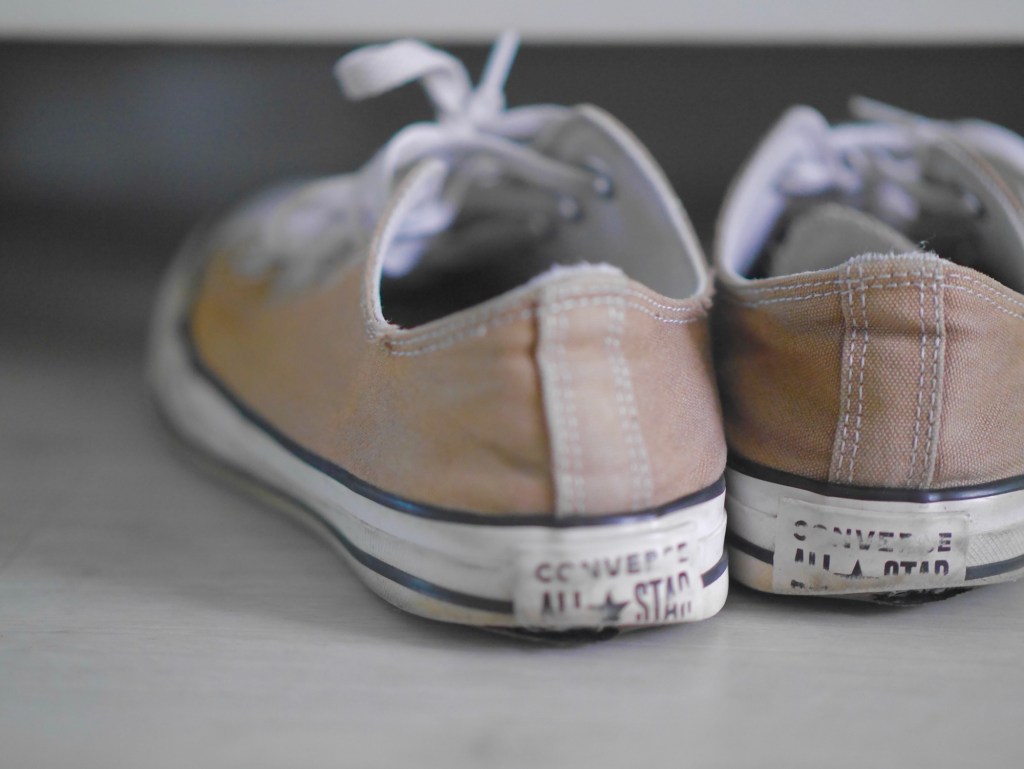
++ I used to have a storeroom full of shoes. I have since reduced to just a few pairs of footwear that I deemed essentials: 1 x hiking boots, 1 x running shoes, 2 x walking sneakers, 1 x pumps, 2 x flats, 1 x sandals and 1 x beach slippers. With fewer pairs of shoes, I wear them more frequently and have no qualms about replacing them when they are beyond repair.

++ For heels, pumps and flats, I always buy them from Charles and Keith because firstly, their cutting suits my feet and I never get blisters from wearing them. Secondly, they are the only mass-brand shoe company I know that provides free simple repair services!

// Housework: Misheru shares a few of her favourite tools that make her house cleaning chores more manageable and enjoyable. Such as a table brush set from Iris Hantverk, dishcloths from Afternoon Tea Living, a kitchen sponge with a handle from Muji, and her favourite wireless vacuum cleaner from Makita, which she placed next to her dining table to clean up any mess quickly. My thoughts: it’s always easier to clean a clutter-free house. We don’t need to follow what she is using to improve our housework. I found plenty of pretty, affordable and practical household tools in our neighbourhood shops that are just as pretty and pleasant to use. Most importantly, gotta keep everything simple and fuss-free at home, including our cleaning equipment and tools!

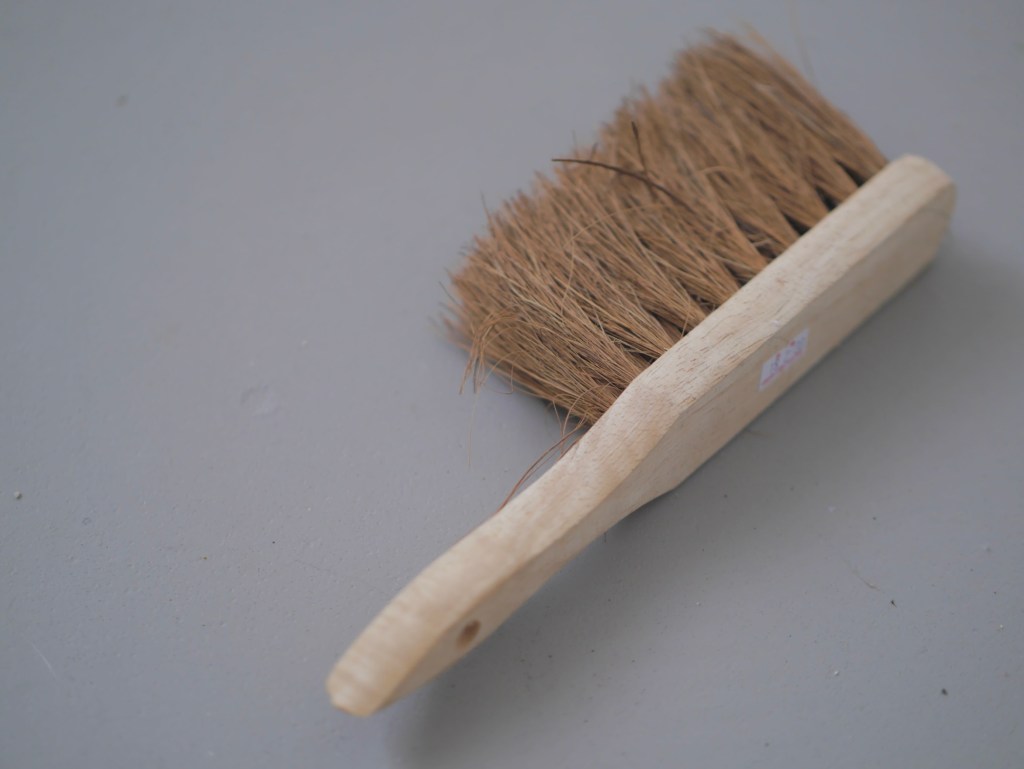
++ This handy brush from a local hardware store costs just $2. I use it exclusively in my kitchen yard to brush the dirt and dust off the walls/floor skirting/window grilles.

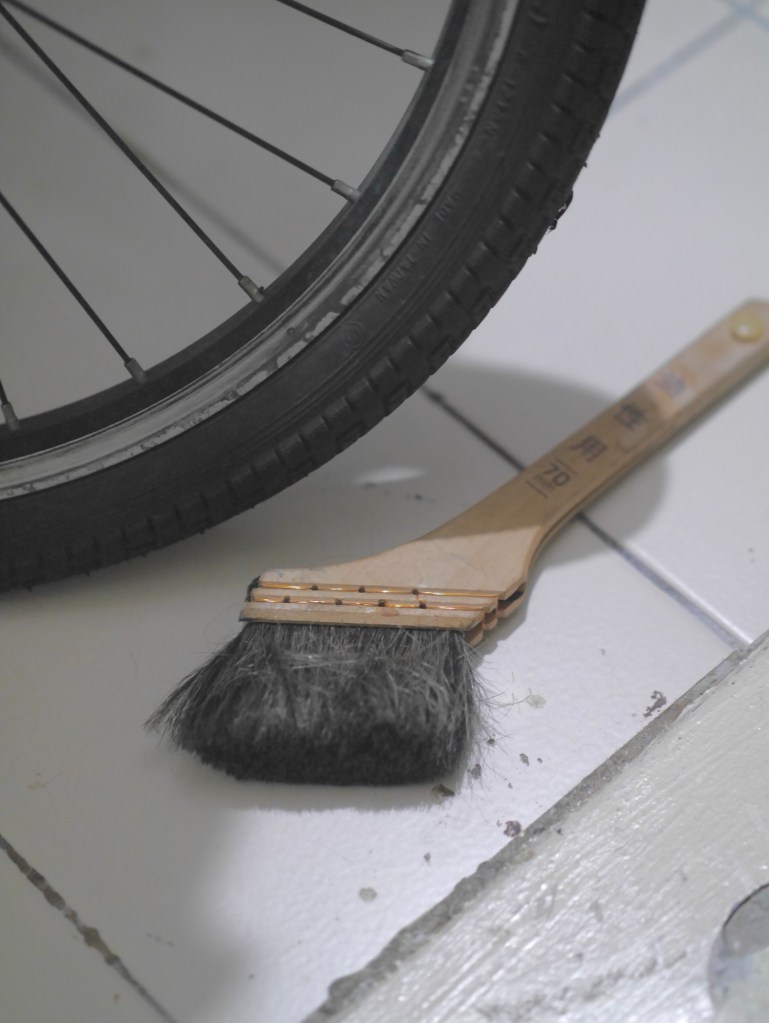
++ Another affordable $2 brush designed for painting. I use it to remove dirt from my bicycles.

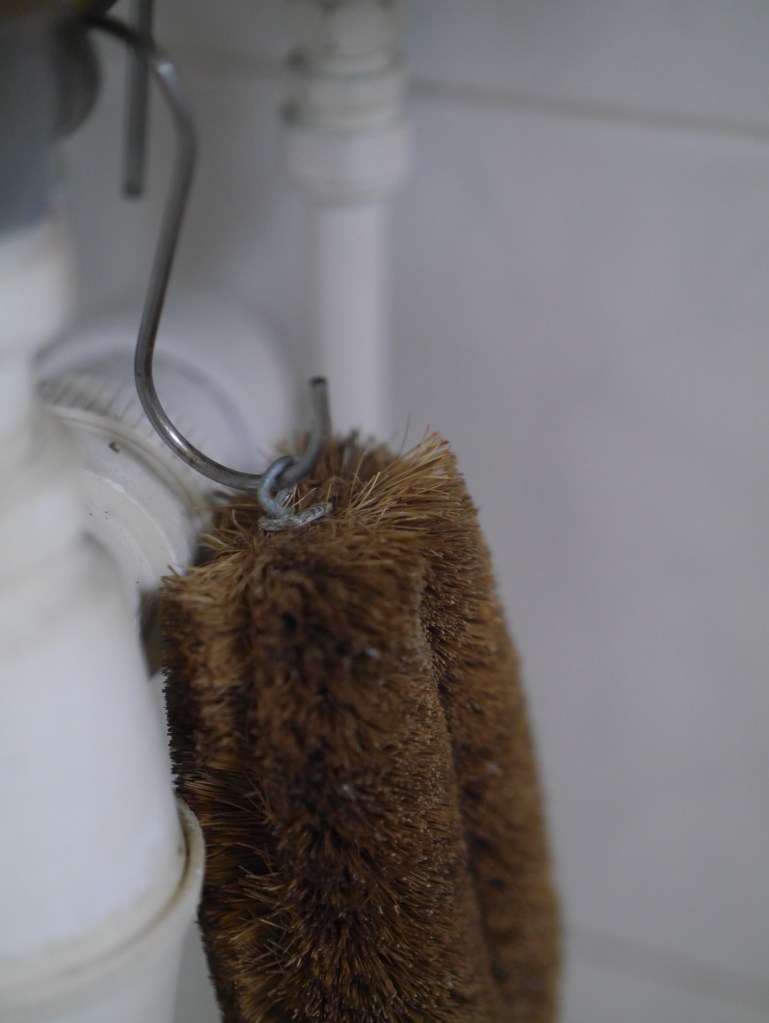
++ These coconut husk bristle brushes are must-haves; I use the small ones as pot scrubbers and large ones for scrubbing toilet floors.

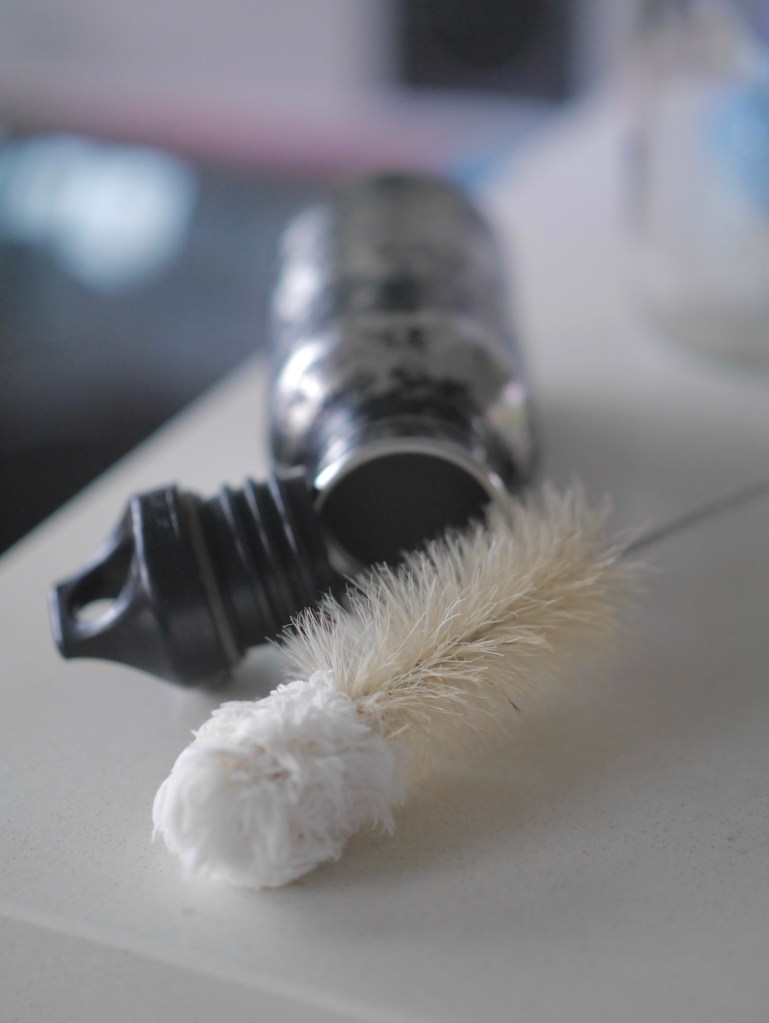
++ This bottle brush from Daiso has a cotton bottom, which allows me to reach the base/corners of drinking bottles easier.

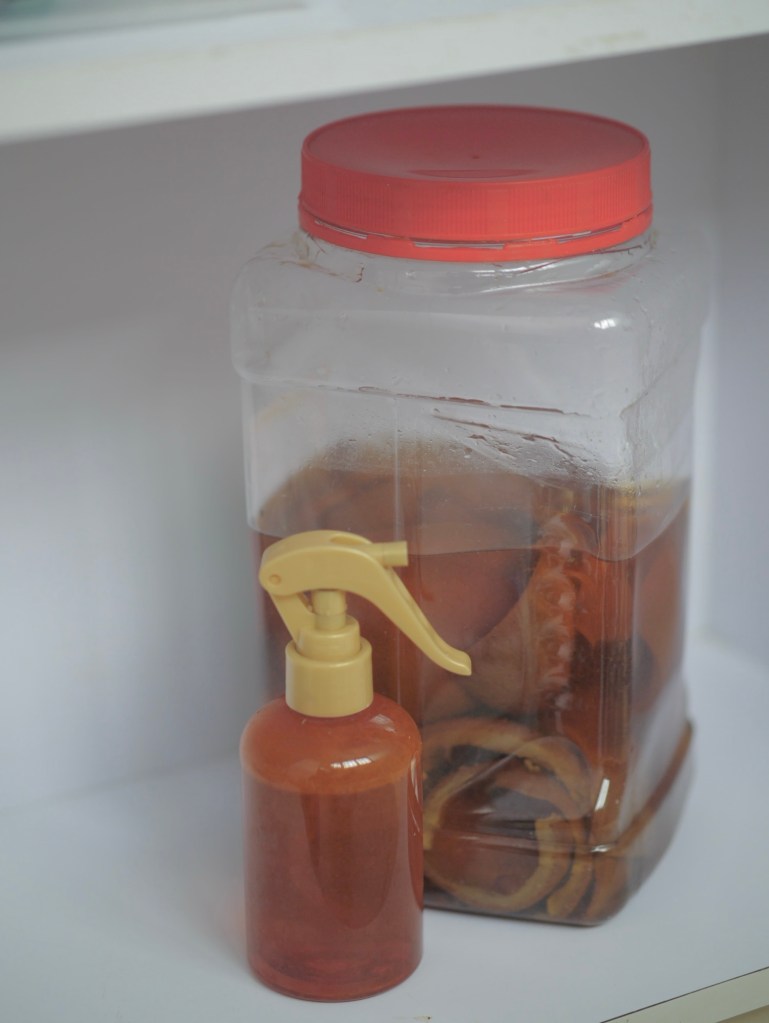
++ I have been using homemade orange peel vinegar cleaner/degreaser forever. Cheap and effective and smells good, too!

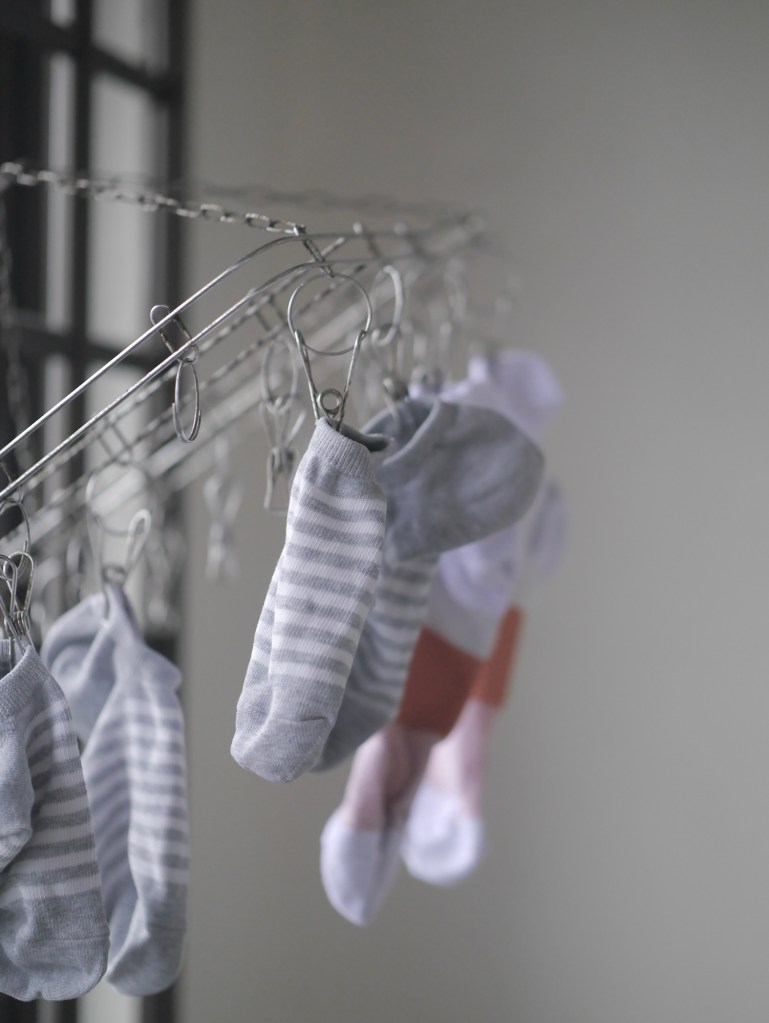
+++ Stainless steel laundry hanger, for air-drying small items like socks, when we run out of space on our laundry poles.

+++ For kitchen rags, I love my affordable and practical “Good Morning” ones, and Muji ones made from recycled factory remnant.

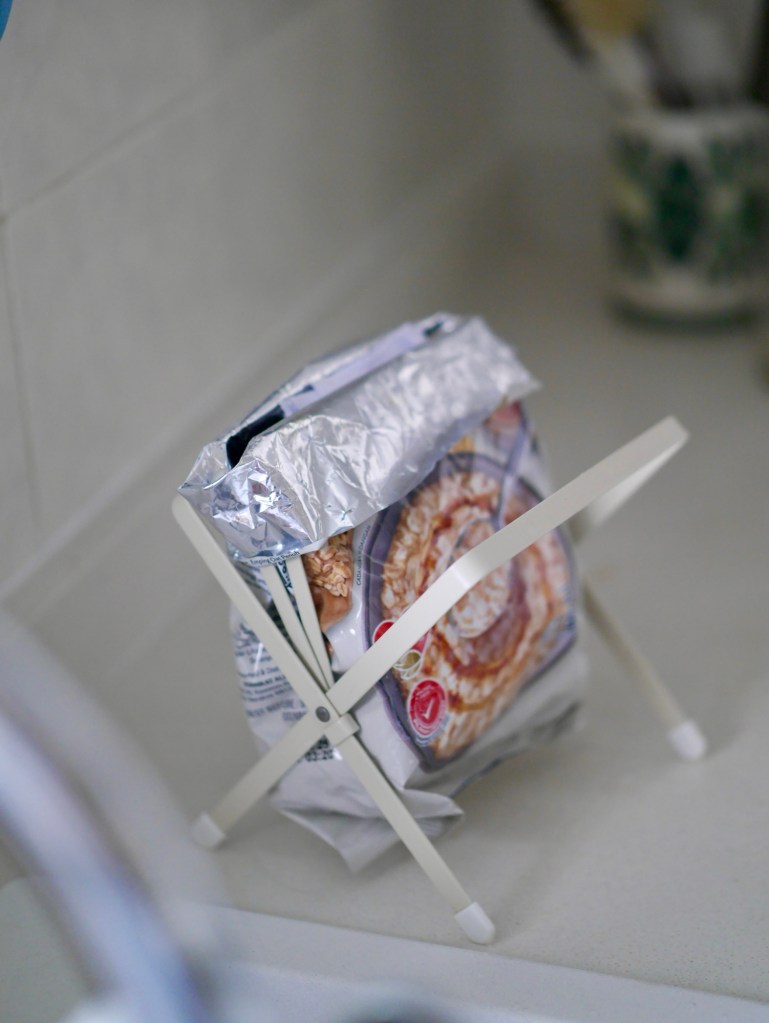
+++ I have been using small containers lined with packaging bags as trash bins in my kitchen. Since I started reducing my waste level in this part of the house many years ago, I never need a large standing bin in my kitchen anymore. So, I was really happy to find this trash bag holder in Japan. The design idea is simple and allows me to repurpose my small food packaging/pouches into kitchen trash bags.

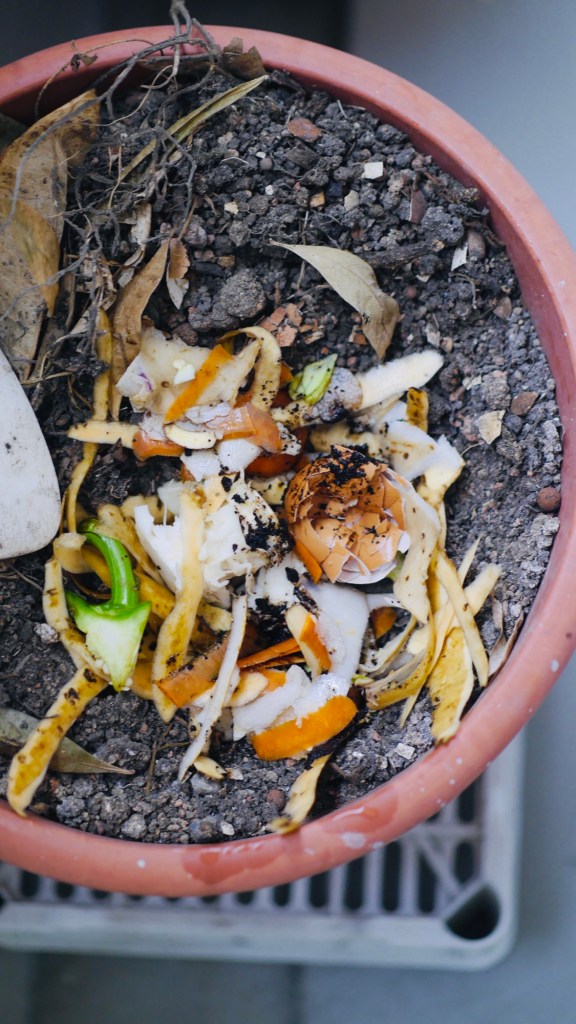
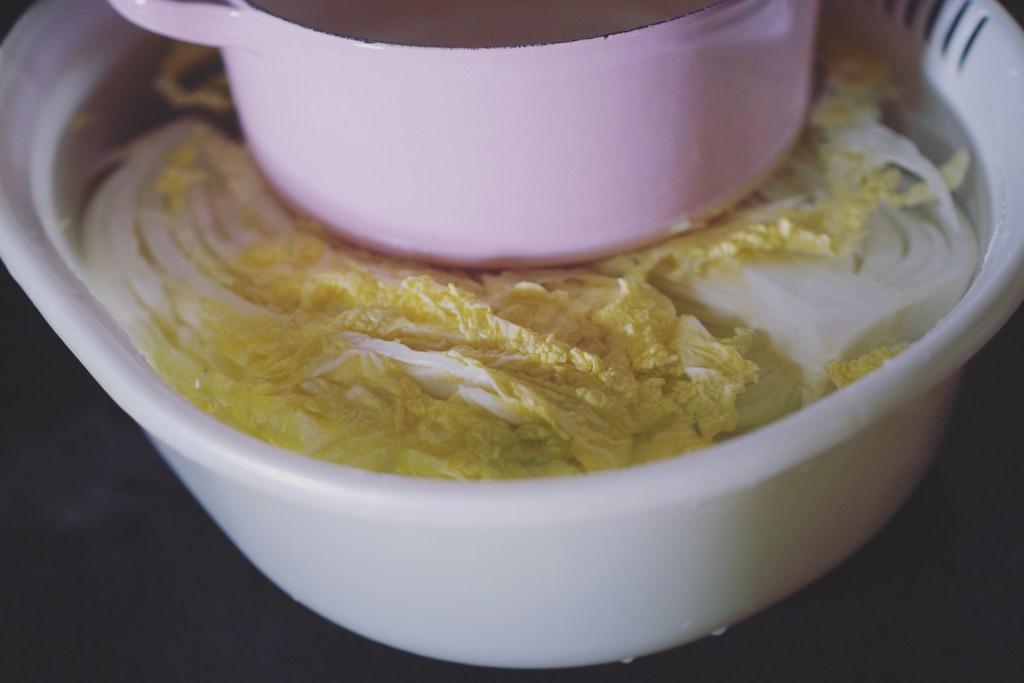
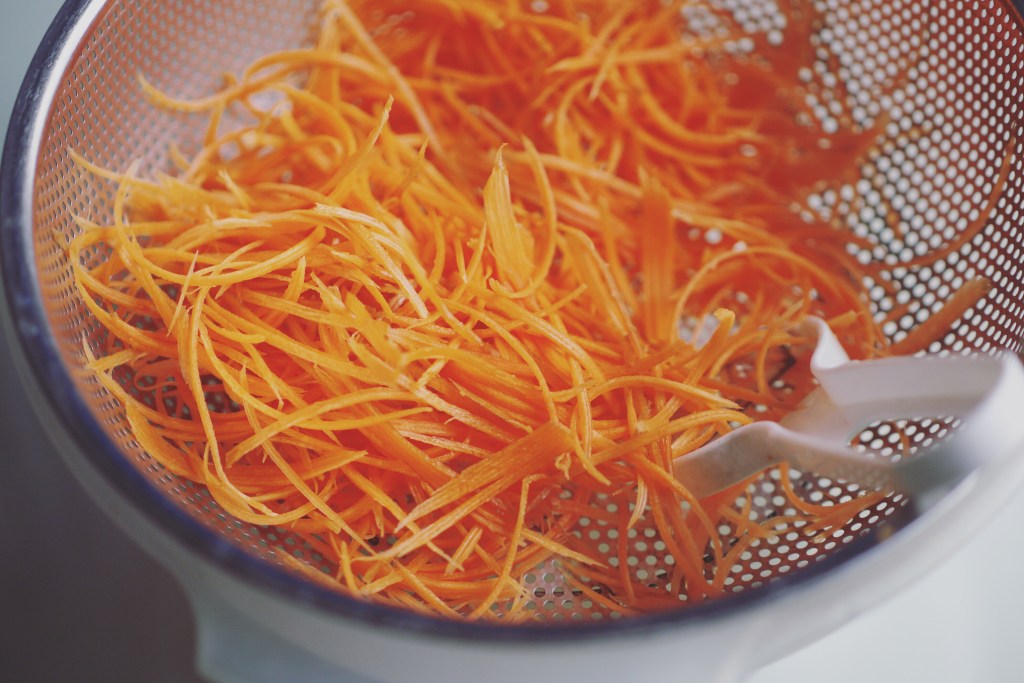
+++ My kitchen trash level is low because I compost most of my fresh kitchen scraps. These include fruit peels and vegetable ends, eggshells, spent coffee grounds or tea leaves. After a few months, these scraps turn into free fertilizer for my corridor garden plants!

// Evenings: Winding down and preparing for bedtime is an essential habit for Misheru. She shared her favourite couch and standing lamp in her book.

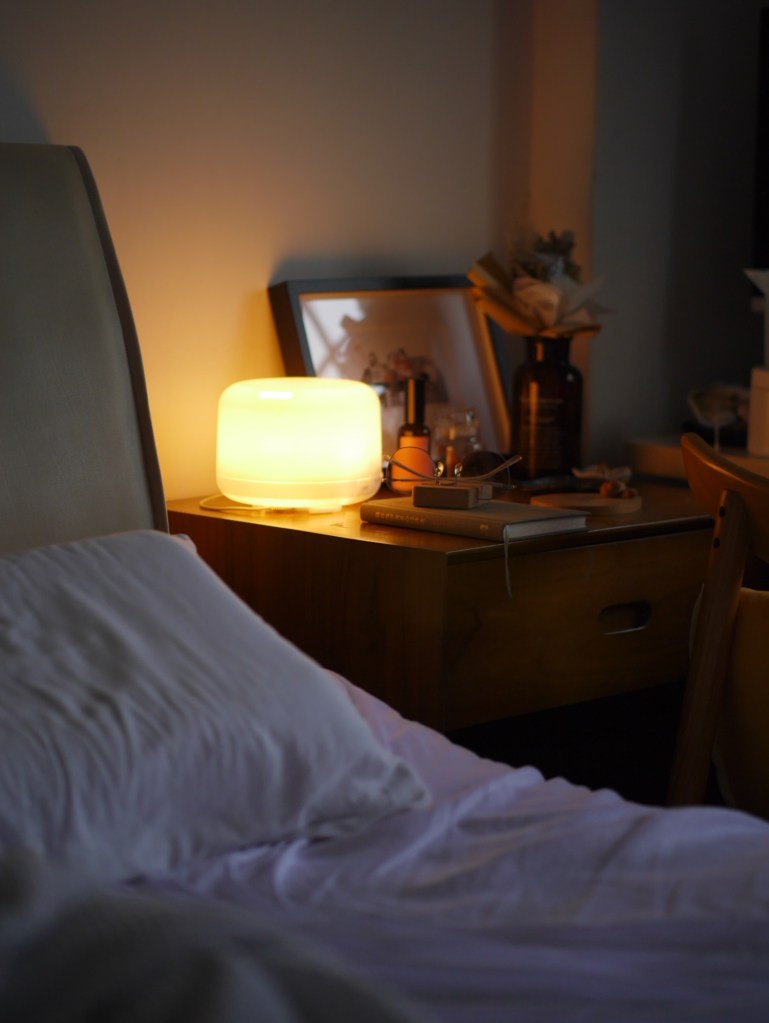
For me, turning on the aroma diffuser-cum-lamp by my bed sets the mood to rest. But I have to admit that I rarely turn on the diffuser function as I find the mist makes this corner too humid. Does anyone feel the same?

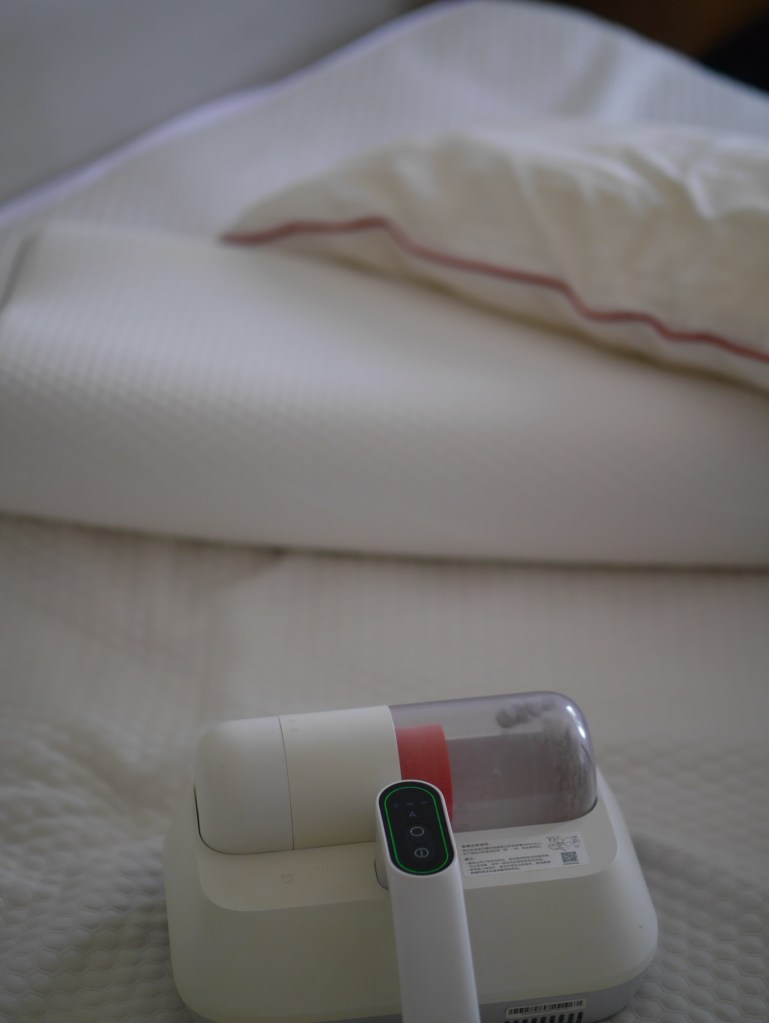
+++ While vacuuming our beds is not a nightly ritual before sleeping, I believe that hygienic bedding and mattresses are very important for quality sleep. I bought a dust mite vacuum cleaner early last year and have been using it often to clean our mattresses, pillows, bolsters and even stuffed toys!

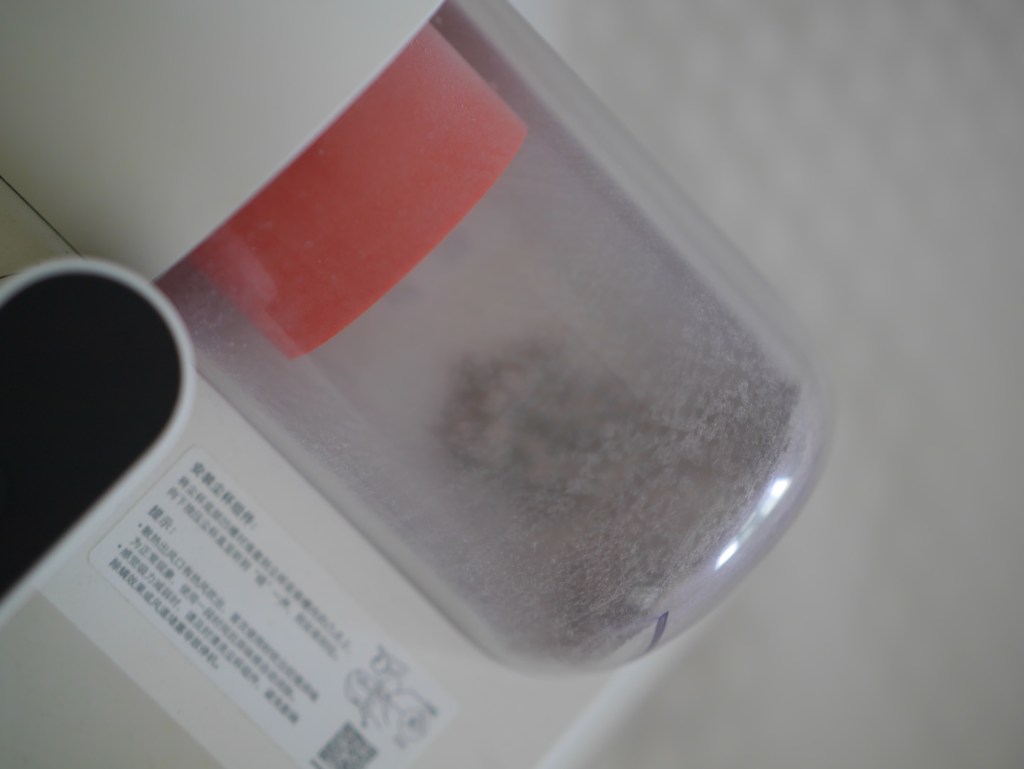
It’s oddly satisfying (and surprising) to see the amount of dust sucked out from our pillows/mattresses every other week.

2. Do not stow away your stuff; use them often!

Misheru encourages using the stuff we own more often to make the most out of it. Instead of storing them in hard-to-find places, try increasing their visibility or displaying them as decor, making them easy to reach and more convenient to use.

My turn to practise:

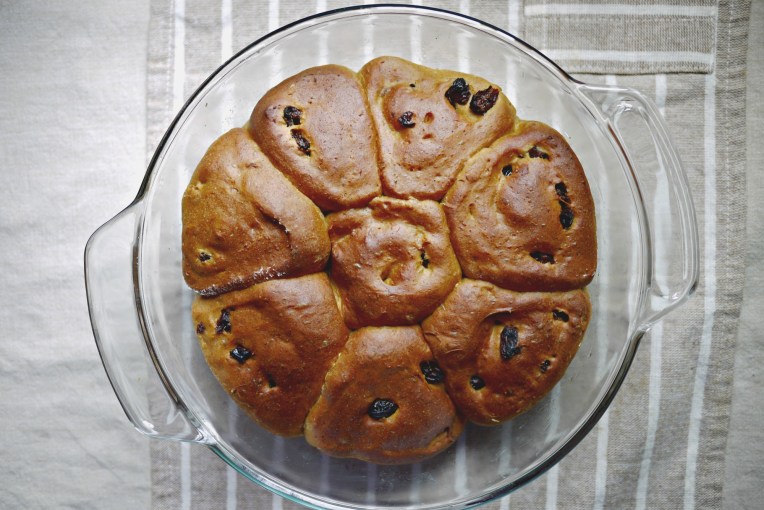
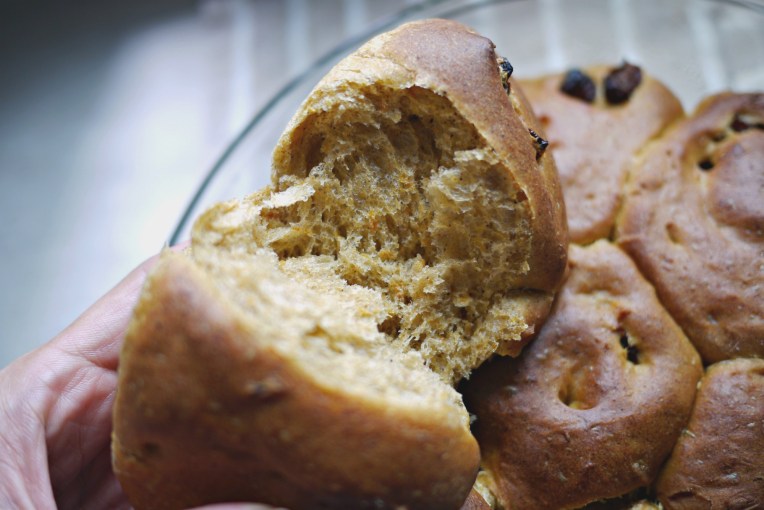
+++ I ALMOST gave away this muffin tray last November when I started the letting-go project. Thankfully, I reconsidered and placed it in the pending box instead. I started baking more muffins and cupcakes again, thanks to the year-end festive mood. I stick to simple recipes that I would use again and again with success! It is now sitting inside my oven, making it super convenient when I need it to bake!

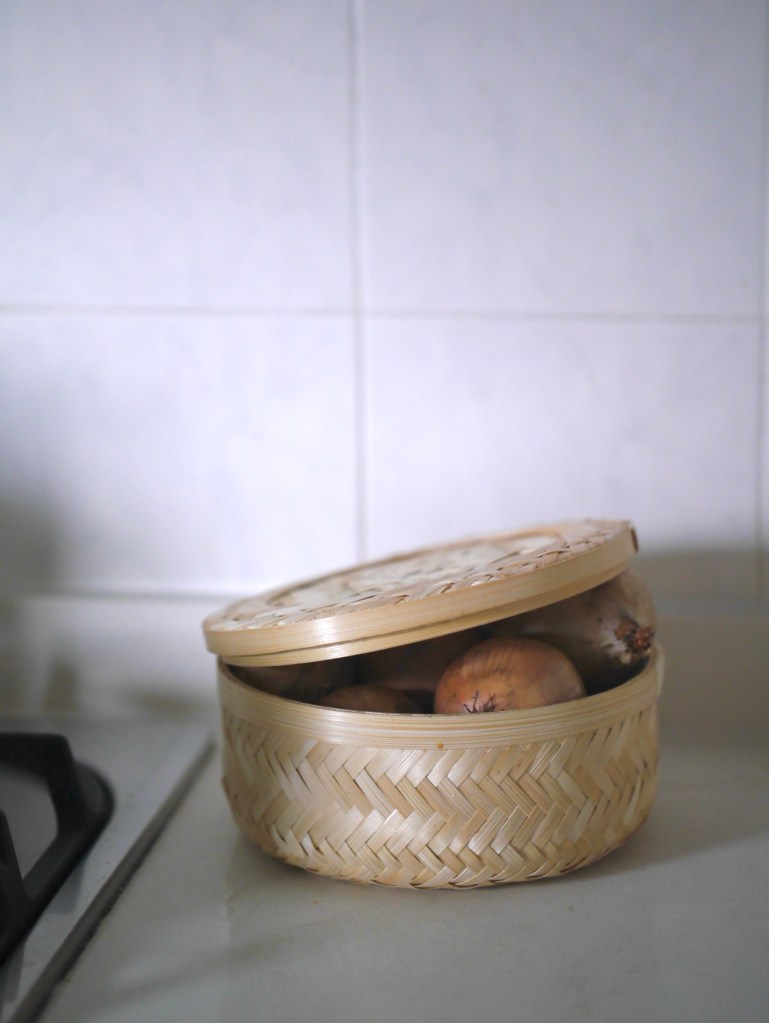
+++ Sometimes, I receive items so pretty that I cannot bear to use them, like this rattan basket. Instead of hiding it inside the cupboard and letting it grow mould, it is now sitting nicely on my kitchen counter as a root vegetables/garlic/onion storage basket.

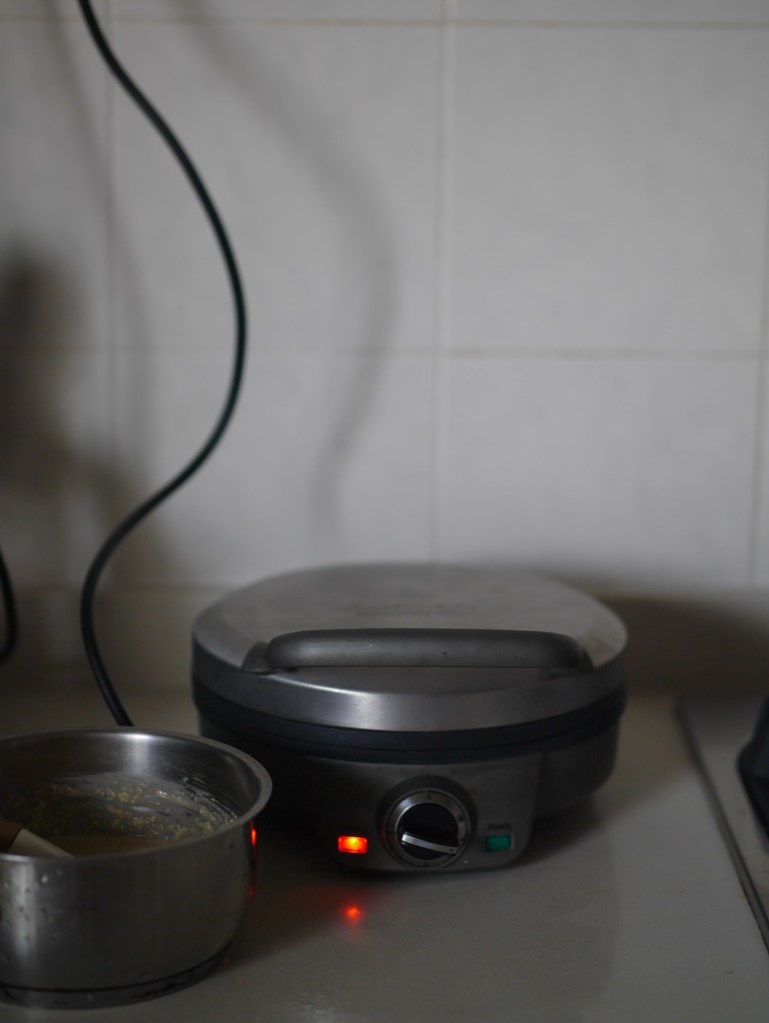
+++ I also started making sure I use my kitchen appliances frequently and not turning them into white elephant, such as this Cuisinart waffle maker that I bought in 2017,

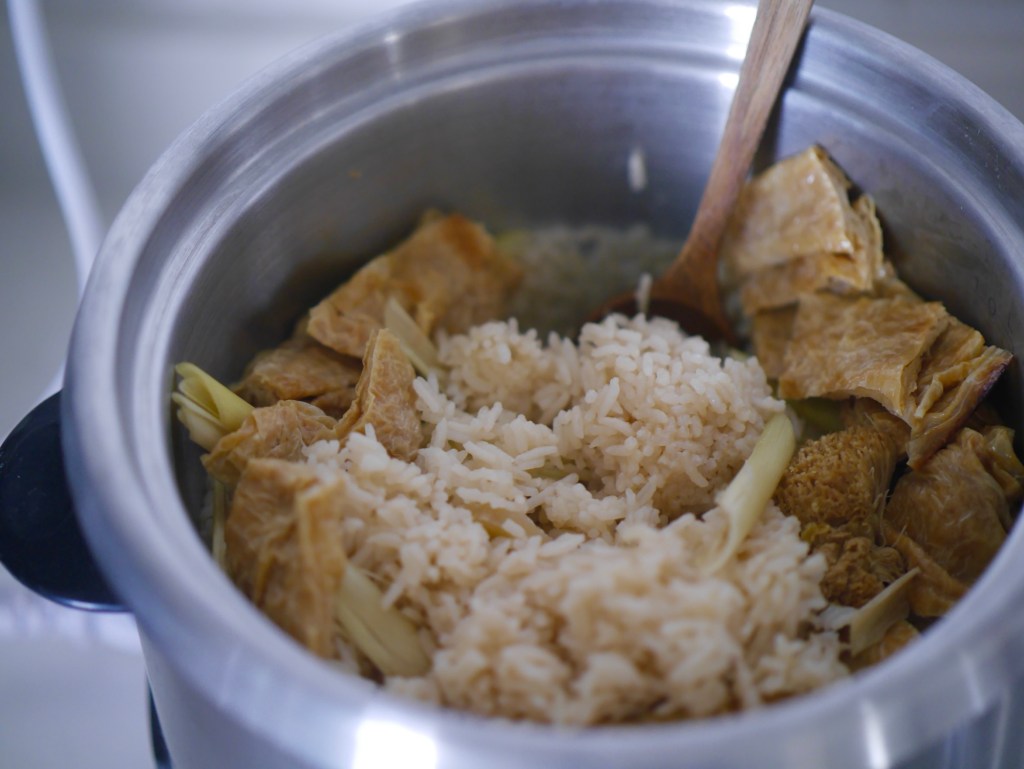
+++ And my Song Cho rice cooker to make slightly larger servings of rice so I can store them in the freezer as part of my meal prep.

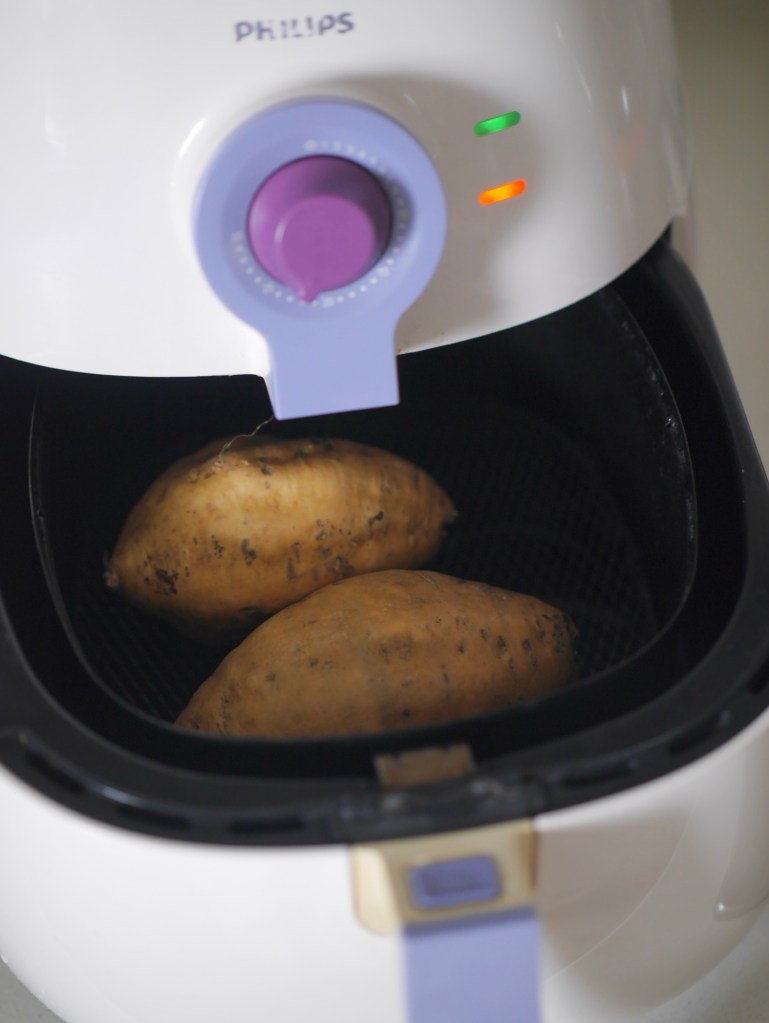
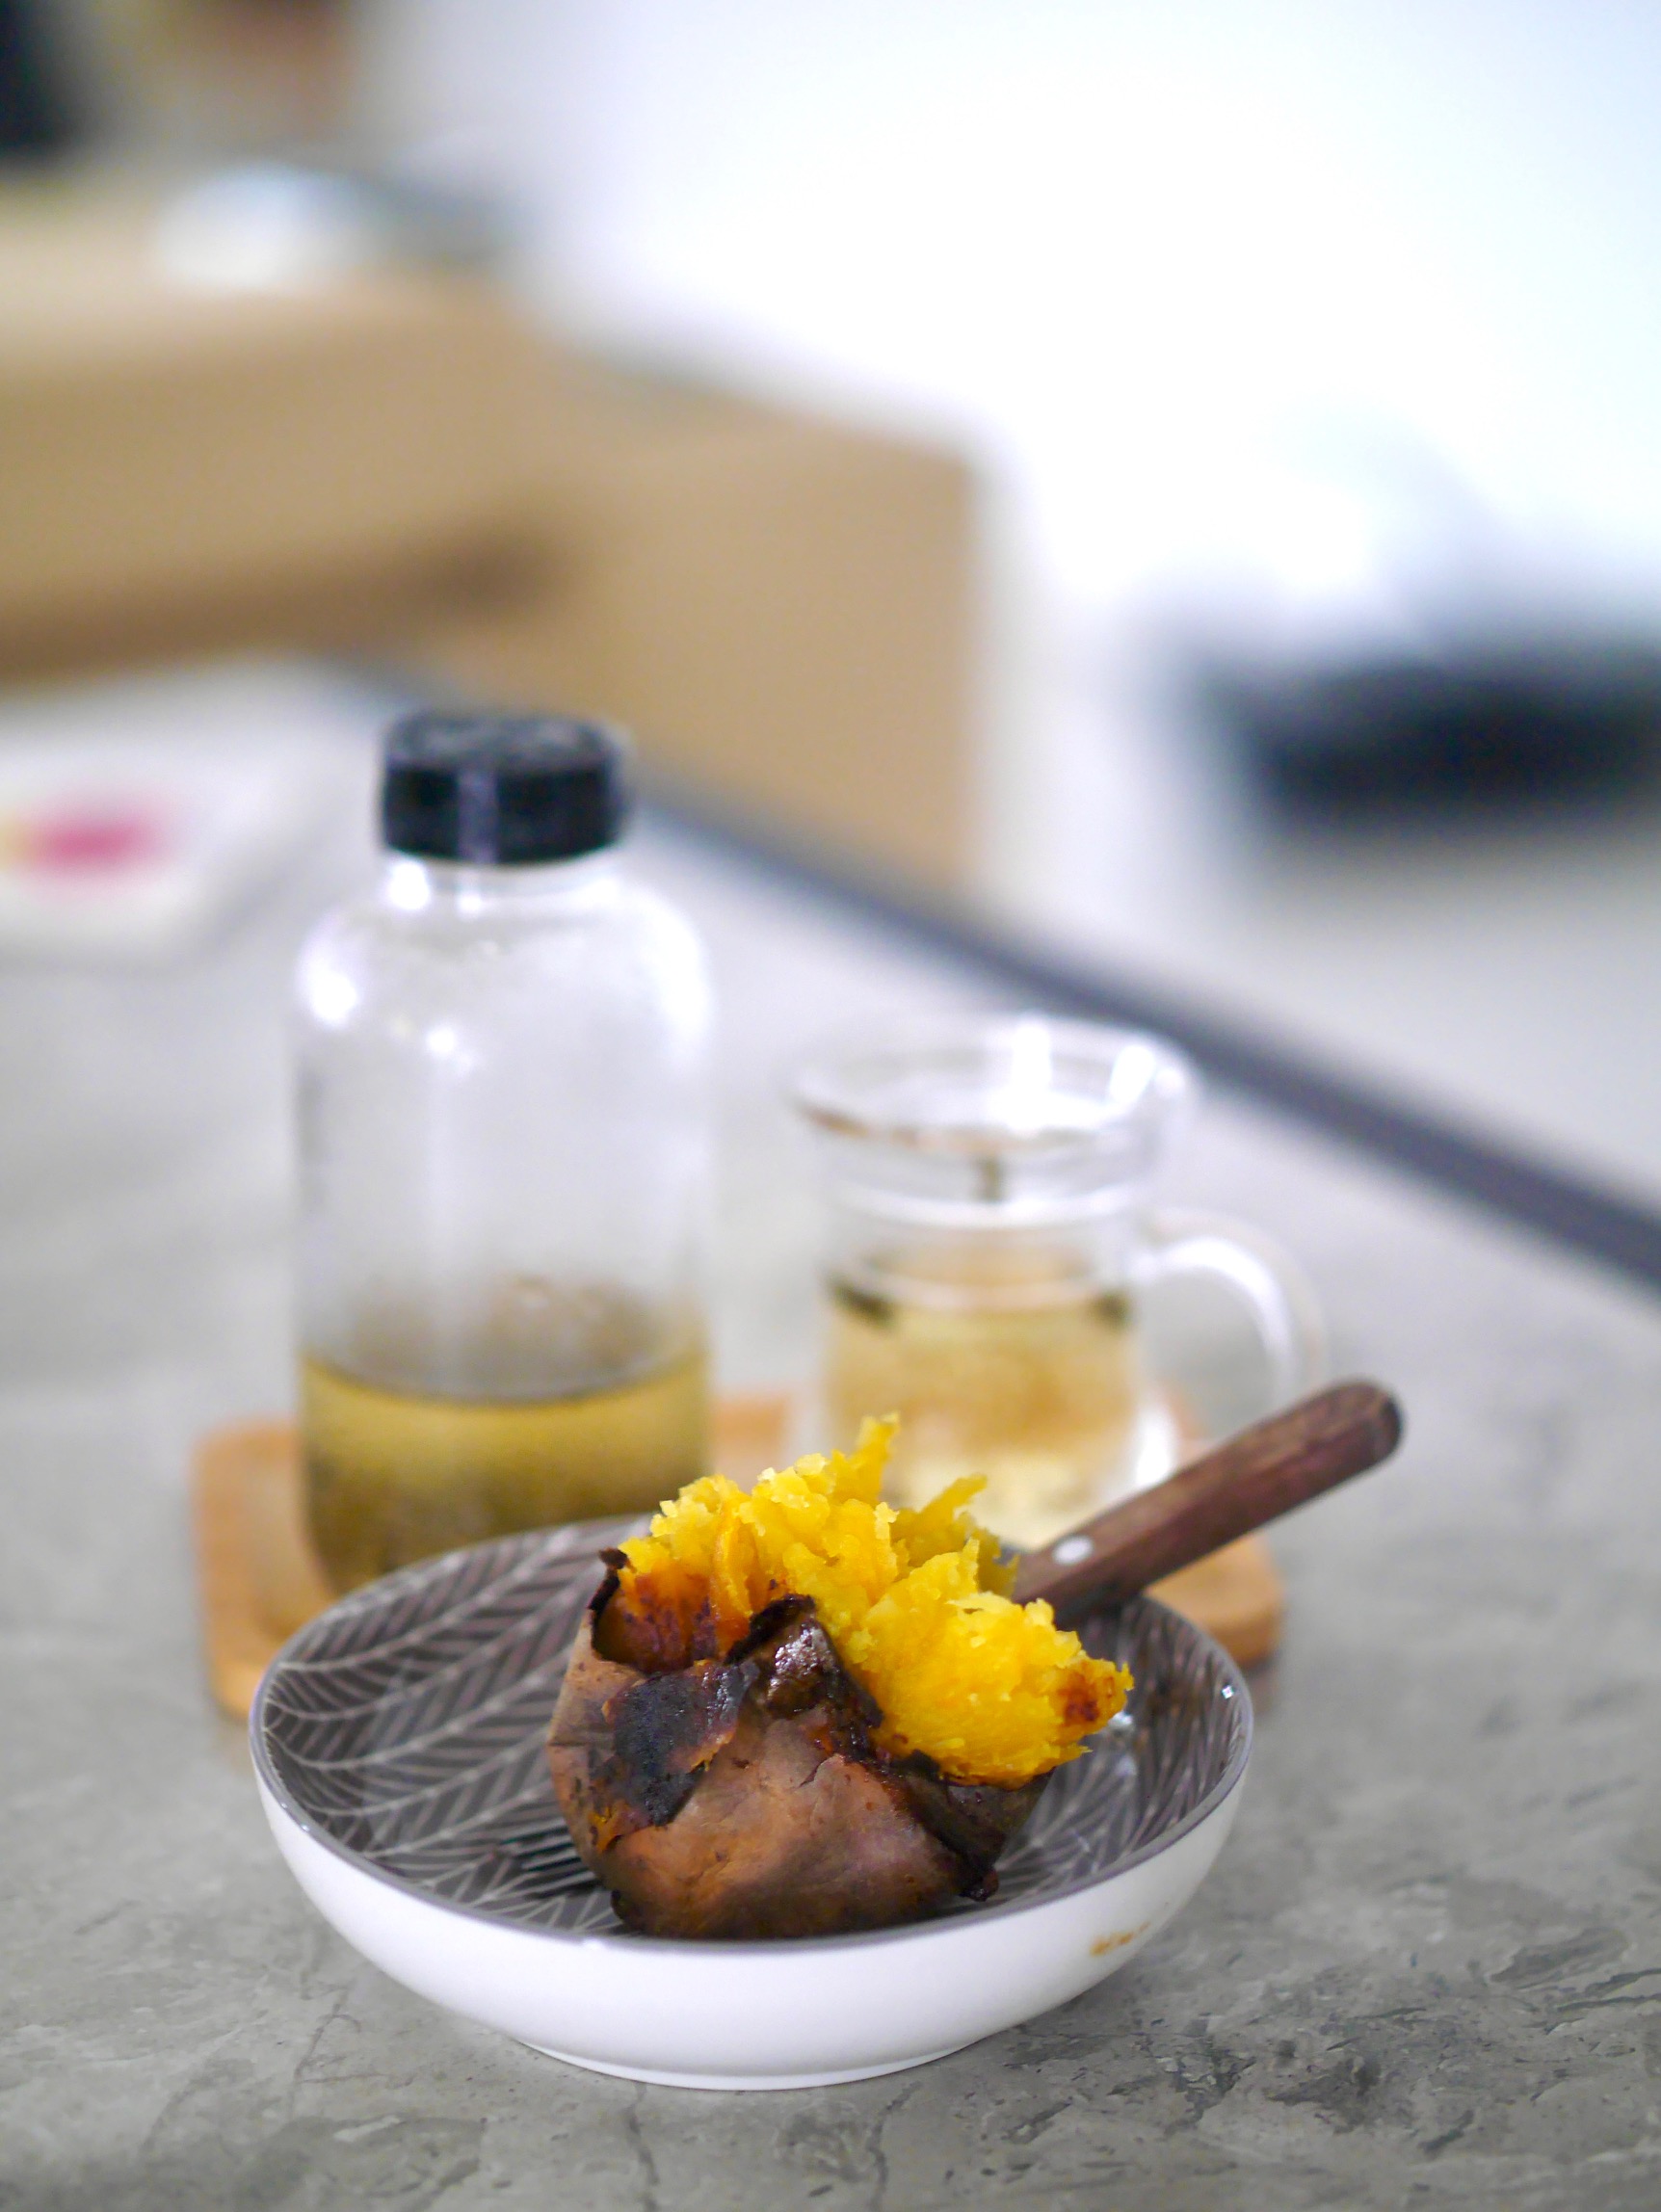
+++ And this first-gen Philips air fryer to bake more honey sweet potatoes!

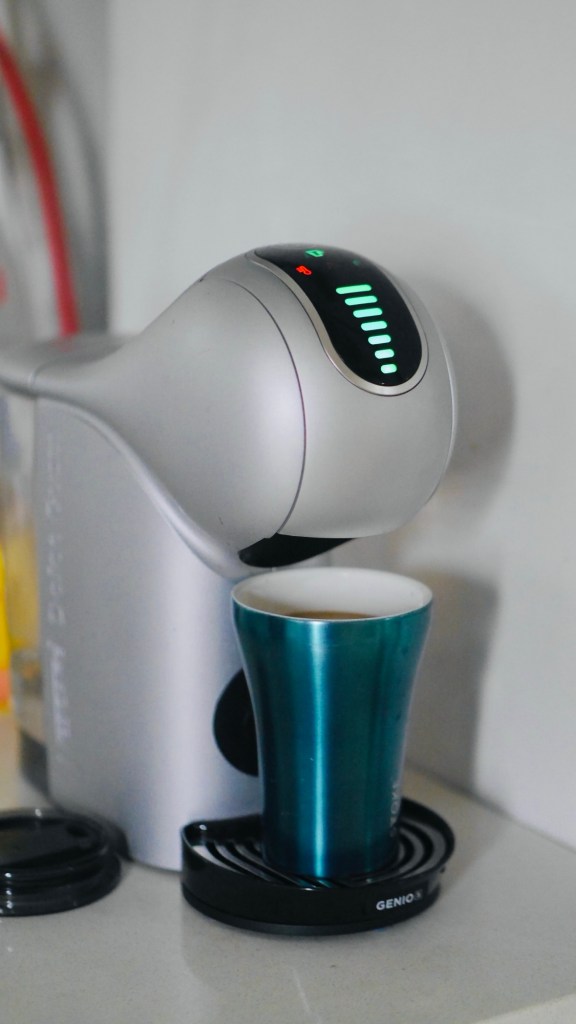
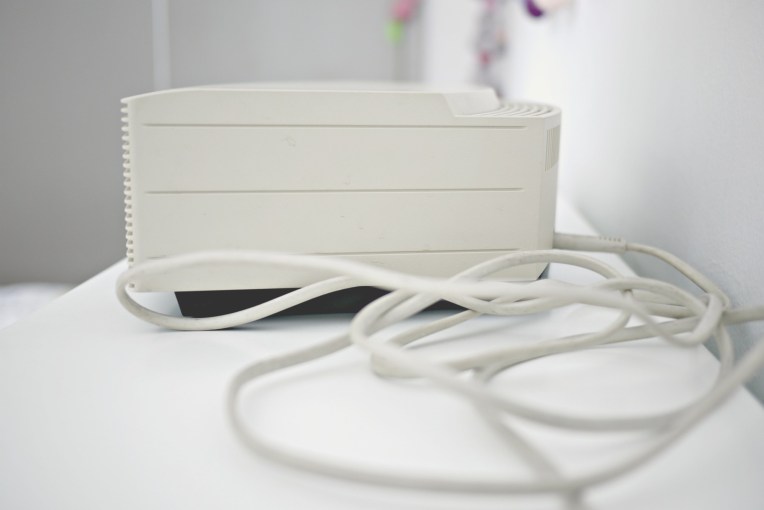
+++ This Nescafe coffee machine gift was stowed away as I didn’t want to incur waste from disposable coffee pods. Thankfully, I found reusable capsules on Shopee and have resumed using the machine to make delicious coffee with Nanyang coffee grounds I buy from the wet market, packaging-free no less!

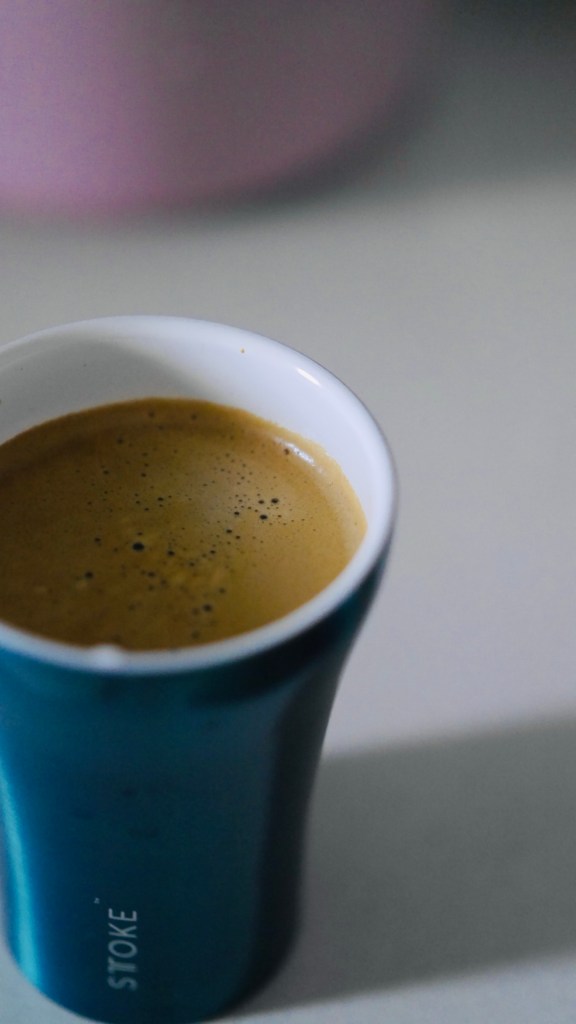
Love the layer of crema that only coffee machines can do!

3. Identify items that you should never buy

I came across a convenience shop that had a poster saying “Find something here that you never knew you needed”. I stepped in and sticked to my shopping list, of course. Temptations to buy more stuff are everywhere, online AND offline. Hence, one of Misheru’s advices to curb mindless shopping is to identify items that we never need to buy. These could be items that we already have too many at home (reusable drinking bottles?) or stuff that we simply can do without.

Here’s my list:

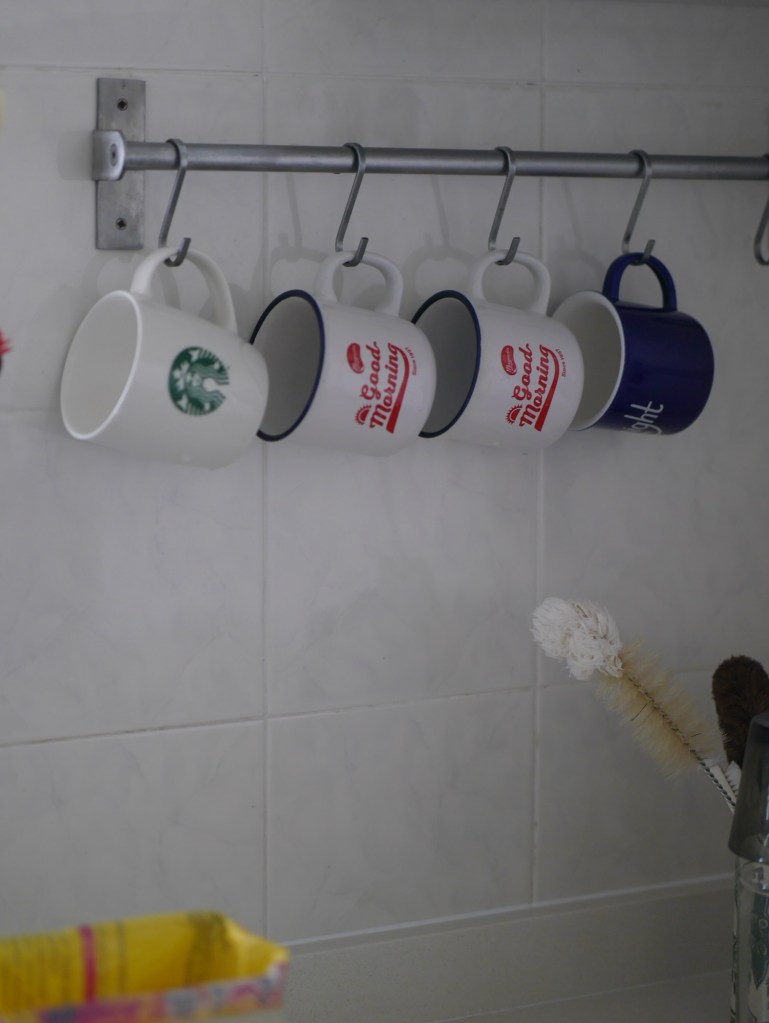
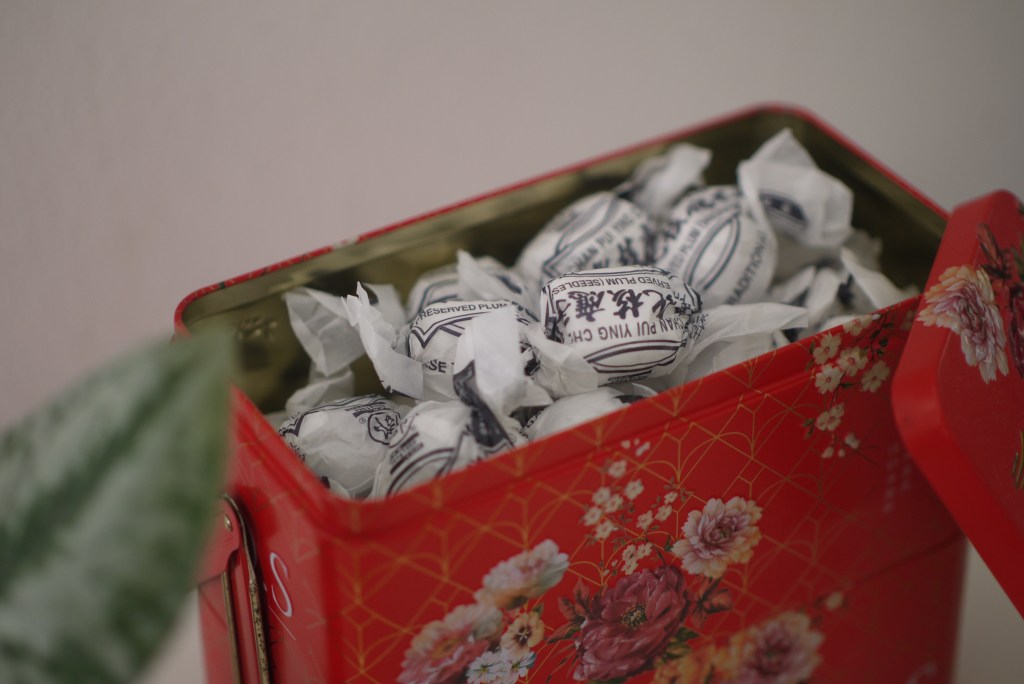
+++ Cups, mugs, glasses! I only display the ones my family uses here but I have a bigger stash for visitors. Have more than enough drinking cups at home without buying!

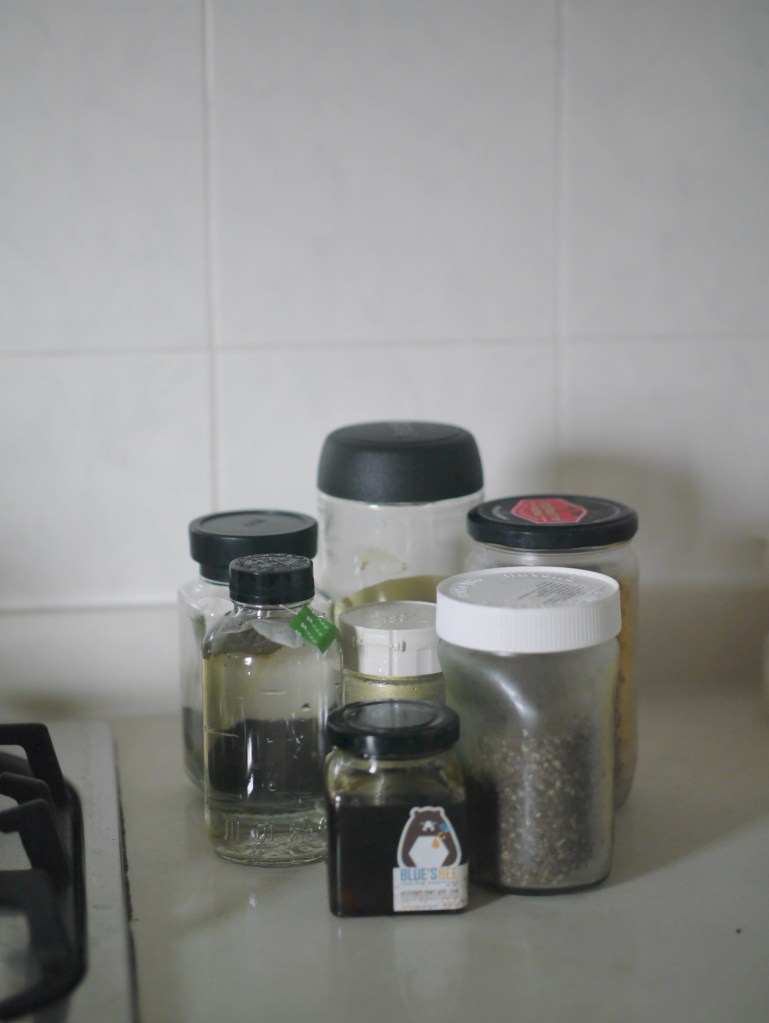
+++ Glass jars; repurposing commercial food containers already provided me with more than enough glass jars, another no-need-to-buy item!

My favourite glass containers are the ones with plastic lids as they don’t rust easily. But the metal ones are prettier. An easy trick to prevent them from rusting is to wipe dry the metal caps immediately after washing.

+++ Reusable food containers; thanks (or no thanks?) to the sustainability trend, many brands are giving out reusable containers as promotional items. I even received glass (not plastic!) food containers from friends who have too many at home!

4. Stick to having just enough

Like Misheru, I am not attracted by bulk discounts. I find them more wasteful as we end up throwing/giving away the excess that we don’t need in the first place. Misheru also highlighted how she shops just enough based on her current needs.

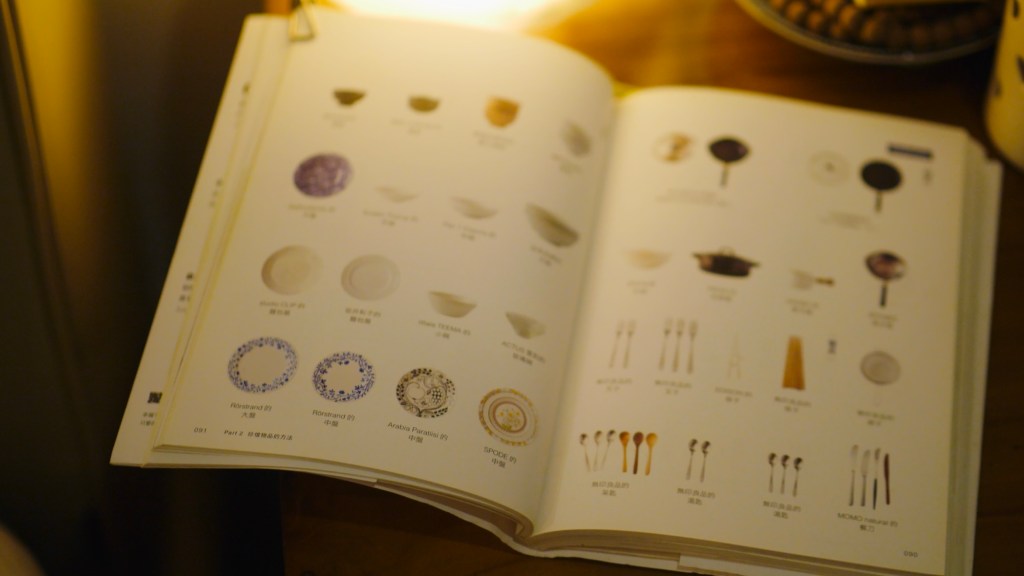
She also shared photos of the stuff she currently owns and truly needs in just eight pages. Despite my mindful consumption habits, I don’t think I can present the stuff I own in so few pages.

// What’s next?

Shopping will only become more and more convenient with more online platforms and physical shopping centres springing up. Marketing has also become more sophisticated, nudging us to buy stuff we never knew we needed.

I reread Misheru’s book once a while to remind myself to focus on enjoying the things I already have at home and not on the stuff corporations want us to buy.

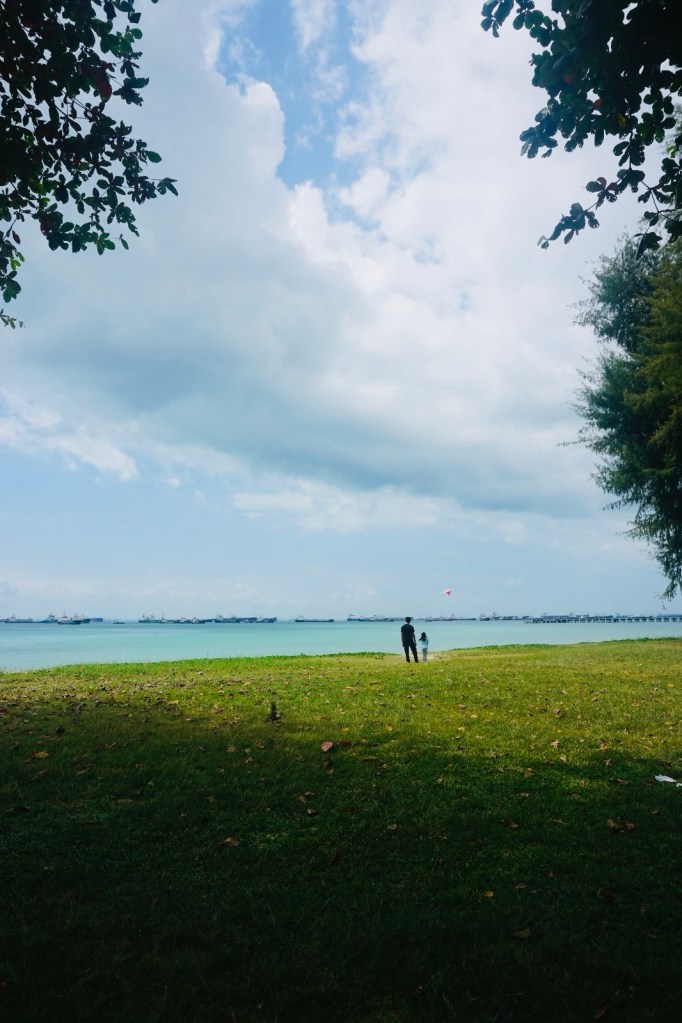
I am also trying to spend less time online and more time out and about with my loved ones, not to shopping centres, but to visit more parks, beaches, museums, and national monuments in Singapore. After all, it is the SG60 year, so expect plenty of local events to fill our calendars! I also picked up a copy of the heritage guide and map of Hougang and will start exploring this part of Singapore first.

Letting go: part 1

There is just one month left in 2024. One of my favourite ways to end each year is resetting my living space or beginning a new habit. I am doing both this year.

Recently, I picked up a book by Misheru from Japan, who also writes online here and here. In this translated book, she talks about her daily habit of removing one item from her house every day. Often, we declutter ruthlessly during annual spring cleaning, only to have the empty spaces filled up quickly with more stuff soon after. Hence, I admire Misheru’s mindful method of letting go of items consistently. I started this project in October with a simple target: to let go of 92 items by the last day of 2024. By today, 61 items have gone, 30 more to go!

The book has three parts. The first part explains the how-tos of letting go of stuff, while part two dispenses some care maintenance tips for our belongings so we can own/use them longer. The final chapter shares how this decluttering habit can also be applied to clear our minds of excessive thoughts and improve our focus on stuff that really matters.

Here are six salient points from Part One that I have found helpful during my two-month experience. See if they resonate with you, too!

1. think of the present moment when letting go of items

When deciding if an item should be kept or thrown away, the “what if I need it in the future” scenario often pops up. Misheru reminds us that we should decide based on our current needs and situation instead of making excuses to convince ourselves that the item will be used in the future.

With this in mind, I discarded some upcycled containers, some kept unused for years. Such as these metal cookie tins that I wanted to repurpose to store tea leaves, but tea leaves never happened.

2. Keep a record of the items let go

Heads-up: If you have plenty of stuff at home, do not expect a transformative change instantly to your space. After removing 61 items in two months, my house didn’t look different! For this reason, Misheru encourages keeping a journal or a photo record of the discarded items. Scrolling through the photos in this growing album, I realised the impact of this daily practice, and this visual reminder motivated me to continue the project.

When done right, we should own less, not more stuff, in the long run, much to the chagrin of companies who always want to sell us more with their never-ending sale and promotions!

3. start a Moodboard, take Before/After Photos

Another way to motivate myself to stick to the habit is to watch home interior videos or scroll through social media accounts for inspiration. Misheru also encourages taking before/after photos of your decluttered spots to see the difference made. Even better, get more encouragement by sharing the images with friends and family!

4. NEVER declutter OTHERS’ BELONGINGS

No matter how tempting, I deal with my stuff only. This is an important point to remember for keeping good vibes at home. Misheru started by decluttering her own items, but she noticed that her husband and children were also influenced by the positive outcomes of her habit.

5. cooling-off period

Some items are more challenging to discard/give away for sentimental/personal reasons. Misheru’s solution is to KIV these items but keep them visible instead of stowing them away. This will act as a constant reminder and become an eyesore. If we still don’t have a use for them after a while, maybe we’ll never use them at all.

6. START FROM A space which has LESS ITEMS of sentimental value

Begin with a room/spot where you won’t have too many sentimental items or things that are difficult to let go. Misheru’s suggested order of decluttering spots:

  1. Wallet (yes, we accumulate stuff even in our wallets!)
  2. Daily carrying bag
  3. Study/work desk
  4. Entryway
  5. Bathrooms
  6. Bookshelves
  7. Kitchen, and finally,
  8. Wardrobe.

I would add our household shelter/storeroom as the ninth and last spot! I also started the habit with my kitchen as I often clean out this area and thought it would be easier to start here. Here are some of the first few items I let go of in the past months:

//The first item to go was an old melamine plate with cracks and scratches. I thought of repurposing it for non-food use, but after years of hiding it under my kitchen sink, I don’t think I’ll ever use it.

// Mesh bag that I wanted to repurpose as a dish scrubber. Since I have not run out of kitchen scrubbers, I will let go of this mesh bag first.

// Another one of those I-think-I-have-use-for-it-someday item

// Old kitchen towel with tear holes. I have extended its lifespan long enough; too embarrassed to share how long I have been using this towel to dry my hands in the kitchen!

// I have too many repurposed glass food jars and bottles, so I let go of some as they take up too much cabinet space. I have the habit of wrapping glass items in case they break, the shards won’t hurt anyone in the waste management process.

// More glass containers wrapped/bagged differently.

// I try to reuse plastic containers at least once so they are not single-use waste. This PP5 one has been reused many times; it’s time to say goodbye.

So far, it’s been a relatively easy and smooth process, but I know it’ll be more challenging to let go of stuff when I reach my wardrobe and storeroom!

I thrifted … a camera!

I had my previous camera for almost 14 years before its SD card slot and USB port became glitchy. Reading, transferring, and importing photos became so unstable that I stopped taking pictures with it. Repairing is always my first choice to extend the lifespan of my stuff, but the manufacturer told me they no longer carry the components for my camera model. While researching for a replacement, I stumbled upon a few YouTube videos reviewing “retro” cameras and raving about the photo quality/aesthetics of those point-and-shoot cameras from the 2000s. That’s when I realised why my daughters were so happy when they found my old but still working Canon point-n-shoot digicams; it’s trendy for their generation to buy/use something from the past! And that’s how I ended up looking for a secondhand camera. I settled on a not-so-new model launched in 2013, but the seller took such great care of it that it looked brand new! At just $255, I saved quite a bit of money compared to buying a new model.

It’s been a year since I used the preloved camera, and it has worked well. The WIFI/Bluetooth photo transfer feature is a game changer, as I no longer need to wait until I return home to share the photos. I know this is now a default feature for all cameras, but not back in 2009! Here are some of my favourite recent vacation photos. I think I will be buying secondhand cameras from now on!

Simple Pleasures – CNY 2022

// hanging up leeks, my favourite edible CNY decoration-cum-food. Chinese knots and ribbon were previously decorations on a gift hamper, diverted them from the trash bin. Yay!

// placed my money planter from here into an empty tea canister, the red colour is an instant ‘huat’ effect!

// another hamper embellishment diverted from the incinerator 🙂

// never mind that this is actually a mooncake tin, repurposing it for displaying sweets and goodies that don’t require an air-tight container.

// I no longer need new outfits to usher in the new year. This habit has saved me plenty of shopping time and even more money on impulse buys, especially styles that I don’t wear beyond CNY. With proper care, I have many pieces that are still in great condition. Others just need some mending/alteration to become wearable again. Or a thorough washing, never fails to restore stuff to its former glory.

// took home a stack of excess marketing materials to add even more festive cheer to my place, beats sitting in the warehouse and turning irrelevant after the CNY.

// with limited house visits, we are spending a lot of time at home. Borrowed a few Ebooks from NLB, to be devoured over the next three days.

// counting my vegetarian journey into its 15th year, I have not run out of things to eat, still exploring new vegetarian recipes and ingredients. I discovered konjac sashimi last year but they are mostly in grey/brown colour. Found this version mimicking lobster meat that is a perfect addition to my CNY yusheng, as the vegetarian salmon slices are getting more pricey.

Fried Nian Gao With Rice Paper

I love my mum’s deep-fried nian gao with crispy batter but I have never cooked this CNY snack before. My small-batch home cooking style doesn’t justify the amount of oil required. There are pan-fried recipes that use less oil like this and this, but I got interested only after seeing this version wrapped in spring roll skin.

I want to taste more of the nian gao than the skin, the outer covering should just be crispy. I used these clear rice paper as they are thinner than spring roll skins and have a neutral taste.

Soften the rice paper with water and fold a piece of nian gao in it. Pan-fry over low heat until the bottom turns crispy.

Flip and fry the other side as well.

The rice paper is really thin as you can see the nian gao inside through the skin.

The nian gao is ready when both sides are cooked, serve immediately.

I really like the nian gao made this way; no fuss and just one frying pan to wash.

Keeping the rest of the nian gao slices in the fridge, frying more in the next few days!

How I shop meat-free at wet markets

I always think it is a big bonus to be staying near a wet market. The small business owners never fail to shower regular customers with plenty of neighbourly love. Like, they’ll show concern when you don’t turn up for weeks, and then we’ll go on to assure each other that everyone at home is alright; something we no longer take for granted since the onset of the pandemic.

I don’t plan my shopping list in great detail when I shop at the wet markets. I just have an idea how many meals I am buying ingredients for. Then, I’ll let the vegetable stall helpers recommend what to buy and cook. They would usually recommend based on what are in season or in abundance. You’ll need to exercise plenty of self-control as the stallholders tempt you with their suggestions. On this day, there were a lot of huge napa cabbages. And so, that’s how I ended up making kimchi.

I have tweaked my usual quick kimchi recipe (again) because I ran out of rice flour at home. But Maangchi has all purpose flour on this ingredient list here, so I made the switch to avoid another grocery trip. I have provided the recipe at the end of this post, but this post is really about how a vegetarian shops for her homecooked meal plans.

++ Greens ++

Due to my meat-free dietary choice, my family consumes a lot of leafy vegetables along with me. I also buy one or two hardy vegetables such as broccoli and cauliflowers as they stay fresh longer. I also ask for a handful of spring onions, cilantro and pandan leaves; these are simple ingredients that add oomph to homecooked dishes. The best part about buying from the wet markets is that almost everything comes without plastic wraps. The sellers simply wrap everything in newspapers and place them in my reusable shopping bags.

++ Mushrooms and tofu ++

Besides vegetables, mushrooms and tofu are also my must-buy grocery items. I bring my own containers to buy shiitake mushrooms and firm tofu, available in bulk sans plastic. There’s no pressure to buy in huge volume, no buy-1-get-1-free offers here; I simply purchase the amount of food I need and finish up before they turn bad.

++ noodles ++

It’s boring to eat rice all the time. I usually keep some packets of noodles and rice cakes at home as they make very useful pantry items for quick and easy one-pot meals. These are not plastic-free, but I am not pursuing a perfectly zero-waste kitchen either. The impact on overall waste reduction is greater when everyone makes a small, conscious effort to cut down on trash. Even if it means an occasional zero waste fail, it’s still better than no efforts at all.

++ More Mushrooms and root vege ++

More food packed in plastic, mostly fresh mushrooms. Today, I got oyster and shimeji mushrooms; these provide great flavour to stir fries. Eryngii, also known as king trumpet or king oyster mushroom provides an amazing scallop-like texture; I love adding them to all my Buddha bowl recipes.

With most of of food imported, packaging is a practical solution that keeps produce from ending up as waste due to spoilages. Besides opting for non-excessively packaged items and choosing local produce whenever possible, I also decline additional plastic bags and carriers. And then, I’ll always make sure the food purchased ends up in our tummies and not in the landfills, because food waste is still the dumbest environmental problem. That’s why I only buy loose carrots, onions and potatoes, not those in big bags.

++ Eggs and tempeh ++

No meat, no problem. Eggs and tempeh are great protein-rich meat alternatives. Also come with minimal plastic packaging when you buy these from wet markets. The egg seller even allows you to return the carton for reuse!

++ Storing & Organising ++

Potatoes: Depending on my meal plans, I buy just enough potatoes and use them up before they sprout. Here are my storing tips that I have been using to keep potatoes fresh up to 1.5 weeks:
1. Place them in a mesh bag for ventilation
2. Store in dark, cool place; I keep them in the darkest corner on my countertop
3. Do not wash the potatoes until you are ready to use them
4. Do not keep them in the fridge
5. Keep them away from onions and bananas

Onions and Garlic: I keep these in a basket on the countertop

Eggs: They last longer when store in fridge, but I try to use them up in two weeks.

Spring Onions & Cilantro: I store these inside airtight boxes so that they stay fresh; they don’t turn mushy even after one week. Carrots too.

Vegetables and fruit: These go into the crisper drawer, but not before wrapping them in newspapers or beeswax wrap.

After organising my kitchen, I start to make quick vegan kimchi with the following recipe adapted from Maangchi’s recipe here.


Quick VEGA napa cabbage kimchi

1 large napa cabbage
Salt

For kimchi porridge 
2 cups water
4 teaspoons all purpose flour
3 teaspoons sugar
4 tablespoons Korean hot pepper flakes*
3 tablespoons soy sauce
6 cloves garlic
1 teaspoon ginger, grated
1/2 onion, chopped
4 stalks spring onion, chopped
1 carrot, julienned

Cut napa cabbage length wise into 4 or 6 parts, depending on your preference and the size of your cabbage.

Rub salt between the leaves, add water and let it sit for 2 hours. I place a cast iron pot to press the cabbage down, making sure it stays submerged in the salted water.

Make kimchi porridge while waiting for the cabbage to be ready.

In a saucepan, add water and all purpose flour, stir with a spoon to mix well.

Cook over medium heat, stirring continuously to make sure the mixture cooked into a smooth paste without burning at the base. Once a thick paste is formed, add sugar, continue stirring until all the sugar grains disappear. Turn off heat and let the paste cool down.

When the paste has completely cooled, add garlic, grated ginger and chopped onions.

Blend with an immersion blender.

Add Korean chili pepper flakes, I use 4 tablespoons, add more if you prefer spicy kimchi.

To finish the porridge making, add soy sauce, julienned carrots and chopped spring onions, stir to mix well.

We are now ready to make kimchi!

Rinse the cabbage leaves in clean water to remove all the salt.

Rub kimchi porridge evenly on every leaf, mix well.

This can be served right away as fresh kimchi.

Or, let it ferment overnight at room temperature.

The cabbage will continue to release liquid during fermentation. Next day, I transfer the kimchi into glass bottles and keep them inside the fridge to let it continue to ferment slowly.

One large napa cabbage yields four large-680ml bottles of prebiotic-rich kimchi.

Besides eating the kimchi straight from the jar, I also add them to stews/ stir-fries/ fried rice.

Need more reasons to make kimchi at home? Here are more meat-free recipes that make good use of the good stuff!
Kimchi Jjigae
Quick Kimchi Pancakes
Kimchi Fried Rice
Kimchi Bibimbap
Mushroom and Kimchi Dumplings
Tofu and Kimchi Dumplings

Carrot Cinnamon Raisin Buns

Carrot Cinnamon Raisin Buns // Mono + Co

These are basically cinnamon buns with the sugary fillings and glaze removed.  I thought it was a good idea to add mashed carrots into the dough since they go so well with cinnamon and raisins in my carrot cakes.

Carrot Cinnamon Raisin Buns // Mono + Co

Because I did not spread butter and sugar on the surface of the dough, there were no pretty swirls on my cinnamon buns. If you prefer to see that on your rolls, brush a generous layer of melted butter, followed by another layer of cinnamon grounds, brown sugar and raisins before rolling the dough up.  The layer of fat will keep the dough from sealing up during slicing and proofing.

Carrot Cinnamon Raisin Buns // Mono + Co

I baked these buns in my 9-inch/ 23cm clear glass pot instead of my round tin as I wanted to utilize the pot more.  It also serves as a great storage container for the buns since it comes with a heavy glass lid.

Carrot Cinnamon Raisin Buns // Mono + Co Carrot Cinnamon Raisin Buns // Mono + Co Carrot Cinnamon Raisin Buns // Mono + Co

I feel great seeing carrots in my breakfast rolls!


Carrot Cinnamon Raisin Buns

235g plain flour
1 teaspoon instant dry yeast
1/4 teaspoon sea salt
3 tablespoons brown sugar
2 tablespoons cinnamon grounds
1 small egg, beaten
95g carrots, steamed + mashed
25g water
25g cold butter, cubed
50g raisins **

** Soak raisins in a bowl of warm water for 30 minutes.  Drain and gently squeeze dry to remove excess liquid before use.

In a mixer bowl, combine all the dry ingredients together (plain flour, yeast, sea salt, brown sugar, cinnamon grounds) with a hand whisk.  Then add beaten egg, cooled mashed carrots and water.  Turn on the mixer to knead with a dough hook.  Once a dough ball is formed, stop the mixer and let the dough rest for 15 minutes.

Start the mixer again to knead for 1 minute before adding cubed butter one by one, and knead till the dough reach window pane stage.  Stop mixer and leave the dough to bulk rise at room temperature for 60 minutes.

After the dough has risen, punch down the dough to deflate and transfer to a clean and lightly floured work top.  Sprinkle worktop and palms with flour if the dough is too sticky to handle.

Roll out the dough to a rectangle sheet, spread raisins on the surface.  Roll up the dough from the longer edge and pinch to seal.  Slice the roll into 8 pieces and arrange them in a 9-inch pan.  Leave this aside to proof for another 60 minutes, covered.

Preheat oven to 170C, and bake the bread for 25-35 minutes.

When done, remove bread from baking tin immediately and place on a rack to cool completely.

Save

Save

Save

Save

Tidy Tuesdays : Cord Mess

Taming Cord Mess // Mono+Co

Cords, cables, wires.  Where do I start and where do they end?  I am never the best person to decide power point locations around the house.  I will just hide them away for aesthetics purpose instead of considering their locations from a necessity point of view.

I wish every appliance will be wireless someday.  If that is not possible, then that device will come with its own retractable cord, like those found in the vacuum cleaners.  Extend when I use them, retract and hide the wires when they are being stored away.  Can’t help but see coils of cords around the house as a potential landing area for dust and dirt.   Thankfully, my electrical kettle comes with a design that allows the dangling cord to be coiled and hidden below the base.  Grease and dust? Yikes, you get the idea.

Right now, I am using 2 solutions to organize cords that are way too long.

Taming Cord Mess // Mono+Co

Make knots : For slim and long ones like charging cables, which I want them at a fixed length, I shorten them by making a wobble, there are plenty of Youtube guides online, just search “wobble”.

This monkey knot looks stylish for cord management too, but I have yet to use it.

Taming Cord Mess // Mono+Co

Cable Reel : For other devices that I need some flexibility in the cord’s length, I use this cable reel (photo above) from Daiso that allows me to coil up lengthy cords in a white subtle enclosure.  It comes in 2 models/sizes, but I find the large one easier to use as it coils up longer cords like those of table lamps (they are the most generous when it comes to cord lengths!) and standing/table fans (the adjustable reel allows me to alter the length of the cable depending on which part of the house I want the fan to cool down.)

I have 5 of this cable reel at various parts of my house now, they are a breeze to use and the best part is they instantly erase sight of cluttered cable mess tagging behind these appliances :

Taming Cord Mess // Mono+Co Taming Cord Mess // Mono+Co Taming Cord Mess // Mono+Co Taming Cord Mess // Mono+Co

Save

Save

Save

Save

Save

Housekeeping : Removing Rust Stain On Glass

Housekeeping : Removing Rust Stain On Glass // Mono+Co

Glass is one of my favorite material.  Plastic is on the other end of the spectrum.  Where possible, I will choose a glass container over Tupperware.  They look prettier and last really long if you don’t have butter fingers.  They are also really fairly easy to clean; most of the glass items in my house still look brand new.

All in mint condition, until I got this rust looking stain on the bathroom shelf.  Seems like someone left a wet metal cap overnight on it and the unsightly ring rust stain formed right in the middle of the shelf, a very eye catching spot.  When I run my finger over the stain, I couldn’t feel anything, just smooth glass, as if the rust color has be absorbed.

I have tried baking soda, in vain, hoping that it will gently scrub off the stain.  Seems like stains on glass are a lot difficult to remove than I thought.  Then I recall this “rust dissolving jelly”from Daiso sitting in the tool box.

Housekeeping : Removing Rust Stain On Glass // Mono+CoHousekeeping : Removing Rust Stain On Glass // Mono+Co

After leaving the jelly for a few minutes, the stain came off easily when I rubbed it off with cotton bud.

Gosh, lucky me,  no more eye sore on the shelf now.  Shelf is looking brand new again.