Natural Starter Potato Boule

Natural Starter Potato Boule // Mono + Co Natural Starter Potato Boule // Mono + Co Natural Starter Potato Boule // Mono + Co

No recipe here, as I am still trying to figure out the best timing for every step in baking a bread with a natural starter:  what time to start, when is the starter most active, how long to wait, and when to bake.  They say every starter is unique, so watch the dough and judge with your eyes, see how the starter rises and falls, how the dough doubles in size, and not be fixated by the clock or recipe instructions.

I tried a few times to “bake by feel” and began to feel confident to use the natural starter for my root vegetable bread recipes.  A few tweaks are still required before I get the amount just right for my pullman loaf.  Until then,  I will just shape them into simple boules if they rise too much or too little to fit into my pan.  This one happens to use 100g of starter, 350g of bread flour and 100g of mashed potatoes, and took me about 15 hours from start to finish.

Save

A Dough for 1 Wholemeal Taro Loaf + 4 Buns

Wholemeal Taro Loaf // Mono + Co Wholemeal Taro Loaf // Mono + Co Wholemeal Taro Loaf // Mono + Co Wholemeal Taro Loaf // Mono + Co Wholemeal Taro Loaf // Mono + Co Wholemeal Taro Loaf // Mono + Co

Yes! Another taro loaf recipe.  But I added 100 gram more flour to have some excess dough for 4 buns, 50g of dough for each bun to be exact.  I also filled the buns with cream cheese, with this soft sweet bun recipe, any filling will go with it, just add your favorite.

Wholemeal Taro Loaf // Mono + CoWholemeal Taro Loaf // Mono + Co

I can make three loaves of bread with half a taro bought from the market.  Even after adding an egg, and a generous slab of butter, the bread appears white, not yellowish.  This is what I like about adding taro to Asian style bread recipes.

If you like to bake a loaf for next day’s breakfast and extra four buns for afternoon tea, here’s the recipe:


1 loaf + 4 buns recipe

250g bread flour
50g wholemeal flour
1/4 teaspoon sea salt
2 tablespoons raw sugar
1/2 tablespoon instant yeast
100g steamed taro, mashed
1 egg, 70g with shell
30g water
35g cold butter, cubed

In a mixer bowl, mix well the dry ingredients: bread flour, wholemeal flour, yeast, sea salt, and raw sugar with a hand whisk.  Add cooled mashed taro, egg, and water to the dry ingredients, and knead with a dough hook attachment on the lowest speed (KA 1) until the ingredients come into a ball.  Let the dough stand for 15 minutes, cover the bowl with a clean tea towel if it’s windy in your kitchen.

Start the mixer running on its lowest speed again, and knead the dough for 1 minute, before adding cubed butter, one by one.  Knead until the dough reaches window pane stage, this is when the dough becomes very smooth and elastic, and starts to pull away from the sides of the bowl.  Remove the bowl from mixer, cover with tea towel, and bulk rise for 1 hour.

After an hour, the dough should rise to double its volume, punch it down to release the gas, and transfer to a clean work top.  Flatten the dough to push out gas trapped inside the dough, either by hand or a rolling pin.  Shape the dough and place it in a greased bread tin, seam side facing downwards.  Let this sit in a draft free place to rise for another 50-60 minutes.

Take out 4 x 50g of dough, and shape them into balls on a baking tray.

Shape the remaining dough into a loaf and place it in a greased bread tin, seam side facing downwards.  Let this sit in a draft free place to rise for another 50-60 minutes.  I divided the remaining dough into 3 equal parts and shape them swiss rolls style.

Let bun dough proof for 45 minutes, bake for 25min at 170C.

For Pullman loaf, proof for 50-60 minutes, bake in a preheated oven at 170C for 30 minutes.  Remove the bread from the pan immediately after baking, and let it cool on a rack completely before slicing or serving.

Store in an airtight container if not consumed immediately, to keep the loaf soft and the crumbs from drying out.

Save

Save

Soft Taro Milk Loaf

Soft Taro Milk Loaf // Mono + Co Soft Taro Milk Loaf // Mono + Co Soft Taro Milk Loaf // Mono + Co

The first bread loaf that I bake after almost a month long hiatus is this Taro Milk Loaf, exactly the same as this recipe I baked earlier, with milk instead of plain water.  The bread is now good enough to be eaten on its own since I have added a whole egg, butter, and milk as ingredients.  Talk about convenient food!


Soft Taro Milk Loaf

200g bread flour
1/2 tablespoon instant dry yeast
1/4 teaspoon sea salt
2 tablespoons organic raw sugar
100g steamed taro, mashed
1 egg **
55g fresh milk
30g cold unsalted butter, cubed

** I ran out of large eggs and used a 55g egg for this bake.  If a larger egg is used, I will add just 30g milk, and top up if necessary, spoon by spoon, until the ingredients come into a ball.  Otherwise, the dough may end up too wet to be handled or shaped.

In a mixer bowl, mix well the dry ingredients: bread flour, yeast, sea salt, and raw sugar with a hand whisk.  Add cooled mashed taro, egg, and half of the fresh milk to the dry ingredients, and knead with a dough hook attachment on the lowest speed (KA 1).  Slowly add in the remaining of the fresh milk, with the mixer running, until the ingredients come into a ball.  Let the dough stand for 15 minutes, cover the bowl with a clean tea towel if your kitchen is windy.

Start the mixer running on its lowest speed again, and knead the dough for 1 minute, before adding cubed butter, one by one.  Knead until the dough reaches window pane stage, this is when the dough becomes very smooth and elastic, and starts to pull away from the sides of the bowl.  Remove the bowl from mixer, cover with tea towel, and bulk rise for 1 hour.

After an hour, the dough should rise to double its volume, punch it down to release the gas, and transfer to a clean work top.  Flatten the dough to push out gas trapped inside the dough, either by hand or a rolling pin.  Shape the dough and place it in a greased bread tin, seam side facing downwards.  Let this sit in a draft free place to rise for another 50-60 minutes.

Bake in a preheated oven at 170C for 30 minutes.  Remove the bread from the pan immediately after baking, and let it cool on a rack completely before slicing or serving.

Store in an airtight container if not consumed immediately, to keep the loaf soft and the crumbs from drying out.

Save

Save

Save

Soft Taro White Loaf

Soft Taro White Bread // Mono + Co

I like adding taro to bread recipes as it gives the bread a milky white shade.  I add quite a bit of butter (20-40g depending) to my bread doughs, so the end bake usually ends up with a slight tinge of yellow.  But not bread with taro added.  The texture will also appear more cottony soft because of its white crumbs.  The bread is definitely soft, of course, like all other bread baked with root vegetables added.  I had to cool the bread on its side which has the largest surface area, as the bread was collapsing under its own weight.  By the time it completely cools down, I realised that rack marks have been made on its side!

Soft Taro White Bread // Mono + Co

To buy a whole taro for my small family will be too much.  Only a 100g is needed for this recipe, so I usually ask the grocer to sell me a third or half of a big taro, that’s why I love buying my supplies from the wet markets, everything is negotiable! I will then steam the whole thing, use 100g of it to bake bread, chop the remaining into large chunks so that they fit into my  airtight container and keep in the fridge, to be used up within a week.

Soft Taro White Bread // Mono + Co Soft Taro White Bread // Mono + Co

I adapted from this taro bun recipe that is baked in an 8-inch round pan.  My Pullman tin is smaller, so I used 200g of bread flour instead of 230g.


Soft Taro White Loaf

200g bread flour
1/2 tablespoon instant dry yeast
1/4 teaspoon sea salt
2 tablespoons raw sugar
100g steamed taro, mashed
1 large egg **
30g water
30g cold butter, cubed

** I use a large egg weighing 70g.

In mixer bowl, combine bread flour, yeast, salt, and sugar well with a hand whisk.  After the dry ingredients are mixed, add cooled mashed taro, beaten egg and half of the water.  Start the mixer and knead on its lowest speed (KA 1) .  If the ingredients do not come together into a ball, slowly add more water, spoon by spoon, once a ball dough starts to form, stop.  Let the dough sit for 15 minutes.  If your kitchen is windy, cover the bowl with a clean tea towel.

After 15 minutes, start the mixer again and knead for 1 minute before adding cubed butter, one by one.  Knead this until the dough reaches window pane stage; when the dough becomes very smooth and elastic.  Remove bowl from mixer and bulk rise this for 1 hour.  It will rise to double its original volume.

Punch the dough down and transfer it to a clean work top.  Flatten dough with a rolling pin to push out gas inside the dough.  Shape the loaf and place in greased bread tin, seams side facing downwards.  Let it rise in a draft-free place for 50-60 mins.

Bake in a preheated oven at 170C for 30 minutes.  Once done, invert pan carefully and remove bread from the pan and let it cool completely on a rack.

Store in an airtight container.

Save

Save

Save

Save

Wholemeal Potato Bread

Wholemeal Potato Bread // Mono+Co

Simple half wholemeal half white flour recipe  to make when white bread is too plain and fruits or nuts are not available.

My other half is crazy over a store-bought sprouted grains bread that is just as pillowy soft as the white ones.  The potato bread I baked is just as soft, but not as sweet as the commercial ones.  Thinking of tweaking the next bake with honey or date syrup to sweeten it without adding more sugar.

Wholemeal Potato Bread // Mono+Co Wholemeal Potato Bread // Mono+Co Wholemeal Potato Bread // Mono+Co Wholemeal Potato Bread // Mono+Co


Wholemeal Potato Bread Loaf

100g bread flour
100g wholemeal flour
1/2 tablespoon (3g) instant yeast
1/4 teaspoon sea salt
2 tablespoon raw sugar
1 large egg
105g mashed potato
30g water
30g cold unsalted butter, cubed

In a mixer bowl, place bread flour, wholemeal flour, instant yeast, sea salt and raw sugar, and mix well with a hand whisk.  Next, add beaten egg, mashed potatoes, and water, attach the bowl and dough hook to the mixer and start kneading at the lowest speed (KA 1) till all the ingredients form a ball.  Stop the mixer and leave this aside for 15 minutes.

Turn the mixer to speed 1 again, and knead for 1 minute, before adding butter cubes into the bowl one by one to be combined with the dough.  Keep knead till dough reaches window pane stage, when it is smooth and elastic.  Remove bowl from mixer and let the dough rise in a draft-free place for 1 hour.

The dough should rise to double its volume.  Punch the dough down, and transfer to a clean work top.  Shape the loaf and place in greased bread tin, seams side facing downwards.  Let it rise in a draft free place for 50-60 mins.

Bake in a preheated oven at 170C for 30 minutes.  Remove bread from tin immediately when baking is done, and let it cool completely on a rack before slicing.

If not consume immediately, store in an air-tight container.

Save

Save

Save

Save

Black N White Bread Loaf

Black N White Potato Bread Loaf // Mono+Co Black N White Potato Bread Loaf // Mono+Co

I haven’t forgotten about the bamboo charcoal powder.  It is sitting on the table next to my hot water flask, creating an eyesore, just to remind me to use it.  I almost wanted to put a tablespoon of it into my banana smoothie after stumbling upon this idea here.  Then I realized bamboo charcoal might not be activated charcoal.  I will only do this on the last day of its expiry out of desperation if there is still any left.

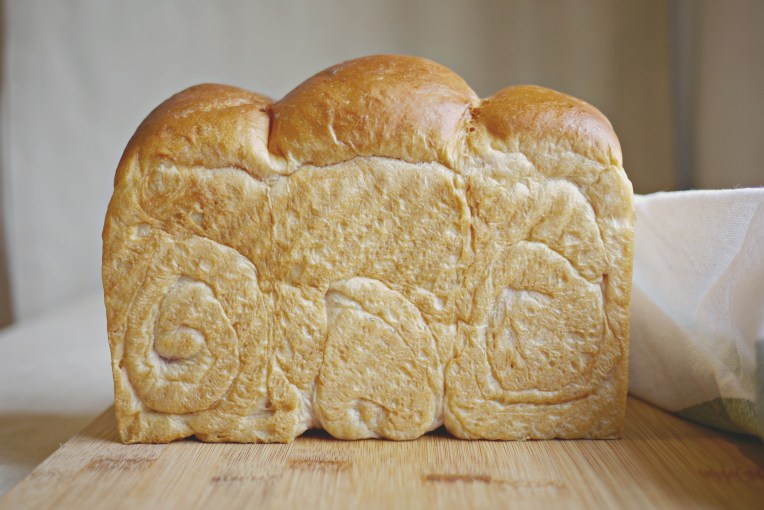
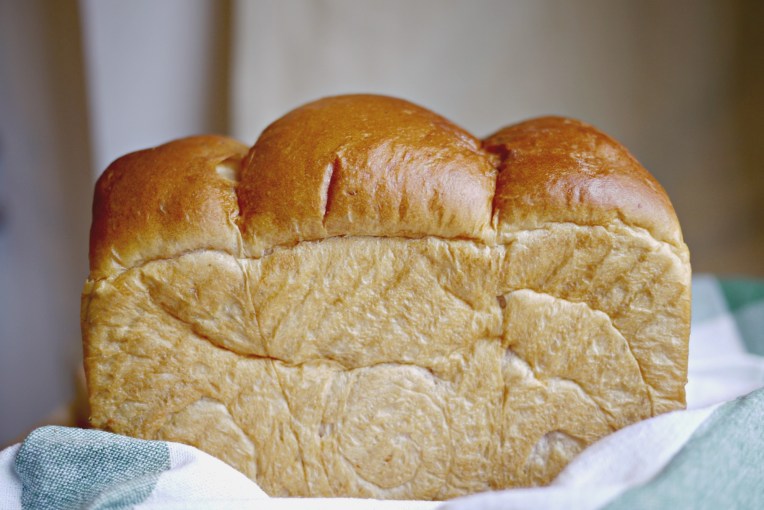
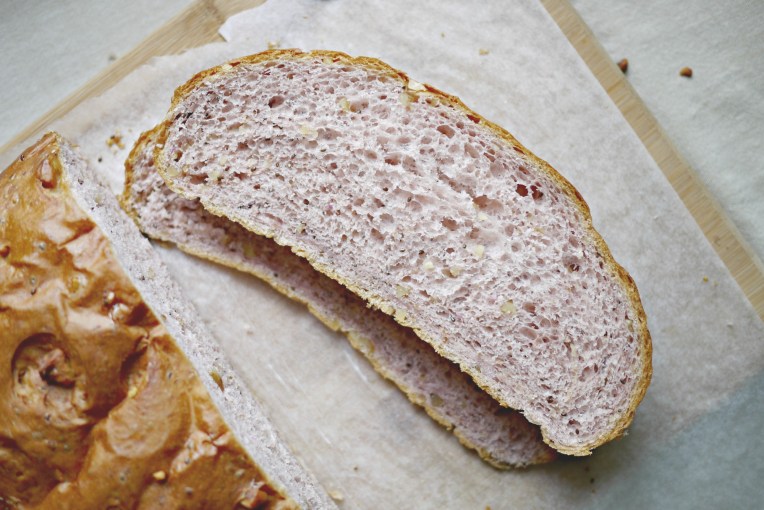
To do something different this time, I baked a 2 color bread by adding the charcoal powder to half of the dough, that’s why you don’t see an all black loaf here.

Black N White Potato Bread Loaf // Mono+Co

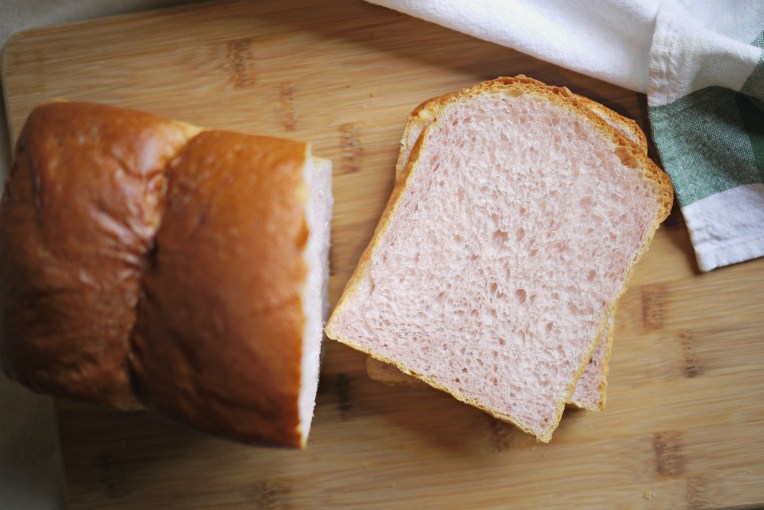
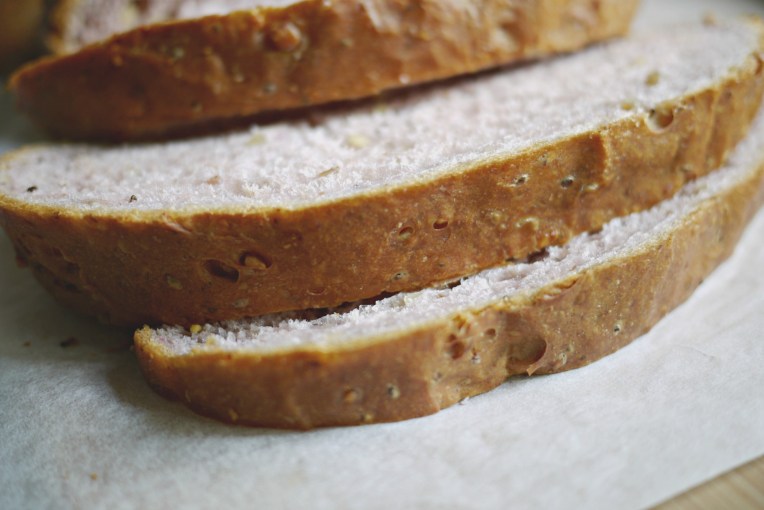
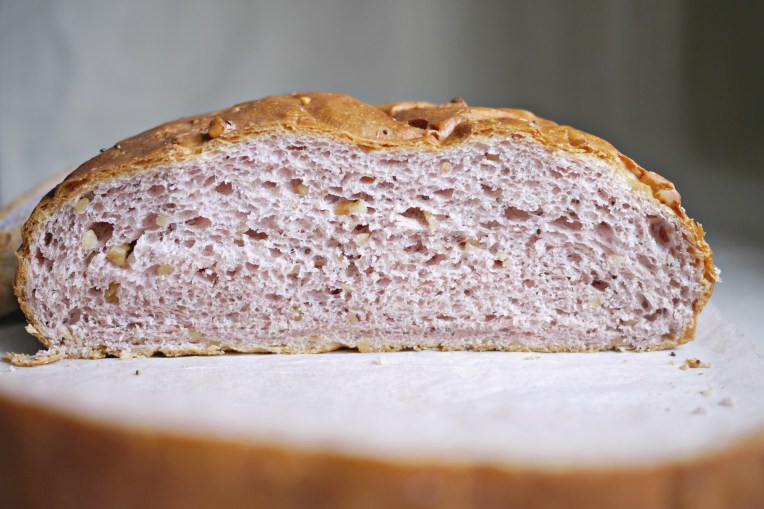
I divided the dough into 4 portions and layered them in alternating colors, here’s how the loaf look after slicing.  Pretty huh?

Black N White Potato Bread Loaf // Mono+Co

I also did something different with the potatoes, I steamed them instead of boiling it in water.  The potatoes were not overly wet compared to the boiling method but surprisingly, I added less water.

As a general rule to adding water to bread dough, never pour the water level stated in the recipes all at once (yes, including mine.)  In fact, the water required vary slightly with each occasion I bake. This difference could due to the water content of the potatoes, the brand of flour, or even the size of the egg.  I’ll even blame the weather!  Too hot, too cold, too wet …..

Therefore, always pour half the liquid amount stated first, then with the mixer running, add the balance bit by bit, giving the ingredients a few moment in between to absorb the water properly. Only if the dough doesn’t gather into one ball, then add a bit more liquid.  Once a dough ball is formed, stop adding.

Black N White Potato Bread Loaf // Mono+Co Black N White Potato Bread Loaf // Mono+Co Black N White Potato Bread Loaf // Mono+Co

The texture of the bread with steamed potatoes remains soft, as with other bread loaves that I have been baking with root vegetables.

Two more things to note.  Firstly, store homemade bread in an airtight container if you are not finishing it immediately.  Otherwise, the bread will harden.  I noticed a layer of crust forming on my sliced bread after leaving them overnight on the counter in a paper bag.  Not that nice, as I am the kind who like to sink my teeth into pillowy bread.  If that sort of thing unfortunately happened, simply heat them up in a toaster for a few minutes; warm toast with butter is my next favorite way to eat bread.  And secondly, consume them within 2 days, or else keep in the freezer.  I realize that homemade bread do not keep well, especially recipes with potatoes, maybe due to it’s higher moisture content.  And if the bread comes with natural colorings added, mold might not be easily spotted on stale bread.


Black N White Bread Loaf

200g bread flour
1/2 tablespoon instant yeast, about 3g
2 tablespoon raw sugar
1/4 teaspoon sea salt
100g potato, steamed + mashed
1 large egg
20-30g water
30g cold unsalted butter
1/4 teaspoon bamboo charcoal powder

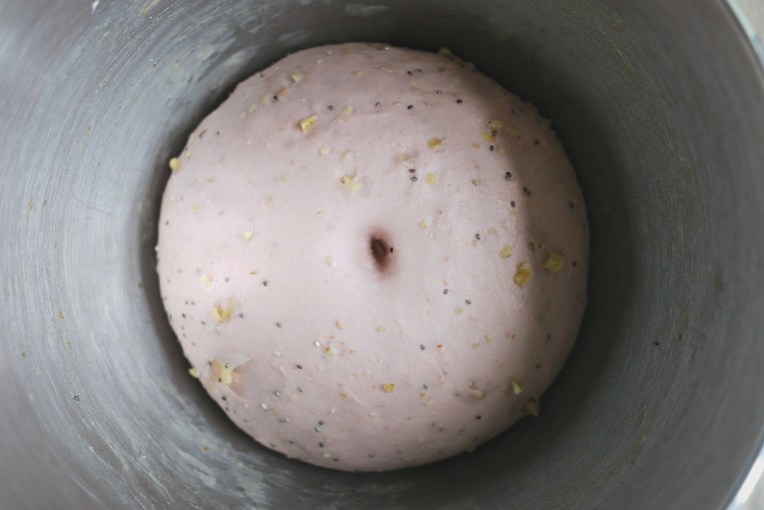
In a mixer bowl, combine bread flour, yeast, raw sugar and sea salt with a hand whisk.  Add mashed potatoes, beaten egg, half the amount of water and start the mixer to knead with a dough hook, at its lowest speed.  Add remaining water in a slow trickle, stop once the ingredients come into a ball.  Leave this aside for 15 minutes.

Turn the mixer on again to run for 1 minute, still on its lowest speed, before adding cubed butter one by one into the bowl with the mixer running.  Knead this until window pane stage.  Remove dough from bowl and divide it into two equal portions.  Return one dough back into the mixer and knead bamboo charcoal powder into the dough.  Place doughs in separate bowls and bulk rise for 1 hour.

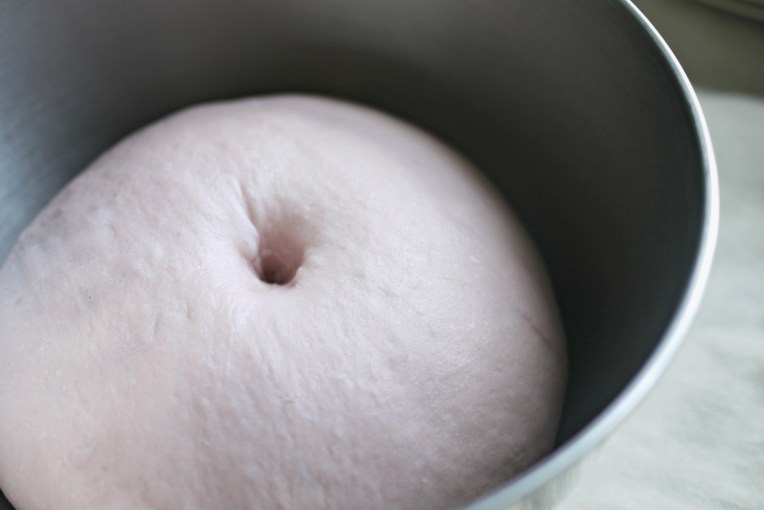
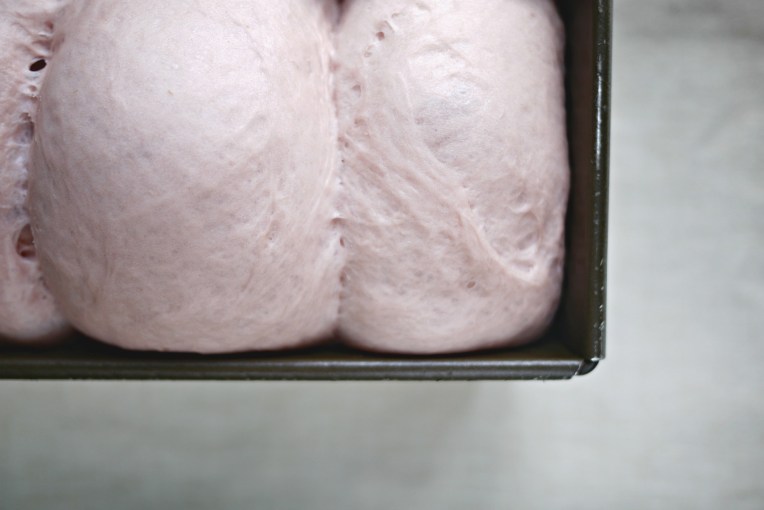
Both doughs would rise to double their volume, punch down to deflate and transfer to a clean work top.  Slightly flour the surface if the doughs are too sticky to handle.

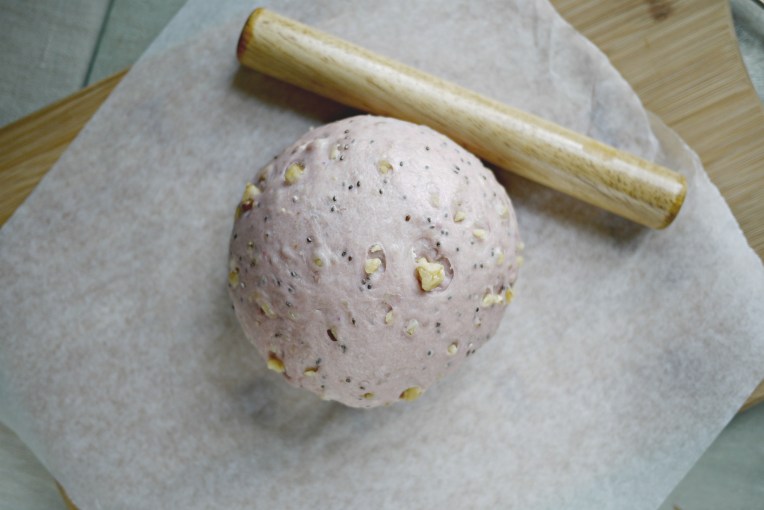
Divide each color dough into 2 balls again, so you end up with 2 plain balls and 2 charcoal balls .  With a rolling pin, flatten each ball into oval shape dough, making sure they are about same size.  To assemble, place the 4 flattened doughs on top of each other, in alternate colours.

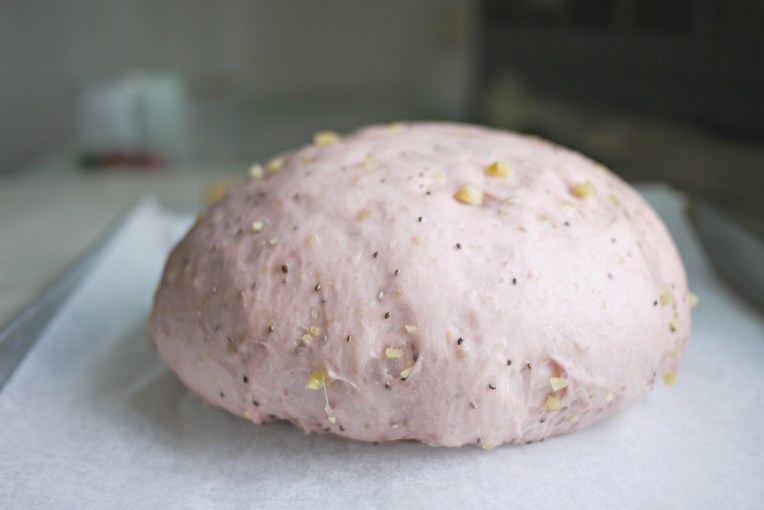
With palms, gently pressing all the layers together, and roll it up tightly from the long end so that you end up with a football shape dough.  Place it in a bread tin, proof this for 50-60 minutes.

Once the dough has risen higher than the bake tin, bake in a preheated oven for 30 minutes at 170C.  Mist the top slightly before placing it in the oven.

When done, remove the bread immediately from the tin and let it cool completely on a rack before slicing.

Save

Save

Save

Save

Save

Save

Save

Save

Save

Save

Save

Save

Fluffy Soft Taro Buns

Fluffy Taro Buns // Mono+Co Fluffy Taro Buns // Mono+Co Fluffy Taro Buns // Mono+Co Fluffy Taro Buns // Mono+Co

I am still a novice when it comes to fancy bread shaping.  But I am learning.

Most of the time, I decide the shape of my bread while the dough is going through its bulk rise, not before I start gathering ingredients to bake.  Having said that, there were occasions when I switched lanes at the very last minute.  It helps that bread recipes are really versatile in terms of shaping and baking.  Like today’s post.  The bread was meant to be baked into a loaf, I changed pans to bake them into small buns instead.  On a separate day, I might shape them into bagels and bake them on a tray.  Or, divide the dough into 3 portions, and bake a plaited loaf.  The possibilities are endless, as long as the recipe produces soft buns that I like.

The basic ingredients and method that I have been playing around with are pretty similar.  To the purists, bread should be no more than a coagulation of flour, water, and yeast.  I added more because I will be bored with eating the same thing every day.  Same reason for shaping them differently.  With a little bit of prompting from my grocer (taro was highly recommended that day!) and some creativity in shaping the bread, I can’t wait to explore more on bread shaping.


Fluffy Soft Taro Buns

230g bread flour
1/2 tablespoon instant dry yeast
1/4 teaspoon sea salt
2 tablespoon raw sugar
100g steamed taro
1 large egg **
30-40g water
37g cold butter
optional toppings: black,white sesame seeds

** I use a large egg weighing 70g

In mixer bowl, combine bread flour, yeast, salt, and sugar well with a hand whisk.  After the dry ingredients are mixed, add cooled mashed taro, beaten egg and half of the water.  Start the mixer and knead on its lowest speed (KA 1) .  If the ingredients do not come together into a ball, slowly add more water, tablespoon by tablespoon, once a rough ball dough starts to form, stop. Let the dough sit for 15 minutes.  If your kitchen is windy, cover the bowl with a clean tea towel.

After 15 minutes, start the mixer again and knead for 1 minute before adding cubed butter, one by one.  Knead this until the dough reaches window pane stage; when the dough becomes very smooth and elastic.  Remove bowl from mixer and bulk rise this for 1 hour.  It will rise to double its original volume.

Punch the dough down and transfer it to a clean work top.  Divide the dough into 6 equal portions and shape each one of them roughly into a ball, let them rest for 15 minutes, covered.

After 15 minutes, the doughs would expand slightly.  With a rolling pin, flatten each dough to push out the gas and then shape them into tight balls.  Place them in a well greased 8″ tube pan and proof for 50-60 minutes.  The doughs would expand to reach the top of the pan, and form triangular shaped buns.  Spray a light mist of water on top, and sprinkle black/white sesame seeds on each dough.

Bake in a preheated oven at 160C for 25 minutes.  Once done, invert pan to carefully remove bread from the pan and let it cool completely on a rack.

Save

Save

Save

Save

Save

Save

Save

Save

Save

Save

Purple Sweet Potato Bread Loaf #3

Soft Purple Sweet Potato Bread Loaf // Mono+CoSoft Purple Sweet Potato Bread Loaf // Mono+Co

To answer my own question from here, yes, sugar made a different in height.  I also added one egg instead of half to save the trouble of finding another recipe to use the remaining egg.  So maybe it helped too?

Nothing else is new here, so I simply copy and paste the recipe from loaf #2 post, and added a series of photos to demonstrate how I shape the loaf.  Hope this helps.

Soft Purple Sweet Potato Bread Loaf // Mono+CoSoft Purple Sweet Potato Bread Loaf // Mono+CoSoft Purple Sweet Potato Bread Loaf // Mono+CoSoft Purple Sweet Potato Bread Loaf // Mono+Co Soft Purple Sweet Potato Bread Loaf // Mono+Co    Soft Purple Sweet Potato Bread Loaf // Mono+Co


Purple Sweet Potato Bread Loaf

220g bread flour
1/2 tablespoon instant dry yeast
1/4 sea salt
2 tablespoon raw sugar
100g purple sweet potato, steamed + mashed
1 large egg **
40g water
40g cold unsalted butter, cubed

** refers to large egg that weighs at least 70g including the shell.

Combine flour, yeast, sugar and salt in a mixer bowl and stir with a hand whisk to mix these dry ingredients well.  Add sweet potatoes, beaten egg and water, turn the mixer on lowest speed (KA1) with a dough hook, and knead until the ingredients come into a ball.  Stop the mixer and let this dough stand for 15 minutes to allow liquid to be absorbed better by the flour, I find that kneading to reach window pane stage later will be easier with this additional dough resting step.

After 15 minutes, turn the mixer on again to knead the dough for 1 minute, then slowly add cubed butter one by one, and knead till dough reaches window pane stage.  Remove bowl from mixer, and let it proof for 60 minutes, covered and placed in a draft free place.

The dough would have expanded to twice its size.  To test if it is ready to be shaped, poke a hole in the center with a floured finger, the dent should not bounce back if the bulk rise is completed.  Once the dough is ready, punch down the dough to deflate it, and transfer it to a clean work top.

Soft Purple Sweet Potato Bread Loaf // Mono+Co

With a rolling pin, flatten the dough to push out gas trapped inside the dough.  Divide the dough into 3 equal portions.  Shape each ball as follow and place them in a bread tin, seam side downwards, and proof for another 60 minutes.

Soft Purple Sweet Potato Bread Loaf // Mono+Co Soft Purple Sweet Potato Bread Loaf // Mono+Co Soft Purple Sweet Potato Bread Loaf // Mono+Co Soft Purple Sweet Potato Bread Loaf // Mono+Co  Soft Purple Sweet Potato Bread Loaf // Mono+CoSoft Purple Sweet Potato Bread Loaf // Mono+Co

Bake in a preheated oven at 170C for 30 minutes.  When done, remove bread from tin immediately and let it cool completely on a rack before slicing.

If you like your bread loaf soft at the top, brush over the top crust with butter when the bread is freshly hot out of the oven.  The soft dome top also makes slicing easier after the bread has cooled down.

Soft Purple Sweet Potato Bread Loaf // Mono+Co

Save

Save

Save

Save

Save

Walnut Chia Seed Sweet Potato Bread

Walnut Chia Seed Purple Sweet Potato Boule // Mono+Co

My solid wood counter top recently started to warp and I texted to ask my contractor, how can stone warp.  You see, I always thought I have a stone surface given its natural stone-like finishing, at least to my absolutely untrained eyes.  It’s not my contractor’s fault, as the kitchen wasn’t really a big a part of my life then when we first moved in.  I left the choice of layout and materials to them as it wasn’t exactly a favorite part of my house.  That’s how I ended up thinking I had a stone counter.

And more than 10 years later, I had the cheek to ask for a possible material defect check.  This mistake was so ridiculous, I started laughing at myself after ending the conversation.  Goes to show how little I know about renovations.  I am more of a touch-up fan than an overhaul person.  But this time, the damage is far too serious to be touched up, and a replacement looks inevitable.

Then I started imagining myself, excitedly, kneading bread on a marble top, or a beautiful butcher block counter. Basically, materials that are drop dead gorgeous but will require relatively higher maintenance and care, something I am not willing to spend too much time on.  I don’t even hand knead my bread to begin with!  So going back to reality, I will talk to my contractor about the more practical choices, and this time, you bet I will be much more informed and more involved.  This habit has finally come in handy.

Speaking of hand-knead loaves, boule is a favorite style that I like to associate 100% handmade bread with.  And this walnut chia seed potato bread is one that I would bake into a boule when I am not baking with a bread tin, even though I knead all the time with an electric mixer.

Walnut Chia Seed Purple Sweet Potato Boule // Mono+CoWalnut Chia Seed Purple Sweet Potato Boule // Mono+Co


Walnut Chia Seeds Potato Bread

200g bread flour
1/2 tablespoon instant dry yeast
1/4 teaspoon sea salt
2 tablespoons raw sugar
100g purple sweet potato, steamed+mashed
1 large egg **
30g water
35g cold unsalted butter, cubed
50g walnuts ***
3/4 tablespoon chia seeds

** I use large egg that weighs around 70g
*** Pulse walnuts in a food processor 3 or 4 times to break them up into medium size pieces.  Do not mill them into grounds or paste.

In a mixer bowl, add bread flour, instant yeast, sea salt, sugar, stir with a hand whisk to mix the dry ingredients together uniformly.

Add mashed sweet potatoes, beaten egg, and water, and knead them into a ball using a dough hook attachment with the mixer turned on to its lowest speed (KA 1).

Turn off the mixer and leave the ball dough to sit for 15 minutes.  Then restart the mixer and knead for 1 minute before adding the cubed butter one by one with the mixer running.

Keep kneading until there are no traces of butter left, and the dough reaches window pane stage and becomes very elastic.  Add walnuts and chia seeds, and mix them uniformly into the dough. Leave this aside to bulk rise for 60 minutes.

The dough will double its volume and is ready for shaping if you can do this “belly button test”, the dent made with a floured finger doesn’t bounce back.

Walnut Chia Seed Purple Sweet Potato Boule // Mono+Co

Punch to deflate the dough, and transfer it to a clean work top.  Flatten the dough with hands to push out trapped gas.  Usually, I use a rolling pin for this purpose, but this would be difficult with pieces of walnuts in the dough.  I place it in the photos to show the difference in the size of the dough before and after the final proof.

Shape the dough into a ball, and place it on a greased/lined baking tray, mine measures 30cm x 30cm.  Leave this covered, in a draft-free place.  I put mine in the oven, without the power turned on.

Walnut Chia Seed Purple Sweet Potato Boule // Mono+CoWalnut Chia Seed Purple Sweet Potato Boule // Mono+Co

This is the dough after 60 minutes of final proof.

Walnut Chia Seed Purple Sweet Potato Boule // Mono+Co

Bake it in a preheat oven 170C for 22-25 minutes, until it turns golden brown.  Then leave it to cool completely on a rack before slicing.

Enjoy.

Walnut Chia Seed Purple Sweet Potato Boule // Mono+Co Walnut Chia Seed Purple Sweet Potato Boule // Mono+Co

Save

Save

Save

Save

Save

Save

Save

Save