Deep Fried Cauliflower

deepfriedcauliflower001 deepfriedcauliflower002 deepfriedcauliflower004

Hardly deep fry anything at home, but rave reviews on deep fried cauliflowers got me thinking how nice it would be if my kids were half as enthusiastic about cauliflowers as they are with broccoli.  To further entice them, I served the fried florets in paper bags, a la 鹽酥雞 style, an occasional Taiwanese snack treat that they like.

They finished up the cooked cauliflowers pretty fast.  Maybe it is the seasoning mix, or maybe because deep frying significantly altered the taste of the cauliflower, to almost chicken like.  I would like to be creative with the seasoning next time : parmesan cheese, five spice powder, garlic powder…. condiments that are usually sprinkle on fries and popcorn chicken.

This is really interesting, roasted cauliflower head is next on my list to try.  Kids, you are finally eating cauliflowers!

DEEP FRIED CAULIFLOWER
INGREDIENTS

1 small cauliflower, cut into bite sized florets
Rice flour, for dusting
Peanut oil for deep frying
1 stalk spring onion, green portion chopped finely
1/2 teaspoon crushed red chilli flakes
Old Bay Seasoning, for seasoning

METHOD

01. Fill a small saucepan with enough peanut oil to keep the the cauliflower florets fully submerged during deep frying.  To use the least amount of oil, I used my smallest 14cm pot and fry the florets in a few batches. Heat up the oil over medium heat.

02. Coat cauliflower florets lightly with rice flour. Deep fry each batch of the florets till golden brown.  Drain them on paper towel to absorb excess grease.

03. Toss Old Bay Seasoning to taste.  Sprinkle with spring onions and chilli flakes.  Serve immediately.

Kimchi Fried Rice : Risotto Method

kimchifriedricerisottocooking003 kimchifriedricerisottocooking002

This dish is a great way to use up the kimchi juice, the liquid released from the cabbage during fermentation. According to here : “the one milliliter of the juice from well-ripened kimchi contains roughly 100 million lactic acid bacteria, up to four times more than the same weight of yogurt.” Good stuff!

It would be a waste to discard them away, as they make great seasoning for soup and stew dishes.  I happen to have quite a lot (more than 2 cups) at the bottom of container with my homemade kimchi, the level of liquid will increase over time, as fermention continues to take place daily.

I decided to make kimchi fried rice using risotto cooking style, i.e. stirring in the kimchi juice into uncooked rice bit by bit, till the liquid is fully absorbed and the rice is cooked.  This would be a great way to use up as much of the kimchi juice as possible.  With cooked rice, adding too much liquid while frying will only end up with a plate of soggy rice, not my type of fried rice.

Other than chopped kimchi, I added fresh button mushrooms, baby corn and eggplant to make the one-dish meal even more fulfilling. This recipe is on the spicy side.  Use lesser kimchi juice and replace balance liquid addition with broth/water if a less spicy version is preferred.

KIMCHI FRIED RICE : RISOTTO METHOD
INGREDIENTS
SERVES 1

½ cup uncooked short grain rice 
2 tablespoons of olive oil
1 small onion, chopped 
2 button mushrooms, sliced 
1 baby corn, sliced
½ cup of chopped kimchi
1 small eggplace, cut thick slices 
2 cups of kimchi juice 
hot water
mozzarella cheese,optional
nori seaweed, for garnish

METHOD

01. Arrange eggplant slices on a baking tray and drizzle olive oil on top.  Roast till tender, I grill mine in a toaster oven for 15 minutes.

02. Wash rice and drain. Set aside.

03. Pour olive oil on a heated pan, add chopped onions and cook till soften.

04. Add button mushrooms, baby corn and chopped kimchi, mix and fry well, until the kimchi turns fragrant.

05. Add rice, fry and coat the grains with rest of ingredients, about 1 minute.

06. Add enough kimchi juice to cover the rice in the pan and bring to boil.  Reduce heat to simmer, stir with a wooden spoon to prevent rice from getting burnt at the bottom.

07. When the water is all absorbed by the rice, add remaining kimchi juice/hot water/broth.  Again: just enough to cover the rice, and repeat with a few more liquid additions till the rice is cooked.

08. When the rice is thoroughly cooked, throw in a few cubes of mozzarella cheese and let the heat from the cooked rice soften the cheese.

09. Transfer to serving plate.  Top with roasted eggplant slices and nori seaweed, eat immediately.

Braided Bread With Sweet Milk Crumbles

sweetbunplait001 sweetbunplait004 sweetbunplait005 sweetbunplait003sweetbunplait002sweetbreadbraided008 sweetbunplait006

The original recipe is titled Fresh Cream Bread from “孟老师的100道面包”.   I replaced the fresh cream with milk and butter instead, as it was too hazy to get out of the house for a packet of fresh cream.  Thankfully the modified milk and butter ratio worked wonderfully well, and so here I am noting it down, in case I run out of fresh cream again.

The accompanying sweet milk crumbles recipe makes too much that is required for the 2 loaves of braided bread.  I only realized it after comparing the photos of my bake with the book.  From the look of the photo, I think only 1/4 of the crumbles made with the recipe was used.

Later, I learned that the unused crumbles can be stored in chiller for future use.  Although my generous crumb serving did not make the bread taste too sweet, it is still made of 30g icing sugar (that is at least 15g of castor sugar).  I better half the crumble recipe next time if I do not want to keep any leftovers, or just use a quarter of it and store the rest in the freezer.

BRAIDED BREAD WITH SWEET MILK CRUMBLES
ADAPTED FROM : 孟老师的100道面包 p.43
INGREDIENTS

for bread
200g bread flour
30g raw sugar
¼ teaspoon salt
1 egg, yolk and white separated
3g instant yeast
110g cold fresh milk
25g cold unsalted butter, cubed

for sweet milk crumbles
30g icing sugar
50g corn starch
5g milk powder
40g cold unsalted butter, cubed

METHOD

01. In a mixing bowl, add in bread flour, raw sugar, salt, egg yolk, instant yeast and fresh milk.

02. Using a dough hook, knead the ingredients together at low speed till a dough ball forms.  Increase mixer speed (my KA at speed 2) and knead till dough becomes stretchy, about 3 minutes.

03. Add cubed butter piece by piece while the mixer is turning at low speed.  When the last trace of butter disappears,  increase mixer speed a step up (to 2) and knead till dough reaches window pane stage.

04. Remove the mixing bowl from the mixer, and cover a clean towel over the bowl.  Leave it at a spot that is draft free and let it proof for 80 minutes.

05. After the dough has risen, punch it down to degas it and transfer to a clean worktop.  If the dough is too sticky to handle, slightly grease hands and worktop with some butter.

06. Divide the dough into 6 equal pieces, rolling them into balls. Cover with towel and leave it aside for 15 minutes.

07. After 15 minutes, flatten dough to push out the gas inside with palm or rolling pin. Roll each piece of dough into long strands.  Instructions in the book stated about 28cm, I simply roll mine to fit my baking tray and make sure all 6 strands are around same length.)

08. Braid 3 of the dough strands loosely, making sure that both ends are tucked and sealed properly under the bread.  Transfer shaped bread onto baking tray.  Repeat step with the remaining 3 dough strands.

09. Cover with  towel again and let it have a final proof of 30 minutes, while we proceed to make the sweet milk crumbles.

10. With a small hand whisk, mix the dry ingredients (icing sugar, milk powder and corn flour ) well in a bowl.

11. Rub in cubed butter till resembles breadcrumbs.  Set aside.

12. After the bread is done with its final proofing stage, gently brush surface of the bread with egg white, and sprinkle sweet milk crumbles on top.

13. Bake in a preheated oven at 180C/350F for 16 – 20 minutes.  As your oven temperature may be different from mine, watch the bread closely from the 15th minute onward and remove it from oven once it turns to the golden brown.  I baked mine for 18 minutes in my fan-forced oven.  Let the bread cool completely before storing in an air tight container.

Baking Traditional Mooncakes : 10 Tips

traditionalmooncake005 traditionalmooncake011traditionalmooncake001 traditionalmooncake002 traditionalmooncake006 traditionalmooncake003 traditionalmooncake007

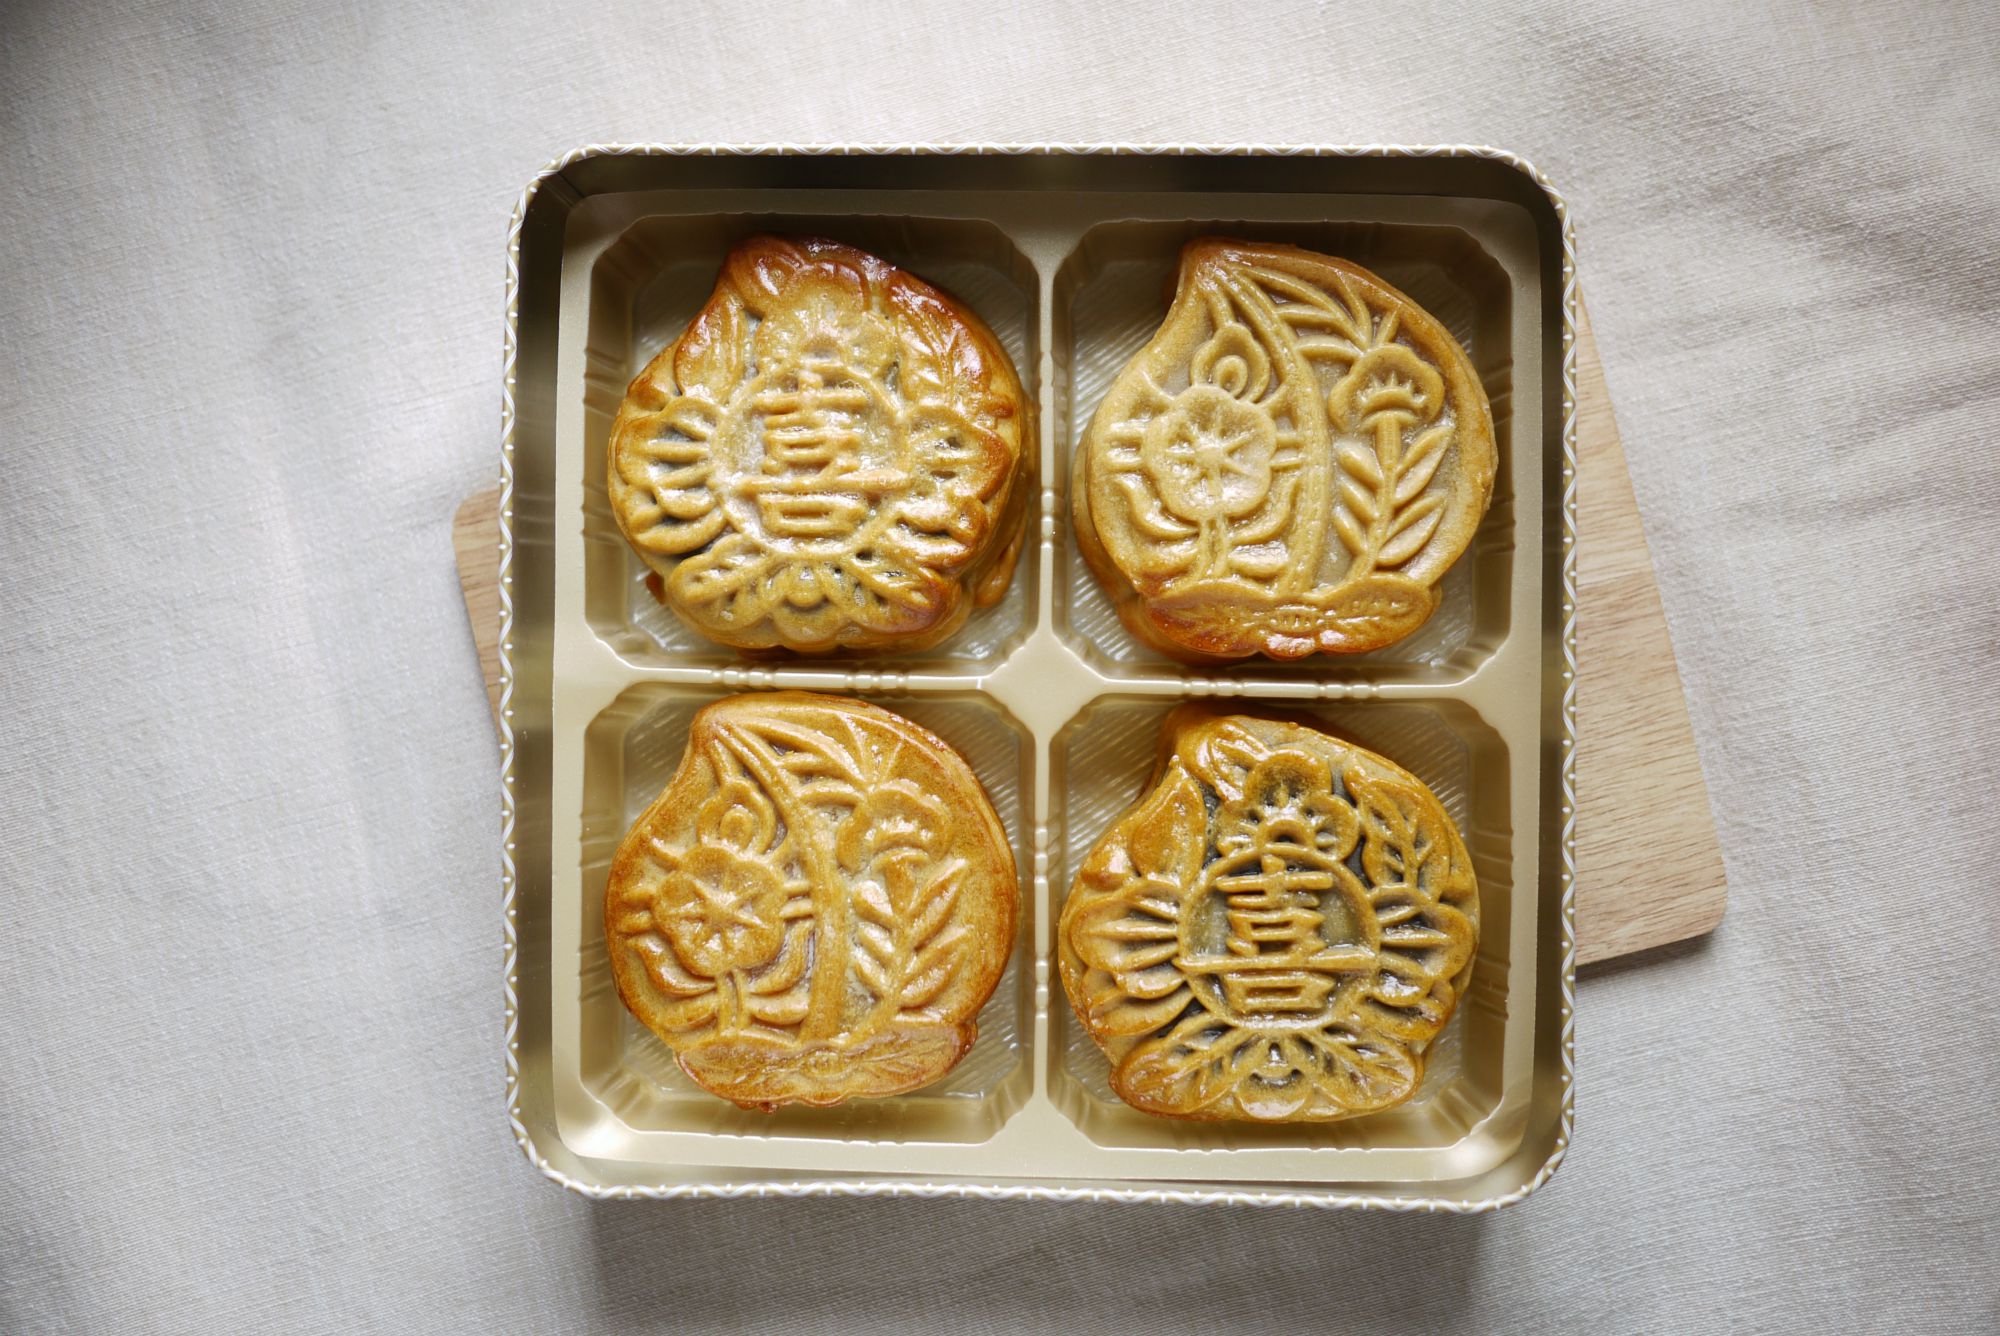
I never imagined that I would be baking mooncakes from my home kitchen.  Thanks to the various internet communities that post recipes and photos of their successful bake almost daily, I am able to save up quite a tidy sum this year by gifting my homemade version.

The only hard choice I had to make was which recipe to use, as almost everyone’s finished bake seemed wildly successful, even the first timers.  I eventually decided to get store bought fillings, and focus all my learning efforts on making the mooncake skin first.  Then I patiently scrolled through as many homemade mooncake recipes as possible, and made the following list of important tips to take note on D-Day.

The next time I try my hands on baking mooncake will be a year later, so this list of 10 tips will be useful as refresher note.


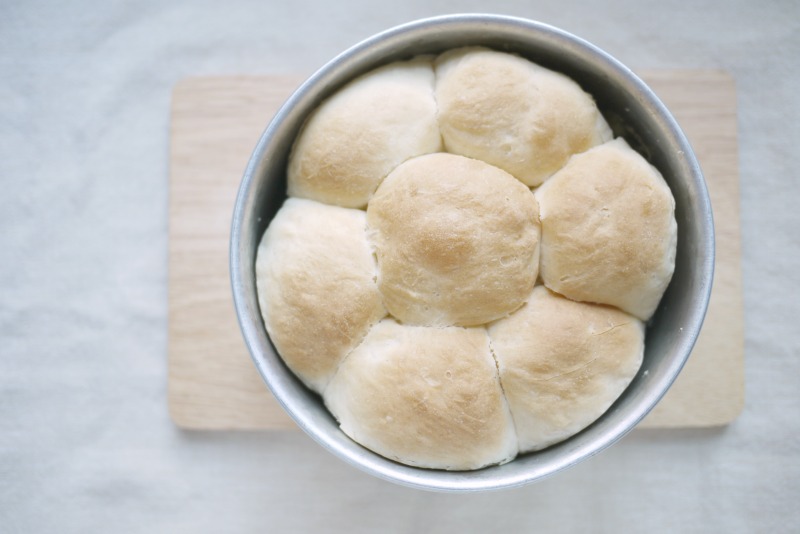
01. Most recipes use plain flour, but hong kong flour or top flour is highly recommended here.  I used hong kong flour for making “pao”, and was immediately sold when I saw the packaging specified “for making mooncakes”.traditionalmooncake010

02. I wanted to omit alkaline water, but decided against this since it is supposed to neutralize the acid in golden syrup, so that there is no sour taste in the mooncake.  Sour mooncake skin?  Yikes, no way!  I will find some other ways to clear the bottle of lye water by either making some ramen noodles, or transforming spaghetti into ramen, or yellow hokkien noodle.

03. Do not overknead the dough, once the ingredients come into a ball, stop.  I wonder if this only applies to recipe with plain flour with higher gluten level? I just follow this rule since longer kneading doesn’t really make sense for mooncake skin, not making bread here.

04. Leave the dough in the fridge overnight.  The suggested dough resting time range from 40 minutes to 2 days.  I decided to leave it overnight in the fridge, instincts tell me that a colder dough will be less sticky thus easier to handle.

05. Proportion of skin to filling is 3 : 7.  I used this ratio to make 170g mooncakes (51g :119g) and I think it is perfect.   Same ratio applies for making smaller 50g mooncakes; 15g skin, 35g filling.

06. Dust hands and worktop with just enough flour to prevent the dough from sticking.  Dust the dough again with flour before placing it in the mould.  Do not oil the mould or dust the mould with flour.

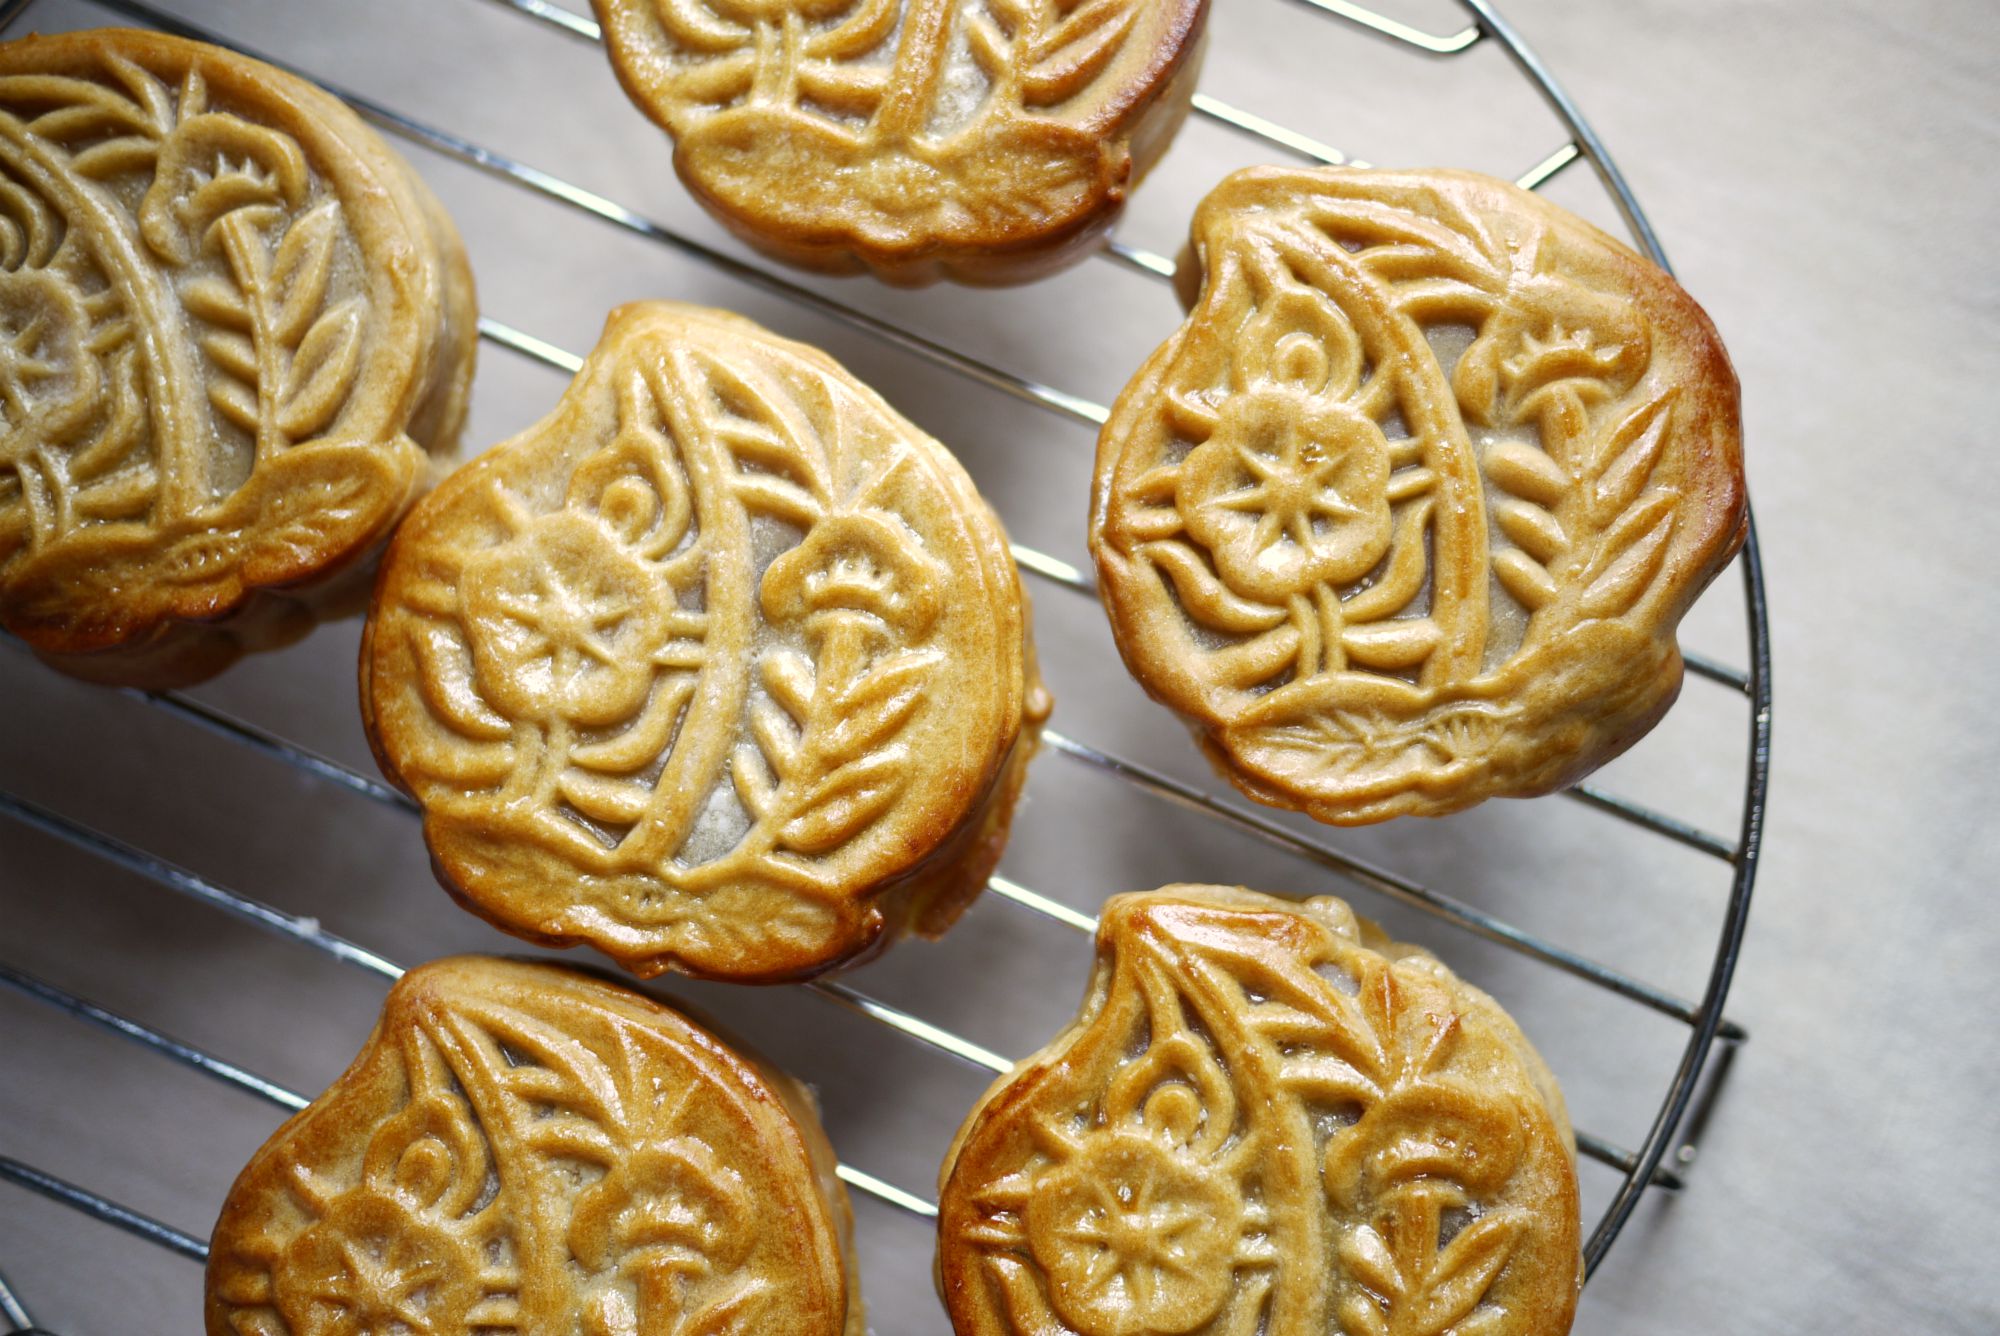
07. It is a must to mist the mooncakes with water first before baking, especially the sides of the mooncakes.  This will prevent the skin from cracking after baking, apparently a common problem that takes place when the mooncakes are cooling down on the rack.

08. Halfway through the baking, the mooncakes need to be taken out and cooled down first for 15minutes, before applying egg wash and return to the oven.  If the mooncakes are not cooled down before apply eggwash, you will get cooked egg mixture on the mooncakes, cracks may form too.

09. Sieve the beaten egg for a more even egg wash.  Adding a few drops of water, or oil will also make a prettier eggwash.  I added a few drops of peanut oil.

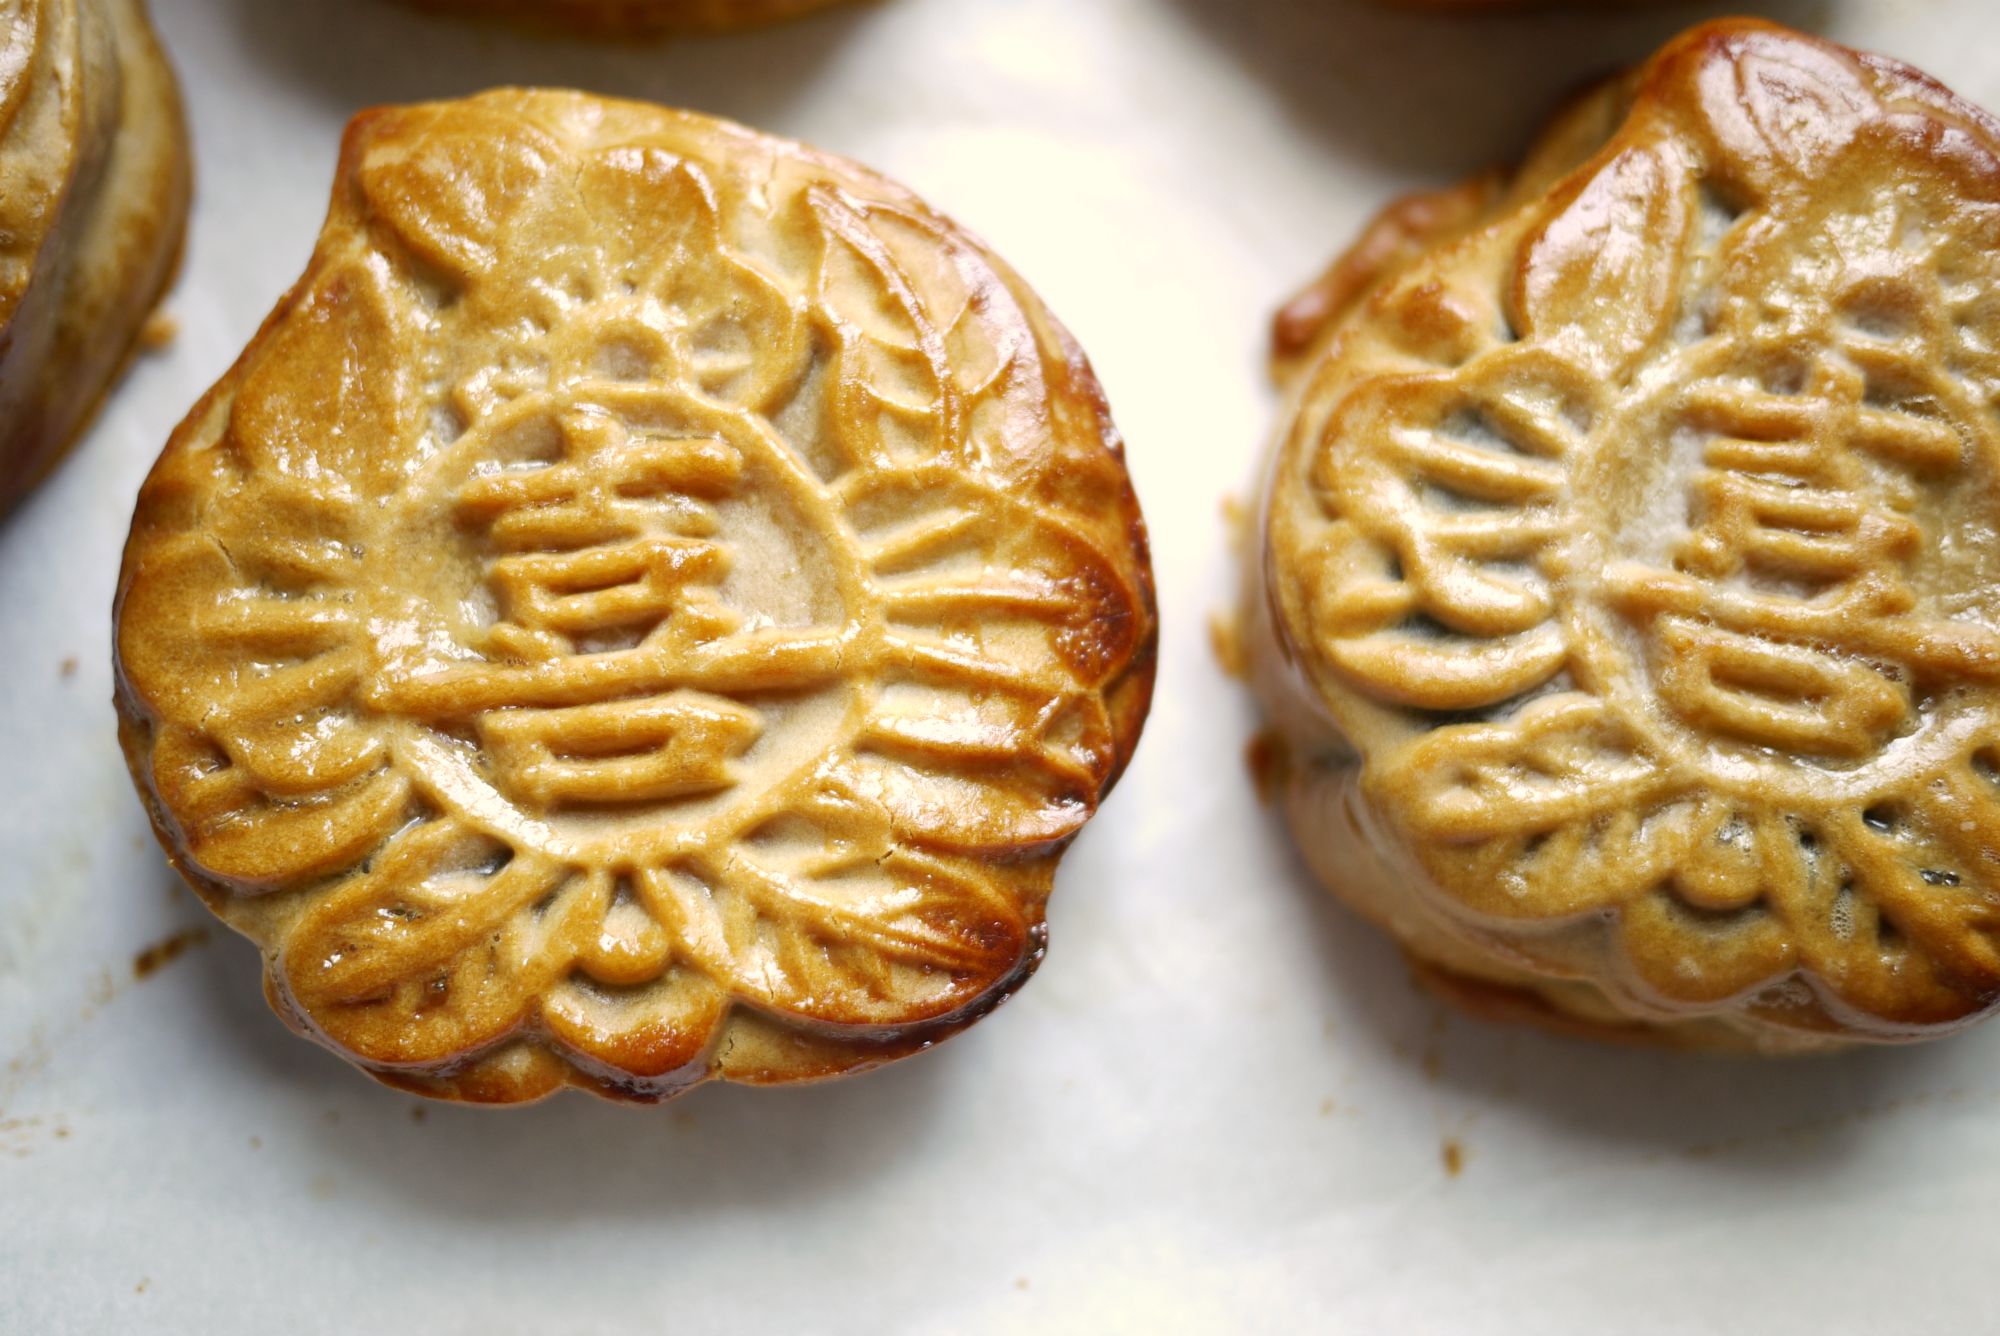
10. Leave the completely cooled mooncakes in an airtight container for at least 2 days to allow the skin to absorb the oil from the filling, a process call 回油 / release oil , this is the step that makes mooncakes looking all shiny and pretty.  It also makes the skin soft and chewy.


I managed to test out two dough recipes, modified with peanut oil instead of vegetable oil, followed the baking process to a T, and found not much difference between them.  Both types of dough are easy to handle, as long as you dust your hands with hong kong flour.  But I noticed a chilled overnight dough is easier to manage than one left to sit for 2 hours.  So planning ahead and make the dough the night before would be ideal.

There is not much difference taste wise, though I thought the mooncakes made with 10g additional golden syrup produced a sweeter aroma when they were just taken out from the oven.  But frankly, after the mooncakes had been left to 回油 and the skin softened, the difference in sweetness of the skin is even more negligible, as I am tasting more of the filling than the skin.  So I gathered that it is more important to stick to the the right skin to filling ratio and get a good quality filling that isn’t too dry.  I got my white lotus paste and red bean paste from here and I am giving them two thumbs up.

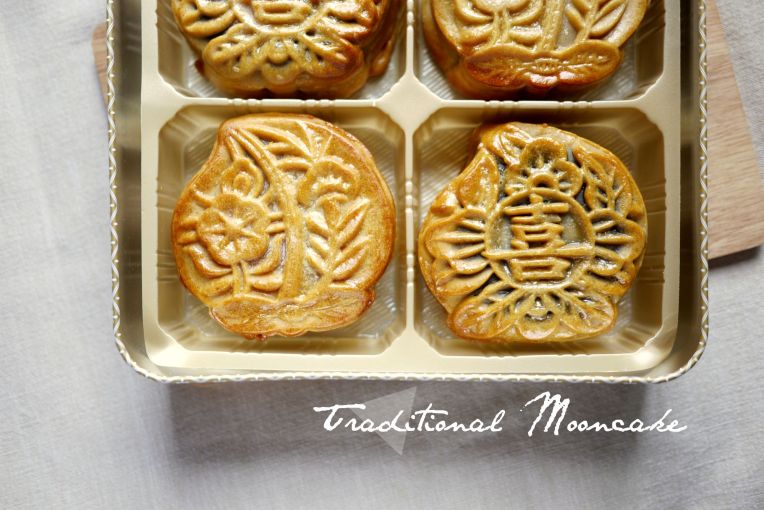
TRADITIONAL BAKED MOONCAKE
ADAPTED FROM CHRISTINE’S RECIPES & NOOBCOOK
INGREDIENTS

christine's mooncake skin recipe
100g hongkong flour
60g golden syrup
½ teaspoon alkaline water/lye water
28g peanut oil

noobcook's mooncake skin recipe
100g hongkong flour
70g golden syrup
½ teaspoon alkaline water/lye water
25g peanut oil

fillings
store bought red bean paste / lotus seed paste

others
1 egg, for egg wash
clingwrap for shaping the mooncake into balls
mooncake mould

METHOD

01. Choose one of the skin recipe above.  I made 12 large mooncakes (170g) with 3x the recipe with some left over for making a few mini mooncakes.  According to both original posts, one serving of the skin recipe is enough to make 12 x 50g mini mooncakes.

02. In a mixing bowl, mix golden syrup, alkaline water and peanut oil together with a whisk.

03. Add sifted hongkong flour and knead into a dough.  The dough will be sticky.

03. Place the dough in a plastic bag, seal tight and rest the dough overnight in the fridge.

04. When ready to make the mooncakes, prepare a baking sheet lined with parchment paper.  Roll the filling into 119g balls.  I prepared 6 x red bean and 6 x white lotus.  Set aside.

05. On a clean worktop, place a sheet of cling wrap, about 30cm x 30 cm.  Leave a heap of about 2 tablespoons of hong kong flour aside on the worktop, this will come in handy to dust hands and dough with, whenever it becomes too sticky to handle.

06. Take out the dough from the fridge.  Dust clean, dry hands with hongkong flour and weigh 51g of skin dough out.  With floured palms, roll it into a ball and place it on the clingwrap, flatten it into thin disc with palm/fingers so that it is big enough to wrap a filling ball.

07. Place the filling ball in the center of the disc, and fold up the dough (with the cling wrap, it is easier without sticking to hands) around the filling, slowly wrap and seal the skin around the filling.  Gently push and slide the soft dough skin to create an even layer of skin all around the filling and make sure that the filling ball is all covered.  Peel away the clingwrap and shape the mooncake into a ball with floured hands.

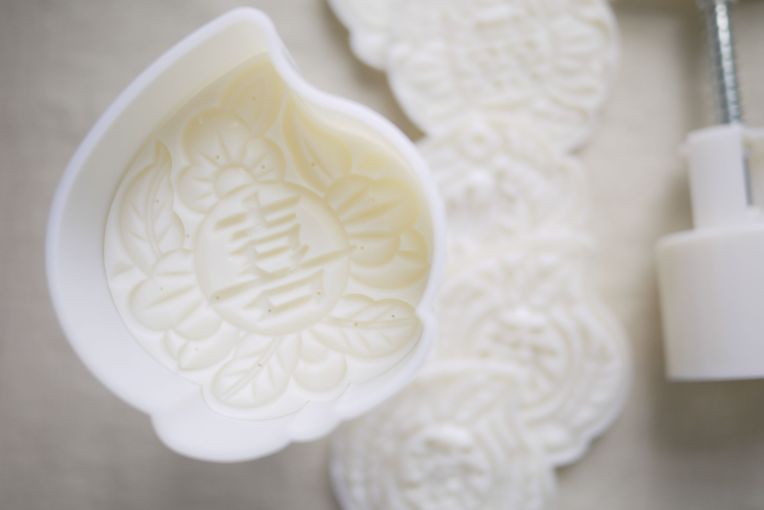
08. I use a plastic piston mould (see second photo above), and this is how I carry out the moulding process.  Dust more flour onto the mooncake if needed, paying more attention to the top part of the mooncake that will be imprinted with design.  Place the mooncake ball on the baking tray lined with baking paper.  Place the piston mould over the mooncake to cover it completely and press down the plunger as it creates the pattern on the surface.  Stop when you feel that you cannot push down the plunger anymore, do not over exert the downward force or continue pressing, otherwise the mooncake dough will be forced to ooze out from the mould. Release the plunger and slowly lift the mould up, pressing down the plunger gently if needed to release the mooncake onto the baking tray.   I do this directly on the baking tray so that I will not accidently damage the mooncake patterns during the process of transferring, as they can be quite soft before baking.

09. Mist the mooncakes with water before baking them in a preheat oven at 180C, for 10 minutes.

10. Prepare egg wash by running a lightly beaten egg through a sieve, add 2-3 drops of oil and mix well.

11.  After 10 minutes of baking, take out the mooncakes and allow them to cool down for 15 minutes on the baking tray.

12. Apply eggwash thoroughly, and bake again at 180C for 8 to 10 minutes, or until the mooncakes turn golden brown.

13. Let the mooncakes cool completely before storing them in an airtight container for at least 2 days.  By then, the mooncakes should turn shiny and the skin will be soft, this is the best time to consume.

Bake A Wholemeal Loaf, Sponge Method

wholemeal bread sponge 001 wholemeal bread sponge 002 wholemeal bread sponge 003 wholemeal bread sponge 004

I have some wholemeal flour and rye flour, packaging opened and half used, leftover from a recent wild yeast starter attempt.  As they are coming to the end of their shelf life ( I play safe and set use by date at 6 months after opening, stored in fridge), it’s time to dig out some tried and tested recipes online and start baking.  First up, this Simple Wholemeal Bread recipe from here.

This recipe uses the sponge method; an initial dough made with just flour, yeast and water is left to rise for a specific amount of time, then mixed with the remaining ingredients for the final bake.  Most sponge method I have come across requires at least 4 hours and some even suggest an overnight sit, but this recipe only calls for 90 minutes.

I have also adjusted the baking time to just 170C/325F for 30 min instead of 190C/375F.  I prefer my sandwich bread pillowy with a thinner and softer crust, and I learned that the time and temperature can be tweaked to achieve different crust quality.  The color of the final bake may look a bit pale to some, but as long as the bread is completed cooked, I am fine with this time/temperature combo.  Feel free to increase your baking temperature if you prefer a darker crust.

WHOLEMEAL BREAD (SPONGE METHOD)
ADAPTED FROM : HAPPY HOME BAKING
INGREDIENTS

for sponge
120g wholemeal flour
85g bread flour
1 teaspoon instant yeast
130g water

for main dough
85g bread flour
15g raw sugar
1 teaspoon salt
10g milk powder
50g water
15g cold unsalted butter, cubed

bake in a 20cm x 10cm x 10cm pullman tin

METHOD

01. In a mixing bowl, combine ingredients for sponge , both types of flour, yeast and water, and knead with a dough hook at low speed (KA Speed 1) till they are mixed well and come into a ball.  Lay a clean tea towel over the mixing bowl to cover the dough, let sponge sit and rise for 90 minutes.

02. After 90 minutes, add bread flour, sugar, salt, milk powder and water to the sponge dough in the mixing bowl.  Do not add the butter yet.  Turn on the mixer at low speed first to combine all the ingredients.  Once the ingredients have come into a ball, increase the speed (level 2) to knead the dough for about 2 minutes.

03. Turn down the speed back to low, and add butter cubes one by one.  Once the last trace of butter has disappeared, turn up the speed of the mixer to knead the dough till gluten forms, and stop only after it reaches window pane stage.

04. Cover mixing bowl/dough with towel, and let it rise for 60 minutes, or till it doubles in volume.

05. After the dough has risen, punch the dough down to degas it and transfer it to a clean worktop.  If the dough is too sticky, lightly grease hands and tabletop with some butter.

06. Divide the dough into 3 equal portions.  shape them into balls, and let them sit, covered, for 15 minutes.

07. After 15 minutes, flatten out the dough with a rolling pin, pushing out any gas inside the dough, at the same time, turning it into a flat oblong shaped dough.  Roll up the flatten dough, from the shorter side facing you, into swiss roll style, and place the dough inside a pullman tin. Repeat with the remaining 2 dough balls.

08. Cover the baking tin with towel and let the bread have a final proof till the dough rise to reach 90% of the height of the tin.

09. Bake the bread, uncovered, in a preheated oven at 170C/325F for 30 minutes.

10. After baking, remove the bread from the tin immediately, brush top with some melted butter, and allow it to cool completely on a rack before slicing.


Bake A “Flower” Bun

breadroll 001

Almost got myself a bread maker.  The idea of smelling freshly baked bread from the moment I wake up at 6am in the morning is really tempting.  But I backed out last minute as I still like to style my breads in different shapes, like this “flower” shape bun baked in a 6 inch cake pan.  Well, at least $150 saved!

The recipe is the basic bread version from the book <<新手零失敗超手感麵包>>.  It wasn’t as fluffy as I thought it would be, given that the dough rose quite a bit.  I managed to finish it in a day with kaya and butter, but I think it will turn denser the next day. 

I like the book as it has other simple recipes such as stews, a soup, salads and some jam spreads that the author Backe actually serves at her homecafe in Japan.  How nice it is to enjoy food at a homecafe!

Kimchi Spaghetti

kimchi spaghetti 001 kimchi spaghetti 002

This kimchi pasta sauce is even easier to make than the usual tomato sauce, as it requires no simmering.  I pan fried some erynglii mushrooms to replace the meat in the original recipe, and cook everything under 20 minutes.  That’s my kind of instant noodles!

KIMCHI PASTA
ADAPTED FROM : NO RECIPES
INGREDIENTS
SERVING : 1


100g uncooked spaghetti
2 pieces eryngii mushrooms
1 tablespoon olive oil
¼ small yellow onion, chopped
½ cup chopped kimchi
1 teaspoon gochujang/korean hot pepper paste
1 tablespoon hot water
optional for garnishing : black sesame seeds and coriander leaves

METHOD

01. Cook spaghetti, al dente style, according to package instructions, drain and set aside.  I usually dump the cooked pasta back in its cooking pot that has been drained of liquid but still hot enough to keep the pasta warm.

02. Clean and pat dry eryngii mushrooms.  Slice each mushroom, cross section, into 4 pieces.  On a heated pan, place the mushroom slices and cook over medium heat.  Liquid will soon be released from the mushrooms as you cook, keep cooking till the liquid evaporates and when the bottom of the mushroom turns slightly charred, flip and repeat on the other side.  Remove from pan, set aside.  Wipe the pan dry, and use the same pan to cook the kimchi pasta next.

03. To make kimchi pasta sauce, heat olive oil in the pan, add chopped onions and cook till them turn soft and translucent.

04. Add chopped kimchi, and cook till fragrant.

05. Mix gochijang with hot water to dilute the sticky paste.  Pour in the mixture into the kimchi sauce.  Stir around to mix well.  If the kimchi sauce is on the dry side, add one or two tablespoons of water.

06. Add in the cooked spaghetti, and stir around to coat the pasta with the sauce well.

07. Transfer to serving plate, top with pan fried mushroom slices, and garnish with a dash of black sesame seeds and coriander leaves.  Enjoy!

Garlic Mushroom Pasta

garlic mushroom pasta 001 garlic mushroom pasta 002

A fast and simple pasta dish that I make pretty often, as I always have fresh shimeji and shitake mushrooms in my fridge.  To avoid using too much oil in this single serving dish, I only used the minimal amount of butter to fry the garlic, herbs and mushrooms at first, then top with olive oil before serving.  I also stir in the grated cheese while the penne is hot to make it more creamy.

GARLIC MUSHROOM PASTA
ADAPTED FROM : FOOD.COM
INGREDIENTS


1 serving penne pasta, al dente, keep warm
1 tablespoon of butter
1 tablespoon of extra virgin olive oil
2 large cloves garlic, minced
1 teaspoon red pepper flakes
1 packet of fresh shimeji mushrooms
6 fresh shitake mushrooms, sliced
1 teaspoon dried sweet basil herb
Salt and pepper, to taste
grated old cheddar cheese, to taste

METHOD

01. In a heated pan, melt the butter and cook garlic till fragrant and turns slight brown.

02. Stir in sweet basil and chilli flakes to mix.

03. Add both mushrooms and cook until they soften.

04. Season with salt and pepper.  Remove from heat.

05. Add cooked penne  and grated cheese into the pan of cooked mushrooms and toss well.

06. Transfer to plate, drizzle extra virgin olive oil before serving.

Fresh Spinach Frittata

spinach mushroom frittata 002 spinach mushroom frittata 003 spinach mushroom frittata 004spinach mushroom frittata 006 spinach mushroom frittata 005

As I cook more often, the faster and easier it becomes.

The grocery shopping trip has also become more efficient, as I know the quantity and types of food that I can handle well.  I allow myself to buy only one “exotic” or unfamiliar ingredient per trip and cook it before my next shopping trip.  Plus, I always keep in mind that it is the size of the crisper drawer, not the entire fridge, that determines the maximum quantity of purchase.

Back to fast and easy cooking, this 16cm frittata gets done really quick, only 15 minutes, as cooking time is solely for frying the eggs and blanched spinach mixture till set, plus another 2-3 minutes under the broiler to cook the top.  Since eggs get cooked really fast, they make a fulfilling breakfast even on a school day morning rush.

My Tiger wide tray toaster oven is big enough for my skillet, but I fear that it might not be able to handle the cast iron weight, so I left the lever door open, hold the skillet (wearing oven mitt) under the heating element to broil the frittata.  This method takes away the need to preheat the oven, saving time and electricity, as I only need the broiler for less than 5 minutes.

Served these with sauteed button mushrooms, perfect way to start the day!

FRESH SPINACH MUSHROOM FRITTATA
INGREDIENTS


3 eggs
4 stalks spinach, wash and cut away roots
dash of black pepper
1 tablespoon salted butter
2 tablespoons grated cheddar cheese
red chilli flakes, optional

INSTRUCTIONS

01. In a pot of boiling water, blanch spinach till cooked, emerge immediately in a bowl of room temperature water. Remove from water and chop roughly. Set aside.

02. In a bowl, whisk spinach, eggs and black pepper together.

03. Heat up the skillet over medium heat.  Melt butter and pour in egg mixture. Sprinkle chilli flakes on top.

05. Cook till frittata is almost done, around 3-4 minutes, but top remains slightly moist.

06. Place skillet in oven and broil till eggs are fully set, about 3 minutes.

07. Remove from oven, sprinkle grated cheese.  Serve immediately.