Bake A Wholemeal Loaf, Sponge Method

wholemeal bread sponge 001 wholemeal bread sponge 002 wholemeal bread sponge 003 wholemeal bread sponge 004

I have some wholemeal flour and rye flour, packaging opened and half used, leftover from a recent wild yeast starter attempt.  As they are coming to the end of their shelf life ( I play safe and set use by date at 6 months after opening, stored in fridge), it’s time to dig out some tried and tested recipes online and start baking.  First up, this Simple Wholemeal Bread recipe from here.

This recipe uses the sponge method; an initial dough made with just flour, yeast and water is left to rise for a specific amount of time, then mixed with the remaining ingredients for the final bake.  Most sponge method I have come across requires at least 4 hours and some even suggest an overnight sit, but this recipe only calls for 90 minutes.

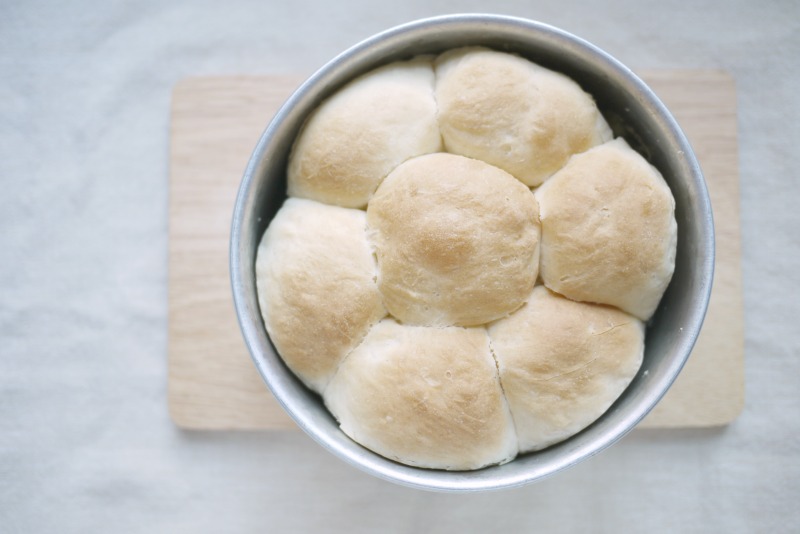
I have also adjusted the baking time to just 170C/325F for 30 min instead of 190C/375F.  I prefer my sandwich bread pillowy with a thinner and softer crust, and I learned that the time and temperature can be tweaked to achieve different crust quality.  The color of the final bake may look a bit pale to some, but as long as the bread is completed cooked, I am fine with this time/temperature combo.  Feel free to increase your baking temperature if you prefer a darker crust.

WHOLEMEAL BREAD (SPONGE METHOD)
ADAPTED FROM : HAPPY HOME BAKING
INGREDIENTS

for sponge
120g wholemeal flour
85g bread flour
1 teaspoon instant yeast
130g water

for main dough
85g bread flour
15g raw sugar
1 teaspoon salt
10g milk powder
50g water
15g cold unsalted butter, cubed

bake in a 20cm x 10cm x 10cm pullman tin

METHOD

01. In a mixing bowl, combine ingredients for sponge , both types of flour, yeast and water, and knead with a dough hook at low speed (KA Speed 1) till they are mixed well and come into a ball.  Lay a clean tea towel over the mixing bowl to cover the dough, let sponge sit and rise for 90 minutes.

02. After 90 minutes, add bread flour, sugar, salt, milk powder and water to the sponge dough in the mixing bowl.  Do not add the butter yet.  Turn on the mixer at low speed first to combine all the ingredients.  Once the ingredients have come into a ball, increase the speed (level 2) to knead the dough for about 2 minutes.

03. Turn down the speed back to low, and add butter cubes one by one.  Once the last trace of butter has disappeared, turn up the speed of the mixer to knead the dough till gluten forms, and stop only after it reaches window pane stage.

04. Cover mixing bowl/dough with towel, and let it rise for 60 minutes, or till it doubles in volume.

05. After the dough has risen, punch the dough down to degas it and transfer it to a clean worktop.  If the dough is too sticky, lightly grease hands and tabletop with some butter.

06. Divide the dough into 3 equal portions.  shape them into balls, and let them sit, covered, for 15 minutes.

07. After 15 minutes, flatten out the dough with a rolling pin, pushing out any gas inside the dough, at the same time, turning it into a flat oblong shaped dough.  Roll up the flatten dough, from the shorter side facing you, into swiss roll style, and place the dough inside a pullman tin. Repeat with the remaining 2 dough balls.

08. Cover the baking tin with towel and let the bread have a final proof till the dough rise to reach 90% of the height of the tin.

09. Bake the bread, uncovered, in a preheated oven at 170C/325F for 30 minutes.

10. After baking, remove the bread from the tin immediately, brush top with some melted butter, and allow it to cool completely on a rack before slicing.


DIY Journal Planner Printable – Sept to Dec 2015

printable sept to dec 2015 journal 001printable sept to dec 2015 journal 002

2015 is counting down to its final quarter.  Decided to bear an hour of sit-though to complete my DIY journal template for the rest of the year.  Anyway, the last three months of the year usually pass like a whirlwind, with final exams and holiday activities.  I might as well start the planning early.  I missed the August deadline but decided to play catch up, memories can be easily retrieved nowadays with digital trails left behind in the smartphone; whatsapp conversations, photo gallery etc.  Downloadable as a separate file here.

NOTES BEFORE PRINTING: While the PDF file is in A4 size, I design it with an A5 booklet in mind.  The entire Sept-Dec planner takes up 20 pages, but with the booklet layout, it fills up both sides on 5 sheets of A4 paper.  You can easily choose this under the “Page Sizing and Handling” options in the Printing menu.  Click on “Booklet” and then “Both Sides” under Booklet Subset option.  Preview to make sure that the printing take up only 5 sheets of A4 paper.

Monthly Journal Download Title

DIY Journal Planner Printable – July 2015

diy july 2015 journal template

NOTES BEFORE PRINTING: While the PDF file is in A4 size, I design it with a A5 booklet in mind.  The planner portion takes up only 5 pages (Page 2 to 6), but with the booklet layout, I inserted a front and back cover page (Pg1, Pg8), plus a random notes page (Pg7), to fill up both sides on 2 sheets of A4 paper.  You can easily choose this under the “Page Sizing and Handling” options in the Printing menu.  Click on “Booklet” and then “Both Sides” under Booklet Subset option.  Preview to make sure that the printing of the 8 pages document will now take up only 4 pages on 2 sheets of A4 paper.

Monthly Journal Download Title

DIY Journal Planner Printable – June 2015

diy june 2015 journal template 001 diy june 2015 journal template 002

School holiday officially starts today!  Start filling the journal with your holiday plans!

BEFORE PRINTING: While the PDF file is in A4 size, I design it with a A5 booklet in mind.  The planner portion takes up only 5 pages (Page 2 to 6), but with the booklet layout, I inserted a front and back cover page (Pg1, Pg8), plus a random notes page (Pg7), to fill up both sides on 2 sheets of A4 paper.  You can easily choose this under the “Page Sizing and Handling” options in the Printing menu.  Click on “Booklet” and then “Both Sides” under Booklet Subset option.  Preview to make sure that the printing of the 8 pages document will now take up only 4 pages on 2 sheets of A4 paper.

Bake A “Flower” Bun

breadroll 001

Almost got myself a bread maker.  The idea of smelling freshly baked bread from the moment I wake up at 6am in the morning is really tempting.  But I backed out last minute as I still like to style my breads in different shapes, like this “flower” shape bun baked in a 6 inch cake pan.  Well, at least $150 saved!

The recipe is the basic bread version from the book <<新手零失敗超手感麵包>>.  It wasn’t as fluffy as I thought it would be, given that the dough rose quite a bit.  I managed to finish it in a day with kaya and butter, but I think it will turn denser the next day. 

I like the book as it has other simple recipes such as stews, a soup, salads and some jam spreads that the author Backe actually serves at her homecafe in Japan.  How nice it is to enjoy food at a homecafe!

DIY – Calendar Makeover

calendar makeover 001calendar makeover 008
My daughter likes the old school style daily calendar, while I use the tear off sheets for scribbling random notes.  These wall calendars are usually free, and the daily chinese horoscope and quotes makes a pretty interesting read from time to time.  But the auspicious “Gong Xi Fa Cai” red frame is starting to look dated after Chinese New Year, as if I am still leaving behind some CNY decoration in the house, long after the festive celebration is over.

So I updated it with a few simple items:
1) a very thick A4 cardboard wrapped with patterned paper as backing,
2) grey felt to cover the red metal frame, which I retain part of, as a tearing guide.
3) large white clip for design.

Here are some step-by-step photos that I took along the way :
calendar makeover001
(above) Original calendar design, I used a simple S-hook to hang it on the wall.  Not so nice.
calendar makeover 002
(above) Dismantle the calendar to separate the three components : calendar + screw and bolt + metal frame.
calendar makeover 003
(above) For brand new calendar, there is no need for this step.  But I have used this calendar for a few months, a big gap is left from the torn out section, so I cut the frame to retain just the front panel to use it as a tearing guide for the remaining months.
calendar makeover 004
(above) Align the grey felt over the metal tearing guide and poke a small hole on the felt over the calendar’s larger punch hole and slowly push the screw through the felt, metal sheet, and calendar.
calendar makeover 005
(above) The hole on the felt cannot be too big or the screw will simply go through it instead of binding the felt onto the calendar.
calendar makeover 006
(above) Mark the two spots on the thick cardboard where the calendar will be mounted on.  Poke a small hole and wrap the cardboard with decorative paper, make a small hole where the spots were marked earlier.  Push the screw through, and finally fasten with bolt.
calendar makeover 007
(above) How the calendar looks after completion.

Kimchi Spaghetti

kimchi spaghetti 001 kimchi spaghetti 002

This kimchi pasta sauce is even easier to make than the usual tomato sauce, as it requires no simmering.  I pan fried some erynglii mushrooms to replace the meat in the original recipe, and cook everything under 20 minutes.  That’s my kind of instant noodles!

KIMCHI PASTA
ADAPTED FROM : NO RECIPES
INGREDIENTS
SERVING : 1


100g uncooked spaghetti
2 pieces eryngii mushrooms
1 tablespoon olive oil
¼ small yellow onion, chopped
½ cup chopped kimchi
1 teaspoon gochujang/korean hot pepper paste
1 tablespoon hot water
optional for garnishing : black sesame seeds and coriander leaves

METHOD

01. Cook spaghetti, al dente style, according to package instructions, drain and set aside.  I usually dump the cooked pasta back in its cooking pot that has been drained of liquid but still hot enough to keep the pasta warm.

02. Clean and pat dry eryngii mushrooms.  Slice each mushroom, cross section, into 4 pieces.  On a heated pan, place the mushroom slices and cook over medium heat.  Liquid will soon be released from the mushrooms as you cook, keep cooking till the liquid evaporates and when the bottom of the mushroom turns slightly charred, flip and repeat on the other side.  Remove from pan, set aside.  Wipe the pan dry, and use the same pan to cook the kimchi pasta next.

03. To make kimchi pasta sauce, heat olive oil in the pan, add chopped onions and cook till them turn soft and translucent.

04. Add chopped kimchi, and cook till fragrant.

05. Mix gochijang with hot water to dilute the sticky paste.  Pour in the mixture into the kimchi sauce.  Stir around to mix well.  If the kimchi sauce is on the dry side, add one or two tablespoons of water.

06. Add in the cooked spaghetti, and stir around to coat the pasta with the sauce well.

07. Transfer to serving plate, top with pan fried mushroom slices, and garnish with a dash of black sesame seeds and coriander leaves.  Enjoy!

DIY Journal Planner Printable – May 2015

diy may 2015 journal template 001

With school exams around the corner, I should have prepare this planner printable earlier and double it as a study planner.  But some last minute chores delayed the printing till today.  I can’t wait for at least 10 months of this to be completed, and then I will bind them like this.

BEFORE PRINTING: While the PDF file is in A4 size, I design it with a A5 booklet in mind.  The planner portion takes up only 5 pages (Page 2 to 7), but with the booklet layout, I inserted a front and back cover page (Pg1, Pg8), to fill up both sides on 2 sheets of A4 paper.  You can easily choose this under the “Page Sizing and Handling” options in the Printing menu.  Click on “Booklet” and then “Both Sides” under Booklet Subset option.  Preview to make sure that the printing of the 8 pages document will now take up only 4 pages on 2 sheets of A4 paper.