September School Holiday : Eco-Friendly Activities

September School Holiday : Eco-Friendly Activities // Mono + Co

The school will be closed for 1 week, but there seemed to be enough activities with environmental focus to carry through the entire month that allow one to be inspired and pick up some green habits.

// Catch an eco film
++ Don’t just catch the commerical blockbusters, choose from an array of eco films that will be screened from 1-3 Sep at the annual Eco Film Festival Singapore. Check out the film and programme schedule here. Free event.

// Host an eco-themed film private screening
++ The kind people at Eco Film Festival has obtained private screening license for the following films to choose from:
– The True Cost
– Cowspiracy
– A Plastic Ocean
– Guardians of Raja Ampat
– Disobedience
– Project Wild Thing
– Captain Planet Summit to Save The Planet
Cost : Free, register by 8 Sept here, & host the private screening from 15th-24th Sept.

September School Holiday : Eco-Friendly Activities // Mono + Co

// BYO Singapore Campaign
++ Ditch the disposables habit and start bringing your own shopping bags, drinking cups and lunch boxes.  Details here.

// Take part in energy saving challenge
++ Get the entire family to reduce household electricity use and win some prizes. Details here.

September School Holiday : Eco-Friendly Activities // Mono + Co

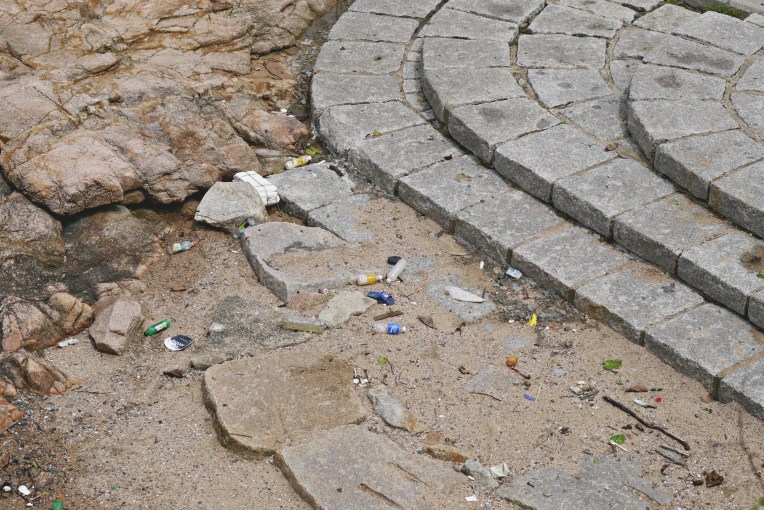
// Volunteer for a coastal clean up
++  Coney Island with Trash Hero Singapore on 3 Sep
++  Lim Chu Kang East with Little Green Men on 9 Sep
++  Mandai Mudflats with Nature Society on 9 Sep. Register here.
++  Ponggol Beach with on 23 Sep. Register here.

September School Holiday : Eco-Friendly Activities // Mono + Co

// Balik Kampung
++ Enjoy kampung lifestyle? Now that there is a week of school holiday, volunteer on a weekday to help out with “landscape and farm maintenance” at Kampung Kampus. Details here.

September School Holiday : Eco-Friendly Activities // Mono + Co

// Start a recycling corner at home
++ Watch your trash trail closely and do good by dropping off the recyclables at one of these Tzu-Chi recycling points on 10 Sep.

// Nature Sketching
++ At Botanic Gardens on 16 Sep.  Details here.

// Picnic events
While these are not eco-themed events, I love the challenge of having a picnic with no disposables and instead, serving food on proper crockery.  Enjoy the events nicely plan out by various organizers, but keep the trash at bay.  I listed them according to locations.
++ Safra Ponggol on 3 Sep here
++ Marina Barrage on 3 Sep here
++ Bishan Ang Mo Kio Park on 2 Sep here
++ Concerts at Botanic Gardens always pull a picnic loving crowd, a check on the website shows concert event to be held on 2 Sep, 3 Sep, 9 Sep, 23 Sep, 30 Sep.

// Nature Tour
Guided walks are always popular with families during the school holiday, get the kids in touch with nature.
++ Pasir Ris Magrove Boardwalk Tour on 3 Sep. Sign up here.
++ Learning Forest Tour at Botanic Gardens 30 Sep. Details here.

Save

Save

Save

Save

Save

Save

Save

Save

6-Inch Castella Cake

6-Inch Castella Cake // Mono + Co

Have been putting off baking Castella cakes since most recipes require steam-baking.  I do not have a steam oven, neither do I have a large roasting pan to hold my cake pan to do a “water-bath”.  The aha moment came only when I saw this 6-inch Castella cake recipe: I can water bath this 6-inch cake in a 10-inch cake pan!  I even get to omit using aluminum foil to wrap my pan since I am not using a springform pan, the only item discarded after baking this cake is the parchment paper used to line the base of the pan.  There is no need to line the side of the pan.

6-Inch Castella Cake // Mono + Co

Using the steam baking method definitely made the cake airy yet producing a fine and moist texture.  No cracked top, and not much shrinkage after cooling down, all thanks to the slower (1 hour at 150C) yet even heat source from the water bath, just like this steamed chocolate cake recipe post has described.

6-Inch Castella Cake // Mono + Co

Trim the round cake into a thick rectangular slab to serve, just like the ones attracting long queues at the malls.  I found this article in mandarin that is super detailed with its step-by-step method, definitely worth a read.  The instructions has an additional step to slash the top halfway during baking to make it split evenly for the rest of the process.  I am thinking of making this variation already for my next attempt.


6 -INCH CASTELLA CAKE

adapted from My Mind Patch

3 eggs, yolks and whites separated *
40g rice bran oil
50g plain flour **
30g fresh milk
40g raw sugar
pinch of salt
Optional: 1/4 teaspoon vanilla extract

* I use eggs weighting 70g with shells for this recipe
** original recipe called for top/cake flour, I used plain flour to bake and the texture is still very fluffy to me.

Warm up rice bran oil in a saucepan over low heat, watch the oil carefully and turn off the fire once you see waves/lines begin to form at the base of the pot.

Add the plain flour to the warm oil and mix with a spatula, then add milk and vanilla extract, and stir to mix again.

Next, add the egg yolks, one at a time, stirring well to form an even mixture before adding the next yolk.  Set this batter aside.

To prepare meringue, whisk egg whites with a pinch of salt until frothy.  Add raw sugar next and whisk this mixture until it forms soft peaks.

Add about 1/3 of the meringue to the cake batter and mix well with a spatula.

Fold in the rest of the meringue to form an even cake batter.

Prepare a 6-inch cake pan by lining just the base with parchment paper.  Pour the cake batter into the pan and bang the pan on the table 3 times to get rid of air bubbles trapped inside the batter.  Removing these trapped bubbles ensure an even and smooth finished cake texture.

Place this pan inside a 9 or 10-inch round pan (or roasting pan if you have one) and fill the larger pan with about 2-cm deep of hot water.  Send the cake to bake immediately in a preheated 150C oven for 1 hour.

When the cake is done, remove from oven and drop the cake pan from a height of 10cm onto a padded counter top, 3 times.  This is supposed to help preventing excessive shrinkage during as the cake cools.  Leave the cake inside the pan to cool on a rack for 15 minutes before turning the cake out, removing the parchment paper at the base of the cake.  Return the cake to the pan and cool it further 15 minutes.  This cake serves best when still warm.

Save

Save

Save

Save

Simple Pleasures

Simple Pleasures // Mono + Co

// after learning that the glass has become a worthless commodity in the recycling industry hence jars & bottles are sent to landfills instead, I added a Pinterest board for “glass bottles and jars upcycling ideas”.  I wrote about how I repurpose some of mine last month here.

Simple Pleasures // Mono + Co

// glass thermal bottle for my daily tea habit.

Simple Pleasures // Mono + Co

// these desiccant sachets start popping up inside all our bags of Menglembu groundnut snack!  Till I figure out how to tell if these are still effective, I will be reusing them to keep my tea leaves dry.

Simple Pleasures // Mono + Co

// reviving my neglected sourdough starter…. it’s still alive!!!!!

Simple Pleasures // Mono + Co

// diy single-ingredient toothpaste with only baking soda, coconut oil is simply too messy for me and too oily for my basin.  Just add water and it becomes a natural mouthwash.

Save

Save

Save

Save

Handsewn Bento Bag

Handsewn Origami Bento Bag // Mono + Co

I don’t own a sewing machine (yet), so these hemmed Tenugui/Japanese hand towels from Daiso are great for my sewing craft work.  The drawstring produce bags handsewn with the same material are really light-weight and handy for my plastic-bag-free market trips, they are also great as lunch box carriers, something useful especially for packing hot food in my non-thermal stainless steel containers as they are too hot to hold without handles.

Handsewn Origami Bento Bag // Mono + Co

Just like the my previous projects, I am using the same Tenugui with dimension measuring 87 x 35cm.  My bento bag is modified from this design that originally requires the width to measure 1/3 to the length of the fabric.  After tucking the fabric in various ways to figure out a similar sewing pattern without cutting any part of it, I managed to sew this not-that-symmetrical origami bento bag.

Handsewn Origami Bento Bag // Mono + Co

The space is generous, I tried with a 26 x 13 x 6cm box an still manage to tie a pretty bow with the ends of the bag.

Handsewn Origami Bento Bag // Mono + Co

Save

Save

Oatmeal Porridge White Pullman Loaf

Oatmeal Porridge White Pullman Loaf // Mono + Co

I like how oatmeal porridge in this recipe made the sourdough bread really soft, so I added 135g of it to my bake today.  I probably need to add more if I want it to be as soft and fluffy as the ones I bake with steamed taro or steamed white rice.

Oatmeal Porridge White Pullman Loaf // Mono + Co

Oatmeal Porridge White Pullman Loaf // Mono + Co


Oatmeal Porridge Pullman Loaf

for oatmeal porridge:
100g boiling hot water
35g instant oatmeal

290g bread flour
1/2 tablespoon instant dry yeast
1/4 teaspoon sea salt
2 tablespoons raw sugar
1 large egg **
80g water
25g cold butter, cubed
topping: 2 tablespoons rolled oats

** I use a large egg weighing 70g.

To prepare oat porridge, mix hot water to instant oatmeal and stir until a thick consistency is formed. Leave it aside to cool completely.

In mixer bowl, combine bread flour, yeast, salt, and sugar well with a hand whisk.  After the dry ingredients are mixed, add cooled  oatmeal porridge, beaten egg and half of the water.  Start the mixer and knead on its lowest speed (KA 1) .  If the ingredients do not come together into a ball, slowly add more water, once a ball dough starts to form, stop adding water.  Turn off the mixer and let the dough sit for 15 minutes.

After 15 minutes, start the mixer again and knead for 1 minute before adding cubed butter, one by one.  Knead this until the dough reaches window pane stage; when the dough becomes very smooth and elastic.  Remove bowl from mixer and bulk rise this for 1 hour.

Punch the dough down and transfer it to a clean work top.  Shape the loaf and place in greased pullman bread tin, seams side facing downwards.  Let it rise in a draft-free place for 50-60 mins.  Before baking, spray the bread top with a fine mist of water and sprinkle rolled oats on top evenly.

Bake in a preheated oven at 170C for 30 minutes. Remove the bread from the pan immediately after baking, and let it cool on a rack completely before slicing or serving.

Store in an airtight container if not consumed immediately, to keep the loaf soft and the crumbs from drying out.

Save

Save

Save

Handsewn Bar Soap Pouch

Handsewn Bar Soap Pouch // Mono + Co

I recently started to make a switch to soap nuts for my handwash laundry.  While I am still getting accustomed to a really low sud way of washing my delicates, it’s indeed a great way to save water just like my almost-no-suds DIY tea seed kitchen detergent.  For more heavier soiled laundry, I am falling back on traditional bar soaps made with vegetable fats.  I tried an old-school “Labour” brand of laundry bar soap a few years back.  Can’t really remember what made me stop abruptly after using up all the 5 bars that came in the pack, but they did last quite a while.

I chanced upon a multi-purpose bar soap brand for household cleaning and laundry recently.  The seller recommended that it will lather even better when placed inside a drawstring bag, and hanging the bag with the soap inside to drip dry after using will prevent the soap from “dissolving” in a soap dish that is always wet.  I think this is a fantastic idea for bar soap users.  I can’t remember losing how many bars of bar soaps in the shower to such “flooding” soap dish incidents, so I diy a pouch my shower bar soap as well.

Handsewn Bar Soap Pouch // Mono + Co

For even better lathering effect, I made the drawstring pouches with a cotton washcloth from Daiso.  My shower bar soap instantly turns into an exfoliating bar when I use the soap placed inside the textured bag.  One washcloth is enough to make 3 handy pouches that fit the standard size bar soaps.

Handsewn Bar Soap Pouch // Mono + Co

Handsewn Bar Soap Pouch // Mono + Co

While this current laundry bar soap doesn’t feel drying to my hands, I can’t remember how my hands actually felt when I was using the Labour brand bar soap, but I remember it being much cheaper.

Handsewn Bar Soap Pouch // Mono + Co

Palm oil, coconut oil, canola oil, soda ash, and sodium hydroxide are listed whereas only “made with vegetable fats” is printed on Labour bar soap’s packaging.

Handsewn Bar Soap Pouch // Mono + Co

The pack comes with 4 individually shrink-wrapped bars.  Since I still have an extra pouch left,  I will be getting the Labour brand this weekend again to see if I like it better when I use it inside the pouch.

Save

Save

Save

Save

Save

Purple Sweet Potato Burger Patty

Purple Sweet Potato Burger // Mono + Co

This purple sweet potato burger patty was created based on a taste that I like, smoky with lots of sweetness from onion and basil leaves.  Added walnut and black sesame seeds to make my mum happy, she always worries that I don’t get enough nutrients by going meatless.  But hey look, my recipe is packed with real food, no space for fillers like breadcrumbs or flour!  Pan frying these patties will require a bit of tender loving care as I only add a beaten egg to hold the ingredients together.

Purple Sweet Potato Burger // Mono + Co

As I made this through trial and error, I don’t have an exact recipe for this.  To recreate this, I will probably be referring to the following photos and estimate the proportion of ingredients by eyeballing.  I did not come up with this recipe from scratch though.  Other than having a rough idea how I want my burger to taste, I referred to one of my favorite recipe sites, Minimalist Baker , for some ideas on creating this delicious looking sweet potato burger patty.


Purple Sweet Potato Burger Patty, A Rough Guide

Purple Sweet Potato Burger // Mono + Co

In a food processor, blitz a handful of walnuts and about 1/4 yellow onion.

Purple Sweet Potato Burger // Mono + Co

Add this to steamed and mashed sweet purple potatoes (from 2 medium size ones), a tablespoon of black sesame seeds, a handful of sweet basil leaves, chopped, an half a tablespoon of sweet paprika.

Purple Sweet Potato Burger // Mono + Co

Stir to mix well.  Depending on how moist the sweet potato is, the patty at this stage will be on the dry side.

Purple Sweet Potato Burger // Mono + Co

Slowly add beaten egg and stop just before the patty mixture becomes too wet to be molded.

You should be able to shape the patty by hand to look like this:

Purple Sweet Potato Burger // Mono + Co

In a preheated skillet, add some cooking oil.  Gently place the patties on the skillet and fry till both sides are cooked.

To assemble and serve, I added lettuce,

Purple Sweet Potato Burger // Mono + Co

sliced red capsicum,

Purple Sweet Potato Burger // Mono + Co

cheddar cheese, and grilled portobello mushroom,

Purple Sweet Potato Burger // Mono + Co

between 2 burger buns.  Eat immediately.

Purple Sweet Potato Burger // Mono + Co

More meatless vegetarian patty ideas, try out:

// this made with black bean,

// this vegan version with chickpeas and sweet corn,

// my favorite protein, bbq tofu patty,

// another “red meat”-looking patty, using beetroot.

Save

Save

Save

Save

Save

Save

Save

Save

Green Monday: DIY Beeswax Food Wrap

Green Monday: DIY Beeswax Cloth Wrap // Mono + Co

I go by a simple rule that if something can be diy-ed relatively easily, then resist buying, unless leaving the ‘making’ to someone else saves me plenty of money.  Beeswax cloth food wraps definitely fall under the “can-do” category.

For the uninitiated, beeswax food wraps are the environmentally friendly solution to plastic cling wraps since it can be reused, unlike the disposable nature of the latter.  I have long given up on plastic food wraps as they never seem to “cling” once out of the dispenser.  I find old newspapers a better wrap for my leafy vegetables and see through food savers are my preferred storage containers for halved lemons, avocados and carrots.  But if you are still buying, using, and discarding rolls and rolls of plastic cling wraps, perhaps you might want to consider investing one of these reusable food wraps.  I have since made these wraps on 2 separate occasions and share some tips and thoughts on this DIY project below.

Green Monday: DIY Beeswax Cloth Wrap // Mono + Co Green Monday: DIY Beeswax Cloth Wrap // Mono + Co

// 001.  Sizes: XS and XL

The best thing about making my own wrap is that I can decide how big or small I want the wrap to be.  As big as this one that I can easily use to wrap watermelon half, or

Green Monday: DIY Beeswax Cloth Wrap // Mono + Co Green Monday: DIY Beeswax Cloth Wrap // Mono + Co

as tiny as this one for 2 cherry tomatoes,

Green Monday: DIY Beeswax Cloth Wrap // Mono + Co

I even have one for wrapping a bamboo spoon for a packed meal.  Neat.

Green Monday: DIY Beeswax Cloth Wrap // Mono + Co

// 002. Methods: Oven or Iron?

These are the initial few sheets that I have made. Things went smoothly right from the very first piece, simply because the bake in the oven method is really easy.

I first line a baking tray with parchment paper, then place the cotton fabric on the paper, sprinkle beeswax pellets evenly on it and place it in a preheated oven at 150C.  It takes just 3 minutes for the beeswax pellets to melt.

Take the tray out, add 1/8 – 1/4 teaspoon of coconut oil (I learned that the addition of oil helps to make the wrap more pliable and cling better here) and use a clean large paintbrush with short bristles (so that the beeswax is not absorbed by the bristles) to spread the wax and oil evenly on every inch of the fabric.  Do this step swiftly before the wax starts to solidify at room temperature.  If the wax solidifies before you can even spread them, pop them back into the oven for another 30 sec to 1 minute this time to melt again, but watch closely and do not leave the oven unattended since beeswax and cotton are flammable.

Once the wax has been evenly spread, remove the fabric from the parchment paper and let it dry.  Once dry, wash it once with water and mild soap before its first use.

Green Monday: DIY Beeswax Cloth Wrap // Mono + Co

Green Monday: DIY Beeswax Cloth Wrap // Mono + Co

The only teething issue I have is how to keep the melted beeswax remaining on the cotton fabric, not on my baking tray.  Even after lining the tray with baking paper, I still ended up with beeswax staining my tray, which I have yet to clear. (Oops)

There is another iron-on method with instructions here.  But I decided not to try just in case the beeswax stains my iron and ironing board.

Green Monday: DIY Beeswax Cloth Wrap // Mono + Co

// 003.  Do they cling well?

Yes.  Much better than plastic cling wraps.  Make these with the lightest cotton fabric, not the heavy kind for making curtains with.  The thin fabric will allow the food wrap to cling better.

Green Monday: DIY Beeswax Cloth Wrap // Mono + Co

I have since been testing these wraps vigorously, at home as well as on-the-go, washing, and drying in between just to see how well they can replace the plastic version.  They definitely work, and they “cling” so much better than the plastic ones.  As beeswax softens at the warmth of my hands, I managed to shape and mold the wrap closely to the contour of the food items or containers.  And once they are placed in the chiller, the shape is further set as the beeswax solidifies.

Green Monday: DIY Beeswax Cloth Wrap // Mono + Co

I am so happy with the result that I customize one as a lid for my baking pan so that it becomes my “bread storage tin”.

Green Monday: DIY Beeswax Cloth Wrap // Mono + Co

And made more with some fabric scraps from Ikea.

Green Monday: DIY Beeswax Cloth Wrap // Mono + Co

But I still prefer plain ones, so I made more with my plain fabric and dye them with pomegranate tea and turmeric tea for a colour variety.

Green Monday: DIY Beeswax Cloth Wrap // Mono + CoGreen Monday: DIY Beeswax Cloth Wrap // Mono + Co

// 004. How to care for them?

First thing first.  These wraps are not to be used for raw meat and dairy products since the wrap can only be washed with cold water and mild soap.  Keep the wrap away from heat sources as the beeswax will melt.  For the same reason, do not it use to wrap hot food.

To wash, simply run the wrap under cold water and wash with mild soap.  Wipe dry with a tea towel if reusing immediately.  Otherwise, hang to air dry, then fold the wraps and store in a drawer.  The wraps will retain the creases from the previous usage and will need a re-wax (same instructions a making a new one) when the wrap no longer clings as well as before.

Green Monday: DIY Beeswax Cloth Wrap // Mono + Co

// 005. Other tips?

++ A pair of pinking shears will help to earn extra design points.

++ Be careful if you are allergic to beeswax or pollen, you might want to get wrap made with plant based wax such as soy instead.

++ When passing food to friends wrapped in these wraps, make sure to inform them that these are reusable and non-disposable.  I am adding this tip because one ended up being trashed by an unaware friend.

Save

Save

Save

Save

Save

Save

Save

Save

Save

Save

Save

Save

Simple Pleasures

Simple Pleasures // Mono + Co

// make extra crispy fried shallots and shallot oil to give away when I buy too big a bag of shallots.

Simple Pleasures // Mono + Co

// bring-your-own-container desserts, always more appetizing than eating out of a single use plastic bag.

Simple Pleasures // Mono + Co

// switching to loose tea leaves.

Simple Pleasures // Mono + Co

// going back to wired mouse and keyboard when I learned that alkaline batteries are not recyclable and incinerated here.

Simple Pleasures // Mono + Co

// this pair of abandoned drinking glasses, washed and sterilized in a pot of boiling water.

Save