Green Monday : DIY Tea Seed Powder 苦茶籽粉 Detergent

Green Monday : DIY Tea Seed Powder 苦茶籽粉 Detergent // Mono+Co

(Update 27 May 2020:  I have stopped making tea seed cleaning detergent this way.   Instead, I reuse a sugar dispenser , fill it up with tea seed powder and sprinkle it directly on the greasy dishes like this.)

Tea seed powder is what remains after the edible oil, more commonly known as Camellia oil (苦茶油), has been extracted from the tea seeds.  The defatted seeds are then crushed and milled into fine powder which contains natural saponins.  This makes the powder an effective yet natural cleaner and degreaser, perfect replacement for my commercial dish washing detergent, less harsh on my hands too.  You see, I love cleaning, but I don’t want my hands to look the part.

Although packaging instructions says to mix powder with water to form a paste for scrubbing dirty dishes, I kind of miss the “slippery feel” of a lathering detergent.  I also feel that I am using more powder than required for my usual load since I am not sure if the dishes are cleaned properly by just rubbing the powder paste on them.  Therefore, I attempt to boil the tea seed powder plus water mixture into a thickened solution that is easier to dispense and apply.  Although the tea seed detergent does not lather up like the commercial ones, the greasy dishes feel squeaky clean after a quick rinse.  There is no soap residue: the kind that takes forever to wash away.  With the water price hike effective this month, water bill saving is a selling point for me to switch to this homemade detergent.

Green Monday : DIY Tea Seed Powder 苦茶籽粉 Detergent // Mono+Co

I have already used up two-1kg pack bought from a local organic shop, not only as detergent, but also in lots of other body care uses as shown here and here.  One important thing to note is that once the bag is opened, the powder will turn rancid fast and must be used up in three months.

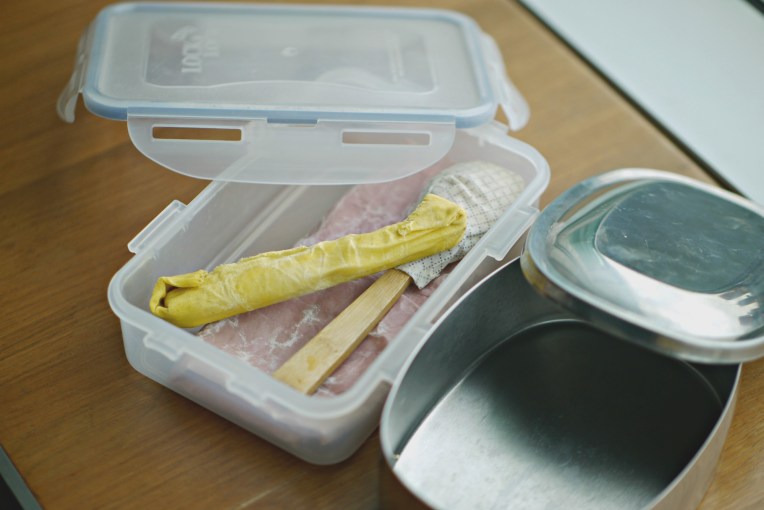
Since the opened bag must be kept in a cool dry place, I choose to store the balance from an opened bag in an airtight container.  Prettier than a pouch clip on a slouching bag.  Lest you think that I diy the label on the plastic container, it is actually a label from another brand that I first bought from Taiwan.  So I have in fact used up a total of 3 kg todate.  Yes, it’s that versatile and effective.

As the tea seed powder solution will turn bad overnight, I have to make a fresh batch everyday for daily use, and discard whatever I can’t finish up.  I have since learned a great tip to make the detergent last longer without spoilage.  Revelation came somewhere between the second and third bag, and after poring over the ingredient labels of a few commercially available tea seed powder detergents : adding sea salt as a natural preservative!

Green Monday : DIY Tea Seed Powder 苦茶籽粉 Detergent // Mono+Co

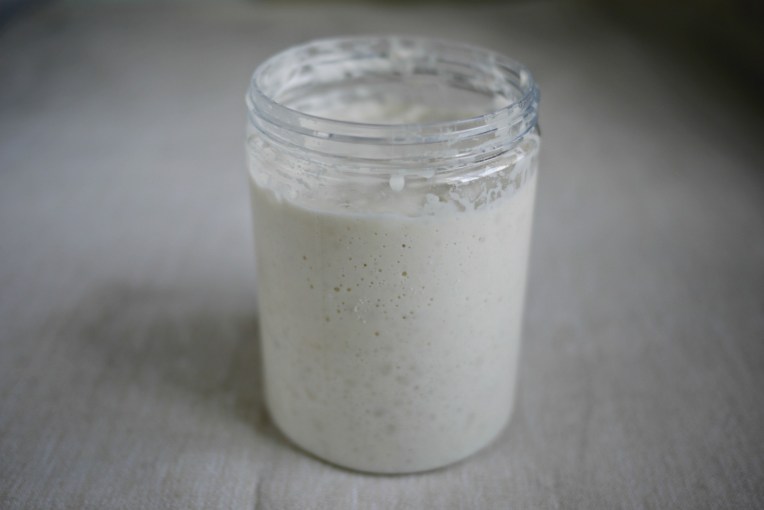
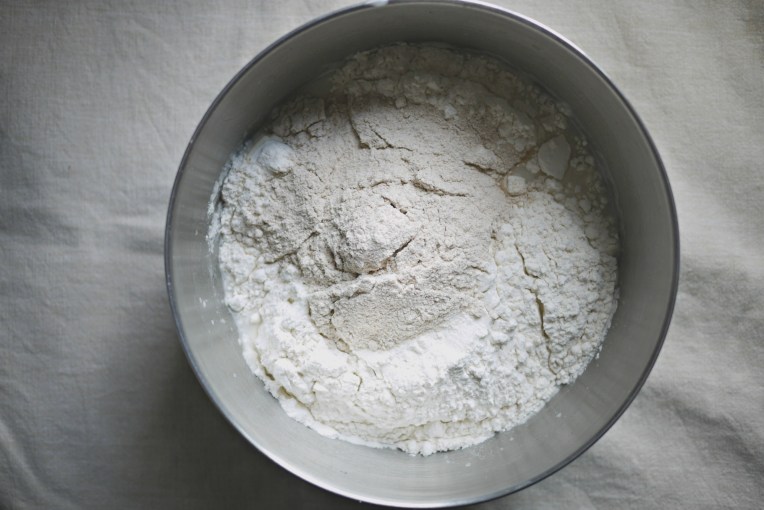
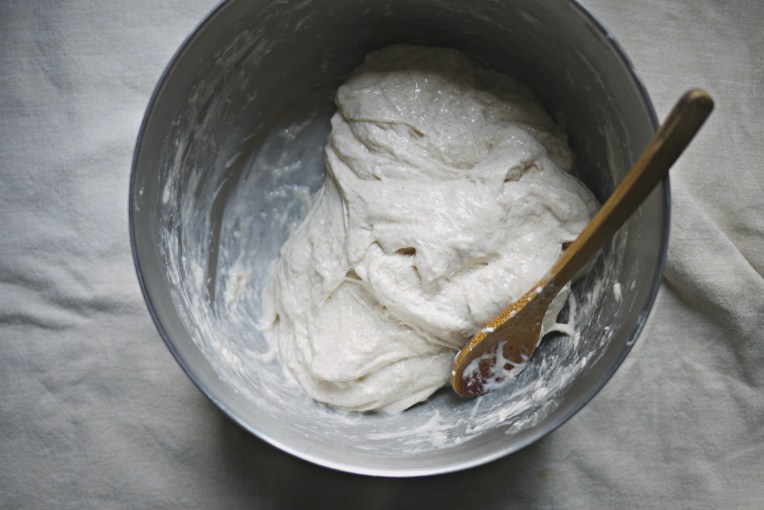
I  don’t have the exact formula or scientific recipe to the proportion of ingredients, but this is the ratio I use : 100 ml water to 1 tablespoon tea seed powder to 1/2 teaspoon sea salt.  I came up with this as it is easy to remember and it also happens to produce a pretty thick consistency after boiling.  If you find it too thick, add lesser tea seed powder for a more runny detergent.  Mix everything in a pot and stir until the powder has completely dissolved.  Bring mixture to boil over medium heat while stirring.

Here are the steps I use to make the detergent : first, mix everything in a pot and stir until the powder has completely dissolved.  Bring mixture to boil over medium heat while stirring.  I use a pot that I cook with, since I wash my pot with the very detergent that I am making, so there is no reason for me to use a separate pot to boil the mixture.  The powder is inedible though, so keep it away from children.

Green Monday : DIY Tea Seed Powder 苦茶籽粉 Detergent // Mono+Co Green Monday : DIY Tea Seed Powder 苦茶籽粉 Detergent // Mono+Co

As soon as the mixture starts to boil, the solution will slowly thicken.  Turn off heat and allow detergent to cool down completely.

Green Monday : DIY Tea Seed Powder 苦茶籽粉 Detergent // Mono+Co

Tranfer detergent to a squeeze bottle or a pump dispenser, shake each time before use.

Green Monday : DIY Tea Seed Powder 苦茶籽粉 Detergent // Mono+Co

I have been filling up a 600ml (600ml water + 6 tablespoons tea seed powder + 3 teaspoons sea salt) squeeze bottle bought from Daiso with my homemade dishwashing detergent.  A bottle can last me for about 4-5 days of daily dishwashing.

Another chemical household product eliminated, another eco multi-purpose cleaner in my house.  More on its other usage soon, especially as a shampoo for my greasy scalp!

Save

Save

Save

Save

Reuse And Repurpose : Glass Jars and Bottles

Reuse And Repurpose : Glass Jars and Bottles // Mono+Co

Although the Plastic-Free-July Challenge targets at single use disposable plastic, I am using this opportunity to mention something about my love for glass jars and bottles.  Glass is my most preferred material as food storage containers for my pantry.  You can see through them and know what’s exactly inside.  There is no worrying of toxins leaching into my food.  And they are such a breeze to sterilize, take your pick from six methods here.

There are many food items that are already packaged in glass vessels, I always think that it’s such a waste to be buying glass containers (or plastic ones) yet discarding perfectly well pasta sauce jars into the recycling bins instead. Here are some of my favorite reused and repurposed glass jars and bottles,  I collect those that come in clean lines and once you remove the labels, they will look totally like the ones that you want to buy from the stores.

Reuse And Repurpose : Glass Jars and Bottles // Mono+Co

+ BEFORE:
Papa Alfredo pasta sauce jars.

+ AFTER:
I love these 680ml pasta sauce wide mouth bottles that do not come with shoulders.  They are great for dispensing breakfast goodies such as Milo powder, oatmeal and granola.  Covering the lids are my diy beeswax wrap to test out how well them can wrap and mold.  I have since been using the wraps for food items instead.

Reuse And Repurpose : Glass Jars and Bottles // Mono+Co

+ BEFORE:
Prego pasta sauce jar.

+AFTER:
Bottle for my homemade cold brew coffee, perfect on a warm day.  I leave the coffee brewing inside the fridge for 1-2 days.

Reuse And Repurpose : Glass Jars and Bottles // Mono+Co

+ BEFORE:
Daiso rice vinegar glass bottle.

+ AFTER:
Cooking oil dispenser.  I buy 2L bottles of cooking oil that are quite bulky to dispense during cooking.  This glass bottle with a flip cap is perfect.  The dispensing hole is also big enough for easy refilling.

Reuse And Repurpose : Glass Jars and Bottles // Mono+Co

+ BEFORE:
Japanese rice seasoning mix bottles.

+ AFTER:
Toasted sesame seeds dispenser.

Reuse And Repurpose : Glass Jars and Bottles // Mono+Co

+ BEFORE:
Bragg apple cider vinegar bottle (946ml) and preserved olive vegetable bottle.

+ AFTER:
Glass water bottle with drinking glass ‘set’.  Fill to the brim daily with drinking water and place on the table as a reminder to keep myself well-hydrated.

Reuse And Repurpose : Glass Jars and Bottles // Mono+Co

+ BEFORE:
Bottled organic milk bought and drank in Korea.

+ AFTER:
I brought it all the way home and currently using it to store balance whipping cream from an opened tetra pak carton.  I sterilize the glass bottle thoroughly every time before reusing it for storing dairy products.

Reuse And Repurpose : Glass Jars and Bottles // Mono+Co

+ BEFORE:
Honey bottles.

+ AFTER:
Condensed milk and evaporated milk containers.

Reuse And Repurpose : Glass Jars and Bottles // Mono+Co

+ BEFORE:
Eternity perfume bottles.

+ BEFORE:
Reed diffusers after removing the spray nozzles.

Reuse And Repurpose : Glass Jars and Bottles // Mono+Co

+ BEFORE:
(left-right) Cough medicine bottle and essential oil bottle.

+ AFTER:
Indoor green display.  Brown bottles go really well with fresh green cuttings like these.

+ BEFORE:
Beer bottle.

+ AFTER:
Flower vase.

Reuse And Repurpose : Glass Jars and Bottles // Mono+Co

+ BEFORE:
Another bottled milk bought and drank during an overseas vacation.

+ AFTER:
For another stem cutting display.

Reuse And Repurpose : Glass Jars and Bottles // Mono+Co

+ BEFORE:
Bragg Apple Cider Vinegar bottle.

+ AFTER:
Wrap the bottle body with jute string and turn it into a rustic looking display vase.

Reuse And Repurpose : Glass Jars and Bottles // Mono+Co

+ BEFORE:
Clarins body oil bottle.

+ AFTER:
Bottle filled with water, placed by the warm window for growing new plants from cutting.

Reuse And Repurpose : Glass Jars and Bottles // Mono+Co

+ BEFORE:
Jam jar bottles.

+ AFTER:
Pretty gift jars, with some crafting efforts.

Reuse And Repurpose : Glass Jars and Bottles // Mono+Co

+ BEFORE:
Nutella 850ml bottle.

+ AFTER:
Pretty greeting card-bottle.

Reuse And Repurpose : Glass Jars and Bottles // Mono+Co

+ BEFORE:
Nutella 1-kg glass bottle.

+ AFTER:
DIY piggy bank.

Save

Save

Save

Save

Save

Save

Save

Save

Save

23 Not-So-Plastic Items To Buy From Daiso

Time to bring out your reusable shopping bags, food savers and tumblers for the Plastic-Free July Challenge.

I digged out my not-so-plastic purchases from Daiso over the years to demonstrate how shopping in everyone’s favorite $2 haunt can be just as enjoyable, without going gaga over only the plastic containers, plastic organizing tools, melamine tablewares, and microfibre towels.  I never know I can find jute strings easily here until I saw them in Daiso!

23 Not-So-Plastic Items To Buy From Daiso // Mono + Co

#01 – cotton dish towels that are so soft that I turn them into handkerchieves to replace the use of tissue papers.

23 Not-So-Plastic Items To Buy From Daiso // Mono + Co

#02, #03, #04 – Three different designs of food savers in glass or enamel material, albeit with plastic lids.

23 Not-So-Plastic Items To Buy From Daiso // Mono + Co

#05 – Japanese Tenugui for anything that requires wrapping.

23 Not-So-Plastic Items To Buy From Daiso // Mono + Co

#06 – drinking mason jar with handle for a yummy smoothie.

23 Not-So-Plastic Items To Buy From Daiso // Mono + Co

#07 – wooden trivets for hot pots.

23 Not-So-Plastic Items To Buy From Daiso // Mono + Co

#08 – natural loofah for smooth skin. I found this without plastic wrappers.

23 Not-So-Plastic Items To Buy From Daiso // Mono + Co

#09, #10, #11, #12, #13 – wooden/bamboo kitchen tools : spoons, chopsticks, forks, spatula, rolling pin.

23 Not-So-Plastic Items To Buy From Daiso // Mono + Co

#14, #15, #16 – paper string (for bundling up newspapers for recycling), jute string (for crafting), butcher’s twine (for cooking).

23 Not-So-Plastic Items To Buy From Daiso // Mono + Co

#17 – these European thin glass drinkwares that I turned into toothbrush mugs.

23 Not-So-Plastic Items To Buy From Daiso // Mono + Co23 Not-So-Plastic Items To Buy From Daiso // Mono + Co

#18 – bakewares that are pretty enough for food to be served in them.

23 Not-So-Plastic Items To Buy From Daiso // Mono + Co

#19 – chawanmushi cups with lids for perfect steamed eggs.

23 Not-So-Plastic Items To Buy From Daiso // Mono + Co

#20 – tea cup for zen moments.

23 Not-So-Plastic Items To Buy From Daiso // Mono + Co

#21 – wooden pot lid holder.

23 Not-So-Plastic Items To Buy From Daiso // Mono + Co

#22 – ceramic plant pot.

23 Not-So-Plastic Items To Buy From Daiso // Mono + Co

#23 – ceramic oil burner for freshening up a room.

I enjoy discovering these non-plastic products as I feel that they give me more value for money since they also tend last longer too, with most in mint condition (except the loofah, of course) when I take good care of them.  What about you? Do you have your favorite non-plastic purchases from your local 100-yen shop too?

Save

Save

Save

Save

Save

Save

Save

Save

Save

Tartine Sourdough Country Loaf

Tartine Sourdough Country Loaf // Mono + Co

I save bread packaging from going to landfills by baking my own rustic bread loaves baked with plain flour bought in bulk.  Currently into natural starter and Tartine’s recipes seem to be on everyone’s must-bake list.

There is nothing different about the recipe I used to bake this classic Tartine sourdough except that I have halved it, based on the size of my Dutch Oven and my refrigerator’s capacity.  Why bake the full recipe when it takes me a few mornings to finish one loaf?  What helped a lot is that this dough recipe is a breeze to mix.  Simply mix another batch when the loaf is about to finish.

Tartine Sourdough Country Loaf // Mono + Co

An active starter is a critical ingredient here.  I continue to be awed endlessly by my natural starter that produces the most dramatic oven spring in my short sourdough baking history.  Coating the surface of the bread with rice flour before slashing is also a must, to make the “split” more obvious and help it look more ‘pro’ and rustic.  My heart skips a beat every time I uncover the pot after the first 40 minutes in the oven.

To ensure that the starter is active, I make sure that I feed my starter at regular interval until it can double within 3 hours at room temperature which is 30C here.

Tartine Sourdough Country Loaf // Mono + Co

While the original recipe stated 20 minutes with the lid and 20-25 minutes with the lid off, this is for bakers who are experienced or willing to risk a scalding arm with a preheated hot dutch oven pot at 230C.  I bake my dough cold, straight from the chiller and in an unheated pot, but I still manage to get a perfect oven spring and a crust that caramalize to a beautiful brown.  I have to bake the bread longer though: 40 minutes in the oven with the lid on and another 40minutes without the lid.

Tartine Sourdough Country Loaf // Mono + Co

Made for myself a step by step pictorial guide with 1/2 the ingredients of this recipe.  Hope you will find it useful too.


Tartine Sourdough Country Loaf

Start with an active starter, pour 125g into a mixer bowl, and add 370g water.

Tartine Sourdough Country Loaf // Mono + Co

Stir around with a wooden spoon until the starter is mixed well with the water.

Tartine Sourdough Country Loaf // Mono + Co Tartine Sourdough Country Loaf // Mono + Co

Add 350g plain flour and 150g wholemeal flour to the diluted starter.

Tartine Sourdough Country Loaf // Mono + Co

Stir and mix with the wooden spoon.  Let this sit aside for at least 30 minutes, covered.

Tartine Sourdough Country Loaf // Mono + Co

After 30 minutes, sprinkle 10g sea salt on top of the dough and another 25g water, and

Tartine Sourdough Country Loaf // Mono + Co

gently stir to mix the salt and water into the autolysed dough, which will appear smoother at this point.

Tartine Sourdough Country Loaf // Mono + Co

Mix until all the water has been absorbed by the dough.  Then, with a clean wet hand, do a few round of  “stretch and pull” actions.  Let dough sit for another 30 minutes.

Tartine Sourdough Country Loaf // Mono + Co

After 30 minutes, repeat the “stretch and pull” action, then let it sit for 30 minutes again.  This will be “Turn #1”.  Repeat this for another 3 times.

Tartine Sourdough Country Loaf // Mono + Co

After “Turn #4”, transfer the dough to a container with cover, or simply cover the mixer bowl (if your fridge has ample space for it) with a pot lid of the right size, and let it bulk ferment inside the fridge overnight.

Tartine Sourdough Country Loaf // Mono + Co

Next morning, when ready to bake, preheat oven to 250C.  Flour the base of a Dutch Oven with rice flour, to prevent the bread from sticking to the pot when baking.  I do this to save on parchment paper.  Retrieve the dough from fridge and shape the dough gently into a ball, place it inside the pot, seam side downwards.

Tartine Sourdough Country Loaf // Mono + Co

Sprinkle rice flour on top and make a score on the surface of the dough.

Tartine Sourdough Country Loaf // Mono + Co

Cover and bake for 40 minutes.

Tartine Sourdough Country Loaf // Mono + Co

After 40 minutes, Remove cover, and bake for another 40 minutes at 220C.

Tartine Sourdough Country Loaf // Mono + Co

After baking, remove the bread from the Dutch Oven immediately, and let it cool completely on a rack before slicing.  Store unfinished bread in an airtight container to prevent crumbs from drying out.

Tartine Sourdough Country Loaf // Mono + Co

Enjoy!

Save

Save

Save

Save

Save

Save

Save

Save

Save

Save

Save

Save

Eco-Friendly Traveller : Hong Kong

Hong Kong. No Disneyland. No Ocean Park.

I was there to spend a simple weekend exploring local organic stores and wet markets (surprised that they are air-conditioned), plus trying out meat-free eateries.  All this while sticking to some basic eco-friendly rules that I follow at home, like finishing up my food.

Eco-Friendly Traveller : Hong Kong // Mono + Co

Despite clearing out my fridge before the trip, I still had a leftover peanut pancake which became my first snack in Hong Kong, packed in beeswax wrapper, stow away inside my luggage with other reusables that became really useful during the trip.

Eco-Friendly Traveller : Hong Kong // Mono + Co

I brought along 2 containers.  A plastic version that is airtight and leakproof and a stainless steel version, two of my most compact ones.  Beeswax wrapper in smaller dimension seals my cutlery set in case I need to throw them into my bag when the containers are full, keeping them away from the-whatever-dirt-I-have inside my bag.  These come in handy for street food and bakeries with no seating, think stinky tofu, cream cakes, and egg tarts.  But whenever there is an option to dine in, I will choose so to save the hassle of explaining my “no-disposable” preference.  It’s a great way to immerse oneself in the native atmosphere.  The servers at the Cha-Chaan-Teng are straightforward and loud, and always have an interesting tale or two to share among themselves, nevermind that the shop is full of hearing ears.  However, take note that some eateries will impose a minimum spending amount per head due to Hong Kong’s high rental rates.  Besides food containers, I also brought along a borosilicate glass flask for hot coffee takeaways and of course, my daily drinking water that I boil and cool every night in the hotel room.  If you find bringing these along cumbersome, at least consider foldable reusable bags for shopping, I brought 4.

Eco-Friendly Traveller : Hong Kong // Mono + Co

Packing for a vacation doesn’t mean stuffing the luggage with plenty of disposables,  especially for a short trip like mine.  I simply condense my bathroom routine with multi-purpose products, such as applying the same jojoba oil for face and body or using the same soap for hair and body.  I could easily do without a face mask or scrub for a week, so why bother bringing along?  Sunscreen is a must though.

The first thing I do when I step into a hotel room is to gather all the disposable items and place them outside the bathroom for the chambermaid to know that they can reuse them after we check out.  Even if you don’t use them, leaving them on the bathroom counter will only damage the paper packaging with water splashed from the sink, making them unusable for the next guest.  I usually bring along my outdoor rubber slippers as bedroom slippers after a quick wash.  But if the room is floored with hardwood, I will just go barefoot, making myself feel at home, thus saving a pair of disposable room slippers from the landfill.

Eco-Friendly Traveller : Hong Kong // Mono + Co

Public transport in Hong Kong is famous for its efficiency.  MTR stations are super accessible, with numerous exits leading to the various destinations.  But I have view watching in mind, so I boarded one of the 11 airport bus routes that depart from the terminal to my accommodation that lies along the route.

Eco-Friendly Traveller : Hong Kong // Mono + Co

Google map has also totally changed my public transport experience in a foreign city, allowing me to explore further, connecting the dots with buses, minibuses, even the 100-year-old tramlines are also included in the Google routes.  No longer are itineraries limited to just popular touristy spots or places near MTR stations.  Precious amount of travelling time is saved by choosing the “fastest route”.

Eco-Friendly Traveller : Hong Kong // Mono + Co

But we can always choose to go the slower way, such as purposely taking a stroll along the street even though a bus will take us there in 5 minutes.  There are plenty of things to see in the neighbourhoods, unlike the cookie-cutter malls.

Some of the daily mundane that caught my eyes:

Eco-Friendly Traveller : Hong Kong // Mono + Co

// public road for everyone

Eco-Friendly Traveller : Hong Kong // Mono + Co

// store with memories

Eco-Friendly Traveller : Hong Kong // Mono + Co

// creating own’s patch of greenery with limited space

Eco-Friendly Traveller : Hong Kong // Mono + Co

// or leave it to nature

Eco-Friendly Traveller : Hong Kong // Mono + Co

// rag-and-bone man, keeping useful items in the loop

Eco-Friendly Traveller : Hong Kong // Mono + Co

// the usual recyclables in demand

Eco-Friendly Traveller : Hong Kong // Mono + Co

// packaging-lite shopping

Eco-Friendly Traveller : Hong Kong // Mono + Co

// wrapped by nature

Eco-Friendly Traveller : Hong Kong // Mono + Co

// cellophane-free vegetables

Eco-Friendly Traveller : Hong Kong // Mono + Co

// local organic vs imported premium

Eco-Friendly Traveller : Hong Kong // Mono + Co

// “it’s more tiring to cook at home”, a reason for take-outs in this fast-paced city

Eco-Friendly Traveller : Hong Kong // Mono + Co

// even places of worship can conduct workshops on environmental issues, overheard at the Wong Tai Sin temple announced over their PA system

Eco-Friendly Traveller : Hong Kong // Mono + Co

// every effort counts, an eco-reminder spotted in a local market: “today let’s save the earth together. tomorrow will be a better day for us.”

Turns out that Hong Kong has plenty of recycling bins dotting around the island.  They are never too far away from you to drop your recyclables.  I started counting recycling bins around me while waiting at the airport.  They are in such abundance that at a particular vantage point, I could spot 3!

Eco-Friendly Traveller : Hong Kong // Mono + Co

// a reminder that you are contributing to the landfill, rubbish don’t just poof and disappear

Eco-Friendly Traveller : Hong Kong // Mono + Co

// no language barrier. no excuse!

Eco-Friendly Traveller : Hong Kong // Mono + Co

// recycling bins next to garbage bins to make you think twice.

Eco-Friendly Traveller : Hong Kong // Mono + Co

// see through ones

Eco-Friendly Traveller : Hong Kong // Mono + Co

// batteries included

Eco-Friendly Traveller : Hong Kong // Mono + Co

// slot for papers only, so you can’t sneak in your plastic bottles

At the end of my trip, I still ended up with some non-recyclable plastic rubbish, though I am sure that I have saved more waste than I have created as a result of being a mindful consumer.  I understand that the environmental problems won’t go away immediately after I reject a plastic shopping bag.  But the key point is to at least try, isn’t it?  Any more tips from experienced eco-travellers?

Save

Save

Save

Save

Save

Save

Save

Save

Save

Save

Save

Save

Save

Save

Save

Save

Save

Save

Origami Bookmark With Tray Liner

Origami Bookmark With Tray Liner // Mono + Co

These origami papers are not what they seem.  The Minion themed tray liners from a popular fast food restaurant are too pretty to be recycled into paper pulp.

After trimming them to square sheets, I proceed to turn them into bookmarks.  Catching up with a novel or two is a great luxury during the school holiday, so these will definitely come in handy when left on the coffee or bedside table.

Origami Bookmark With Tray Liner // Mono + Co

I folded these bookmarks with instructions here, here, and here.

Origami Bookmark With Tray Liner // Mono + Co Origami Bookmark With Tray Liner // Mono + Co

Save

Save

Save

Blue Butterfly Pea Flower Lemonade

Blue Butterfly Pea Flower Lemonade // Mono + Co

My blue butterfly pea flower lemonade has a lighter hue than what you’ll see here and here.  These recipes state to steep the flowers in boiling water first to allow the blue pigment to be extracted before adding the juice of a lemon and transform the blue tea purple.

I prepared mine in a different order: squeeze the juice of a lemon into a glass first, followed by adding ice cubes that has been frozen with the flowers inside each of them.  This method suits me better since I prefer my lemonade really sour with little dilution. By the time all the ice cubes has melted, at least the drink still stay tasting like lemonade.

Blue Butterfly Pea Flower Lemonade // Mono + Co

I started freezing these blue flowers in my ice cube tray when I ran out of ideas what to do with them as they continue to bloom.  I have since brewed them as hot blue tea, dye a cotton hankerchief into a lightest shade of blue (the color has since faded after a few washing), and conducted a self-learning calligraphy lesson in, you guessed it, blue ink.

Blue Butterfly Pea Flower Lemonade // Mono + Co

This is a great way to preserve the blooms and make pretty drinks.  If you let these ice cubes melt on counter, you will get a puddle of blue ink which you can subsequently use for your favorite  crafting ideas with blue pigment.

Blue Butterfly Pea Flower Lemonade // Mono + Co

Blue Butterfly Pea Flower Lemonade // Mono + Co

Back to my lemonade, as the ice cubes started to melt, the color of the drink slowly turned pink.  It’s so perfect for the warm day!

For the curious ones, this explains the science behind.

Blue Butterfly Pea Flower Lemonade // Mono + Co

Save

Save

Save

Save

Save

Save

Save

Green Monday : DIY Cotton Ironing Board Cover (No-Sew)

Green Monday : DIY Cotton Ironing Board Cover (No-Sew) // Mono + Co

Sometimes, synthetic materials are so ubiquitous in our lives that I often overlook simpler/ natural alternatives until I ask myself if a DIY avenue is possible.  For all the countless ironing board covers that I have been replacing over the years, I always blindly pick one from the shelf pondering over only the size and pattern design but never the material composition.  There wasn’t much choices available at the supermarket where I usually buy my covers from and technology all seems to be pointing towards a shinier and easier-to-glide surface for a perfect press anyway.

Green Monday : DIY Cotton Ironing Board Cover (No-Sew) // Mono + Co

When the latest cover accidently got burnt by a wrong temperature setting (note to self: focus!) and let off a plasticky whiff, I started wondering if I should seek a better cover made of a thicker material with a higher heat resistance level.  I started recalling how my mom used to make us do our ironing seated on the floor without an iron board.  What lies underneath the garment is just a huge piece of heavy cotton canvas that has been folded multiple times to create a thick pad.  And after we were done, the canvas was stowed away nicely in the wardrobe, unlike the modern bulky standing iron board that sticks out like a sore thumb propped against one side of my bedroom wall.  I don’t intend to discard my ironing board since I have grown accustomed to doing my ironing while standing, but this brief reminiscence reminded me of a piece of cotton cloth that could be perfect for this DIY.

Green Monday : DIY Cotton Ironing Board Cover (No-Sew) // Mono + Co

The cotton cloth fits the dimension of the ironing board nicely, but I wasn’t in the mood to sew this by hand, yet.  Instead, I retain the damaged cover (a temporary pad since I find the cotton not thick enough) and start manoeuvring the cloth around to wrap the cover and the ironing board.  If you can make your own bed or wrap a present neatly, this should not be difficult.

Green Monday : DIY Cotton Ironing Board Cover (No-Sew) // Mono + Co Green Monday : DIY Cotton Ironing Board Cover (No-Sew) // Mono + Co Green Monday : DIY Cotton Ironing Board Cover (No-Sew) // Mono + Co

When it comes to the narrowest end of the ironing board, I can’t tuck in all the excess fabric without obstructing the folding parts of the the board for storage.  Instead, I used a hair tie to gather the bulk end tightly to keep this part of the board tapered and neatly so that the cover doesn’t move around when ironing.

Green Monday : DIY Cotton Ironing Board Cover (No-Sew) // Mono + Co  Green Monday : DIY Cotton Ironing Board Cover (No-Sew) // Mono + Co

I am working on part 2 of this DIY : finding a suitable padding material and putting everything together, sewn by hand. But if you are lucky enough to own a sewing machine, here are few links that will be useful:

Craftsy blog

The 36th Avenue

My Plastic Free Life

The Spruce

Save

Save

Save

Save

Save

Save

Cucumber Cold Soba Salad

Cucumber Cold Soba Salad // Mono + Co

The hot weather lately is becoming unbearable.  I decided to save myself from the hot kitchen by tossing a salad for lunch.  The only cooking involves boiling the soba, which only takes 4 minutes on the stove if you use an electric kettle to boil the water beforehand.

Cucumber Cold Soba Salad // Mono + Co

I halved the portion and dropped miso and tahini from the original recipe as I wanted a light clear dressing.  Instead of soy sauce, I seasoned the salad with liquid aminos, something I have grown to like with soba.  Rice vinegar provided a nice tangy finish to the dressing, I also added more sesame oil than the original recipe.

Cucumber Cold Soba Salad // Mono + Co Cucumber Cold Soba Salad // Mono + Co Cucumber Cold Soba Salad // Mono + Co


Cucumber Cold Soba Salad

adapted from cookie and kate

1 bunch of soba noodles
1 small japanese cucumber
1 stalk scallions, chopped 
1 stalk cilantro, chopped
1 tablespoon rice vinegar
1/2 teaspoon grated ginger
1 tablespoon liquid aminos
or, light soy sauce
1 tablespoon sesame oil
1 teaspoon red pepper flakes
1 tablespoon black sesame seeds

Cook soba according to instructions on the packaging.  Drain and rinse with cold water until the noodles are at room temperature.

To prepare Japanese cucumber, use a vegetable peeler to peel skin, use a knife and julienne the peel into thin strips.  Cube the rest of the cucumber and set these aside.

In a bowl, whisk to mix rice vinegar, grated ginger, liquid aminos, sesame oil and red pepper flakes.  Adjust according to taste.  Mix this dressing to coat the cooked soba noodles in a large bowl. Then toss in cubed cucumber and the julienned peels, chopped scallions and cilantro, and black sesame seeds. Adjust seasoning further to liking.

Serve immediately.

Save

Save

Save

Save

Save

Save

Save