Gruyere Cheese Chia Seed Loaf

greyure cheese bread 001 greyure cheese bread 002 greyure cheese bread 003 greyure cheese bread 005greyure cheese bread 004

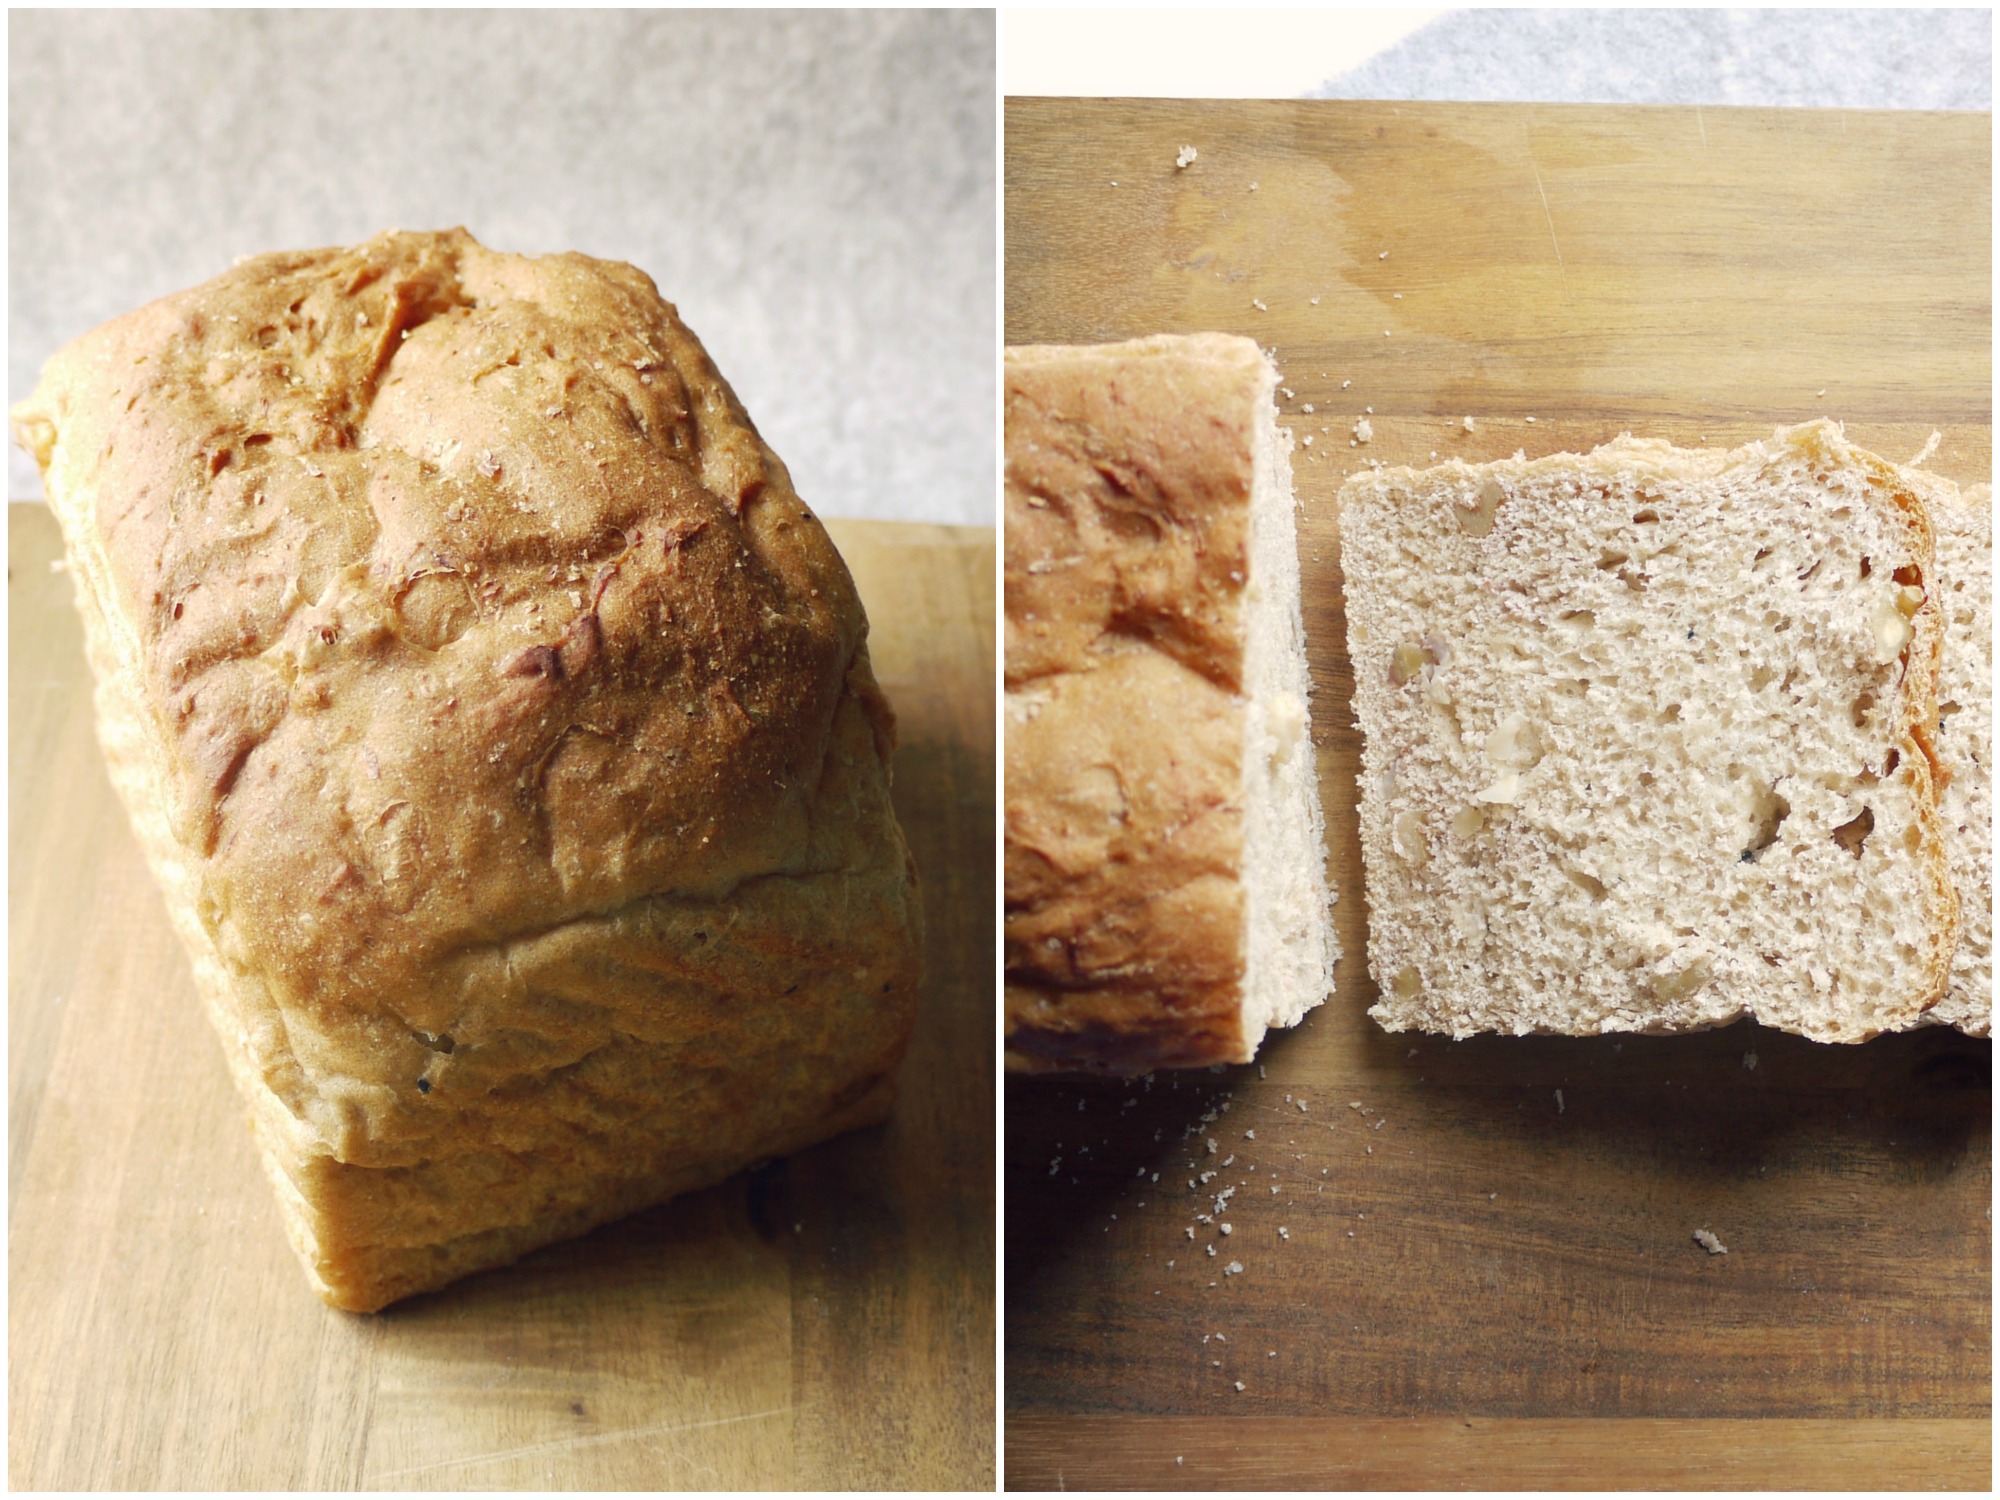
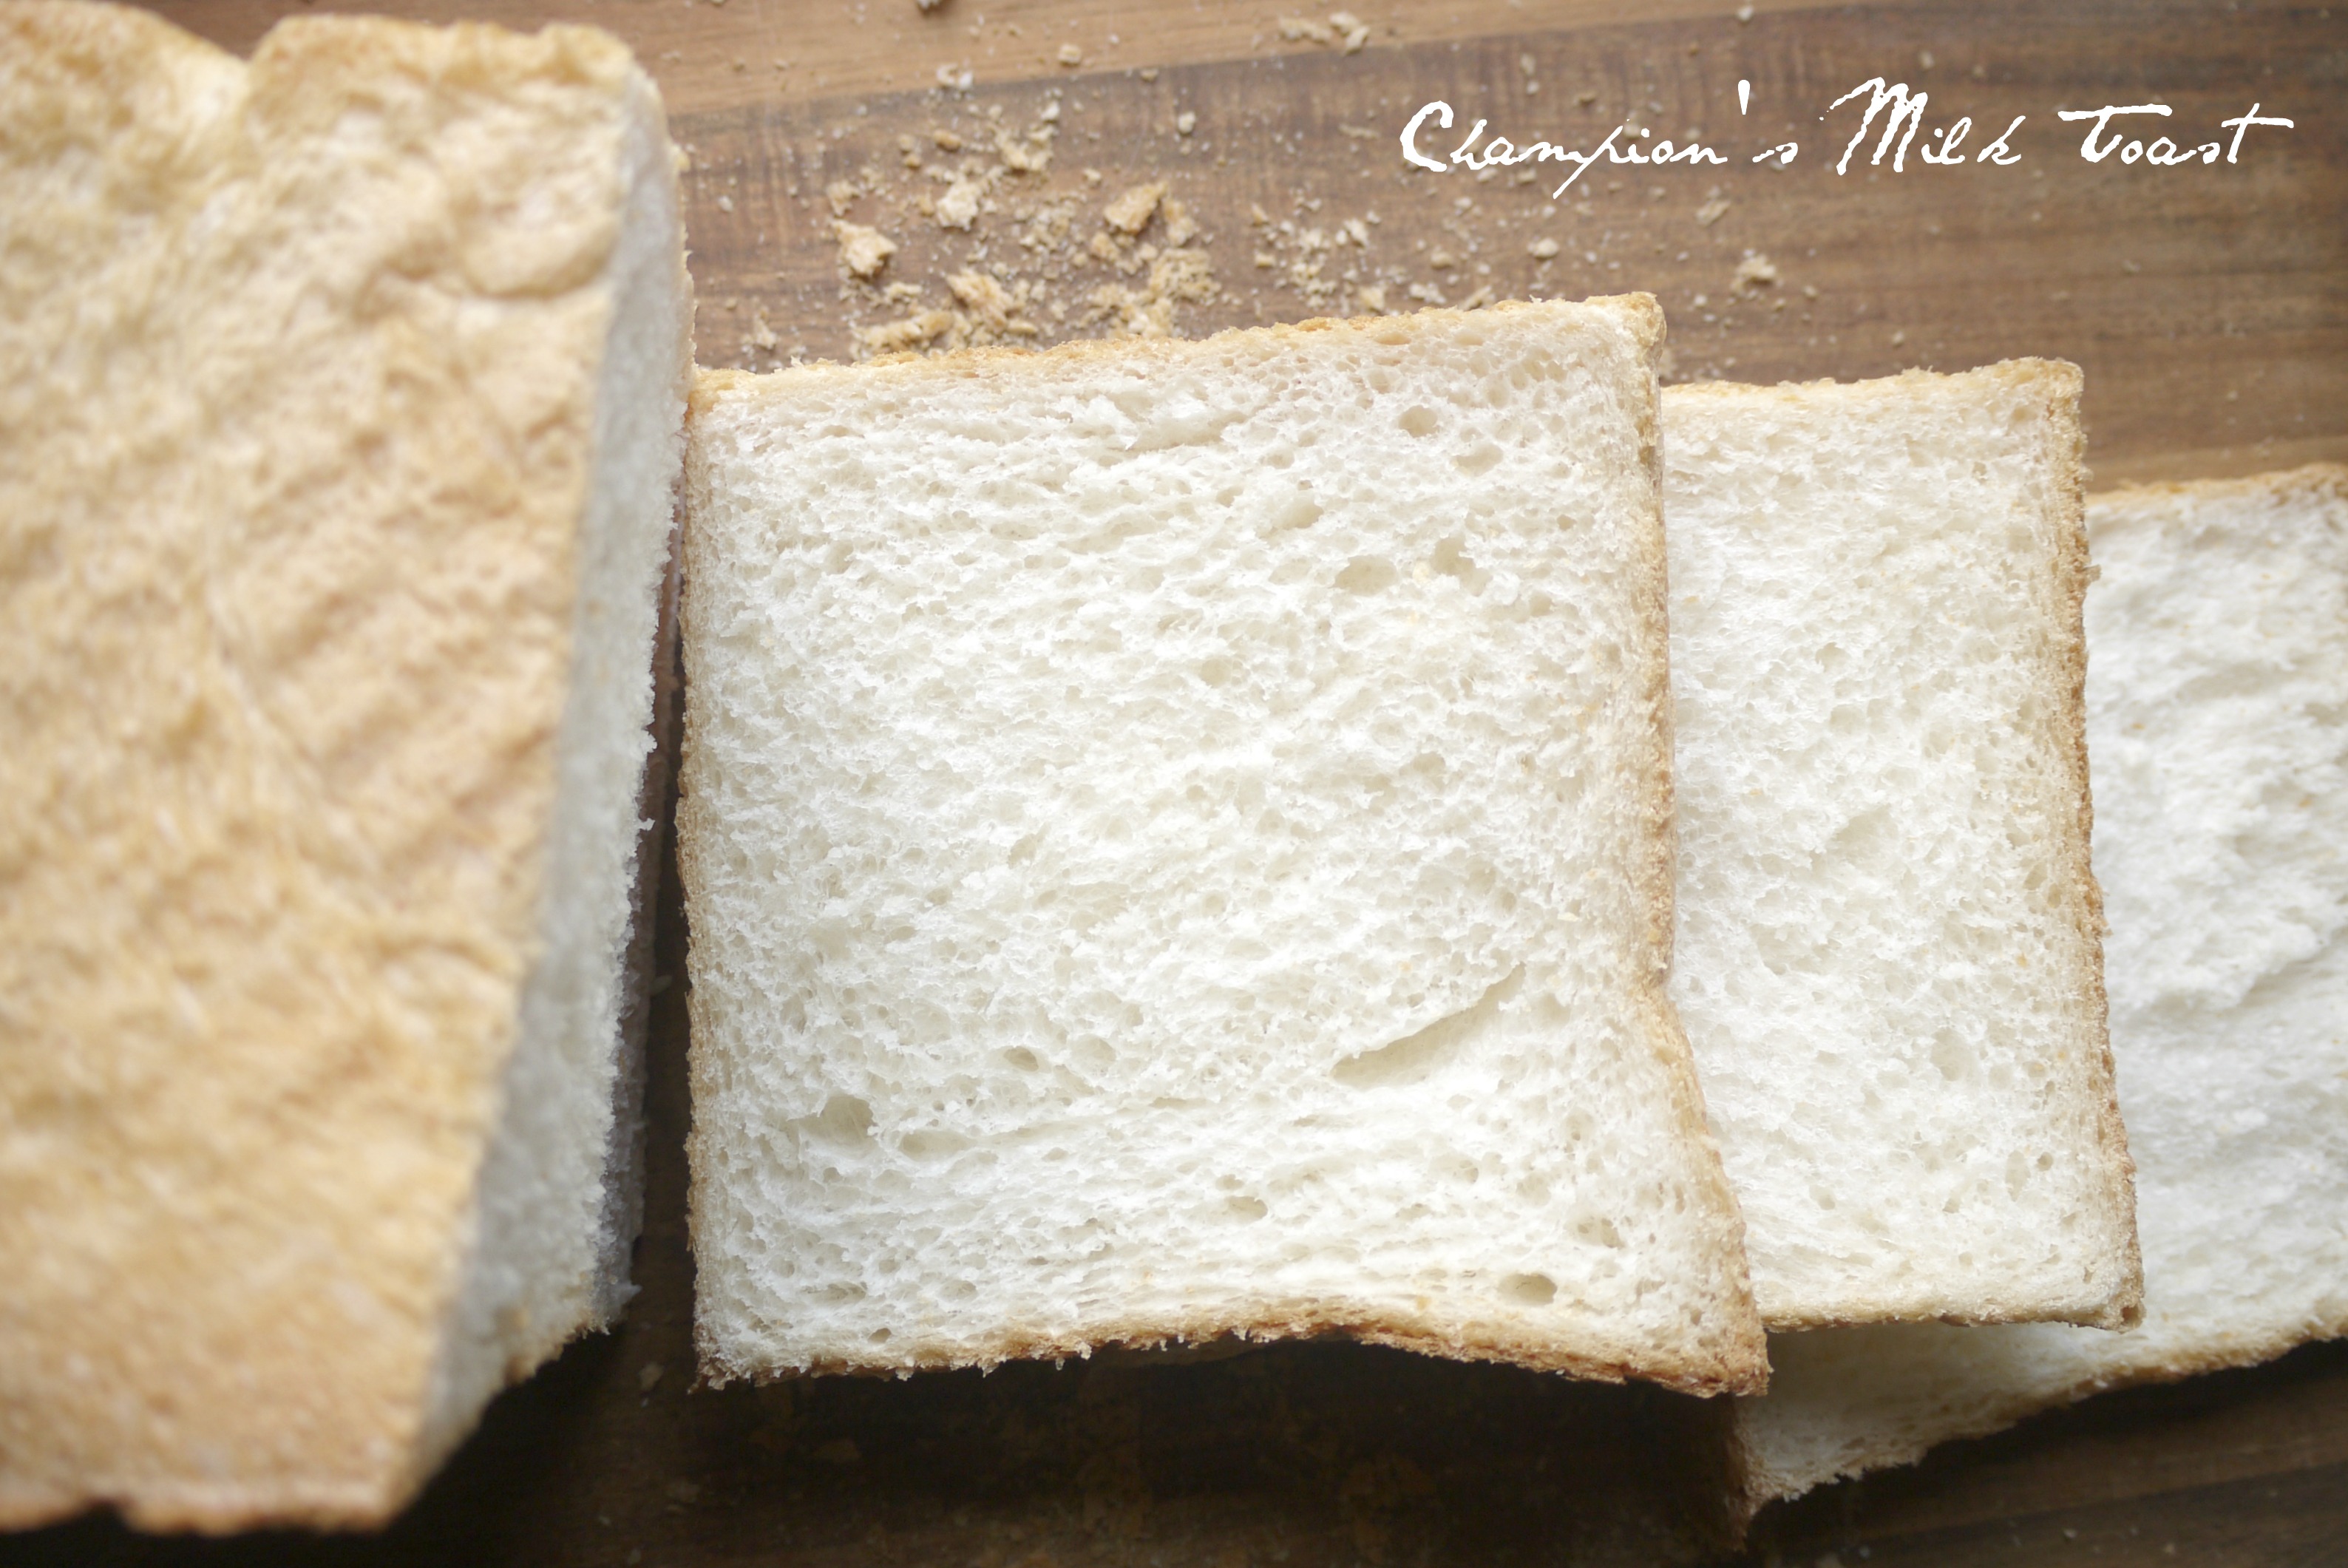
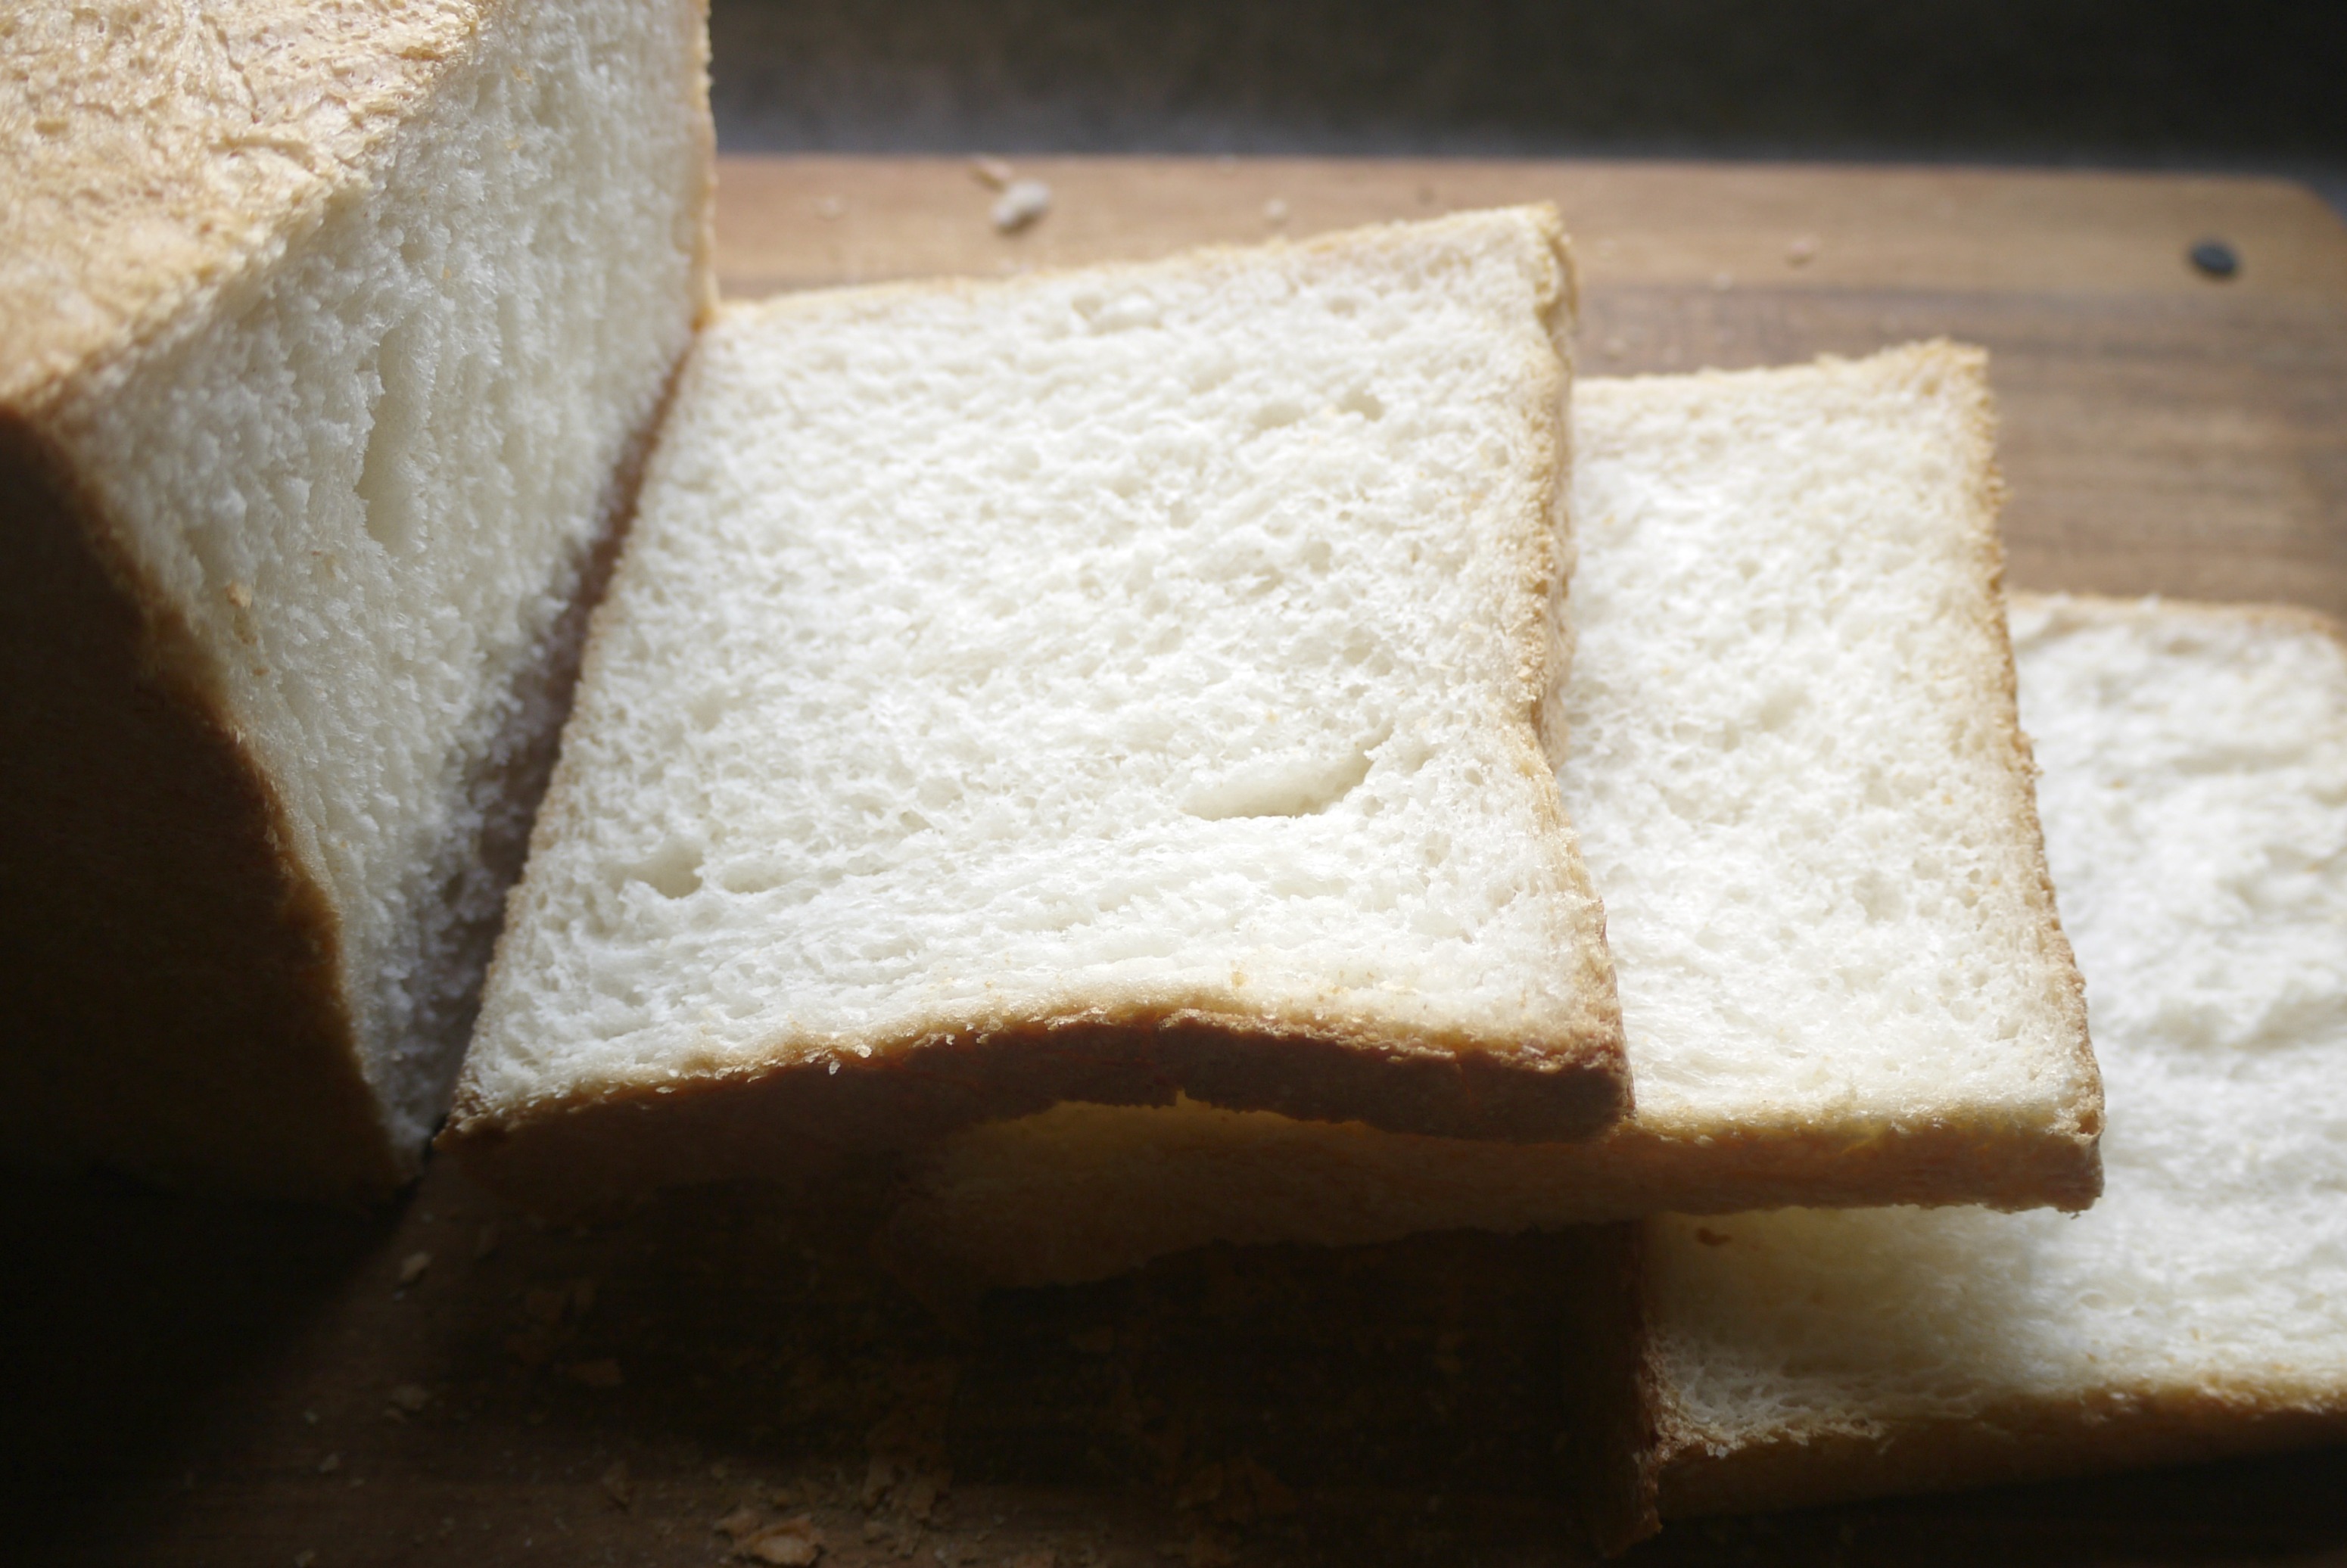
This super soft bread loaf filled with Gruyere cheese cubes are really fluffy, I almost tore the dome top apart from the bread when I was removing the very fragile, steaming hot bread from the tin for cooling. Some part of the cheese melted and got stuck to the sides of the tin.  But luckily, even with a slight tear, exposing the interior of the steaming bread while cooling down did not do too much damage to the texture of the bread.  So the next time when I am adding cheese into the bread dough, I’ll make sure that the cheese are placed towards the center of the bread, where there are ample “cushioning” areas, so that after proofing, the cheese will not end up anywhere near the inner sides of the cake tin.

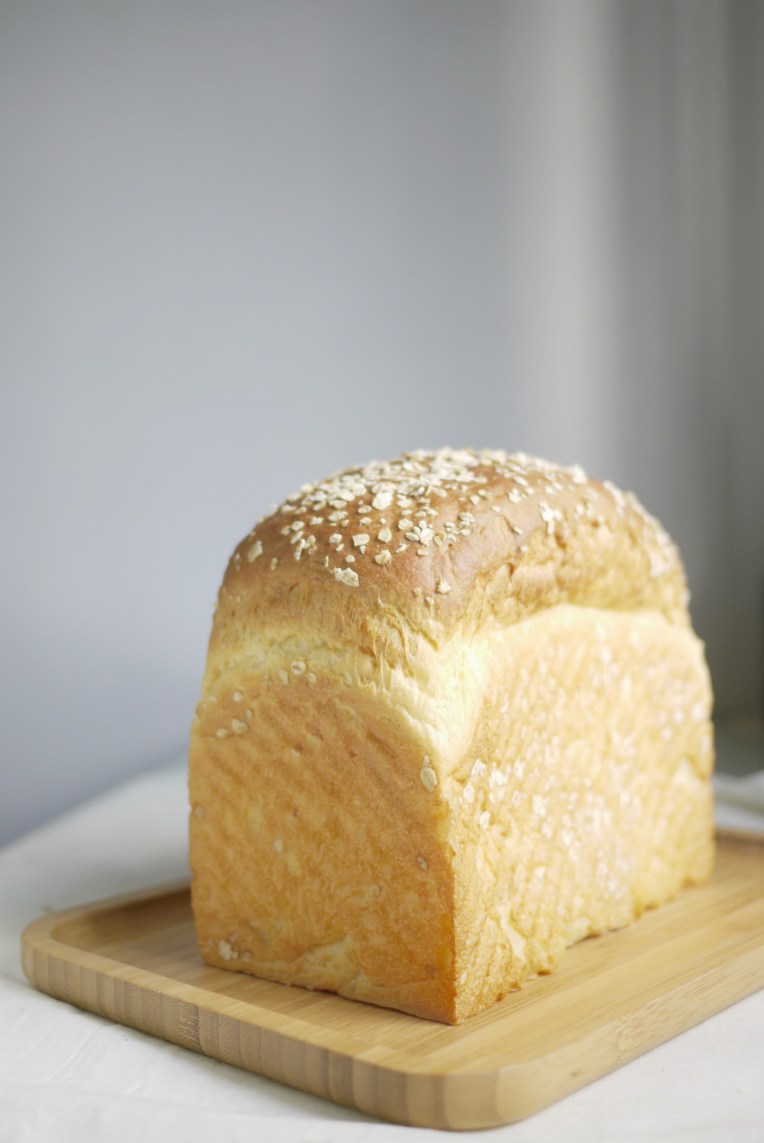
You might have also noticed that I have used a smaller cake tin instead of the usual bread tin that are taller.  I was thinking of a popover bread design, where the bread has a disproportionately huge crown, hoping that it might look interesting.  Before it went into the oven for baking, I made sure that the bread had risen above the brim, by at least half the height of the cake tin.  After a light misting with water and 30 minutes in the 170C oven, the bread rose further quickly.  As  you can see from the first photo, the crown was indeed bigger than the bread’s lower body.  But alas, the bread was too soft to stand upright for a nice shot.  Even when placed back into its baking tin, the whole loaf simply sank in, not that great a sight on photo too.

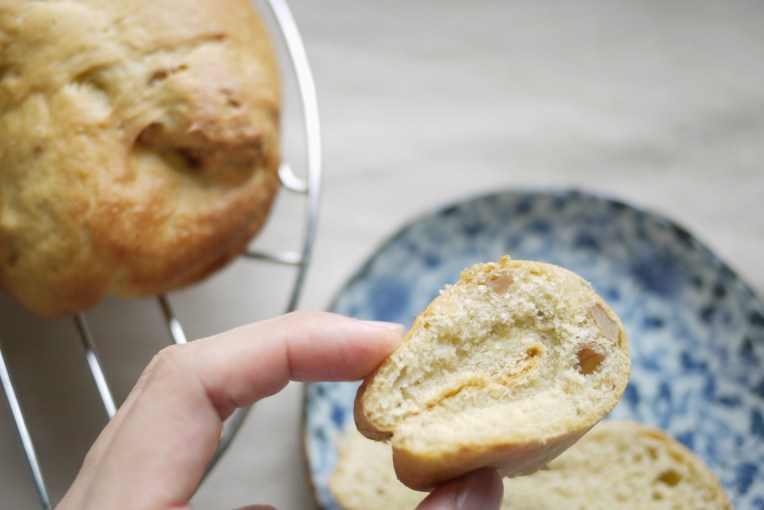
But all these doesn’t matter, because the bread was delicious.  The vegetarian Gruyere cheese I added really gave the bread a lovely savory flavor, I am so glad that I cut down on sugar to let the saltiness of the cheese gets through nicely.  I wish I had put in more, not every bite is cheesy though, but not before I figure out how to shape the bread with cheese inside without giving me a ‘meltdown’ incident like this loaf again.


GRUYERE CHEESE CHIA SEED LOAF


200g bread flour
30g oat flour
100g potato, cooked and mashed
1 teaspoon instant yeast
1/4 teaspoon salt
1 tablespoon raw sugar
1 small egg 50g
40g water
40g cold butter, cubed
2 tablespoons chia seeds
30g Gruyere Cheese**, cubed

** I got my vegetarian Gruyere cheese cultured with non animal rennet from the brand Mainland. I am always looking for yummy vegetarian hard cheese, if you have come across any nice ones, let me know!

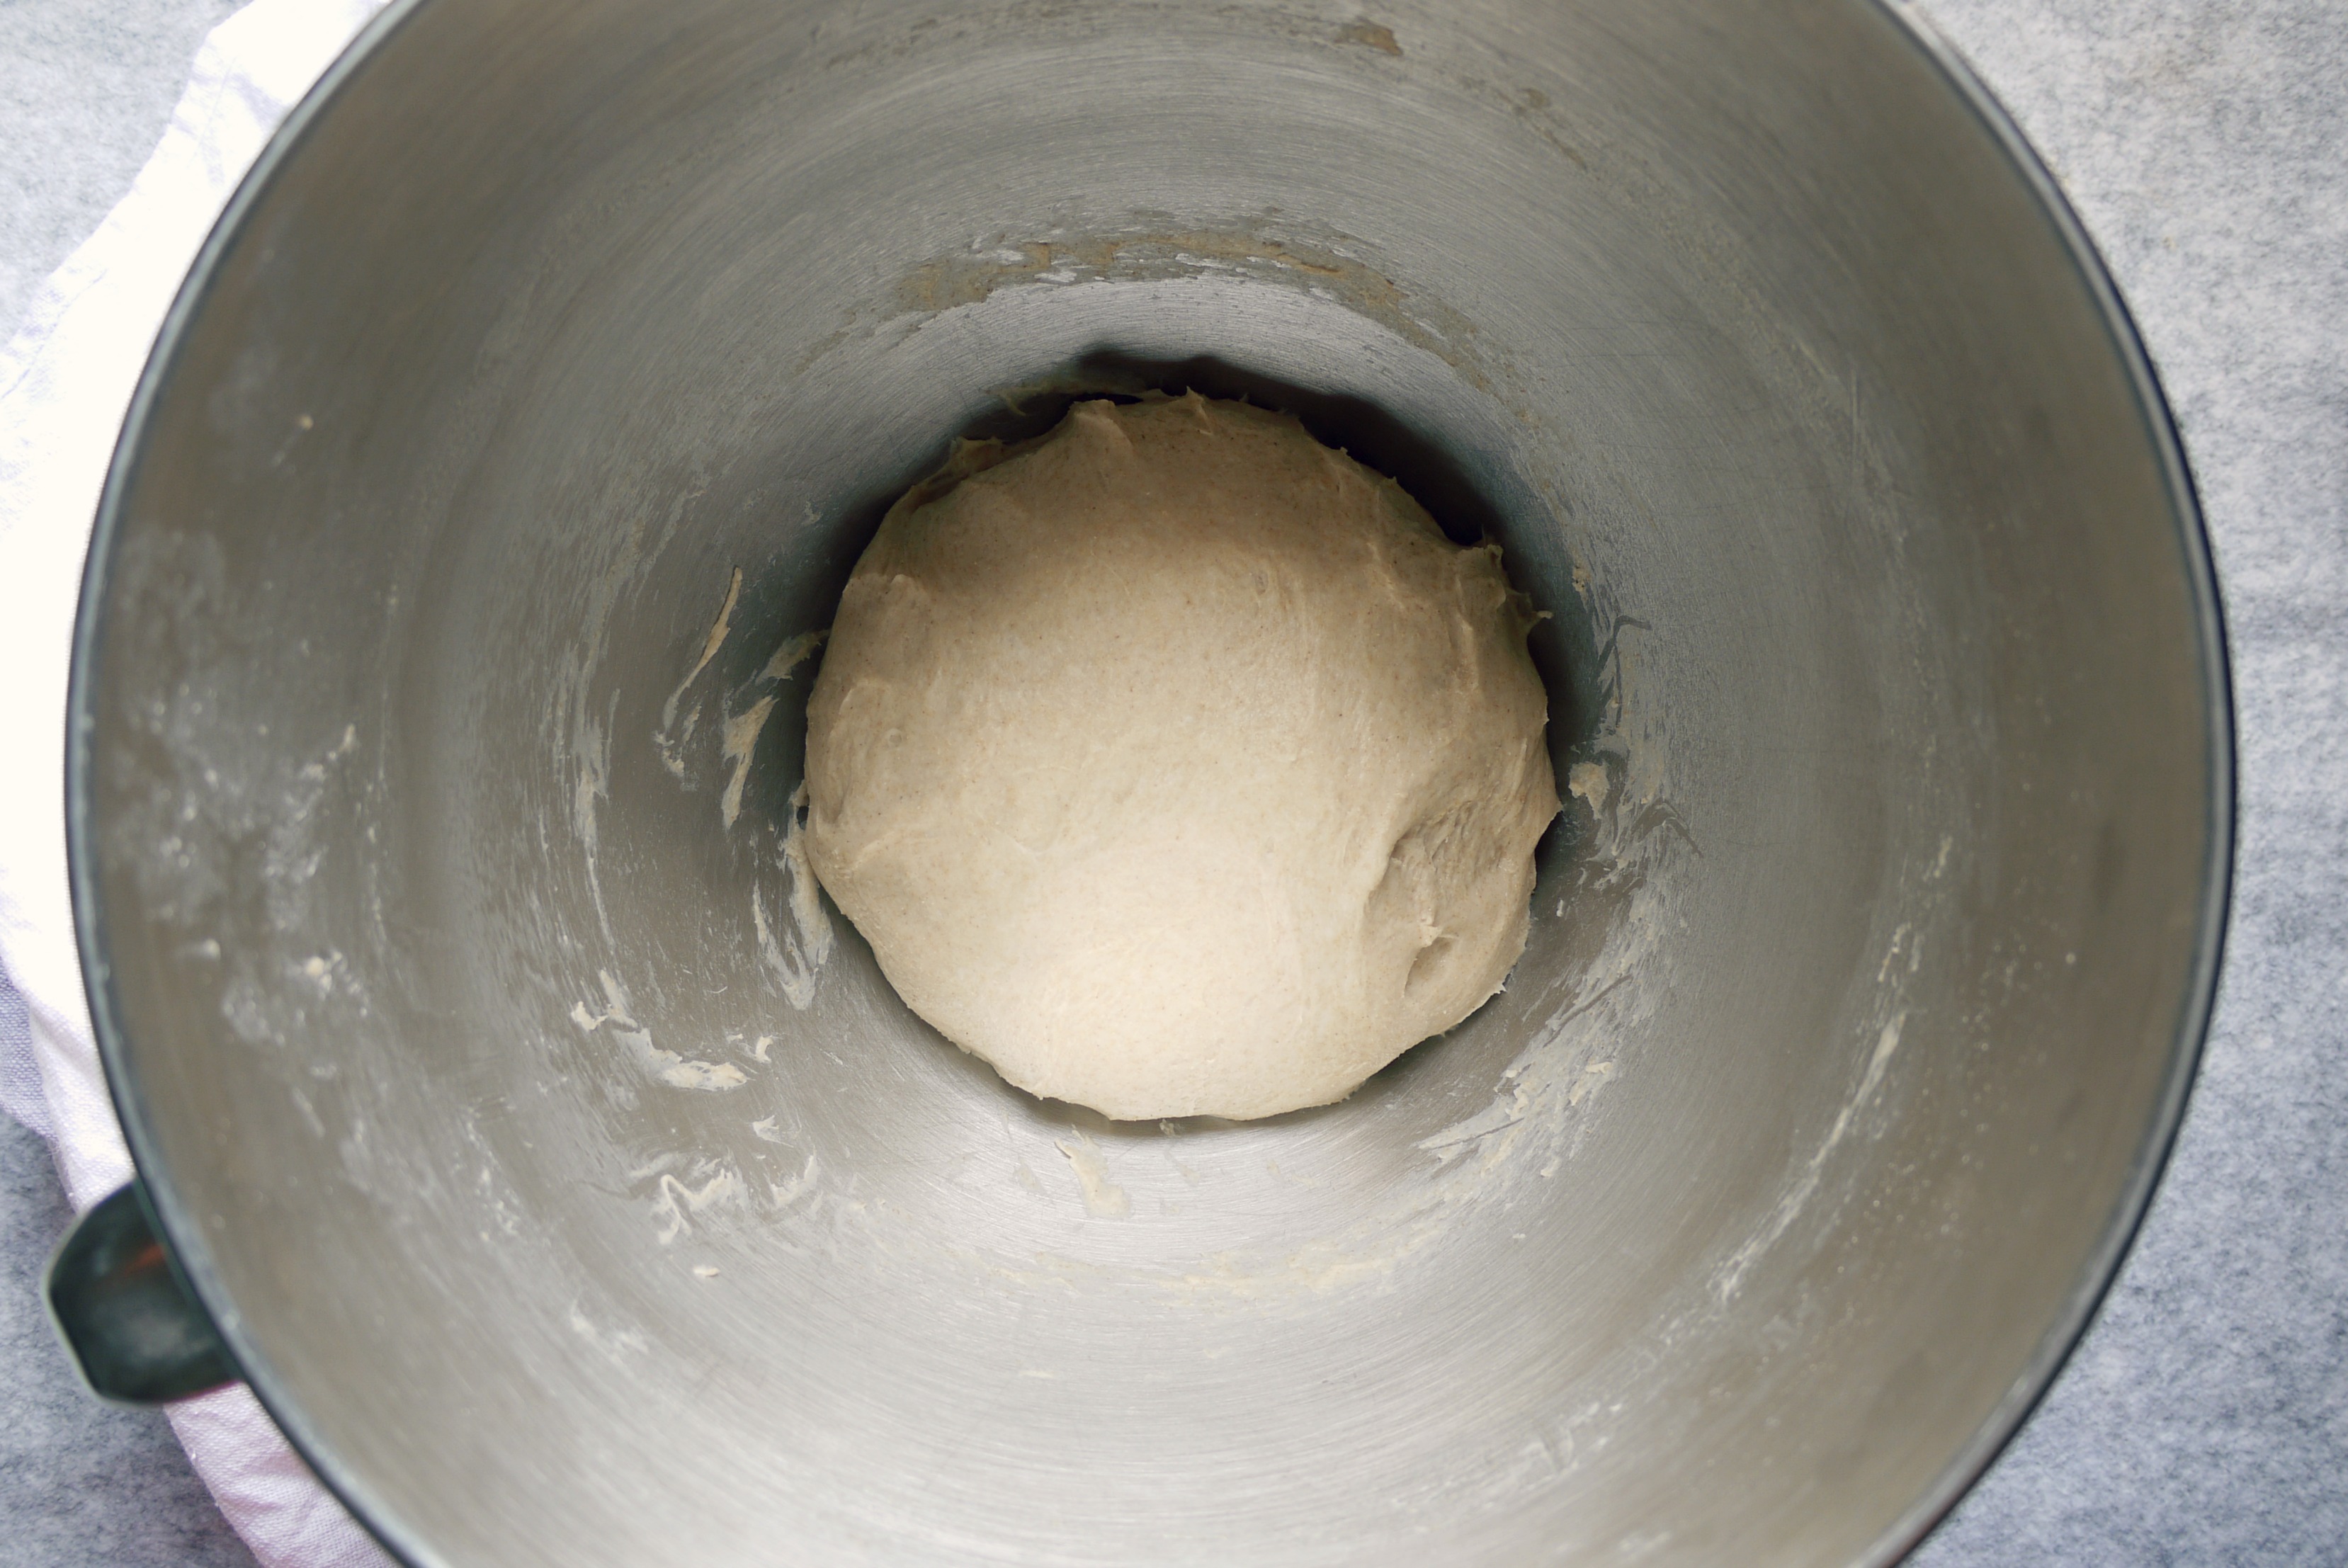
In a mixer bowl, combine bread flour, oat flour, yeast, salt and sugar and mix the dry ingredients evenly with a hand whisk.  Add cooled mashed potatoes, beaten egg, and water into the mixture and start the mixer on low speed (KA 1) with a dough hook to start kneading.  Once the ingredients come into a ball dough, stop the mixer and let the dough rest for 15 minutes.

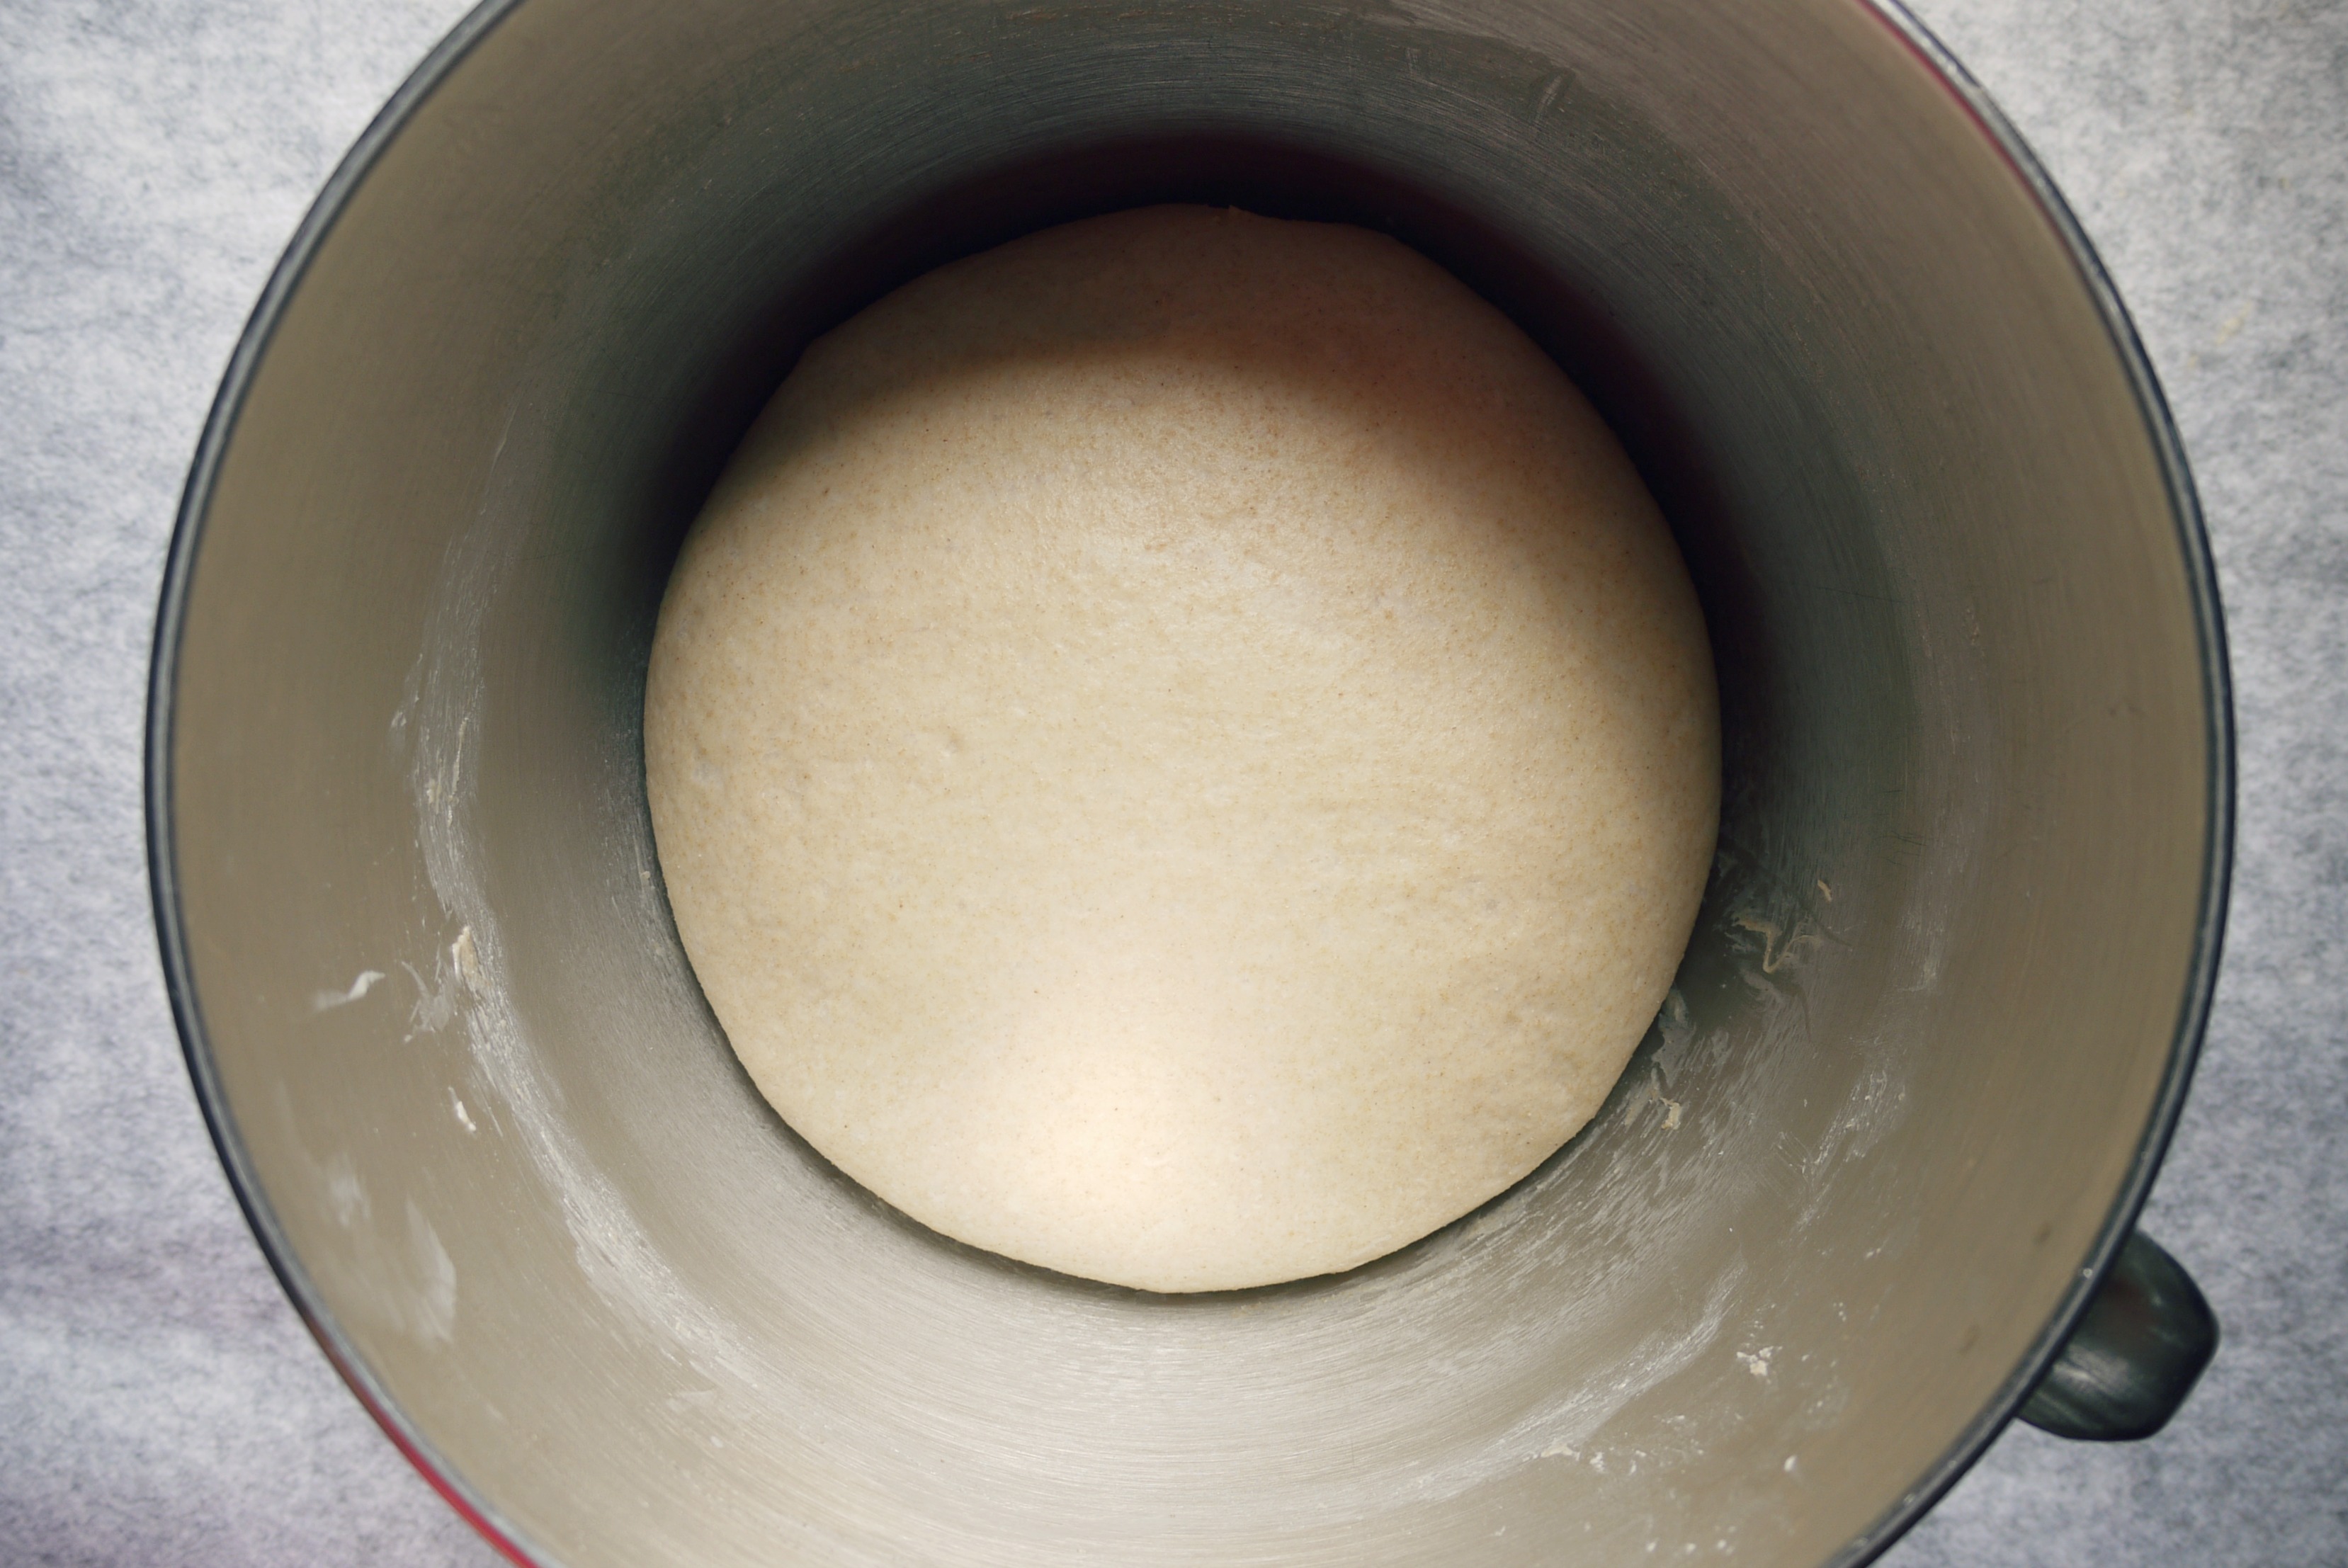
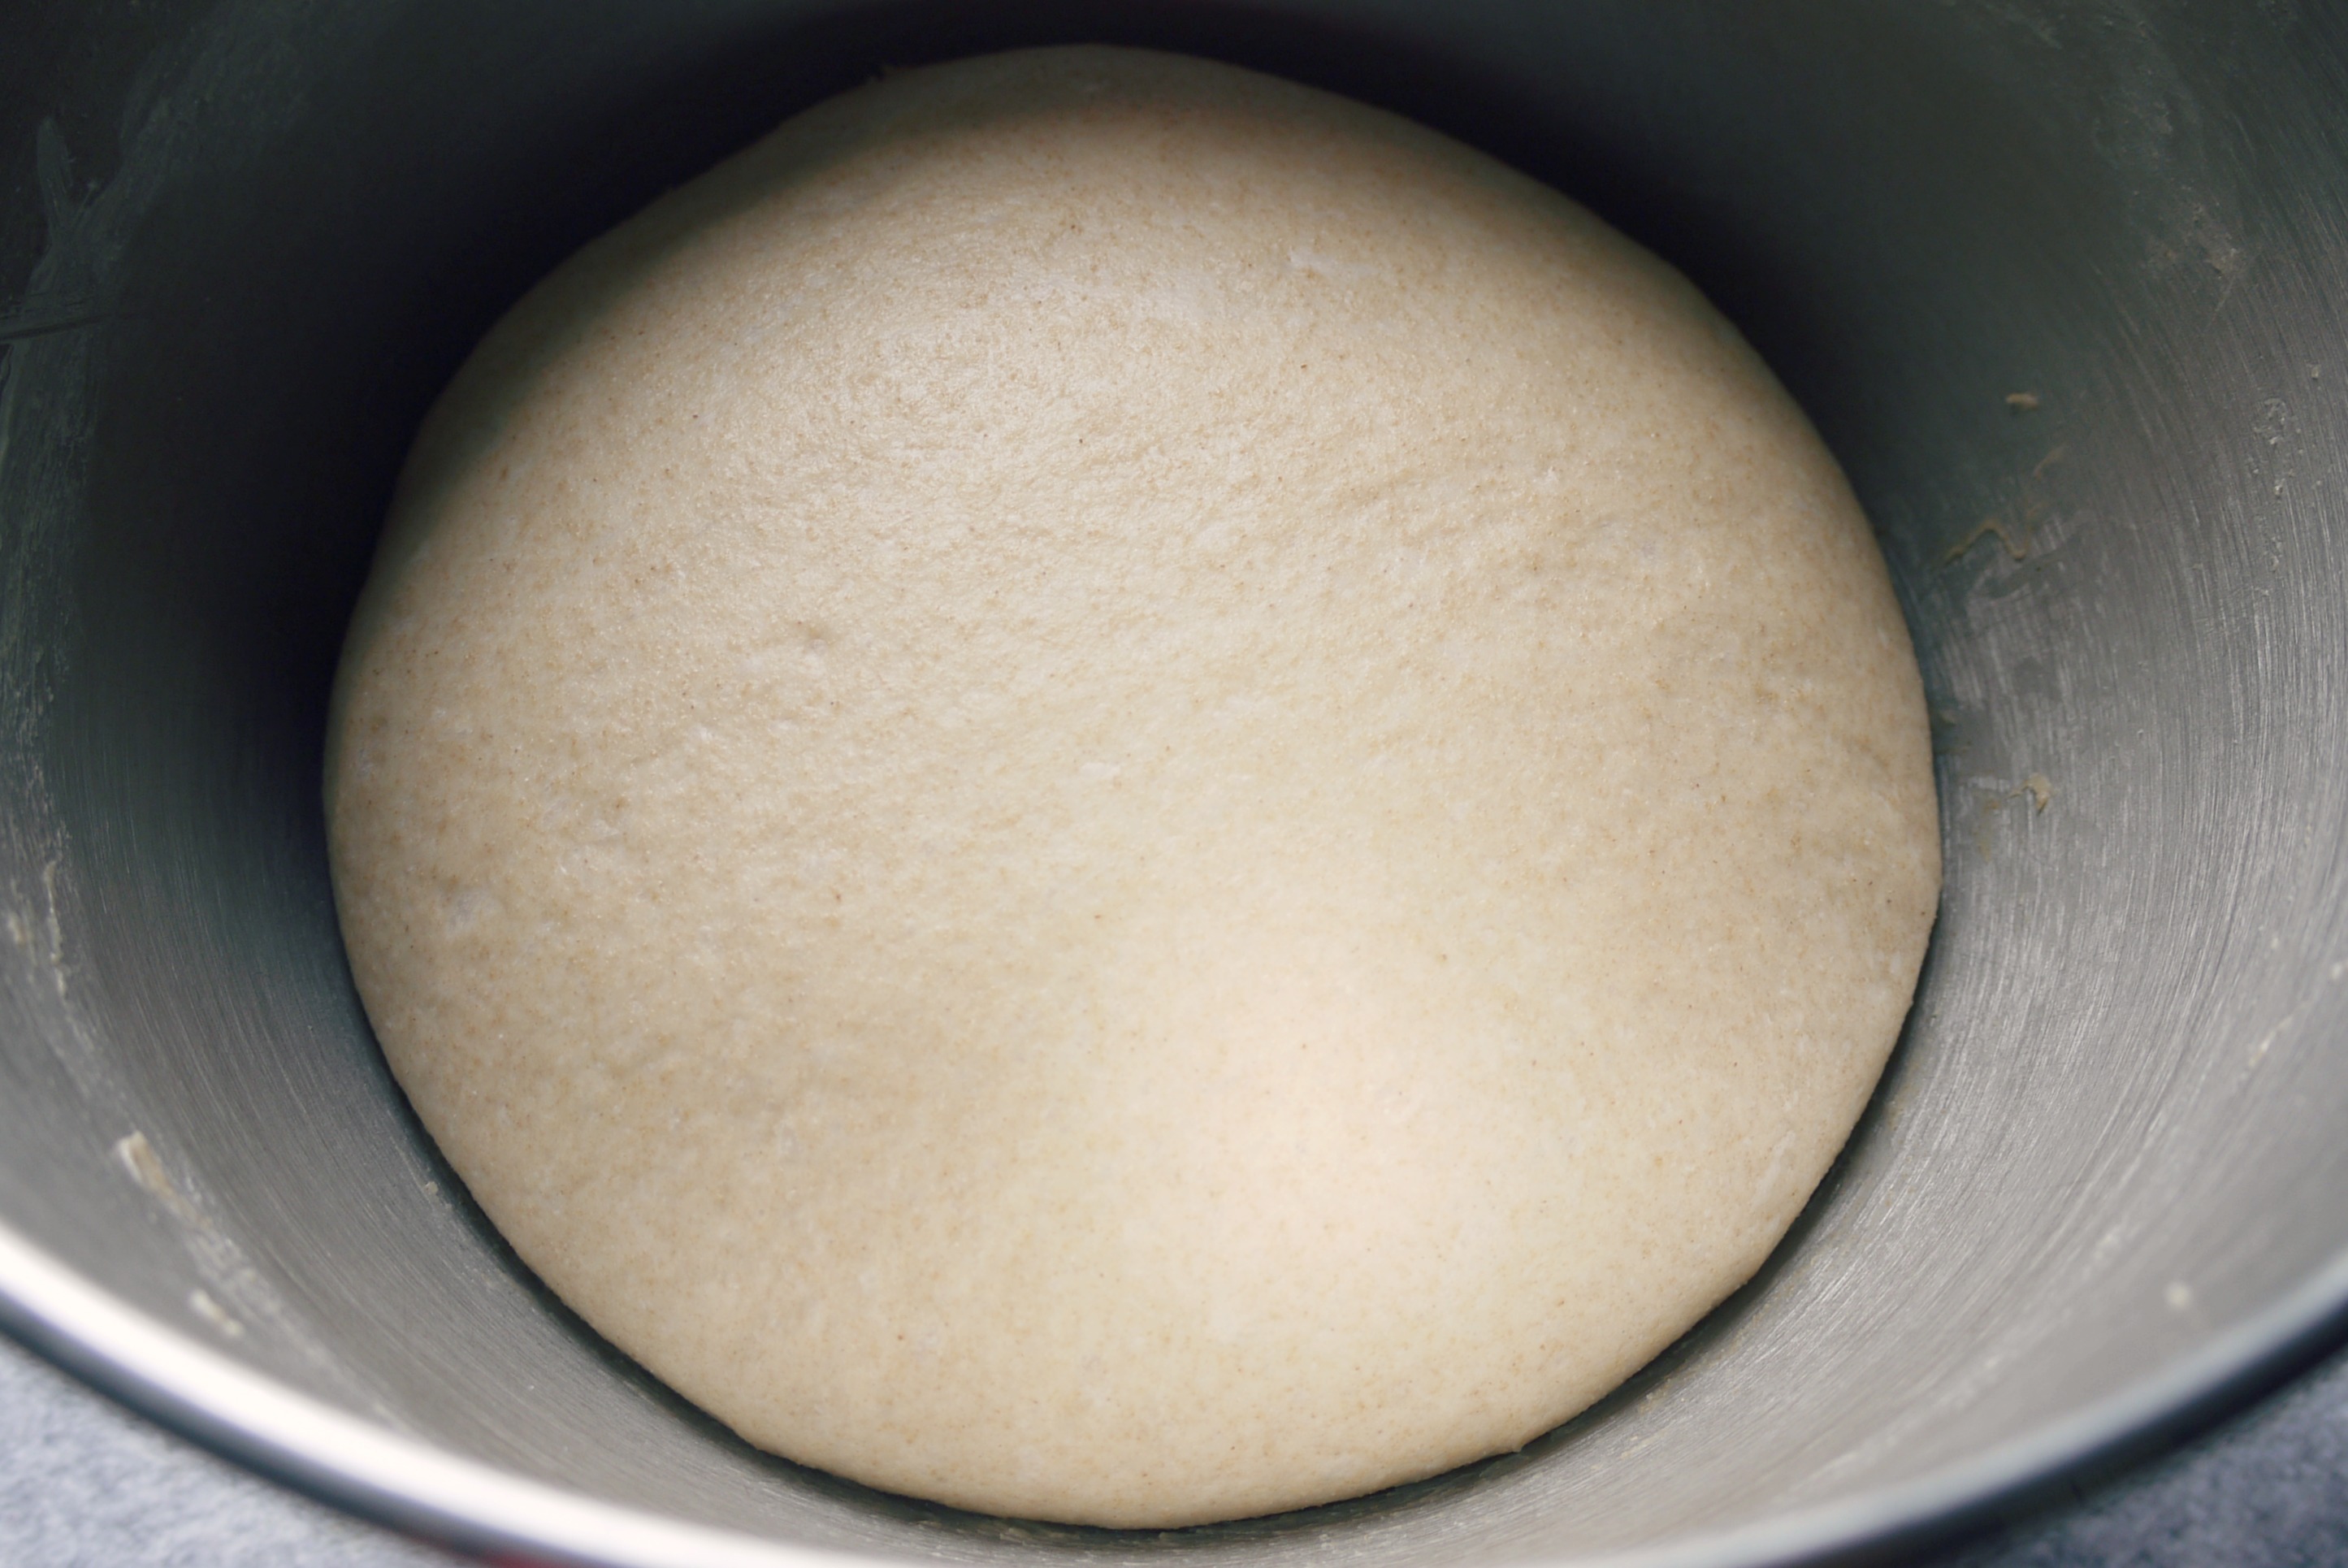
After the dough has rested and the flour has absorb the liquid properly, turn the mixer on again on low speed for about 1 minute, before adding the butter cubes one by one with the mixer running. Knead the dough till window pane stage.  To incorporate chia seeds into the dough using the electric mixer, pour in the chia seeds in a steady stream from a spoon, alternating between speed 1 and 2 till the chia seeds are being mixed uniformly into the dough.  Alternatively, kneading the chia seeds into the dough manually on a clean worktop.  When done, let the dough rest covered in the bowl for 1 hour to expand twice its size.

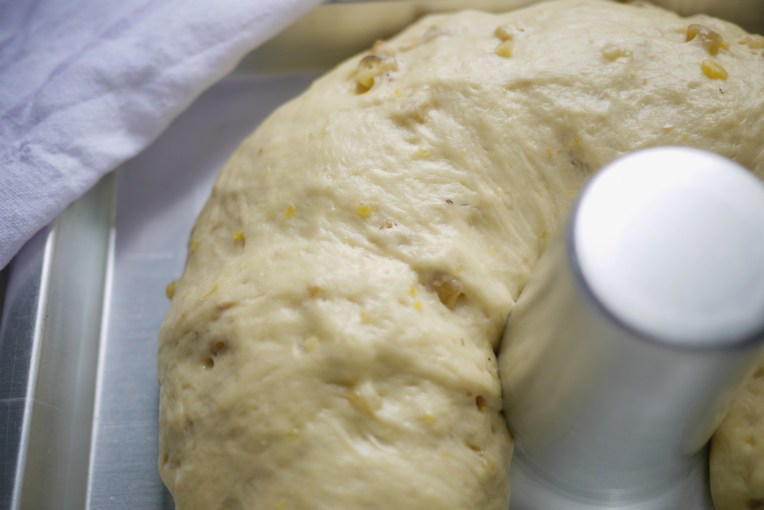
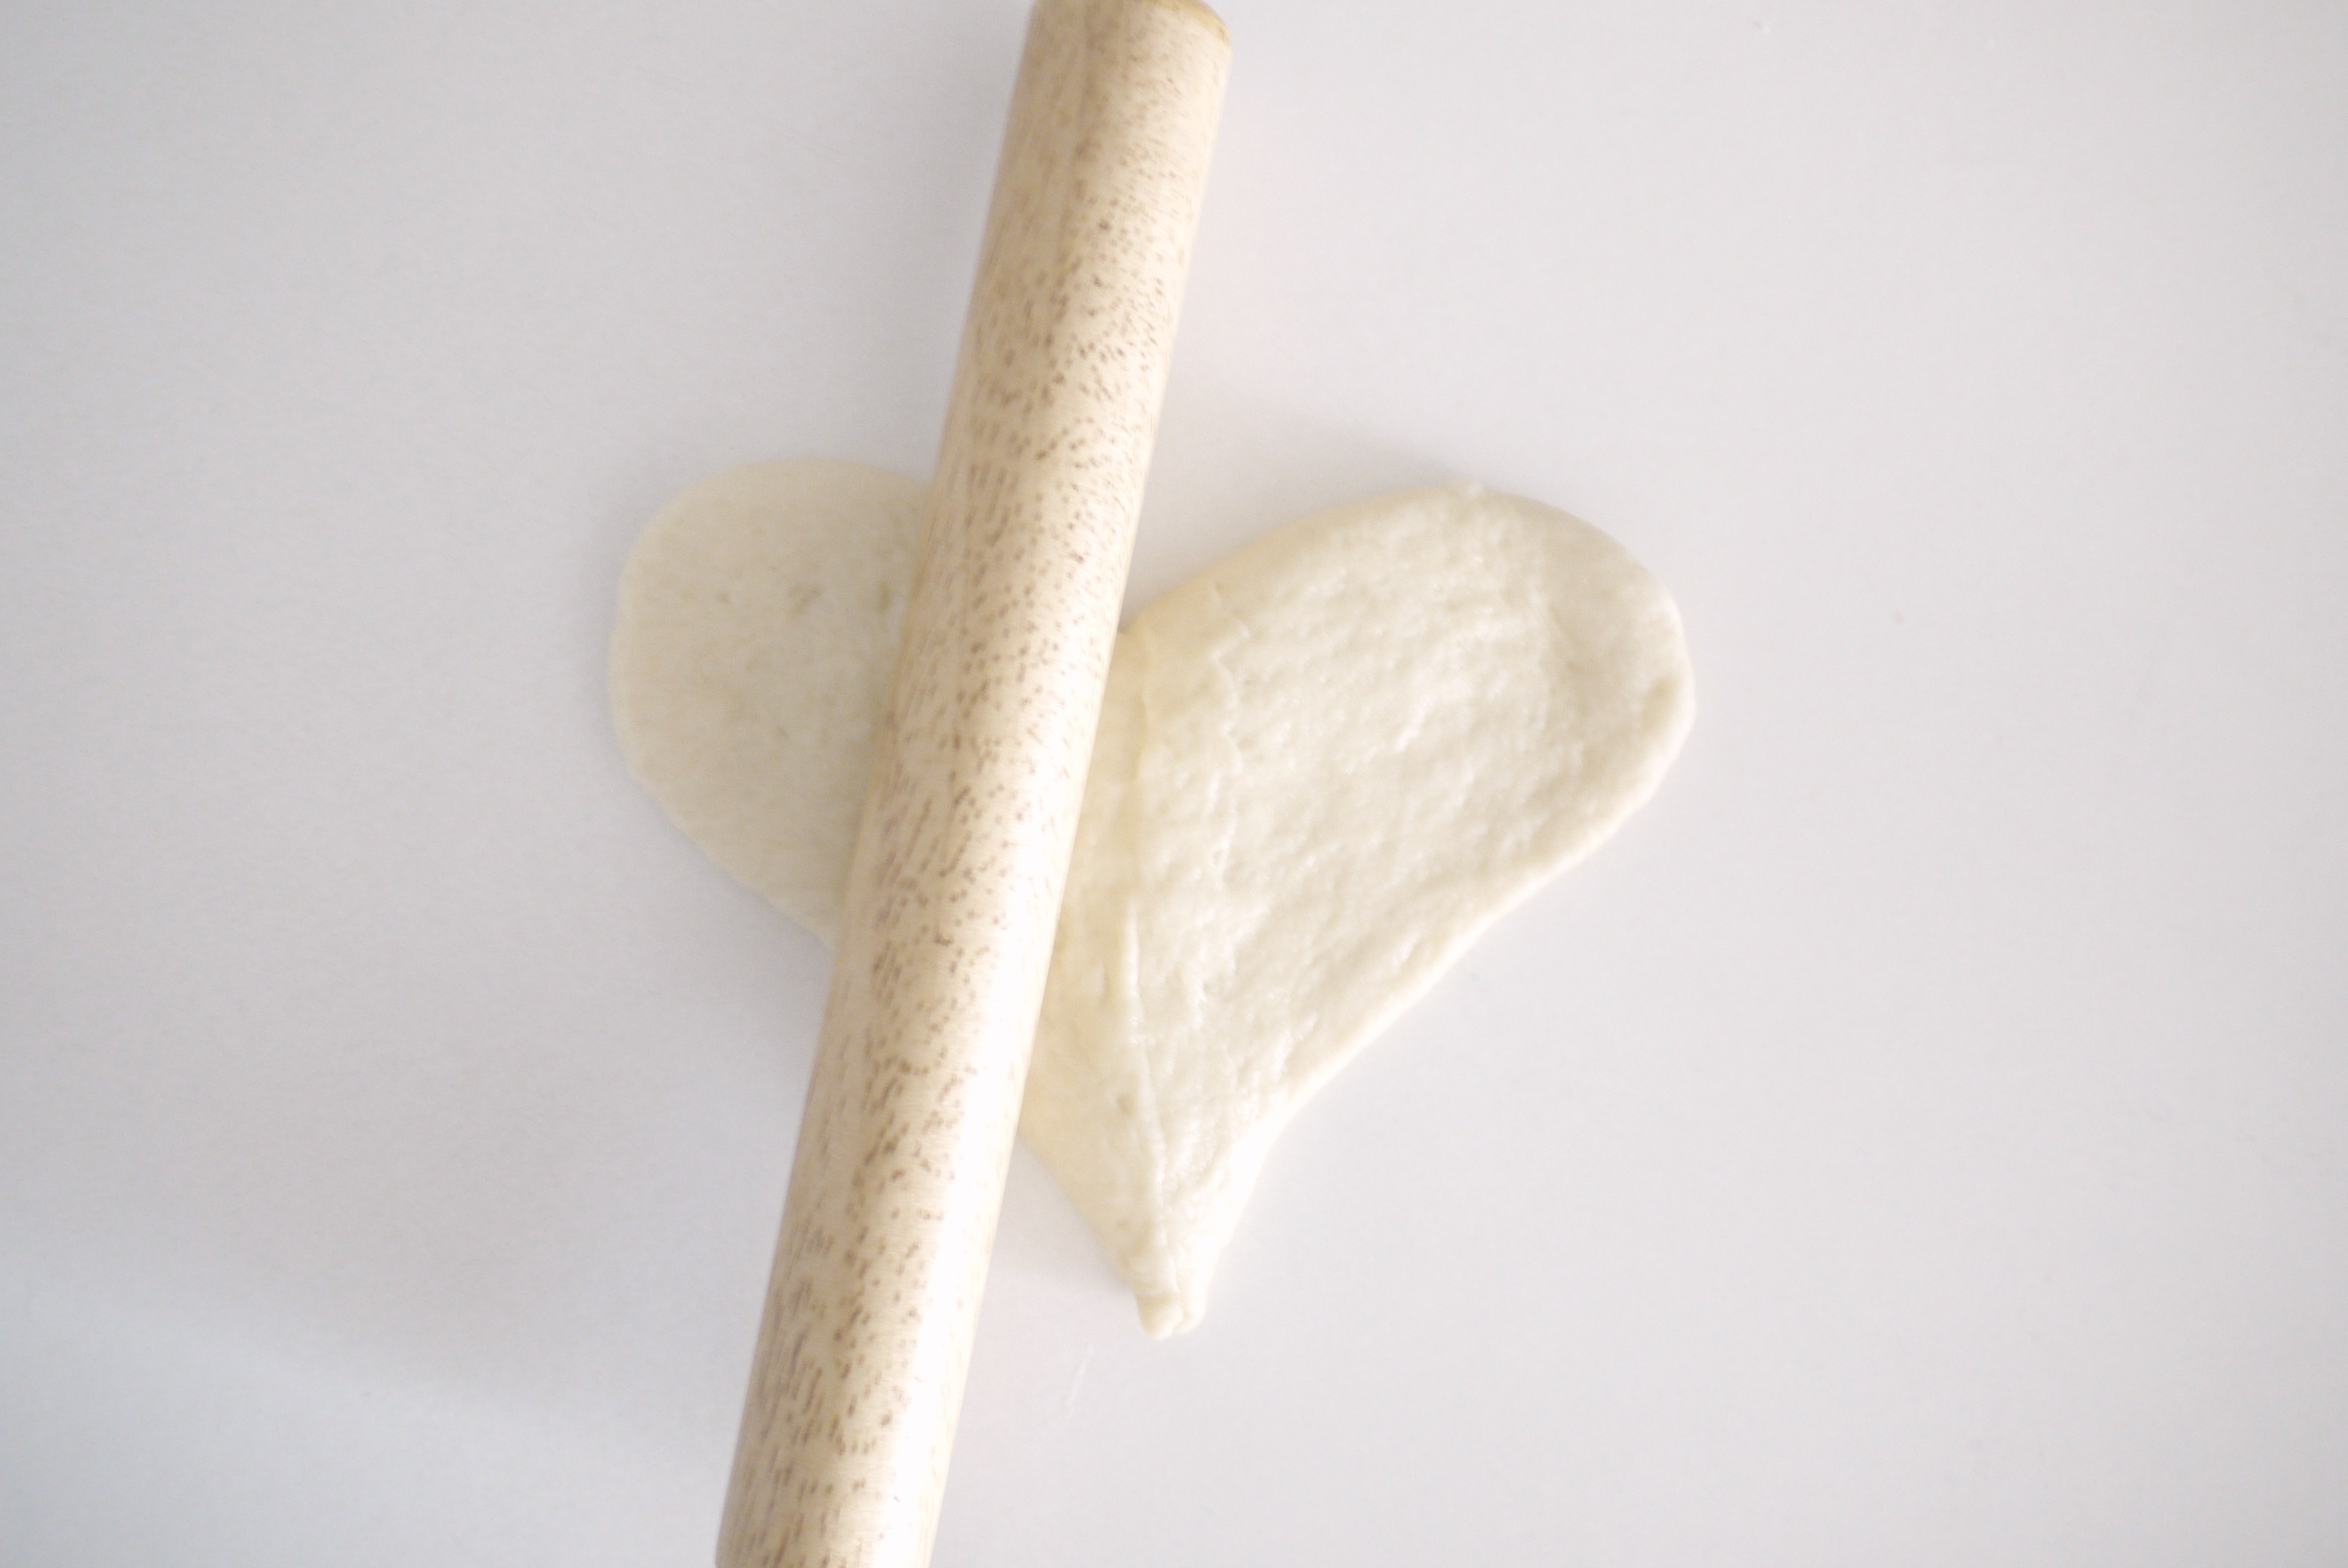
After an hour, punch the dough down to deflate it and transfer dough to a clean slightly floured worktop.  The dough will be sticky, do not add too much, just enough to prevent hands from sticking to it, deflate dough to squeeze out air bubbles trapped inside.  Roll dough into a ball and flatten it to an oblong dough, arrange chopped cheese on the dough towards the center and roll up the dough to wrap the cheese within and place the rugby shaped dough inside the bread tin, seam side downwards. Let it proof for another 45 minutes to 1 hour, covered and placed in a draft free place.

I baked this in a 8″ x 3.5″ x 3″ rectangular cake tin to create a popover /muffin top proportion bread.  Grease the inner surface well with butter.  The dough rose to the brim within 35 minutes, and higher by 1 hour. Baked at 170C for 30 minutes.  If this is baked in a regular pull man pan, it will take 45 minutes to reach the brim and can be baked in the oven by 1 hour too.  After baking, remove the bread from the tin immediately and allow it to cool completely on a rack before slicing or serving.

Save

Make it Healthier : Oatmeal Potato Bread Loaf

Oatmeal Potato Bread // Mono+CoOatmeal Potato Bread // Mono+Co

I am on a bread baking lucky spree, you know, the period when every single thing you modify to a recipe turns out 101% successful?  This was made with adding oat flour (diy!) and raw sugar to amp up its feel-good factor.  Very glad that this oatmeal loaf recipe has turned out so well.  The dough rose over and above the tin, creating these stretchy structure below the crown that are really pleasing to the eyes after baking.  As with the other potato breads that I have baked, the interior is soft and fluffy.

I have been baking this recipe at 170C degrees, and this is my preferred oven temperature nowadays, instead of 180-190C. Baking at this temperature for at least 30 minutes achieves the most delicate, softest, yet golden brown crust, my essential requirements for bread loaves are that are both cottony and great looking.  As I usually bake for next day’s breakfast, I find that breads baked at this temperature also stay soft longer.  Breads I have baked with thicker crusts tend to turn crummy next day which lead to more clean up work after breakfast.  No good.

Oatmeal Potato Bread // Mono+CoOatmeal Potato Bread // Mono+Co

Slice this super soft loaf with a good bread knife.  I recently acquired a new one only to realize what a world of difference it made.  Too often, I destroy my perfectly baked pillowy loaf with a lousy bread knife that squash my bread more than slicing it.  Now I can serve perfectly sliced breads for breakfasts, thin or thick, without any problem!

Oatmeal Potato Bread // Mono+Co


OATMEAL POTATO BREAD

100g bread flour
100g plain flour
30g oat flour **
100g cooked+mashed potatoes
2 tablespoons raw sugar
1/4 teaspoon salt
1/2 tablespoon instant yeast
1 egg ***
40-50g water
40g cold butter, cubed
2 tablespoons oatmeal, and more for topping

** If oat flour is not a regular item in your pantry, no need to buy a bag just for this recipe.  Simply run oatmeal/rolled oats in a processor till fine, that’s your oat flour.  Or omit this completely and coat dough with more oatmeal on top before baking.

*** I use 1 small whole egg, weighing about 50g with shell.  If you have larger eggs (70g and above), use half of a beaten egg.

*** Use water left over from boiling the potatoes with, this water contains starch from the potatoes and are great for making bread.  Remember to cool them down to room temperature before using.

In a mixer bowl, place bread flour, plain flour, oat flour, potatoes, raw sugar, salt, yeast, and mix these dry ingredients well with a spoon.  Add beaten egg and 40g of water.  Turn the mixer on, with a dough hook, knead ingredients on low speed (KA:1).  Watch the ingredients as it gathers to form a dry ball dough, if it doesn’t, slowly add more water from a pouring cup, and stop when a dough is formed.  Let the mixer knead this dough for another 2 minutes.  Then leave this dough aside for 15 minutes to allow the flour to absorb the liquid properly, a process known as autolyse method.

After 15 minutes, turn the mixer on again on low speed, you might notice that the dough is now slightly more elastic than before, let mixer run for a minute before adding cubed cold butter one by one, till they get mixed well into the dough and there is no visible sight of solid butter.

Continue to knead this dough to reach window pane stage, it should look and feel smooth and elastic.  Remove mixing bowl from mixer, cover bowl with a clean towel, and let it rise for an hour.

After an hour of rising, punch dough down to deflate and transfer to a clean worktop.  If the dough is too sticky, grease hands and worktop with some butter for easier handling.  With a rolling pin, or bare hands, deflate dough to squeeze out air bubbles trapped inside the dough.  Roll dough into a rugby ball shape to fit your bread tin, roll it over a plate filled with 2 tablespoons of oatmeal, place the dough inside baking tin, seam side down.  We will coat more on the top after the dough rise to the top of the tin.  Let it proof for another 45 minutes to 1 hour, covered and placed in a draft free place.

After its final proof, mist the top of the bread slight with water, sprinkle generously with more oatmeal to your liking, tap lightly to make the toppings adhere better to the dough.  Bake bread in a preheated oven at 170C for 30 minutes, till golden brown.

Remove bread from its tin immediately after baking and let it cool completely on a rack before slicing/ serving it.  Due to the weaker interior structure of this bread when it is steaming hot, I cool it lying on its side to prevent the bread from collapsing on its weight.  After cooling down, the crust structure will become more stable and the bread will be able support its own weight upright.

Make Them Softer : Mini Walnut Bread Rolls

Walnut Mini Rolls // Mono+Co Mini Walnut Bread Rolls // Mono+Co Make Them Softer: Mini Walnut Bread Rolls // Mono+Co Make Them Softer : Mini Walnut Bread Rolls // Mono+Co

For the past few months, I have been on a bread baking spree converting a few bread recipes to include mashed potatoes as an additive.  This walnut roll’s  original recipe is from a Japanese baker/author Backe Akiko, whose backyard garage cafe I really envy.  Her recipes requires only basic ingredients, but I wish they have a more “squishable” bite.

Enter the mashed potatoes.

I halved the original recipe, tweaked the flour and water amount with added potato and the end result is a softer bun.  As the dough is quite wet, I suspect I might have used easily another 2-3 grams of butter when oiling my hands and work top to make the handling of the dough easier without sticking.

I served them with Japanese curry for breakfast and thought they made a perfect match, although the bread rolls can also be great on their own too, or simply add a spread of butter for a quick on the go snack.

~ Enjoy!


MINI WALNUT BREAD ROLLS

largely adapted from Backe's book here

60g mashed potatoes**
100g bread flour
 1/2 tablespoon sugar
 1/4 teaspoon salt
 1 teaspoon instant yeast
 40g water***
 2g chilled butter
 25g walnuts, chopped

** Potatoes are boiled, mashed and cooled to room temperature before use.
*** You may like to use the starchy water left behind from boiling the potatoes with, cooled to room temperature.

In a mixer bowl, combine the flour, sugar, salt and instant yeast with a hand whisk to mix well the dry ingredients together.  Add mashed potatoes, and start the mixer running with a dough hook on the lowest speed.

Slowly drizzle the cooled potato water into the mixture with a pouring cup, or spoon by spoon, and when the mixture gathers into a ball, stop adding water.  As the quantity of ingredient is really quite small for the dough hook to reach in the big mixer bowl, halfway through the liquid addition, it will be a good idea to stop the mixer and use a spoon to manually incorporate the wet and dry ingredients together, otherwise you may end up adding too much water. Add butter and knead the dough till window pane stage.

Pour all the 25g chopped walnuts into the mixer to incorporate the nuts into the dough.  The dough will be wet and sticky, but still manageable with oiled hands/fingers.  Stop the mixer, and place dough in a greased bowl for its first proof, around 45 minutes.

The dough would have risen to about twice its original size after 45 minutes, punch down the dough to deflate it, and transfer the dough to a clean work top.  Grease the work top if the dough is too sticky.  Divide the dough into 3 portions, roughly roll them into balls, place on work top, cover and let the dough relax for 10 minutes.

After 10 minutes, deflate to squeeze out any air bubbles trapped in the dough balls, and then shape them into balls again, and arrange them in a greased 8″x3.5″x3″ rectangular cake tin.  Let it go through its final proof before baking, covered and placed in a draft free place, around 45 minutes.

When ready to bake, make sure that the oven has been preheated to 190C.

Bake for 15-18 minutes, till the bread are golden brown.

Remove from oven and cool on rack before serving.  If you want a soft crust, brush melted butter over the bread now while they are fresh hot out of the oven.

If not eaten immediately, store in an airtight container to keep the bread rolls soft after they have cooled down.

Save

Start The Day With Sweet Potato Bread

Sweet Potato Bread // Mono+Co Sweet Potato Bread // Mono+Co

If I have to give one compelling reason to not own a bread machine, it has to be the freedom to shape my own bread.  But that is only because my KitchenAid mixer did most part of the hard work: the kneading process.  This horse shoe shaped bread was inspired by a modern bakery from Taiwan.  After making some mental notes on the ingredient permutations (they even kimchi!) and some interesting scoring patterns, I decided to bake my next day’s breakfast loaf using a familiar recipe but shaped it like a horse shoe, just like those ‘artisan-looking’ breads on the bakery’s shelves.

I used a Wilton heating core to hold the bread dough in a semi circle shape, even after a pretty dramatic final proof.

As usual, with one sweet potato, the recipe produced a super duper soft bread texture, without any need for chemically derived bread improver.  I can’t help doing one or two “bread-yoga-poses” to  illustrate my point.

Sweet  Potato Bread // Mono+Co Sweet  Potato Bread // Mono+Co Sweet  Potato Bread // Mono+Co Sweet  Potato Bread // Mono+Co Sweet  Potato Bread // Mono+Co


SWEET POTATO WALNUT HONEY BREAD

adapted from here

93g cooked+mashed sweet potato
 175g bread flour/ plain flour
 2 tablespoons honey
 1/4 teaspoon salt
 1/2 tablespoon instant yeast
 1/2 egg
 40g water
 35g cold unsalted butter, cubed
 40g walnut, roughly chopped

*After many rounds of baking breads with tubers, I think that the amount of sweet potatoes added does not have to be as accurate as the recipe.  To avoid food waste, I simply eyeball one that would roughly give me around 70g-100g of potato after peeling, and use up the entire cooked potato for the bread, instead of leaving behind small chunks just to adhere strictly to the amount the recipe had called for.  However, as the additional potatoes contains water, the amount of liquid added to the dough subsequently need to be adjusted; just enough for the ingredients to come to a ball.

In a mixing bowl, combine flour, mashed sweet potatoes , honey, salt, yeast and beaten egg.  With a dough hook, knead the ingredients on low speed, nothing much would happen now as most of the ingredients are dry, slowly drizzle water from a pouring cup and stop when the ingredients start to gather into a ball.  You may like to use the starchy water left behind from boiling the sweet potatoes with, just return them to room temperature.

If you have time, leave this dough aside for 15minutes to allow the flour to absorb the liquid properly.  Otherwise, add cubed butter one by one, till they are mixed completely into the dough and there are no sight of butter left. Continue kneading this dough to window pane stage, the dough should look really smooth and elastic.  Finally, add the roughly chopped walnuts and let the mixer incorporate the nuts into the dough, takes about 1 minute.

Place dough in a greased bowl, cover and let it rise for an hour. Punch dough down to deflate it and transfer to a clean worktop. Shape to desire, in my case, I flatten the dough on the worktop with a rolling pin and push out all trapped air bubbles, then I roll up the dough, longer side facing me, swiss roll style.  Pinch the open ends to seal them firmly.  With seams facing downwards, place the dough on a greased baking tray and wrap it around a greased Heating Core (totally optional, if you don’t have this, just roughly bend the dough into horse shoe shape on the baking tray).  Leave it covered, place in a draft free place, and let it rise for 45min to 1 hour.

Preheat oven to 170C and bake the bread for 25 to 30 minutes, till golden brown.  Lightly mist the bread with water before putting it into the oven. I learned this trick when baking sourdough style bread, and have since adopted this habit with all of my breads, somewhat like my “lucky charm” for a successful bake.  Try this with your next homemade bread, and see if it works for you too!

When the baking is done, remove heating core and transfer the bread to a wire rack to let it cool completely before slicing/ serving.

Walnut Wholemeal Bread

walnutwholewheatbread001 walnutwholewheatbread006 walnutwholewheatbread007 walnutwholewheatbread008 walnutwholewheatbread005

Unlike most home bread makers I know, my bread making routine did not take off well with a bread making machine.  The model I bought produced bread with a synthetic aroma that I couldn’t quite figure out what it was even till now.  As it was a discontinued model that went for a song, I had no after sales service to rely on.

For a while, I thought my recipes were wrong.  Yeast was not a familiar ingredient then.  I figured I had probably put in too much yeast, cos I could not pinpoint what other ingredient could attribute to that strange smell the whole time when the bread was in the machine.  After throwing about 5 loaves away, I gave up troubleshooting the recipe, and decided that yeast was just not my kind of ingredient. And along the way, concluded that bread making machines make strange smelling bread.

It was not until I got a mixer which came with the dough hook, that eventually turn me into an avid bread maker.  The breads I kneaded with the mixer and baked in the oven no longer emit that strange smell, so I could safely conclude that there was indeed something wrong with my bread machine.  Although I wished I could handle a dough from start to finish like this, the mixer made the task too easy, plus my hands are too warm to handle the dough.  A half machine homemade bread is still better than a factory produced one anyway.  No E-some-number ingredients. No Preservatives.  Just flour, salt, water and yeast.  Plus any ingredients that I like.

I am beginning to get too comfortable with this Champion’s Milk Toast recipe, so I started adapting it to bake a healthier wholemeal version.  My first not-so-successful attempt, to replace the bread flour completely with wholemeal flour, ended up with a super dense loaf.  So this time I tried with a plain flour and wholemeal flour mixture.

The first proof went well enough to encourage me to added some chopped walnuts into the dough during final shaping stage.  I decided not to use my usual “swiss roll” shaping method to create a neat looking loaf, but with this folding and sealing method instead.  The end result is a pretty rustic looking loaf of bread, that still maintains the fluffy texture of the original Champion’s Milk Toast.


WALNUT WHOLEMEAL BREAD
Adapted from here
INGREDIENTS :
- 150g plain flour or bread flour
- 150g wholemeal flour
- 24g fine sugar
- 1/2 teaspoon sea salt
- 135g water
- 69g fresh milk
- 3/4 teaspoon instant yeast
- 15g unsalted butter, cubed
- 30g walnut, roughly chopped

INSTRUCTIONS :

01. Put all ingredients, EXCEPT BUTTER & WALNUTS, in the  mixing bowl.
02. With a flat beater attachment, mix all ingredients at low speed (1 on my kitchenaid)
03. Change to a dough hook, and continue to knead the dough, adding cubed butter gradually.  Keep kneading till dough reached window pane stage.  You may increase the speed of the mixer to level 2 halfway when the dough starts to look stretchy and pulls away from the sides of the bowl.
04. Remove the bowl from the mixer, grease working hand slightly with butter so that the dough won’t stick to fingers, loosely shape the dough into a ball*.
05. Cover the bowl with a clean damp tea towel, and let it proof for at least 60 minutes (or until it double in size).
06. After the dough has double in size, punch the dough down, and move it to a clean work top.
07. Roll loosely into a ball, leave it on the counter covered with towel for 15 minutes.
08. After 15 minutes, the dough will rise again.  Flatten the dough and add chopped walnuts to the dough.  Knead to mix the walnut well into the dough.
09. Shape the dough into a loaf shape and place it in the bread tin.
10. Covered the bread tin with towel, and let it have a final rise.
11. Once dough has risen to fill up the bread tin, bake it for 30minutes in a preheated oven at 170C / 240F.
12. When the baking time is over, remove the bread from the bread tin immediately, and let it cool down completely on a rack.


++ NOTES TO SELF ++
///
this dough will be sticky, almost impossible not to stick to fingers when touched, so I had to use the tucking method (using greased fingers to tuck/fold the sides of the dough to its base)  to roughly shape it into a neat ball for its first proof. See second photo,  it’s not all smooth and perfect, but good enough.
///
my bread tin measures 20x10x10 inches.

Champion’s Milk Toast | 吴宝春金牌牛奶吐司

wpcmilkbreadloaf001 wpcmilkbreadloafsq wpcmilkbreadloaf002 wpcmilkbreadloaf003 wpcmilkbreadloaf004 wpcmilkbreadloaf005 wpcmilkbreadloaf006 wpcmilkbreadloaf007 wpcmilkbreadloaf008

I have been very very lucky to be able to get my hands on 吳寶春麥方店’s World Champion Rose-Lychee bread (荔枝玫瑰麵包) before, but not his Japanese style breads.  Looking at the whole array of items available at his bakery, I am not sure if I will settle with a plain looking milk loaf from the Master Baker.  But back at home, kids love white, soft and fluffy breads, and it’s going to be an impressive story to tell my husband that I baked a milk toast with this recipe supposedly from 吳寶春.

I did a very fast browse around the bakery website to see how the end result should look like, but could not find the item ‘金牌牛奶吐司’.  However, from the ingredients, I reckoned that it should be looking like this 皇冠吐司, or like another all milk version called 極制瑞穗鮮乳土司.  Despite doing my homework, I still ended up baking the loaf with my bread tin covered, even though the pictures online clearly show otherwise.

I have since found a few other 吳寶春‘s bread recipes videos online, with the master himself demonstrating the steps.  This is one generous Master Baker.


RECIPE : CHAMPION’S MILK TOAST | 吴宝春金牌牛奶吐司
Source
INGREDIENTS :
- 300g plain flour or bread flour
- 24g fine sugar
- 1/2 teaspoon sea salt
- 135g water
- 69g fresh milk
- 3/4 teaspoon instant yeast
- 15g unsalted butter, cubed
INSTRUCTIONS

01. Put all ingredients, EXCEPT BUTTER, in the  mixing bowl.
02. With a flat beater attachment, mix all ingredients at low speed (1 on my kitchenaid)
03. Change to a dough hook, and continue to knead the dough, adding cubed butter gradually.  Keep kneading till dough reached window pane stage.  You may increase the speed of the mixer to level 2 halfway when the dough starts to look stretchy and pulls away from the sides of the bowl.
04. Remove the bowl from the mixer, grease working hand slightly with butter so that the dough won’t stick to fingers, loosely shape the dough into a ball*.
05. Cover the bowl with a clean damp tea towel, and let it proof for at least 60 minutes (or until it double in size).
06. After the dough has double in size, punch the dough down, and move it to a clean work top.
07. Divide the dough into 2 equal portions, roll each into a neat ball, leave it on the counter covered with towel for 15 minutes.
08. After 15 minutes, the dough rise again.  With a rolling pin, flatten the dough, pushing out trapped air inside, then loosely roll up, swiss roll style.
09. Cover with towel, and proof for another 15 minutes.
10. Repeat step 8, place dough inside the bread tin, covered with towel, and let it have a final rise.
11. For square loaf : Once dough has risen to fill up about 90% of the bread tin, cover bread tin, wait for another 15 minutes (to let dough rise all the way to the top), and bake for 40 minutes in a preheated oven at 210C / 410F.
12. If bake without cover, bake for 30minutes at 170C / 240F.


++ NOTES TO SELF ++
///
this dough will be sticky, almost impossible not to stick to fingers when touched, so I had to use the tucking method (using greased fingers to tuck/fold the sides of the dough to its base)  to roughly shape it into a neat ball for its first proof. See photo 3,  it’s not all smooth and perfect, but good enough.
///
my bread tin measures 20x10x10 inches.

ABin5 : A Refresher

claypotbread // mono+co claypotbread // mono+coclaypotbread // mono+co claypotbread // mono+co

While drafting the previous pizza recipe post, where I used the ‘Artisan Bread in Five Minutes’ (ABin5) way for preparing the pizza dough, I realized that I have been making changes to this method since I adopted it two years ago.  A new edition of the book has also been released, so here’s a refresher post on baking bread this way.

First, the 3 major changes I have adopted:

____________

/ Earlier, I was weary of adding too much salt into the mixture for fear of, firstly, it will affect the level of rise in the dough (what if I put too much and kill the yeast?), and secondly, it will be more healthy to have lesser salt in the bread.  However, I have noticed that there is a difference in the taste when I added up to a full tablespoon of salt into my dough, depending on what salt is used.

/ I have been using ONLY the weighing method to get the amount of flour right, achieving a consistent level of hydration for the dough for every batch.  I have noticed with my earlier trials that the ABin5 master recipe is really a very forgiving recipe; no matter how wet the dough is, it still rises predictably, and the bread still come out pretty well.  Nowadays, I prefer the dough made with the weighing method, as it is a lot easier to handle, not too runny, allowing me to shape the bread better; most of the dough should go into the bread, not on my hands only to be washed away!

/  I have been using the steam trap method with a simple claypot, instead of the broiler in the oven method.  The authors of the book have also mentioned this method as a more convenient one.  I do not preheat my claypot though, as my claypot manufacturer’s instruction specifically states that the claypot should not be heated without any liquids in it.  So I proofed my bread dough in it (covered with clean, damp tea towel), and bake it in a preheated oven for 30 minutes with lid on, and then another 15-20 minutes without the lid.

____________

RECIPE FOR ARTISAN BREAD IN 5 MINUTES
/Source

____________

3 cups lukewarm water
1 tablespoon instant yeast
1 tablespoon salt
2lb or 910g of plain flour

____________

01. Place water, salt and yeast in a plastic container that is big enough for the dough.  This container preferably with lid (if not, cover with cling wrap will do too) will also be the storage container for the dough to be placed in the fridge.  Make sure your fridge has a space for it.  A 6-quart container is recommended in the book.

02. Add in the flour all at once.  Stir with a pair of long chopsticks until the dough comes together, it should be a wet and shapeless one.  If yours can be kneaded into a ball at this stage, you have probably used too much flour.  You can still save the dough by adding water slowly, till you get the dough to its rightful consistency.

03.  Cover the container loosely, saving a gap for the gases to escape as the dough proof.

04. Allow the dough to rise to double its bulk, anything from 2 hours to 4 hours, depending on the room temperature.

05. Once the dough has risen to its max, it will start to settle down, sink a little and form a flat top.  This dough is now ready to be used, or it can be stored in the fridge when you are ready to bake a bread or pizza.  I prefer keeping it in the chiller for a few hours so that the dough is easier to handle.

06. On baking day, take out the dough from the fridge, and dust the surface with some flour, so that it won’t stick to your hands when retrieving the dough.

07. Pull out a piece of dough and cut out about the size of a grapefruit , or weigh 1lb.  Return the rest of the dough into the fridge.

08. Form the dough into a ball, gluten coated.  Sprinkle flour on surface as you go for easier handling, but take care not to incorporate the flour into the dough.  Handle the dough gently at this stage, do not knead, press or squeeze out the air that has expanded inside the dough.

09. Rest the shaped dough by placing it in a claypot (lightly dusted with flour),  from 40 minutes (according to the book’s instructions) or 90 minutes.  I let it stand longer till the dough returns to room temperature.

10.  Preheat the oven to 230C (450F).  When the oven is ready, pour some flour on the bread surface, and slash the loaf with a clean knife or scissors (I have to admit that I find the scissors easier to manage! Just make 3 to 4 decisive fast snips…) so that it does not split at the bottom during baking.

11.  Cover the claypot, and quickly place it into the oven, bake for 30 minutes.

12. After 30 minutes, continue to bake at the same temperature for 15-20 minutes, without the cover.

13. When done, remove the claypot from the oven, and let it cool on a rack.

14. Allow the loaf to cool completely on a rack to room temperature before slicing it.  Otherwise, the bread will end up with a hard crust and a gummy interior.

Easy Handmade Pizza with ABin5 dough

abin5 dough pizza // mono+co abin5 dough pizza // mono+coabin5 dough pizza // mono+coabin5 dough pizza // mono+co

The hunger pang came after watching a pizza ad, showing a pair of pretty hands kneading the floured pizza dough, sprinkling herbs and toppings, before presenting 5 rectangular pizzas, each with a different flavor.

Not too difficult, if you ask me, once you have this bread dough and this tomato pasta sauce ready.  I had to settle with frozen beef meatballs, canned button mushrooms and cheddar cheese as toppings as I do not have much items in my pantry, being a Friday, aka empty fridge day; I make it a point to clear out my groceries by Fridays, and start afresh on Saturdays.  But you can easily “upgrade” with a simple switch of toppings to fresh ingredients such as mozzarella cheese and basil.

*Hint*  Those delivery menus from pizza shops have lotsa great ideas!

RECIPE FOR PIZZA DOUGH
Source


- 3 cups lukewarm water
- 1 tablespoon instant yeast
- 1 tablespoon salt
- 2lb or 910g of plain flour*

/ To Make Dough

01. Place water, salt and yeast in a plastic container that is big enough for the dough.  This container preferably with lid (if not, cover with cling wrap will do too) will also be the storage container for the dough to be placed in the fridge.  Make sure your fridge has a space for it.  A 6-quart container is recommended in the book.

02. Add in the flour all at once.  Stir until the dough comes together, it should be a wet and shapeless one.  If yours can be kneaded into a ball, you have probably used too much flour.  You can still save the dough by adding water slowly, till you get the dough to its rightful consistency.

03.  Cover the container loosely, saving a gap for the gases to escape as the dough proof.

04. Allow the dough to rise to double its bulk, anything from 2 hours to 4 hours, depending on the room temperature.

05. Once the dough has risen to its max, it will start to settle down, sink a little and form a flat top.  This dough is now ready to be used, or it can be stored in the fridge when you are ready to bake a bread or pizza.  I prefer keeping it in the chiller for a few hours so that the dough is easier to handle.

____________

/ To Bake Pizza (Get your choice of topping ready, I used sliced button mushrooms, sliced ikea beef meatballs, and cheddar cheese)

01. When you are ready to make pizza, take out the dough from the fridge, sprinkle some plain flour on top of the dough and grab a handful of it and cut it out with a pair of scissors.

02. Roughly shape it into a ball with floured hands, and press it down on a baking parchment paper placed on a baking tray.  Stretch out the dough to create a really thin crust (the pizza crust will still rise through the baking process, so I am not worried about the dough being too thin).

03. Spread some garlic butter, or this tomato paste over the dough.

04.  Place sliced button mushrooms and meatballs on top of the butter or tomato sauce.  Drizzle with some olive oil.

05.  In a preheated oven 240C (460F), bake for 8 -10 minutes.  When pizza is cooked, placed sliced cheddar cheese on top, and leave it in the warm oven for another 1 minute to melt the cheese.  If you are using mozzarella cheese, you may add it before baking the pizza.  I ran out of mozzarella and didn’t want my cheddar cheese to brown during baking.

06.  Serve immediately.


++ NOTES TO SELF ++
///
* I have since drop the “scoop-and-level method” as I am really terrible at scooping consistently! But if you are, feel free to use 6 1/2 cup of plain flour for this recipe.
///