5 Pantry Items As Natural Bath And Beauty Products

5 Pantry Items As Natural Bath And Beauty Products // Mono + Co

Through the course of switching to more eco-friendly body and skin care products with less packaging, I discovered a few gems in my kitchen.  Here are 5 that have become my must-haves in both the kitchen and bathroom.

++ Baking soda : This has so many uses around the house that I have been buying the larger 1.81kg box from Arms and Hammer in paper packaging instead of getting those 100g plastic bottles from the baking supplies aisle.  Occasionally, discount stores offer the 454g pack at $1.  I will add a teaspoon here and there for its clarifying and exfoliating properties.  It makes a great foot soak too, for removing feet odours especially from after wearing not so well ventilated covered shoes.  Brownie points for its paper packaging that can be recycled.

++ Organic raw honey : With the 1kg tub going slightly above $20, this is even cheaper than my gentle facial cream cleanser which isn’t even organic.  Do honey’s natural anti-bacterial and anti-inflammatory properties sound like a good idea for a cleanser?  While commercial brands of facial cleanser add honey as one of the many ingredients on the list, I am going for the 100%-honey-and-nothing-else method to clean my face when I don’t wear makeup.  I first learned about plain raw honey as cleanser from a local skincare entrepreneur at an eco-event.  Nothing to mix or cook, simply smear a thin layer of raw honey over damp face, leave it for 10 minutes and rinse off.  The first few attempts left a long trail of ants on my bathroom basin and counter, I now know better to rinse using more gentle action with less messy splashes.  I use only about half a teaspoon each time so the 1 kg tub would have last me really long if I hadn’t used it as food in the kitchen.

5 Pantry Items As Natural Bath And Beauty Products // Mono + Co

Until I can find a bee farm here, I will definitely end up with a plastic container after I finish up the honey.  I am starting a habit to reuse plastic type with recycling symbol #5 (Polypropylene or PP) instead of throwing them into the recycling bins since they are of stronger nature, able withstand higher temperature and thus has more potential for reuse.  As opposed to #1 (PET) from bottled water and disposable food containers which should not be reused and can be easily avoided by bringing own water bottles and lunch boxes.

The tub from honey happens to be a PP5, so off with ideas to reuse the nice looking translucent container.  The handle makes it a convenient non-hot-food storage container, like this honey lemonade I made with “ugly” lemons I bought off the shelves on discount.

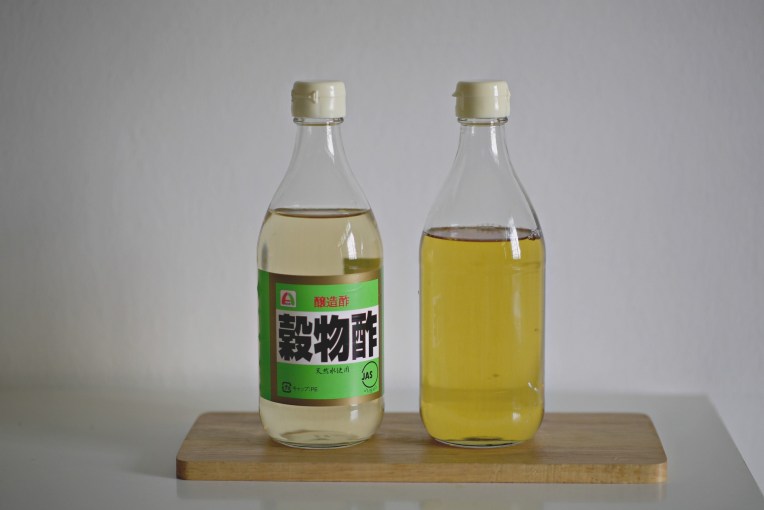
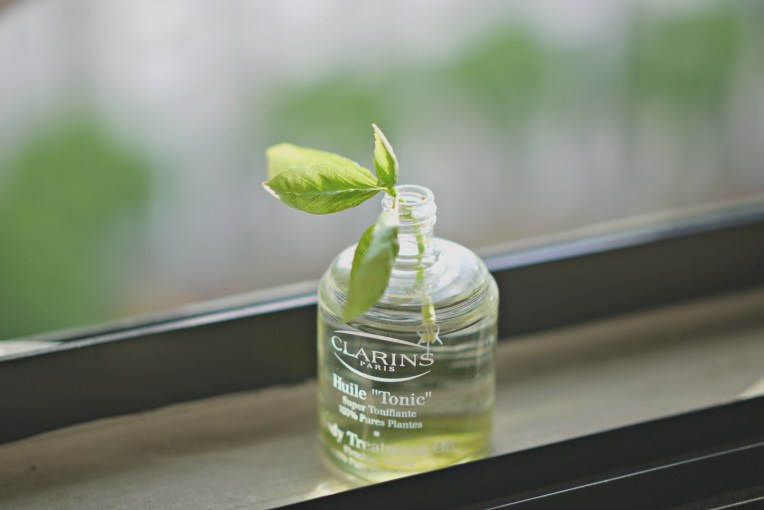
++ Apple Cider Vinegar : I religiously start my mornings with a warm mug of water mixed with a tablespoon of ACV.  ACV is also my go-to ingredient for homemade facial toner after diluted with either plain filtered water or brewed green tea.

5 Pantry Items As Natural Bath And Beauty Products // Mono + Co

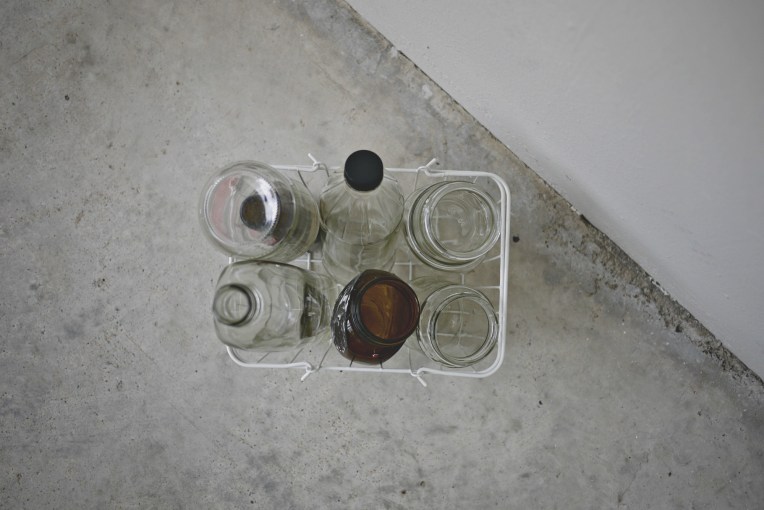
The ACV comes in 2 sizes and I buy whichever is on sale.  The larger empty glass bottle is reused as a water pitcher at home, reminding me to keep myself hydrated throughout the day.  I have kept aside 2 of the smaller size version, waiting for a perfect aha moment to reuse them.  Glass recycling is not as lucrative anymore anyway, so I might as well reuse these glass bottles instead.

++ Coconut oil : I bought coconut oil a few years back to make granola with a sweet smelling whiff of coconut, but the oil has since doubled up as a makeup remover.  I used to buy makeup remover with mineral oil to take off water-proof mascara, though I no longer wear mascara, this oil-in-make up remover thing got stuck with me.  While harboring thoughts of making my own makeup remover to save some moolah sent me to the kitchen pantry where my huge jar of coconut oil sat.  An earlier oil cleansing method attempt which I tried with coconut oil was brushed off as too troublesome since I ended up with the chore of preparing a pail of hot water and a greasy washcloth in the laundry.  However, the attempt taught me that coconut oil is indeed a very effective natural makeup remover.  So now, instead of going through the whole oil cleansing ritual, hot towel and all, I only rub the oil over my face to dissolve the makeup and wash away the grease and makeup with diluted liquid castile soap.  I did not come up castile soap + coconut oil recipe on my own, though I think the method of separate application is.  It actually came from a few sources (here and here) that gave instructions on how to diy makeup remove pads, I simply remove the need to buy (and discard) cotton pads and come up with my own 2-step cleansing process, talking about adapting for zero waste.

++ Tea seed/ Camellia seed powder : This year, I am adding tea seed/ Camellia seed powder to my growing list of natural body and skin care ingredients.  The powder was first acquired, after a long search, as a dishwashing detergent alternative that I have written earlier.  I am not sure why I had to have a hard time looking for this product here in Singapore, given its effective cleansing properties, affordable pricing and its popularity in Taiwan and Hongkong.  Camellia oil, on the other hand, is easily available in health shops here, marketed as a cooking oil that has an even higher oleic acid than olive oil.  The Japanese and Koreans also add the oil to their skincare regime.

5 Pantry Items As Natural Bath And Beauty Products // Mono + Co

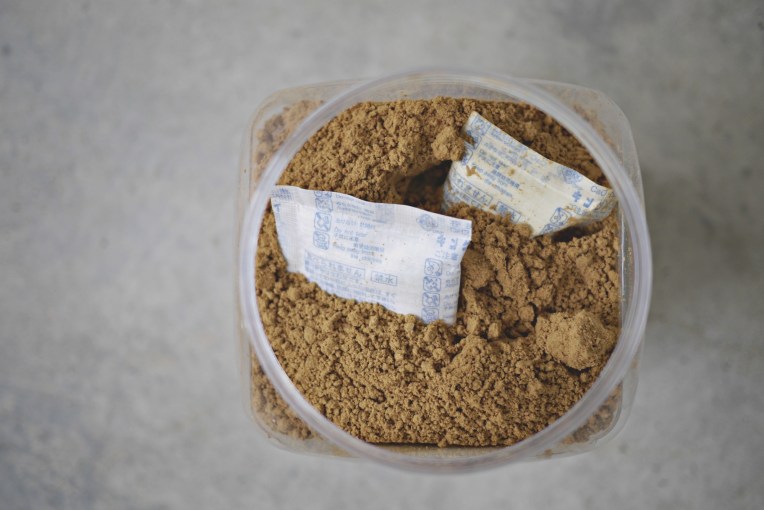
As for the powder with natural saponin, it is simply the residue which would otherwise be discarded from the process of camellia oil extraction.  The factories grind these seed residues into a very fine powder that can be dissolved in water, forming a paste or mixture for cleaning purposes.  Camellia seed powder, unfortunately, has a very short shelf life; one year if the packaging is unopened and 3 months after opening.  And after mixing with water to form a paste, it must be used up by end of the day as the process of decomposition starts to take place.  Given our humid weather here, I have been storing the powder in an airtight container with its past life as the ubiquitous Chinese new year goodies container.

5 Pantry Items As Natural Bath And Beauty Products // Mono + Co

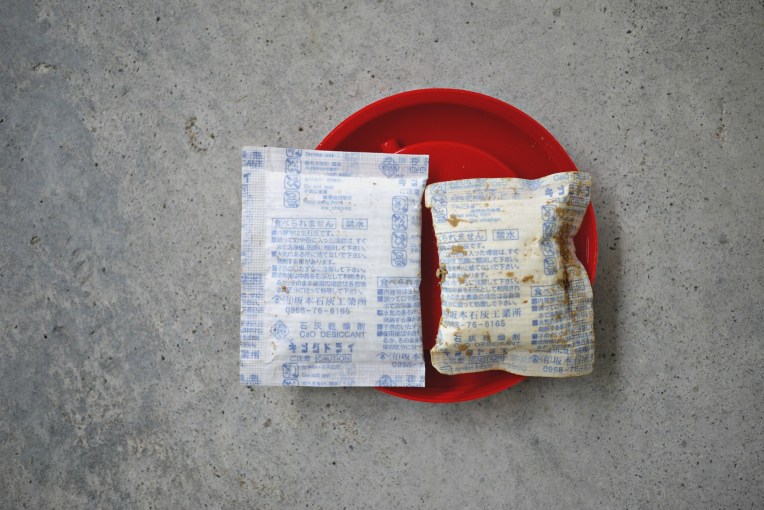
I also reuse dessicants found in Japanese seaweed packets to keep the powder dry.  On the right is an older packet I have been placing inside the powder for past few months and the newer one is on the left.  I find it wasteful to discard these palm-size packets that come with my Daiso seaweed sheets (and they weigh more than all the sheets added up!) so I reuse them in my cookie tins, tea leaves and anything that would thank a dry storage place.  They should be food safe since they come in direct contact with the seaweed sheets anyway.

Because tea seed powder needs to be used up quickly once opened, I have been finding ways to use them beyond cleaning my kitchen counter.  Like those pantry items above, camellia seed powder has crept into my bathroom as skin/hair care products.  Take note that when using tea seed powder as shampoo or facial cleanser, always be careful not to let it get in eyes.  Like any product with saponin, they sting and irritate the eyes when in contact.

Shampoo

1 teaspoon to 200ml water.  Shake to mix in a squeeze bottle.  Apply to scalp, massage gently to clean, rinse completely.

User note: The first time I shampooed with camellia seed powder, I was sorely disappointed that my scalp didn’t feel squeaky clean like my kitchen dishes after washing.  The real difference came the next day, when I noticed that my normally greasy scalp was not oily at all. This kind of prove that the shampoo was working in its own gentle way; cleaning my scalp and hair without stripping away all the natural oil, so the body will not produce even more oil to compensate.

Facial Wash + Scrub

Because the powder is really fine, it makes a gentle cleanser and an even more gentle exfoliant.
Mix 1 teaspoon of tea seed powder with 60ml of water to form a runny mixture.  Rub gently over face to clean.  Rinse completely.

Facial Mask

Mix 1 tablespoon of tea seed powder with just enough water to form a mud-like consistency, thick enough to apply on face.
Spread mask on face, avoiding delicate eye area.  Leave for 10 minutes.
Wash with water, remember to keep eyes shut until all residue has been rinsed clean.

Save

Save

Save

Save

Save

Save

Save

Save

Save

Save

Save

Green Monday : DIY Beeswax Food Wrap Ver 4.0

Green Monday : DIY Beeswax Food Wrap Ver 4.0 // Mono + CoGreen Monday : DIY Beeswax Food Wrap Ver 4.0 // Mono + Co

When I first started making my own beeswax food wraps, one of the suggestions I received was to choose organic fabric for it to be food safe.  I can’t agree more, homemade products have the best reputation for quality when everything thing is made with love.  So I went in search of organic cotton in People’s Park Complex to make my FOURTH batch of food wraps.   Funny that this item was marketed to replace the use of disposable cling wrap, something that I hardly use in the kitchen previously.  However, after making these food wraps of different sizes, I realized that they are kind of useful around the house, and this is my version 4.0.  Yes, I tweak something slightly after every batch.

Green Monday : DIY Beeswax Food Wrap Ver 4.0 // Mono + Co

Version 3.0 saw me making natural dyes with food to dye the fabrics at home.  The latest batch that I am making is intended for wrapping cooked food, there is something uneasy about reusing the same wrap for raw ingredients like onion halves on a bread bun.  I am always running out of the bigger A4 sized wraps anyway.  So I bought $4 worth of cotton fabric that is food grade according to the textile shop owner.  People have been buying these for making tofu, milking hot soy milk and liner for steaming hot buns and dim sum dishes.  Sounds food grade enough.

Green Monday : DIY Beeswax Food Wrap Ver 4.0 // Mono + Co

When it comes to natural dyes, I only have luck with yellow and red/pink so far.  The last blue dye I tried making with blue butterfly pea flower faded away totally after just a wash.  This time, I tried boiling the fabric in pandan leaves to create pastel green shade.  Sadly, it was a waste of time (and gas) when I realize that the green color did not stay a bit on the fabric after one rinse.  Even the cloth I used to squeeze pandan juice to make kaya jam stained better.

Green Monday : DIY Beeswax Food Wrap Ver 4.0 // Mono + Co

And so it was back to just yellow and pink.  For more colors, this site has a comprehensive list of natural dyes, I simply use the ingredients I have in my kitchen and must not be too expensive since the dye is to be discarded after the project.

Green Monday : DIY Beeswax Food Wrap Ver 4.0 // Mono + Co

Here’s the variation I made to my 4th version: after the beeswax wraps have air dried, I hand sewn cloth labels to differentiate the sides so that same side always goes towards the food.  Just like commercial beeswax wraps, there will be a side with prints that will be the facing outside.

A very quick run down on how I treat and dye my fabric before turning them into turmeric yellow color beeswax food wraps:
Step 1 : Trim the fabric to sizes for beeswax wraps.
Step 2 : Handwash with mild detergent and air dry.  Cloth seller mentioned avoiding laundry detergent.
Step 3 : To make turmeric yellow dye, fill up half a small saucepan with water and add 1 tall heap teaspoon turmeric powder, stir to mix well. If you want brighter, deeper shade, add more turmeric powder.  Bring the solution to boil and add 1 heap teaspoon of salt.
Step 4 : Wet the fabric and wring dry before adding it into the yellow dye.   Boil for 5 minutes, turn off the fire and let it soak until the water cools to room temperature.
Step 5 : Remove fabric from dye solution and rinse in cool water.  Air dry and press with an iron.
Step 6 : Line a tray with parchment paper, place the fabric on top.  Sprinkle beeswax evenly and melt the beeswax in a preheated oven at 150C for 2-3 minutes.
Step 7 : Once all the beeswax has melted, take out the tray, add 1/4 teaspoon of coconut oil, spread the oil and melted beeswax evenly on the fabric using a brush with short bristles.
Step 8 : If more beeswax is required, top up and send it back into the oven, but keep a watchful eye on the oven as beeswax is flammable.
Step 9 : Remove fabric from parchment paper and air dry for 1 minute.
Step 10 : Rinse the beeswax wrap with mild detergent once and air dry again before the first usage.
Step 11: (Optional) Sew a cloth label on one side of the wrap so you will know which side always goes towards the food.

For the record, my $4 fabric was made into 9 pieces of beeswax food wraps of various dimensions.

Save

Save

Save

Save

Save

Save

Save

Save

Save

Save

Save

Save

Save

Homemade Spoon Butter : A Wood Preserver

Homemade Spoon Butter : A Wood Preserver // Mono & Co

I have quite a number of wooden kitchen items at home but I have never thought of applying oil over them to moisturize and protect their surfaces.  I always thought that wooden products, being a natural material and subjected to much abuse in my kitchen, are meant to split/turn moldy/breakdown/wear and tear and eventually be replaced due to hygiene reasons.

I was so wrong.

While going through some of the methods to clean and restore my chopping boards, I stumbled upon this post that detailed how to give old wooden salad bowls from the thrift store a total makeover. Another one here.  My wooden spatulas and spoons need more than a thorough nightly air dry as maintenance.  And they have the potential to outlive me and gain vintage status if I just give them regular TLC sessions with spoon butter, which is nothing more than a mixture of beeswax and a neutral flavor oil.  The super brief ingredient list only means that I am going the DIY route instead of buying a big jar that I can’t use up.

There are many recipes out there when you search for “spoon butter recipes” and they are really similar to how I have been making my lotion bars and lip balm.  So I am going to make just enough to buff my wooden utensils and use up the leftover as hand moisturizer for the next few days. I hate leftovers that linger for months.

After eliminating mineral oil, and a number of cooking oil that turns rancid easily, I decided to turn to this recipe that uses coconut oil, something that I have been using for my homemade skin care products.  According to other sites, walnut oil and olive oil are great choices too.  Pick something food grade that you already have in your pantry instead of buying a bottle for a single purpose.

Homemade Spoon Butter : A Wood Preserver // Mono & Co

I made a really small initial batch for testing, with just 3g beeswax pellets and 10g coconut oil, since most instructions mention “1 part beeswax/ 3 parts oil.”  I have covered almost every wooden items in my drawer except for 3 large chopping boards.  If you need more, simply increase the portion of ingredients accordingly, especially for chopping boards.  I will give my boards the royal treatment over the weekend and let it cure longer.

I made the spoon butter directly inside a small glass jar that I am storing it with, hardened wax is really messy to clean up.   I learned that the hard way after making my beeswax wrap, so I will avoid making it a separate vessel to skip the transferring and pouring steps altogether.  For this reason, use a glass jar instead of a plastic one since we will be heating it.

Homemade Spoon Butter : A Wood Preserver // Mono & Co

Place the glass jar with beeswax pellets and coconut oil in a pot of water over low heat and let it simmer.  Once the beeswax pellets melt (in my warm house, coconut oil is always in liquid state), stir to mix well.  I usually hold the bottle by its rim (wear a mitten and be careful) and swirl to mix.  Then leave the spoon butter on the kitchen counter and let it set at room temperature.

Homemade Spoon Butter : A Wood Preserver // Mono & Co

To use, rub the spoon butter over the clean and dry wood surfaces, either with dry cloth or bare hands.  Leave them to sit over night.  The next day, wipe away any residual grease that is not absorbed by the surface with a dry cloth.

Homemade Spoon Butter : A Wood Preserver // Mono & Co

Homemade Spoon Butter : A Wood Preserver // Mono & Co

I always thought my spatula handle feels unfinished and dry.  After treatment, the wood grains even start to look more beautiful.

Homemade Spoon Butter : A Wood Preserver // Mono & Co

The difference before and after on my bamboo chopping board.

Homemade Spoon Butter : A Wood Preserver // Mono & Co

Homemade Spoon Butter : A Wood Preserver // Mono & Co

Bamboo toothbrushes getting a treatment too, especially the ones with unfinished surfaces that gets moldy really easily inside the bathroom.  See the difference before (below) and after (top).  But I can’t seem to find a way to reach the part between the bristles.

Reapply whenever the wooden surfaces start to look or feel dry.  I won’t wait until they crack or split anymore.

Save

Save

Save

Save

Save

Save

Save

No Frills Shopping

No Frills Shopping // Mono + Co

I share frequently on my plastic-bags-free shopping style when shopping at the wet markets.  I will share today how I store the groceries after buying them packaging free.

This method of shopping somehow always piques interest as to 1) how i cope without plastic bags to line my trash bin, 2) how I store the produce without proper packaging.  Even the market stallholders are curious.  But they know a thing or two about the best way to store their stuff, so I often get useful tips from them, minus the plastic bags of course.

Like this yam, uncle told me “must remember to store inside fridge, but let it breathe.” Since I think newspaper is the best material to wrap fruits and vegetables and yet allow them breathe (most sellers bag in shiny plastic bags with a few punched holes,) I simply leave wrap in in newspaper and leave it inside the crisp drawer.  Placed this right at the bottom since I don’t want it to crush on the leafy vegetables.

No Frills Shopping // Mono + Co

Red spinach before.  Auntie merely wrap the roots with a smaller piece of newspaper to prevent the soil from making a mess in my shopping bag.  But I don’t really mind since I clean the bags often and make sure they are dry before folding them up for the next use.  It’s alway good to keep the reusable bags clean and ready.  Nothing foils a green shopping plan than fumbling around looking for clean shopping bags seconds before leaving the house.

No Frills Shopping // Mono + Co

Red spinach after.  All wrapped up with a larger piece of newspaper.  Always remember to remove the elastic bands that are used to tie the vegetables together.  Otherwise, the tension will cause the vegetables to rot fast.

No Frills Shopping // Mono + Co

I used to buy just 1 or 2 stalks of cilantro as they don’t keep well by day 2, until the seller taught me the trick to keep them fresh and perky.

No Frills Shopping // Mono + Co

Store them inside an air-tight container and they will stay like this even after 2 weeks.

No Frills Shopping // Mono + Co

I have since started storing the scallions this way too, these are 1 week old.  Think I buy too much or use up too slowly.

No Frills Shopping // Mono + Co

Bok Choy, bundled with elastic bands.

No Frills Shopping // Mono + Co

Removed the bands and wrapped with newspaper.  These Bok Choy stalks might look limp, but a 15 minutes soak in a basin of water with a pinch of salt is all it takes to bring the crisp back.  I do the same with spinach too, but I will always make a mental note to use up these leafy vegetables first before cooking the more hardy ones.

No Frills Shopping // Mono + Co

Long beans, tied with elastic bands again, now you know why I find elastic bands one of the few household items that I will never need to buy.

No Frills Shopping // Mono + Co

Wrapped neatly with newspaper.

No Frills Shopping // Mono + Co

Next comes the “hardier” vegetables.

No Frills Shopping // Mono + Co

Wrapped all with newspaper sheets except for broccoli, with my diy beeswax wrap.  Not sure if my observation is accurate, but the wrap somehow keeps my broccoli florets longer without turning yellowish.

No Frills Shopping // Mono + Co

The only few items that I can’t get without plastic bag are the melon and pumkin wedges that the seller cuts up into smaller portions.  I tend to choose smaller pumkins so that I can buy them whole, but the whole sharksfin melon is too big for my family’s consumption.  Onions and tomatoes are bought without bags, and store outside the fridge in a basket with my garlic, ginger and potatoes.

No Frills Shopping // Mono + Co

The eggs bought in an egg carton that I “borrowed” from the seller.

No Frills Shopping // Mono + Co

I will transfer the eggs to my box at home, and bring the carton back to the seller on my next trip to market.  Almost all the egg sellers at the markets I visit welcome customers to return clean egg cartons for them to reuse, whether plastic or paper.

No Frills Shopping // Mono + Co

I have been reusing this paper egg carton since June but didn’t bring it along to prevent it from getting damaged or torn.

No Frills Shopping // Mono + Co

This is how I buy tofu, and the auntie taught me to rinse the tofu with water before storing inside the fridge.

No Frills Shopping // Mono + Co

Covered containers that I bring along to buy from the dry goods store where most of the items are packaging free.  This means that I can buy the minimal amount I need without overstocking.   Some planning is required though, to get the right sizing and a correct number of containers.

Save

Save

Save

Save

Save

Save

Save

Handsewn Bar Soap Pouch

Handsewn Bar Soap Pouch // Mono + Co

I recently started to make a switch to soap nuts for my handwash laundry.  While I am still getting accustomed to a really low sud way of washing my delicates, it’s indeed a great way to save water just like my almost-no-suds DIY tea seed kitchen detergent.  For more heavier soiled laundry, I am falling back on traditional bar soaps made with vegetable fats.  I tried an old-school “Labour” brand of laundry bar soap a few years back.  Can’t really remember what made me stop abruptly after using up all the 5 bars that came in the pack, but they did last quite a while.

I chanced upon a multi-purpose bar soap brand for household cleaning and laundry recently.  The seller recommended that it will lather even better when placed inside a drawstring bag, and hanging the bag with the soap inside to drip dry after using will prevent the soap from “dissolving” in a soap dish that is always wet.  I think this is a fantastic idea for bar soap users.  I can’t remember losing how many bars of bar soaps in the shower to such “flooding” soap dish incidents, so I diy a pouch my shower bar soap as well.

Handsewn Bar Soap Pouch // Mono + Co

For even better lathering effect, I made the drawstring pouches with a cotton washcloth from Daiso.  My shower bar soap instantly turns into an exfoliating bar when I use the soap placed inside the textured bag.  One washcloth is enough to make 3 handy pouches that fit the standard size bar soaps.

Handsewn Bar Soap Pouch // Mono + Co

Handsewn Bar Soap Pouch // Mono + Co

While this current laundry bar soap doesn’t feel drying to my hands, I can’t remember how my hands actually felt when I was using the Labour brand bar soap, but I remember it being much cheaper.

Handsewn Bar Soap Pouch // Mono + Co

Palm oil, coconut oil, canola oil, soda ash, and sodium hydroxide are listed whereas only “made with vegetable fats” is printed on Labour bar soap’s packaging.

Handsewn Bar Soap Pouch // Mono + Co

The pack comes with 4 individually shrink-wrapped bars.  Since I still have an extra pouch left,  I will be getting the Labour brand this weekend again to see if I like it better when I use it inside the pouch.

Save

Save

Save

Save

Save

Purple Sweet Potato Burger Patty

Purple Sweet Potato Burger // Mono + Co

This purple sweet potato burger patty was created based on a taste that I like, smoky with lots of sweetness from onion and basil leaves.  Added walnut and black sesame seeds to make my mum happy, she always worries that I don’t get enough nutrients by going meatless.  But hey look, my recipe is packed with real food, no space for fillers like breadcrumbs or flour!  Pan frying these patties will require a bit of tender loving care as I only add a beaten egg to hold the ingredients together.

Purple Sweet Potato Burger // Mono + Co

As I made this through trial and error, I don’t have an exact recipe for this.  To recreate this, I will probably be referring to the following photos and estimate the proportion of ingredients by eyeballing.  I did not come up with this recipe from scratch though.  Other than having a rough idea how I want my burger to taste, I referred to one of my favorite recipe sites, Minimalist Baker , for some ideas on creating this delicious looking sweet potato burger patty.


Purple Sweet Potato Burger Patty, A Rough Guide

Purple Sweet Potato Burger // Mono + Co

In a food processor, blitz a handful of walnuts and about 1/4 yellow onion.

Purple Sweet Potato Burger // Mono + Co

Add this to steamed and mashed sweet purple potatoes (from 2 medium size ones), a tablespoon of black sesame seeds, a handful of sweet basil leaves, chopped, an half a tablespoon of sweet paprika.

Purple Sweet Potato Burger // Mono + Co

Stir to mix well.  Depending on how moist the sweet potato is, the patty at this stage will be on the dry side.

Purple Sweet Potato Burger // Mono + Co

Slowly add beaten egg and stop just before the patty mixture becomes too wet to be molded.

You should be able to shape the patty by hand to look like this:

Purple Sweet Potato Burger // Mono + Co

In a preheated skillet, add some cooking oil.  Gently place the patties on the skillet and fry till both sides are cooked.

To assemble and serve, I added lettuce,

Purple Sweet Potato Burger // Mono + Co

sliced red capsicum,

Purple Sweet Potato Burger // Mono + Co

cheddar cheese, and grilled portobello mushroom,

Purple Sweet Potato Burger // Mono + Co

between 2 burger buns.  Eat immediately.

Purple Sweet Potato Burger // Mono + Co

More meatless vegetarian patty ideas, try out:

// this made with black bean,

// this vegan version with chickpeas and sweet corn,

// my favorite protein, bbq tofu patty,

// another “red meat”-looking patty, using beetroot.

Save

Save

Save

Save

Save

Save

Save

Save

Green Monday: DIY Beeswax Food Wrap

Green Monday: DIY Beeswax Cloth Wrap // Mono + Co

I go by a simple rule that if something can be diy-ed relatively easily, then resist buying, unless leaving the ‘making’ to someone else saves me plenty of money.  Beeswax cloth food wraps definitely fall under the “can-do” category.

For the uninitiated, beeswax food wraps are the environmentally friendly solution to plastic cling wraps since it can be reused, unlike the disposable nature of the latter.  I have long given up on plastic food wraps as they never seem to “cling” once out of the dispenser.  I find old newspapers a better wrap for my leafy vegetables and see through food savers are my preferred storage containers for halved lemons, avocados and carrots.  But if you are still buying, using, and discarding rolls and rolls of plastic cling wraps, perhaps you might want to consider investing one of these reusable food wraps.  I have since made these wraps on 2 separate occasions and share some tips and thoughts on this DIY project below.

Green Monday: DIY Beeswax Cloth Wrap // Mono + Co Green Monday: DIY Beeswax Cloth Wrap // Mono + Co

// 001.  Sizes: XS and XL

The best thing about making my own wrap is that I can decide how big or small I want the wrap to be.  As big as this one that I can easily use to wrap watermelon half, or

Green Monday: DIY Beeswax Cloth Wrap // Mono + Co Green Monday: DIY Beeswax Cloth Wrap // Mono + Co

as tiny as this one for 2 cherry tomatoes,

Green Monday: DIY Beeswax Cloth Wrap // Mono + Co

I even have one for wrapping a bamboo spoon for a packed meal.  Neat.

Green Monday: DIY Beeswax Cloth Wrap // Mono + Co

// 002. Methods: Oven or Iron?

These are the initial few sheets that I have made. Things went smoothly right from the very first piece, simply because the bake in the oven method is really easy.

I first line a baking tray with parchment paper, then place the cotton fabric on the paper, sprinkle beeswax pellets evenly on it and place it in a preheated oven at 150C.  It takes just 3 minutes for the beeswax pellets to melt.

Take the tray out, add 1/8 – 1/4 teaspoon of coconut oil (I learned that the addition of oil helps to make the wrap more pliable and cling better here) and use a clean large paintbrush with short bristles (so that the beeswax is not absorbed by the bristles) to spread the wax and oil evenly on every inch of the fabric.  Do this step swiftly before the wax starts to solidify at room temperature.  If the wax solidifies before you can even spread them, pop them back into the oven for another 30 sec to 1 minute this time to melt again, but watch closely and do not leave the oven unattended since beeswax and cotton are flammable.

Once the wax has been evenly spread, remove the fabric from the parchment paper and let it dry.  Once dry, wash it once with water and mild soap before its first use.

Green Monday: DIY Beeswax Cloth Wrap // Mono + Co

Green Monday: DIY Beeswax Cloth Wrap // Mono + Co

The only teething issue I have is how to keep the melted beeswax remaining on the cotton fabric, not on my baking tray.  Even after lining the tray with baking paper, I still ended up with beeswax staining my tray, which I have yet to clear. (Oops)

There is another iron-on method with instructions here.  But I decided not to try just in case the beeswax stains my iron and ironing board.

Green Monday: DIY Beeswax Cloth Wrap // Mono + Co

// 003.  Do they cling well?

Yes.  Much better than plastic cling wraps.  Make these with the lightest cotton fabric, not the heavy kind for making curtains with.  The thin fabric will allow the food wrap to cling better.

Green Monday: DIY Beeswax Cloth Wrap // Mono + Co

I have since been testing these wraps vigorously, at home as well as on-the-go, washing, and drying in between just to see how well they can replace the plastic version.  They definitely work, and they “cling” so much better than the plastic ones.  As beeswax softens at the warmth of my hands, I managed to shape and mold the wrap closely to the contour of the food items or containers.  And once they are placed in the chiller, the shape is further set as the beeswax solidifies.

Green Monday: DIY Beeswax Cloth Wrap // Mono + Co

I am so happy with the result that I customize one as a lid for my baking pan so that it becomes my “bread storage tin”.

Green Monday: DIY Beeswax Cloth Wrap // Mono + Co

And made more with some fabric scraps from Ikea.

Green Monday: DIY Beeswax Cloth Wrap // Mono + Co

But I still prefer plain ones, so I made more with my plain fabric and dye them with pomegranate tea and turmeric tea for a colour variety.

Green Monday: DIY Beeswax Cloth Wrap // Mono + CoGreen Monday: DIY Beeswax Cloth Wrap // Mono + Co

// 004. How to care for them?

First thing first.  These wraps are not to be used for raw meat and dairy products since the wrap can only be washed with cold water and mild soap.  Keep the wrap away from heat sources as the beeswax will melt.  For the same reason, do not it use to wrap hot food.

To wash, simply run the wrap under cold water and wash with mild soap.  Wipe dry with a tea towel if reusing immediately.  Otherwise, hang to air dry, then fold the wraps and store in a drawer.  The wraps will retain the creases from the previous usage and will need a re-wax (same instructions a making a new one) when the wrap no longer clings as well as before.

Green Monday: DIY Beeswax Cloth Wrap // Mono + Co

// 005. Other tips?

++ A pair of pinking shears will help to earn extra design points.

++ Be careful if you are allergic to beeswax or pollen, you might want to get wrap made with plant based wax such as soy instead.

++ When passing food to friends wrapped in these wraps, make sure to inform them that these are reusable and non-disposable.  I am adding this tip because one ended up being trashed by an unaware friend.

Save

Save

Save

Save

Save

Save

Save

Save

Save

Save

Save

Save

Green Monday : DIY Tea Seed Powder 苦茶籽粉 Detergent

Green Monday : DIY Tea Seed Powder 苦茶籽粉 Detergent // Mono+Co

(Update 27 May 2020:  I have stopped making tea seed cleaning detergent this way.   Instead, I reuse a sugar dispenser , fill it up with tea seed powder and sprinkle it directly on the greasy dishes like this.)

Tea seed powder is what remains after the edible oil, more commonly known as Camellia oil (苦茶油), has been extracted from the tea seeds.  The defatted seeds are then crushed and milled into fine powder which contains natural saponins.  This makes the powder an effective yet natural cleaner and degreaser, perfect replacement for my commercial dish washing detergent, less harsh on my hands too.  You see, I love cleaning, but I don’t want my hands to look the part.

Although packaging instructions says to mix powder with water to form a paste for scrubbing dirty dishes, I kind of miss the “slippery feel” of a lathering detergent.  I also feel that I am using more powder than required for my usual load since I am not sure if the dishes are cleaned properly by just rubbing the powder paste on them.  Therefore, I attempt to boil the tea seed powder plus water mixture into a thickened solution that is easier to dispense and apply.  Although the tea seed detergent does not lather up like the commercial ones, the greasy dishes feel squeaky clean after a quick rinse.  There is no soap residue: the kind that takes forever to wash away.  With the water price hike effective this month, water bill saving is a selling point for me to switch to this homemade detergent.

Green Monday : DIY Tea Seed Powder 苦茶籽粉 Detergent // Mono+Co

I have already used up two-1kg pack bought from a local organic shop, not only as detergent, but also in lots of other body care uses as shown here and here.  One important thing to note is that once the bag is opened, the powder will turn rancid fast and must be used up in three months.

Since the opened bag must be kept in a cool dry place, I choose to store the balance from an opened bag in an airtight container.  Prettier than a pouch clip on a slouching bag.  Lest you think that I diy the label on the plastic container, it is actually a label from another brand that I first bought from Taiwan.  So I have in fact used up a total of 3 kg todate.  Yes, it’s that versatile and effective.

As the tea seed powder solution will turn bad overnight, I have to make a fresh batch everyday for daily use, and discard whatever I can’t finish up.  I have since learned a great tip to make the detergent last longer without spoilage.  Revelation came somewhere between the second and third bag, and after poring over the ingredient labels of a few commercially available tea seed powder detergents : adding sea salt as a natural preservative!

Green Monday : DIY Tea Seed Powder 苦茶籽粉 Detergent // Mono+Co

I  don’t have the exact formula or scientific recipe to the proportion of ingredients, but this is the ratio I use : 100 ml water to 1 tablespoon tea seed powder to 1/2 teaspoon sea salt.  I came up with this as it is easy to remember and it also happens to produce a pretty thick consistency after boiling.  If you find it too thick, add lesser tea seed powder for a more runny detergent.  Mix everything in a pot and stir until the powder has completely dissolved.  Bring mixture to boil over medium heat while stirring.

Here are the steps I use to make the detergent : first, mix everything in a pot and stir until the powder has completely dissolved.  Bring mixture to boil over medium heat while stirring.  I use a pot that I cook with, since I wash my pot with the very detergent that I am making, so there is no reason for me to use a separate pot to boil the mixture.  The powder is inedible though, so keep it away from children.

Green Monday : DIY Tea Seed Powder 苦茶籽粉 Detergent // Mono+Co Green Monday : DIY Tea Seed Powder 苦茶籽粉 Detergent // Mono+Co

As soon as the mixture starts to boil, the solution will slowly thicken.  Turn off heat and allow detergent to cool down completely.

Green Monday : DIY Tea Seed Powder 苦茶籽粉 Detergent // Mono+Co

Tranfer detergent to a squeeze bottle or a pump dispenser, shake each time before use.

Green Monday : DIY Tea Seed Powder 苦茶籽粉 Detergent // Mono+Co

I have been filling up a 600ml (600ml water + 6 tablespoons tea seed powder + 3 teaspoons sea salt) squeeze bottle bought from Daiso with my homemade dishwashing detergent.  A bottle can last me for about 4-5 days of daily dishwashing.

Another chemical household product eliminated, another eco multi-purpose cleaner in my house.  More on its other usage soon, especially as a shampoo for my greasy scalp!

Save

Save

Save

Save

Reuse And Repurpose : Glass Jars and Bottles

Reuse And Repurpose : Glass Jars and Bottles // Mono+Co

Although the Plastic-Free-July Challenge targets at single use disposable plastic, I am using this opportunity to mention something about my love for glass jars and bottles.  Glass is my most preferred material as food storage containers for my pantry.  You can see through them and know what’s exactly inside.  There is no worrying of toxins leaching into my food.  And they are such a breeze to sterilize, take your pick from six methods here.

There are many food items that are already packaged in glass vessels, I always think that it’s such a waste to be buying glass containers (or plastic ones) yet discarding perfectly well pasta sauce jars into the recycling bins instead. Here are some of my favorite reused and repurposed glass jars and bottles,  I collect those that come in clean lines and once you remove the labels, they will look totally like the ones that you want to buy from the stores.

Reuse And Repurpose : Glass Jars and Bottles // Mono+Co

+ BEFORE:
Papa Alfredo pasta sauce jars.

+ AFTER:
I love these 680ml pasta sauce wide mouth bottles that do not come with shoulders.  They are great for dispensing breakfast goodies such as Milo powder, oatmeal and granola.  Covering the lids are my diy beeswax wrap to test out how well them can wrap and mold.  I have since been using the wraps for food items instead.

Reuse And Repurpose : Glass Jars and Bottles // Mono+Co

+ BEFORE:
Prego pasta sauce jar.

+AFTER:
Bottle for my homemade cold brew coffee, perfect on a warm day.  I leave the coffee brewing inside the fridge for 1-2 days.

Reuse And Repurpose : Glass Jars and Bottles // Mono+Co

+ BEFORE:
Daiso rice vinegar glass bottle.

+ AFTER:
Cooking oil dispenser.  I buy 2L bottles of cooking oil that are quite bulky to dispense during cooking.  This glass bottle with a flip cap is perfect.  The dispensing hole is also big enough for easy refilling.

Reuse And Repurpose : Glass Jars and Bottles // Mono+Co

+ BEFORE:
Japanese rice seasoning mix bottles.

+ AFTER:
Toasted sesame seeds dispenser.

Reuse And Repurpose : Glass Jars and Bottles // Mono+Co

+ BEFORE:
Bragg apple cider vinegar bottle (946ml) and preserved olive vegetable bottle.

+ AFTER:
Glass water bottle with drinking glass ‘set’.  Fill to the brim daily with drinking water and place on the table as a reminder to keep myself well-hydrated.

Reuse And Repurpose : Glass Jars and Bottles // Mono+Co

+ BEFORE:
Bottled organic milk bought and drank in Korea.

+ AFTER:
I brought it all the way home and currently using it to store balance whipping cream from an opened tetra pak carton.  I sterilize the glass bottle thoroughly every time before reusing it for storing dairy products.

Reuse And Repurpose : Glass Jars and Bottles // Mono+Co

+ BEFORE:
Honey bottles.

+ AFTER:
Condensed milk and evaporated milk containers.

Reuse And Repurpose : Glass Jars and Bottles // Mono+Co

+ BEFORE:
Eternity perfume bottles.

+ BEFORE:
Reed diffusers after removing the spray nozzles.

Reuse And Repurpose : Glass Jars and Bottles // Mono+Co

+ BEFORE:
(left-right) Cough medicine bottle and essential oil bottle.

+ AFTER:
Indoor green display.  Brown bottles go really well with fresh green cuttings like these.

+ BEFORE:
Beer bottle.

+ AFTER:
Flower vase.

Reuse And Repurpose : Glass Jars and Bottles // Mono+Co

+ BEFORE:
Another bottled milk bought and drank during an overseas vacation.

+ AFTER:
For another stem cutting display.

Reuse And Repurpose : Glass Jars and Bottles // Mono+Co

+ BEFORE:
Bragg Apple Cider Vinegar bottle.

+ AFTER:
Wrap the bottle body with jute string and turn it into a rustic looking display vase.

Reuse And Repurpose : Glass Jars and Bottles // Mono+Co

+ BEFORE:
Clarins body oil bottle.

+ AFTER:
Bottle filled with water, placed by the warm window for growing new plants from cutting.

Reuse And Repurpose : Glass Jars and Bottles // Mono+Co

+ BEFORE:
Jam jar bottles.

+ AFTER:
Pretty gift jars, with some crafting efforts.

Reuse And Repurpose : Glass Jars and Bottles // Mono+Co

+ BEFORE:
Nutella 850ml bottle.

+ AFTER:
Pretty greeting card-bottle.

Reuse And Repurpose : Glass Jars and Bottles // Mono+Co

+ BEFORE:
Nutella 1-kg glass bottle.

+ AFTER:
DIY piggy bank.

Save

Save

Save

Save

Save

Save

Save

Save

Save