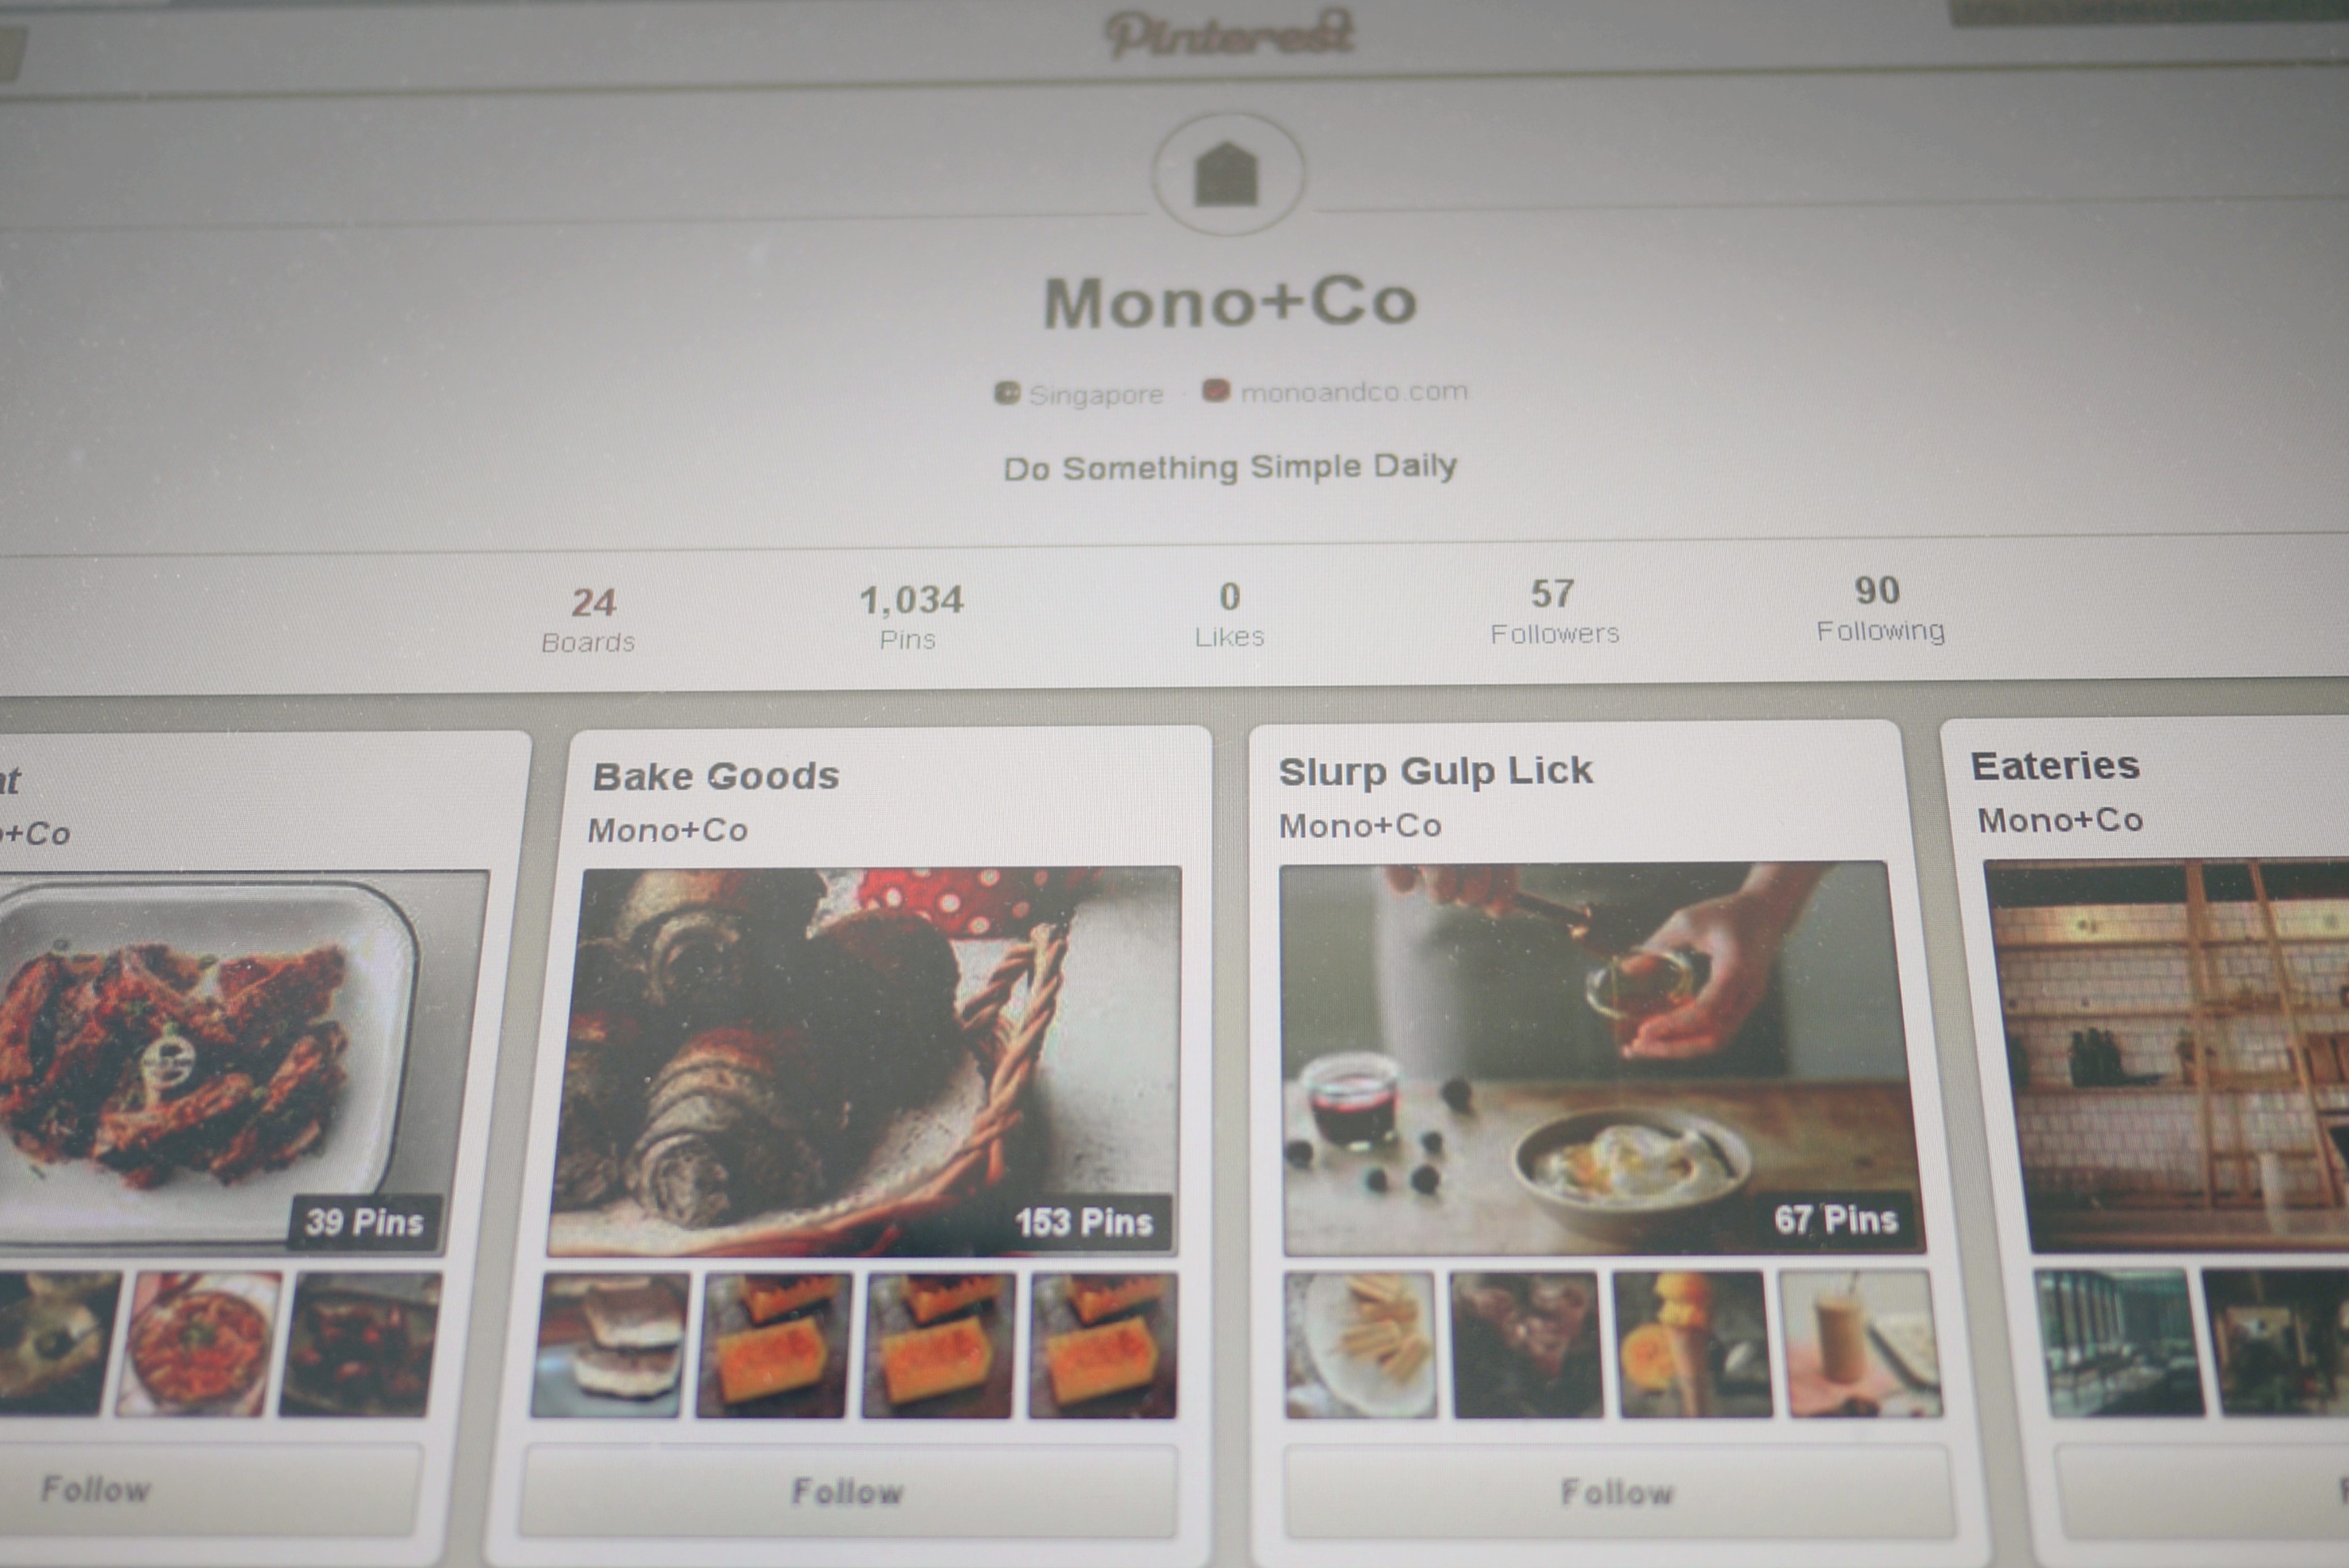
Champion’s Milk Toast | 吴宝春金牌牛奶吐司

wpcmilkbreadloaf001 wpcmilkbreadloafsq wpcmilkbreadloaf002 wpcmilkbreadloaf003 wpcmilkbreadloaf004 wpcmilkbreadloaf005 wpcmilkbreadloaf006 wpcmilkbreadloaf007 wpcmilkbreadloaf008

I have been very very lucky to be able to get my hands on 吳寶春麥方店’s World Champion Rose-Lychee bread (荔枝玫瑰麵包) before, but not his Japanese style breads.  Looking at the whole array of items available at his bakery, I am not sure if I will settle with a plain looking milk loaf from the Master Baker.  But back at home, kids love white, soft and fluffy breads, and it’s going to be an impressive story to tell my husband that I baked a milk toast with this recipe supposedly from 吳寶春.

I did a very fast browse around the bakery website to see how the end result should look like, but could not find the item ‘金牌牛奶吐司’.  However, from the ingredients, I reckoned that it should be looking like this 皇冠吐司, or like another all milk version called 極制瑞穗鮮乳土司.  Despite doing my homework, I still ended up baking the loaf with my bread tin covered, even though the pictures online clearly show otherwise.

I have since found a few other 吳寶春‘s bread recipes videos online, with the master himself demonstrating the steps.  This is one generous Master Baker.


RECIPE : CHAMPION’S MILK TOAST | 吴宝春金牌牛奶吐司
Source
INGREDIENTS :
- 300g plain flour or bread flour
- 24g fine sugar
- 1/2 teaspoon sea salt
- 135g water
- 69g fresh milk
- 3/4 teaspoon instant yeast
- 15g unsalted butter, cubed
INSTRUCTIONS

01. Put all ingredients, EXCEPT BUTTER, in the  mixing bowl.
02. With a flat beater attachment, mix all ingredients at low speed (1 on my kitchenaid)
03. Change to a dough hook, and continue to knead the dough, adding cubed butter gradually.  Keep kneading till dough reached window pane stage.  You may increase the speed of the mixer to level 2 halfway when the dough starts to look stretchy and pulls away from the sides of the bowl.
04. Remove the bowl from the mixer, grease working hand slightly with butter so that the dough won’t stick to fingers, loosely shape the dough into a ball*.
05. Cover the bowl with a clean damp tea towel, and let it proof for at least 60 minutes (or until it double in size).
06. After the dough has double in size, punch the dough down, and move it to a clean work top.
07. Divide the dough into 2 equal portions, roll each into a neat ball, leave it on the counter covered with towel for 15 minutes.
08. After 15 minutes, the dough rise again.  With a rolling pin, flatten the dough, pushing out trapped air inside, then loosely roll up, swiss roll style.
09. Cover with towel, and proof for another 15 minutes.
10. Repeat step 8, place dough inside the bread tin, covered with towel, and let it have a final rise.
11. For square loaf : Once dough has risen to fill up about 90% of the bread tin, cover bread tin, wait for another 15 minutes (to let dough rise all the way to the top), and bake for 40 minutes in a preheated oven at 210C / 410F.
12. If bake without cover, bake for 30minutes at 170C / 240F.


++ NOTES TO SELF ++
///
this dough will be sticky, almost impossible not to stick to fingers when touched, so I had to use the tucking method (using greased fingers to tuck/fold the sides of the dough to its base)  to roughly shape it into a neat ball for its first proof. See photo 3,  it’s not all smooth and perfect, but good enough.
///
my bread tin measures 20x10x10 inches.

Jasmine White Rice : Stove Top Method

stovetoprice001 stovetoprice003 stovetoprice004stovetoprice002

If the rice cooker breaks down one day, at least I know the stove top method.  It is so easy, I hardly even take out my electric cooker to cook rice anymore.

JASMINE WHITE RICE – STOVE TOP METHOD
- 2 cups raw jasmine white rice
- 2 cups water

INSTRUCTIONS :

01. Wash rice thoroughly and drain.  I rinse it in the small saucepan that I using to cook the rice, with at least 3 changes of water. Rinse till water is almost clear.
02. Add in equal portion of water.
03. Soaking is optional, I like to soak mine for 30 minutes.  The raw rice will turn white after absorbing the water.
04. Cover the saucepan and bring it to boil over medium heat.  Turn to lower heat, and let it cook over a gentle simmer until all the water are absorbed by the rice.  My 2 cups of rice take about 8 minutes.
05. Turn off heat, and leave it to sit, pot covered and undisturbed, for at least 10 minutes.  This step is very important to achieve fluffy rice, as the rice continues to cook through steaming in the pot.
06. After 10 minutes, remove lid and fluff the rice with a fork, especially the portion at the bottom of the pot.  Serve immediately.

A Weekly Planner Printable for June 2014 School Holiday & Beyond

weeklyplanner2014weeklyplanner2014002
I am a pencil and paper person, gotta write it down somewhere.  Though I keep a planner for my own schedule, I like a separate one that I can pin up on the fridge/entryway to keep tab of our family activities during this period.  You’ve got a business trip? Jot it down.  You need to go back to school for project work? Jot it down. Concert at the park?  Jot it down and go over with a highlighter please, thank you 🙂

I made a weekly planner template for June holiday last year, this time, I created a template that can be used all year round.

Now about the first few activities I am filling it up with.

The planning of the June Holiday activities has always been made easier with Children’s Season, a series of activities held at various museums across the island, which will kick off 24 May.  For some reason, there was no Children’s Season activities planned for Singapore Art Museum this year, pity as we have always enjoyed the art installations targeted at younger audiences during this period.

Other than the entire list of FREE events, it is also worthwhile to check out some venues during certain dates/weekends where special events** will be held.  I have link them up below as I jot them down on my planner.  After this, off to hunt for more June happenings from my other favourite places.

Army Museum of Singapore
ArtScience Museum
Asian Civilisation Museum
Chinese Heritage Center
iExperience
Indian Heritage Centre
Land Transport Gallery
Malay Heritage Center
Memories at Old Ford Factory  **| 14 & 15 June 2014 | Various Time Slots| A Race Against Time Workshop (Registration Required)
National Museum of Singapore  **| 20 & 21 June 2014 | 6pm – 930pm |  Outdoor Movie Screening
NUS Museum
Our Museum @ Taman Jurong
Peranakan Museum **| 8 June 2014 | 1pm – 5pm | Straits Family Sunday – Supersized!
Police Heritage Center
Science Center Singapore
Singapore City Gallery **| 24 & 28 May, 28 June 2014 | 10am – 1pm| Heritage Trail & Workshop (Registration Required)
Singapore Coins And Notes Museum
Singapore Discovery Center **| 7 & 8 June 2014 | 12pm & 3pm | Special Activities
Singapore Maritime Gallery
Singapore Philatelic Museum
Sun Yat Sen Nanyang Memorial Hall **| 31 May & 1 June 2014 | 10am – 5pm |  Outdoor carnival , handicraft sessions

Easy Roast Chicken Thigh

Simple Roasted Chicken Thigh // mono+corosemarychicken002

Who doesn’t like minimal recipes?

Basic everyday pantry items PLUS simple cooking method, like roasting chicken thighs with just rosemary, garlic, olive oil, salt and black pepper.  Delicious, yet not time consuming.  Here’s the bonus : even lesser time spent on cleaning up after cooking.


RECIPE : EASY ROAST CHICKEN THIGH
Cooking method vaguely adapted from this Source

- 2 chicken thighs
- 2 garlic cloves, sliced
- 2-3 sprigs of fresh rosemary
- 1 tablespoon of olive oil
- Ground black pepper
- Sea salt

INSTRUCTIONS :

01. Wash chicken thighs thoroughly and pat dry with clean towel.

02. Rub seasoning (olive oil, black pepper ground and salt) over the chicken thighs.

03. Carefully separate the skin from the meat to create a pocket, place some slices of garlic and rosemary sprigs between the skin and the meat. **

04. Place chicken thighs in a french oven, covered.

05. In a preheated oven at 205C(400F),  bake the thighs for 30 minutes, with the lid on.

06. After 30 minutes, turn down the temperature to 190C (375F), remove the cover, and bake for another 25 minutes, or until the thighs are thoroughly cooked through.

07. Once it is ready, take out the pot from the oven, and transfer the thighs to a serving plate.

08.  If not serving immediately, keep the roasted chicken thighs warm in the heated french oven, covered, till ready to eat.


++ Notes To Self ++
///
** to achieve the most flavorful and crispy chicken skin out of a bake/roast recipe, be sure to loosen the skin from the meat, place garlic slices and rosemary sprigs under the skin, rub seasoning all over, bake with skin side up till cooked.
///

Mushroom Bulgogi

mushroom bulgogi

These oyster mushrooms make a very satisfying meatless version of Dak (Chicken) Bulgogi.  The sauce recipe is a keeper, use it to team with firm tofu, or use it to stir fry an assortment of mushrooms like shitake, enoki etc.

Unlike the chicken, the fresh king oyster mushrooms will soak up the sauce like sponges when they are still uncooked.  So I skipped the marinating step, and stir fried the mushrooms with the sauce instead.


 RECIPE : MUSHROOM BULGOGI
Adapted from HERE
INGREDIENTS :
- 1 packet of big oyster mushrooms, sliced
- 3 tablespoons soy sauce
- 1 tablespoon lemon juice
- 1 tablespoon brown sugar
- 1 tablespoon honey
- 1 tablespoon rice wine or mirin
- 1 tablespoon minced garlic
- 1 teaspoon grated ginger
- 1 tablespoon sesame oil
- dash of black pepper
- 1 teaspoon sesame seeds

 INSTRUCTIONS :

01. Combine all the items except the mushroom together in a medium bowl, whisk till brown sugar dissolves.

02. Preheat skillet over medium heat.

03. Add a tablespoon of cooking oil, and mushrooms into the skillet.  Stir the mushrooms around the skillet to cook them till fragrant.

04. When the mushrooms are cooked, pour in the sauce in step 1, and stir quickly around to coat them with the sauce.  Add 1 -2 tablespoons of hot water if it is too dry.

05.  Garnish with more sesame seeds. Serve immediately.

Diy Citronella Oil ‘Reed’ Diffuser

diy reed diffuser // mono+codiy reed diffuser

This ‘Cang Mao Yew” is available at most local medical halls, and contains 20% citronella oil, making it a natural and very affordable mosquito repellent.  I have been pouring it into small saucers and placing them around the house where I want to repel mosquitoes.  It evaporates fast though, due to the presence of methol crystals, so I gotta top up the saucers almost every week.  I also drip (can’t pour, the dispenser is just a tiny hole) a lot into my oil burner, minus the flame*, for better aesthetics.

Talking about better aesthetics, I just diy-ed an existing new bottle to a ‘reed’ diffuser with origami paper and adhesive tapes from Daiso.  I flip the reed daily to refresh the diffusing process.


____________

/  *not to be used with a lighted candle, dangerous as it has a very low smoking point.

/  i used a wooden skewer with the pointed end snipped off, rattan would have been a better choice.

/  there are a few versions or brands of ‘Cang Mao Yew’, this made in Singapore brand happened to be one with the highest concentration of citronella oil on its ingredient list.  The rest of the ingredients : clove oil (25%), methol (25%), white oil (10%) and eucalyptus (20%).

Dak Bulgogi (Korean BBQ Chicken)

korean bbq chicken korean bbq chicken 002 korean bbq chicken 003

Meat dishes that are on the sweet side are always a hit with the kids.   Here’s something fast and easy to make, Korean Dak Bulgogi, (BBQ chicken).


DAK BULGOGI
Source
INGREDIENTS :
- 1 pound boneless skinless chicken breast/thigh, sliced
- 3 tablespoons soy sauce
- 1 tablespoon lemon juice
- 1 tablespoon brown sugar
- 1 tablespoon honey
- 1 tablespoon rice wine or mirin
- 1 tablespoon minced garlic
- 1 teaspoon grated ginger
- 1 tablespoon sesame oil
- dash of black pepper
- 1 teaspoon sesame seeds


INSTRUCTIONS :

01. Combine all the items except the chicken slices together in a medium bowl, whisk till brown sugar dissolves.

02. Add chicken slices, making sure they are well coated with the sauce, marinate for about 30 minutes.

03. When ready to cook, preheat skillet over medium heat.

04. Add chicken into the skillet, save the marinating sauce aside.

05. When the chicken meat turns white/opaque and cooks through, pour in the reserved sauce, and stir quickly around to coat the meat with the sauce.

06.  Serve immediately.