Nutella Swirl Bread

Nutella Swirl Bread // Mono + Co

Mashed taro is my favorite thing to add to the bread recipes I bake. They never alter the bread color or flavor, simply making the bread texture softer than usual.

Nutella Swirl Bread // Mono + Co

I finally got my white flour from the market but I didn’t want to bake a white bread loaf, so I mixed some wholemeal flour into this Nutella swirl bread.  The addition of taro always makes my bread soft and fluffy even when I mix some wholemeal flour into the dough.

Nutella Swirl Bread // Mono + Co

I am kind of a Nutella fan (it’s not that hard to be one anyway,) ‘kind of’ because we are in the process of making an 850g jar to last for 4 months.  If we finish up a bottle sooner than planned, we’ll just have to wait until the next “buy-Nutella-month” comes along.  This makes us ration our Nutella treats really carefully and explore other sandwich/toast/breakfast options.

Nutella Swirl Bread // Mono + Co

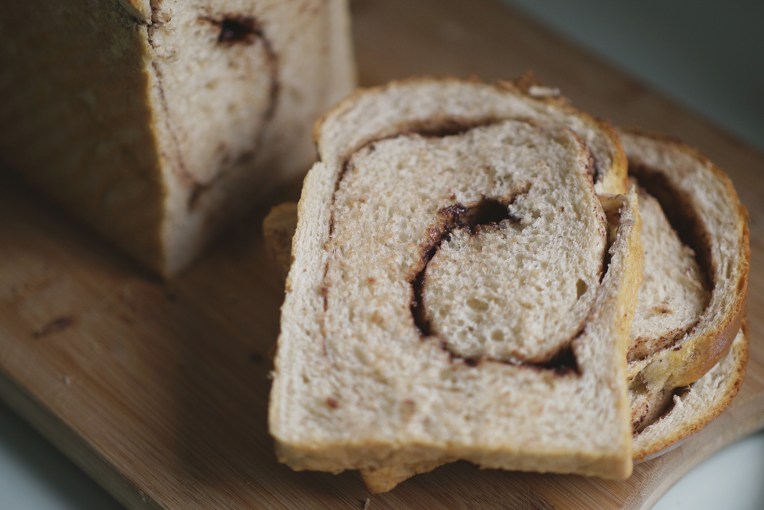
This Nutella swirl loaf merely used up 3 heaped teaspoons of Nutella as I spread them as thinly as possible on the bread dough, before rolling it up for a final proof inside the Pullman bread tin.

Nutella Swirl Bread // Mono + Co

It’s certainly not as luxurious as this or this, but I still managed to taste the chocolate hazelnut spread with every bite.

Nutella Swirl Bread // Mono + Co

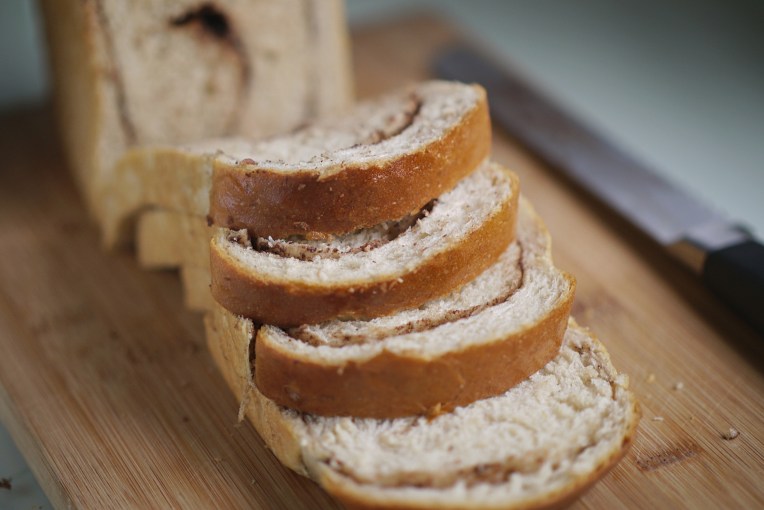
The bread is best eaten on the day it’s baked, if serve while it is still warm will be even better.  Remember what I mentioned earlier about how taro produces soft fluffy bread?  I almost forgot that I added 100g of wholemeal flour to this loaf.

Nutella Swirl Bread // Mono + Co

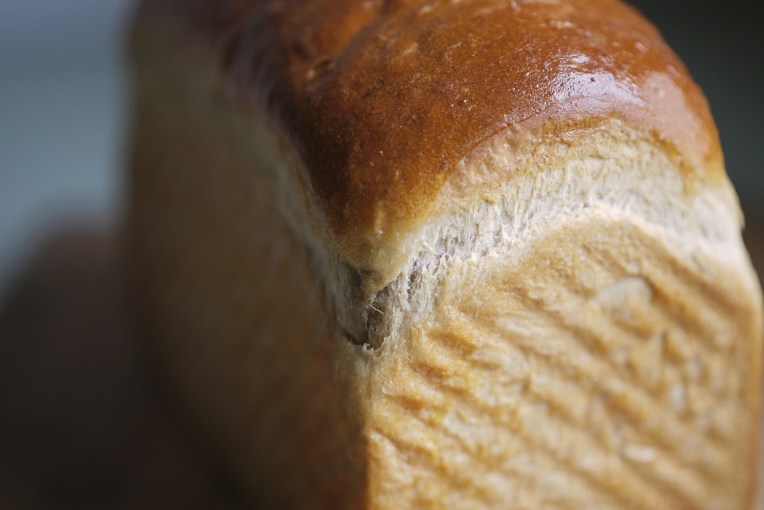
The top crust were baked to a beautiful golden brown shade. I brushed it with melted butter immediately when the bread is cooked to keep it soft instead of crusty when the bread cools completely.
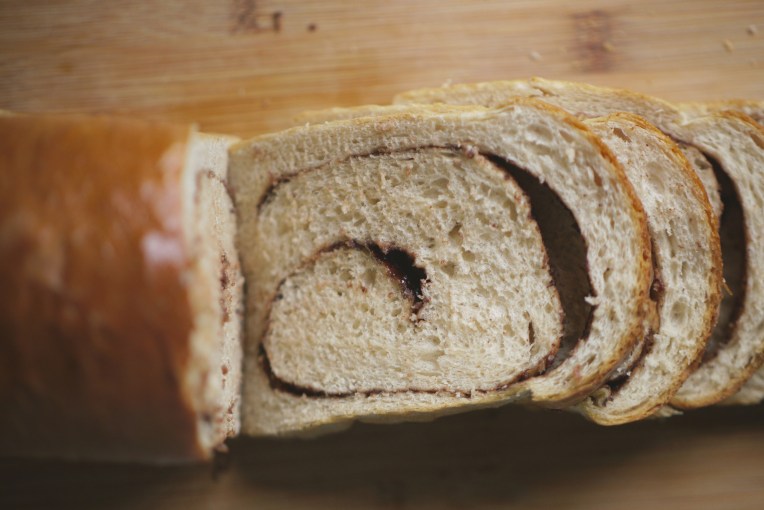
Nutella Swirl Bread // Mono + Co


Nutella Swirl Bread

200g plain flour
100g wholemeal flour
130g steamed taro, mashed
1 egg
2 tablespoons raw sugar
1/4 teaspoon sea salt
2 tablespoon milk powder **
1 teaspoon instant dry yeast
80g water
25g cold butter cubed
3 heaped teaspoons Nutella spread ***

** I use milk power to substitute fresh milk, optional.  If you prefer fresh milk, use it in place of water in the recipe.

*** I use the minimal amount of Nutella in the recipe, feel free to add more according to preference.

In a mixer bowl, combine all the dry ingredients together ( plain and wholemeal flour, raw sugar, salt, yeast,milo powder) with a hand whisk.  Then add mashed steamed taro, egg, and slowly add the water with the mixer running.  Watch the dough, when the ingredients come into a ball,  stop adding and turn off the mixer.  You may need more or less of the water stated in the recipe. Let the dough rest for 15 minutes.

After 15 minutes, start the mixer again to knead for 1 minute before adding cubed butter one by one, and knead till the dough reach window pane stage.  This is when the dough becomes very smooth and elastic, and starts to pull away from the sides of the bowl.  Stop mixer and leave dough to bulk rise for 60 minutes.

After the dough has risen, punch down the dough to deflate and transfer to a clean work top.  Sprinkle worktop and palms with flour if the dough is too sticky to handle.

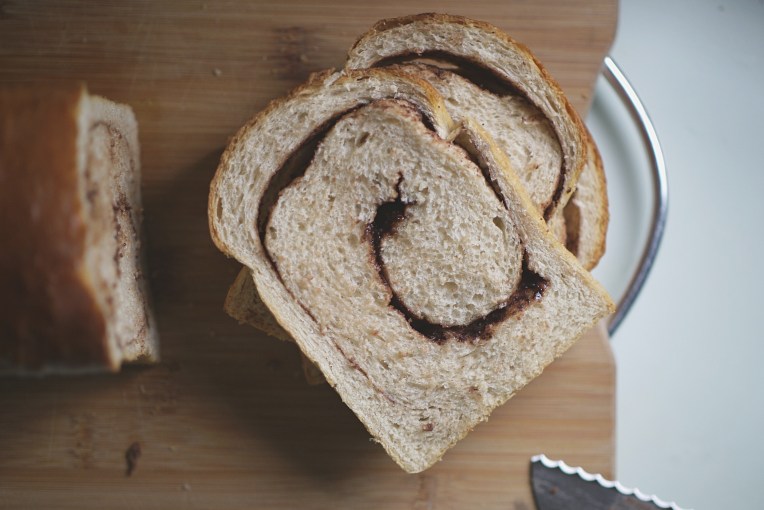
Flatten the dough into a rectangular, with one end about the length of the longer side of pullman tin so that when the rolled up dough fits the baking tin.  Spread Nutella and rolling up the dough swiss roll style.  Pinch opening to seal tightly.  Place dough in a Pullman tin, seam side downwards.  Leave this aside to proof for 60minutes, covered.

Preheat oven to 170C, and bake the bread for 30 minutes.

Remove from oven immediately after baking time is up, and brush melted butter over the top crust.  Let bread cool.

If not eaten immediately, store in airtight container keep the crumbs from drying out.

Save

Save

Save

Milo Taro Pullman Loaf

Milo Taro Pullman Loaf // Mono + Co

I tried something different with this bake.  I used the water bath method to bake this bread for the first 10 minutes, but had to deconstruct the water bath structure once I realized that the bread top had risen to touch the oven’s upper heating element.  That explains the odd looking plateau you see on my bread top.  I continued to bake it the standard way for the remaining 20 minutes.

The additional steam inside the oven looks promising as a method to create taller loaves, although my table-top oven is too small for the set-up; rack + 10″ cake tin with hot water + trivet + Pullman tin.  I won’t put this in my recipe instructions below but I will try another method to create steam inside the oven by placing my smallest ramekins filled with hot water around the corners of the oven instead.  But that’s for another day.

Milo Taro Pullman Loaf // Mono + Co

As always, the addition of steamed taro makes my homemade bread moist and fluffy.  The Milo powder idea stems from this bread recipe that uses cocoa powder.  I added only 2 tablespoons of Milo powder (not the 3-in-1 type) so the loaf does not exactly whiff a strong aroma of chocolate malt, but the color reminds me of the brown traditional Hainan bread loaves : subtle.

For non-taro milo bread ideas (& for me to adapt with taro) :
this recipe with whole wheat flour
this bun recipe with milo custard filling

Milo Taro Pullman Loaf // Mono + Co


Milo Taro Pullman Loaf

280g plain flour
1 teaspoon instant dry yeast
1/4 teaspoon salt
2 tablespoon raw sugar
2 tablespoon Milo powder
100g steamed taro, cooled
1 egg
110g fresh milk
30g cold unsalted butter, cubed

In a mixer bowl, combine all the dry ingredients together ( flour, yeast, salt, sugar, milo powder) with a hand whisk.  Then add mashed steamed taro, egg, and milk to knead into a ball with a dough hook.  Stop the mixer and let the dough rest for 15 minutes.  Start the mixer again to knead for 1 minute before adding cubed butter one by one, and knead till the dough reach window pane stage.  Stop mixer and leave dough to bulk rise for 60 minutes.

After the dough has risen, punch down the dough to deflate and transfer to a clean work top.  Sprinkle worktop and palms with flour if the dough is too sticky to handle.

Divide the dough into 3 equal portions.  Flatten and shape each portion, rolling them up swiss roll style.  Arrange them in a Pullman tin, seam side downwards.  Leave this aside to proof for 60minutes, covered.

Preheat oven to 170C, and bake the bread for 30 minutes.

When done, remove bread from tin immediately and place on a rack to cool completely.

Save

Save

Save

Save

Save

Honey Taro Sandwich Loaf

Honey Taro Sandwich Loaf / Mono + Co

After baking these buns at a lower oven temperature that produced really soft texture, I wanted to see if this can be replicated on covered loaf recipes to turn them softer.

End result: softer, thinner crust with crumbs that stay soft and fluffy.

Honey Taro Sandwich Loaf / Mono + Co

I also added an extra tablespoon of raw honey to this recipe, as I usually can taste some sweetness in my bread, but never the aroma of honey.  This time, with 3 tablespoons in total, I finally can taste the honey in my end bake.  But this also means that I need to add slightly lesser liquid (water in this case) to my dough to make it easier to handle/shape.  Like I mentioned in my other recipes, I like to add just half the liquid stated in the recipe first, then top up slowly till the dough finally come together into a firm ball.  I do this to prevent the dough from getting too wet when I tweak the recipes/ ingredients.  I noticed that even an alteration in the brand/type of flour, sometimes the liquid amount required might also deviate slightly.

Honey Taro Sandwich Loaf / Mono + Co Honey Taro Sandwich Loaf / Mono + Co


Honey Taro Sandwich Loaf

225g plain flour
1 teaspoon instant yeast
1/4 teaspoon sea salt
3 tablespoons raw honey
105g mashed taro
80g water
30g cold butter, cubed

In a mixer bowl, place the dry ingredients: plain flour, instant yeast, and sea salt, mix these dry ingredients well with a hand whisk.  Next, add cooled mashed taro, raw honey, and half of the water to the dry ingredients, and knead with a dough hook attachment on the lowest speed (KA 1).  Slowly add the remaining of the water with the mixer running, you may need more or less of the water stated in the recipe.  Watch the dough, when the ingredients come into a ball,  stop adding water and turn off the mixer.  Let the dough rest for 15 minutes.

Start the mixer running on its lowest speed again to knead the dough for 1 minute, before adding cubed butter, one by one.  Knead until the dough reaches window pane stage, this is when the dough becomes very smooth and elastic, and starts to pull away from the sides of the bowl.  Remove the bowl from mixer, cover and bulk rise for 1 hour.

After an hour, the dough should rise to double its volume, punch it down to release the gas, and transfer to a clean work top. Shape the dough and place in a well-greased Pullman tin, seam side downwards, and cover the tin.  Remember to grease the cover as well.

Let the bread rise for 60 minutes then bake for 30 minutes in a preheated oven at 180C.  Remove bread from tin immediately after baking and leave it to cool completely on a rack.

Save

Save