Simple Small Batch Carrot Cake Loaf

Simple Small Batch Carrot Cake Loaf // Mono +Co

You will like this recipe if you prefer small batch baking.

Simple Small Batch Carrot Cake Loaf // Mono +Co

I am sometimes surprised by the amount of cream cheese frosting I ended up with when I tried out some carrot cake recipes.  Too much. Too sweet.

Actually, I like carrot cakes for the cake, not a big fan of frostings.  Most recipes bake the carrot cake into two layers, with more frostings in between cakes upon assembly.  This lead to a guessing game of how long to cook the cake in the oven if I bake the recipe as one whole cake.  So I ended up halving most recipes and bake them into a loaf, increase the baking time by another 10-15 minutes if required after checking with a test skewer.

I like how this recipe , according to the author, “is good enough to eat on its own”.  The cake is moist and imparts just a nice level of sweetness from cinnamon and raisins.  I will gladly save my calories from the frosting for a bigger slice of this carrot cake.  I also like that the recipe uses wholemeal flour.

As usual, I halved the recipe and at the same time opted out the grated nutmeg, orange zest, pecans, but kept the amount of ground cinnamon intact.  I also substituted melted butter with coconut oil . You may use melted butter or any neutral flavor cooking oil if you don’t have coconut oil.

Simple Small Batch Carrot Cake Loaf // Mono +Co Simple Small Batch Carrot Cake Loaf // Mono +Co Simple Small Batch Carrot Cake Loaf // Mono +Co

Is it a must for your carrot cake to be frosted with cream cheese frosting?  If not, care to share your plain carrot cake recipe with me?


SIMPLE SMALL BATCH CARROT CAKE LOAF

adapted from here

75g melted coconut oil
75g raw sugar
2 small eggs**
100g wholemeal flour
1/2 teaspoon baking soda
1/4 teaspoon salt
1 teaspoon ground cinnamon
100g grated carrots
50g raisins

** I used eggs that weigh 60g each with shell.

In a mixer bowl, combine coconut oil, raw sugar and eggs, and whisk on high speed (KA 8) for 3 minutes.

In a separate bowl, mix wholemeal flour, baking soda, salt, and cinnamon together to form a uniform mixture of flour.

Add the flour mixture to the batter in the mixer bowl and stir to mix well with a hand whisk.

Stir in grated carrots, then raisins.

Pour batter into a small loaf pan (mine’s around 19cmx9cmx6cm) and bake in a preheated oven at 180C for 40 minutes, or until a test skewer inserted comes out clean.

When done, cool the carrot cake in the pan on a rack before slicing and serving.

Save

Save

Save

Save

A Very Versatile Recipe : Cocoa Brownies

A Very Versatile Recipe : Cocoa Brownies // Mono + Co A Very Versatile Recipe : Cocoa Brownies // Mono + Co

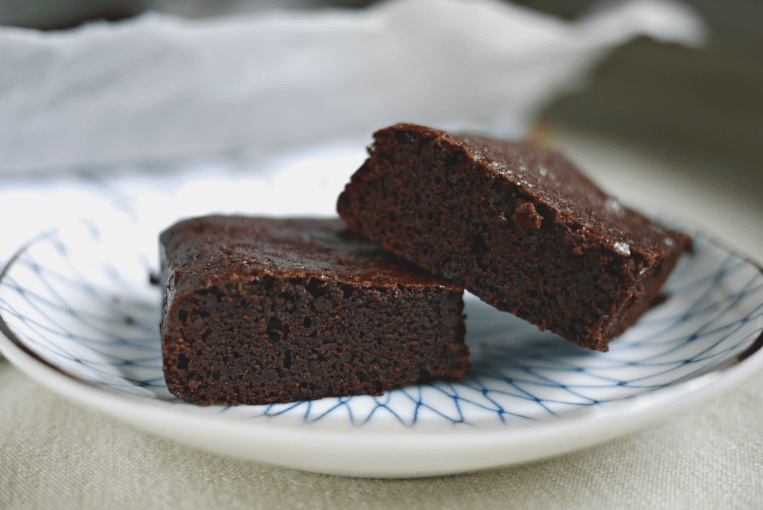
I have been baking brownies with Alice Medrich’s recipe for the longest time.  I love fast and simple recipes, so this one that requires just cocoa powder means that I don’t have to stock up on baking chocolate AND cocoa powder to satisfy that sudden urge for homebaked chewy brownies.  I bake more at home with cocoa powder anyway.

A Very Versatile Recipe : Cocoa Brownies // Mono + Co

Most brownie recipes are very versatile.  Versatile in the sense that I can alter the ingredients slightly, and the brownie will still come out pretty, maybe a little bit less chewy, more spongy etc, but always edible.  If you have tried adjusting a cake recipe, you will understand why I appreciate a versatile recipe.

I have halved the sugar in the recipe and it still works, albeit producing a less moist and thus a less luxurious texture for me.  The sweet spot so far is 190g for me.

I have also topped this brownie with marshmallows, walnuts, almond slices, M&Ms, salt flakes but they are just as enjoyable when baked plain.

I have stirred in a shot of espresso, and tasted not much difference.

I have also tried with 80g eggs and 55g eggs, depending on which egg seller I buy from, the end result is a difference in how high the brownie gets leavened.  A more spongy cake-like brownie is achieved with a wetter batter, i.e. bigger eggs.

In other words, this recipe has never failed me.

A Very Versatile Recipe : Cocoa Brownies // Mono + Co

What will I try next?  Peanut butter, Nutella spread, Speculoos, toasted coconut, white chocolate buttons, cherry liquor…  I am surprised that I have not bake more variations over the years.  To me having it plain is the best way for a satisfying chocolate fix, that is why this is often touted as the best cocoa brownies to bake.

After baking this for years, I have adapted the original recipe and threw in a few tricks to shorten the preparation time required or vary the ingredients to use what I have at home.  Check them out, annotated with asterisks.  I hope they help!  Have fun baking and eating!

Have fun baking and eating!


ALICE MEDRICH’S BROWNIES

adapted from here and here

140G unsalted butter, softened ** (1)
190g raw sugar
65g unsweetened cocoa powder ** (2)
1/4 teaspoon fine sea salt
1/2 teaspoon pure vanilla extract
2 cold eggs ** (3)
65g cake flour ** (4)

** Tip 1 : Soften the butter beforehand to save time on melting the butter over steaming water.  1 hour prior to start baking, I will weigh the butter, then leave it to soften in a 16cm saucepan that I always use to mix this brownie batter.  The long handle makes it easier for me to mix the batter “vigorously”,  which I am often required to do so according to the original recipe.

** Tip 2 : Natural or Dutch processed cocoa powder are both fine to be used according to the recipe, but I have been baking with dutch processed version from Van Houten.  Use what you normally keep at home to bake with.

** Tip 3 : Original recipe asked for large eggs.  I used relatively small eggs that weigh about 55g with shells for this bake.  The brownie did not rise as much compared to brownies that I baked with 70-80g eggs, which could rise so much that the surface crack, the brownie would then sink back slightly after cooling down, but the difference in the thickness of the brownie is pretty obvious with the choice of egg size.

**Tip 4 : The original recipe stated all purpose flour, I have also used cake flour and top flour which produced finer texture brownies with former being my favorite if I have it at home.  Use what you have at home.

To prep, line 8×8 in baking pan with parchment paper and preheat oven to 160C.

In a sauce pan/ heatproof mixer bowl, place softened butter, raw sugar, cocoa powder and sea salt, and place this over a pot/ wide skillet with barely simmering water (** Tip 5 : use boiled water from electric pot to save time) on lowest fire to melt the butter.  Make sure the base of the saucepan / mixer bowl does not touch the water in the pot/skillet.

Stir with a wooden spoon to mix the ingredients until the mixture is smooth and warm enough to melt the sugar, and dipping finger without scalding it (be careful!).

Set the mixture aside to cool it down enough before adding vanilla extract and the eggs, one by one, stirring vigorously with the wooden spoon after each addition.

Add in the flour, and stir until you no longer see any white specks flour.  Then beat vigorously with the spoon for at least 40 strokes.

Pour the batter into the lined pan and level the surface with the back of the spoon.  Bake in a preheated oven for 25-28 minutes at 160C.

Cool completely before cutting it into 16 pieces.  Serve immediately or store in an airtight container.

BSave

Save

Save

Save

Black N White Bread Loaf

Black N White Potato Bread Loaf // Mono+Co Black N White Potato Bread Loaf // Mono+Co

I haven’t forgotten about the bamboo charcoal powder.  It is sitting on the table next to my hot water flask, creating an eyesore, just to remind me to use it.  I almost wanted to put a tablespoon of it into my banana smoothie after stumbling upon this idea here.  Then I realized bamboo charcoal might not be activated charcoal.  I will only do this on the last day of its expiry out of desperation if there is still any left.

To do something different this time, I baked a 2 color bread by adding the charcoal powder to half of the dough, that’s why you don’t see an all black loaf here.

Black N White Potato Bread Loaf // Mono+Co

I divided the dough into 4 portions and layered them in alternating colors, here’s how the loaf look after slicing.  Pretty huh?

Black N White Potato Bread Loaf // Mono+Co

I also did something different with the potatoes, I steamed them instead of boiling it in water.  The potatoes were not overly wet compared to the boiling method but surprisingly, I added less water.

As a general rule to adding water to bread dough, never pour the water level stated in the recipes all at once (yes, including mine.)  In fact, the water required vary slightly with each occasion I bake. This difference could due to the water content of the potatoes, the brand of flour, or even the size of the egg.  I’ll even blame the weather!  Too hot, too cold, too wet …..

Therefore, always pour half the liquid amount stated first, then with the mixer running, add the balance bit by bit, giving the ingredients a few moment in between to absorb the water properly. Only if the dough doesn’t gather into one ball, then add a bit more liquid.  Once a dough ball is formed, stop adding.

Black N White Potato Bread Loaf // Mono+Co Black N White Potato Bread Loaf // Mono+Co Black N White Potato Bread Loaf // Mono+Co

The texture of the bread with steamed potatoes remains soft, as with other bread loaves that I have been baking with root vegetables.

Two more things to note.  Firstly, store homemade bread in an airtight container if you are not finishing it immediately.  Otherwise, the bread will harden.  I noticed a layer of crust forming on my sliced bread after leaving them overnight on the counter in a paper bag.  Not that nice, as I am the kind who like to sink my teeth into pillowy bread.  If that sort of thing unfortunately happened, simply heat them up in a toaster for a few minutes; warm toast with butter is my next favorite way to eat bread.  And secondly, consume them within 2 days, or else keep in the freezer.  I realize that homemade bread do not keep well, especially recipes with potatoes, maybe due to it’s higher moisture content.  And if the bread comes with natural colorings added, mold might not be easily spotted on stale bread.


Black N White Bread Loaf

200g bread flour
1/2 tablespoon instant yeast, about 3g
2 tablespoon raw sugar
1/4 teaspoon sea salt
100g potato, steamed + mashed
1 large egg
20-30g water
30g cold unsalted butter
1/4 teaspoon bamboo charcoal powder

In a mixer bowl, combine bread flour, yeast, raw sugar and sea salt with a hand whisk.  Add mashed potatoes, beaten egg, half the amount of water and start the mixer to knead with a dough hook, at its lowest speed.  Add remaining water in a slow trickle, stop once the ingredients come into a ball.  Leave this aside for 15 minutes.

Turn the mixer on again to run for 1 minute, still on its lowest speed, before adding cubed butter one by one into the bowl with the mixer running.  Knead this until window pane stage.  Remove dough from bowl and divide it into two equal portions.  Return one dough back into the mixer and knead bamboo charcoal powder into the dough.  Place doughs in separate bowls and bulk rise for 1 hour.

Both doughs would rise to double their volume, punch down to deflate and transfer to a clean work top.  Slightly flour the surface if the doughs are too sticky to handle.

Divide each color dough into 2 balls again, so you end up with 2 plain balls and 2 charcoal balls .  With a rolling pin, flatten each ball into oval shape dough, making sure they are about same size.  To assemble, place the 4 flattened doughs on top of each other, in alternate colours.

With palms, gently pressing all the layers together, and roll it up tightly from the long end so that you end up with a football shape dough.  Place it in a bread tin, proof this for 50-60 minutes.

Once the dough has risen higher than the bake tin, bake in a preheated oven for 30 minutes at 170C.  Mist the top slightly before placing it in the oven.

When done, remove the bread immediately from the tin and let it cool completely on a rack before slicing.

Save

Save

Save

Save

Save

Save

Save

Save

Save

Save

Save

Save

Raisin Potato Bread Loaf

Raisin Potato Bread Loaf // Mono+Co Raisin Potato Bread Loaf // Mono+Co

Raisins in bread are always welcome.  The addition of potato made the loaf really soft, as I was slicing it, every piece bended and collapsed beautifully on the one before.

This loaf got wiped out in one day.  Time to get on with ideas for the next potato bread.  I think I just saw purple sweet potatoes at the kitchen counter.

Raisin Potato Bread Loaf // Mono+Co Raisin Potato Bread Loaf // Mono+CoRaisin Potato Bread Loaf // Mono+Co  Raisin Potato Bread Loaf // Mono+Co


Raisin Potato Bread Loaf

220g plain flour
1/2 tablespoon instant dry yeast
1/4 teaspoon sea salt
2 tablespoon raw sugar
100g mashed potato
1 large egg, beaten **
30-40g potato water ***
35g cold butter, cubed
60g raisins ****

** I used a large egg that weighs 70grams with shell.

*** Potato water refers to the water that the potatoes were cooked in.  Cool it down to room temperature before using.

**** Up to 100g of raisins if you really like lots of raisins in your bread.

In a bowl, add the raisins and pour just enough warm water to cover the raisins.  This helps to hydrate them and prevent the raisins from drawing moisture from the bread when they are mixed into the dough.

In a mixer bowl, combine plain flour, instant yeast, raw sugar, sea salt with a hand whisk to form a uniform mixture of dry ingredients.  Add mashed potato, egg, and water next.  Turn on the mixer with a dough hook attachment and knead these ingredients on the lowest speed (KA 1) till they come into a ball.  Continue to knead for 3 minutes, then stop the mixer and let the dough sit for 15 minutes.

Turn on the mixer again and knead for 1 minute before adding butter cubes one by one while the mixer is running on its lowest speed.  Keep kneading till there are no traces of butter left and the dough has reached window pane stage.  At this stage, the dough will be extremely pliable and baby-bottom soft.  Stop the mixer for a while.

With one hand, squeeze to dry the raisins that have been soaked in warm water.  Add them to the dough in the mixer bowl, and start the mixer again on its lowest speed to incorporate the raisins into the dough.  Frankly, the electric mixer won’t do a very good job at mixing the raisins uniformly into the dough without over-kneading it.  I usually stop the mixer after 1-2 minute and take over to knead by hand, trying my best to spread the raisins  and make sure that they don’t clump at one spot.  This is to ensure that there will be raisins on every slice of the bread.

Leave the dough in the mixer bowl for its first proof of 60 minutes.  The dough will rise to double its volume,  punch down to deflate and transfer it to a clean worktop.

Flatten the dough with rolling-pin to push out any gas trapped inside the dough during proofing.  Shape the dough and place in a bread tin.  Proof for 50-60 minutes.

Bake in a preheated oven at 170C for 30 minutes.  Remove bread from bread tin immediately after baking and let it cool completely on a rack before slicing.

To soften the top crust, brush melted butter over the top of the loaf while it is hot.  I keep a handy small block of butter just for this purpose and run it over the crust and let the heat from the bread melt the butter as they come in contact.  Save the hassle of melting butter and washing an oily brush.

Save

Save

Save

Save

Save

Save

Save

Save

Charcoal Potato Dried Cheese Buns

Charcoal Potato Grated Cheese Buns // Mono+Co Charcoal Potato Grated Cheese Buns // Mono+Co

For my family, buns get consumed faster than sliced bread loaf, whether store-bought or homemade.  So it makes a lot of sense to be baking bamboo charcoal buns since I am trying to finish a bottle of the charcoal powder by year end.  I fiddled around with the usual potato bread recipe by adding more fats and reducing mashed potato amount to 100g.  The end result : 4 huge and fluffy buns.

I coated the dough with dried grated cheese, got them with my pasta/ pizza takeaways.  If you have them in your pantry, add them, if not, omit them.  Personally, I do not purchase these powdered cheese as they taste more like salty MSG flavoring than cheese.  You bet I will be making these buns with real cheese topping very soon.

Charcoal Potato Grated Cheese Buns // Mono+Co Charcoal Potato Grated Cheese Buns // Mono+Co Charcoal Potato Grated Cheese Buns // Mono+Co


Charcoal Potato Dried Cheese Buns

220g plain flour
1/2 tablespoon instant dry yeast
1/4 teaspoon sea salt
1/4 teaspoon bamboo charcoal powder
2 tablespoons raw sugar
100g mashed potato
1 large egg **
40g potato water ***
40g cold butter, cubed
20g dried grated cheese, optional

** I used an egg that weighs 70g with shell.

*** Potato water refers to the water that is left behind after cooking the potatoes with.  Cool it down to room temperature before adding them to the rest of the ingredients.

In a mixer bowl, combine plain flour, instant yeast, sea salt, bamboo charcoal powder, raw sugar with a hand whisk to stir the dry ingredients into a uniform mixture.

Add mashed potato, beaten egg, and potato water.  Turn on the electric mixer and knead the ingredients on the lowest speed (KA 1) until they come into a ball.  Continue to knead for about 3 minutes and then turn off the mixer and let this dough stand for 15 minutes.

Turn on the mixer to knead the dough for 1 minute, before adding cubed butter, one by one, while the mixer is running.  Continue to knead even after no traces of butter can be seen, until the dough reach window pane stage, this is when the dough becomes super stretchy and soft, though slightly sticky.  You can tell that you have reached this stage when the dough looks being lifted completely from the bottom and pulling itself away cleanly from the side of the mixing bowl, leaving no messy traces of dough behind.  At this stage, stop the mixer and leave the dough to rise in the covered mixer bowl for 60 minutes.

The dough should rise to double its volume.  Punch down the dough to deflate it and transfer it to a clean work top.  The dough will be sticky, dust hands and worktop with a little flour.  Divide the dough into 4 equal portions.  Flatten each dough to push out any gas trapped inside the dough, shape them into balls.  Holding the seam side of the ball dough, dip it into a small plate filled with grated cheese to coat the top side of the bread with the cheese before arranging it on a greased baking pan, seam side downwards.  Repeat until all 4 doughs are shaped and leave the pan in a draft-free place, covered with a clean towel, to have a final proof of 50 minutes.

Bake the buns in a preheat oven at 170C for 20-25 minutes.  Remove them from the pan and leave to cool completely.

220Save

Save

Save

Miso Soba From Leftover Chap Chye

miso soba

I had some leftover vegetarian Chap Chye from Sunday’s dinner that I wanted to recycle for next day’s lunch.  The heavy downpour in the morning had allowed the temperature to dip just enough for one to have a craving for something hot and soupy.  So I added water to the leftover and a very flavorful instant broth for soba emerged.

Fermented beans, a close relative of miso, is a key seasoning ingredient in nonya chap chye and that why the broth turned out tasting similar to Japanese miso soup.  You can still add some Japanese miso paste if you find it not salty enough after watering down chap chye.

My Chap Chye is already filled with assorted mushrooms, black fungus, burdock and lily bulbs that I picked out from the heap of bean curd sticks and cabbage to make the soup broth.  I left out the last two ubiquitous chap chye ingredients as I did not want my lunch to look like a sloppy effort, though to a certain extent, adding water and noodles to an overnight stew does sound like it!

MISO SOBA WITH LEFTOVER CHAP CHYE

Leftover Chap Chye
Some water
Soba
Japanese miso, optional

METHOD

01. Cook soba according to package instruction, set aside in serving bowl.

02. In a pot, mix chap chye and enough water to make a serving of soba broth.

03. Do a taste test and add some miso paste if it is not tasty enough. I topped my soba with half a teaspoon of miso paste upon serving.

04. Pour the soup over the cooked soba and sprinkle some nori seaweed strips as garnish.

Pineapple Tarts – Enclosed Version

pineapple tart 001 pineapple tart 003

I omitted the egg from this nastar style pineapple tart recipe , and made an enclosed version this year. On hindsight, I should have give them a bright orange eggwash like this, mine are looking way too plain.  But this pastry, once again, pass my kids’ taste test with flying colors.

PINEAPPLE TARTS
// Adapted from A Spoonful Of Sugah
// Yields 27 tarts

170g plain flour
10g corn flour
1 tablespoon icing sugar
125g cold salted butter, cubed
1 teaspoon vanilla essence
1 tablespoon fresh milk, cold
½ serving of this homemade pineapple jam**

METHOD

01. Sieve plain flour, corn flour and icing sugar into a large mixing bowl. Set aside.

02. Mix vanilla extract to fresh milk and set aside. (I prepare this mixture first so that I can add this into the dough mixture straight after rubbing in the flour.  Hands would be too oily by then.)

03.  Add the cubed butter into the sieved flour and swiftly rub butter into flour with clean fingertips until mixture resembles yellow bread crumbs.

04. Fingers will be messy with butter and flour.  With a pastry scraper, scrap the bits stuck on fingers back into the bowl.  The butter is too good and expensive to be wasted!

05. Add milk + vanilla mixture, mix with a metal spoon.

06. If the dough appears dry and cannot be formed into a ball, gradually more cold milk, 1 teaspoon at a time until a soft dough ball finally forms.
07. Chill dough in the fridge for 10 – 20 minutes.  This is to make the dough less sticky and easier to handle.  Do not leave it too long in the fridge, otherwise, it will turn into a very hard block when the butter content turns total solid.

08. While the dough is chilling, roll pineapple jam into tiny balls, 8g each, and  arrange them on a plate. But I usually do this shaping step immediately after my pineapple jam has chilled to room temperature after cooking, and store them in an airtight container in the fridge.

09. Remove dough from fridge.  Weigh 12g of dough, and wrap the pineapple jam with it, and roll it into a neat ball.

10. Arrange tarts on baking tray.  Apply eggwash on top.

11. Bake in preheated oven at 150C for 20minutes.

12. Cool completely before storing in an air tight container.


** The homemade jam recipe yield approx 60 x 8g jam balls (depending on how big the pineapples are), so you might want to double this pastry recipe if you want to finish up the pineapple jam.

Pineapple Jam – 4 Simple Tips

pineapplejam 002

I am really glad that I made the switch to homemade pineapple jam and it is not as difficult as I have imagined.  I always thought that I would either burn the jam or scald myself while stirring the bubbling, boiling hot jam.  But after several attempts, I am glad that none of that happened, what’s more, I have discovered 4 simple tips that make the cooking of pineapple jam not so tedious (or risky.)

01. Cut down the prepping time

Yes, the jam recipe I am using still takes at least 2 hours to cook, but what I am suggesting is to cut down the time taken to prepare the fresh pineapples before grating them.  It is extremely helpful get the fruit seller to have the crown, skin and “eyes” removed, this would take away an hour or so of preparation time, depending on how many pineapples you are using.

02. Cook the jam in a enameled dutch oven

I cook 2 medium size pineapples each time in my 20cm dutch oven pot.  Most recipes state to cook the jam in a non-reactive pot, due to the acidity of the pineapples.  Instead of stainless steel pots which are the most common non reactive cookware, I find that the enameled cast iron pot distributes heat more evenly, very important for jam recipes which require long hours of boiling and and even longer simmering.  Even after the sugar has caramelized, the jam does not stick to the pot easily, scoring extra brownie points as I prefer my jam really sticky for my enclosed pineapple tarts, which means that I tend to cook my jam much longer than stated in the recipe stated.  If you are making open face tarts, the pineapple jam can be less sticky as they will be cooked further under direct heat in the oven with the tart pastry.

03. Add sugar only after the liquid from the grated pineapples has been reduced first

Some recipes ask to combine and cook all the ingredients from the beginning, which would require the cook to stand next to the stove from start-to-end, stirring all the time, so that the jam will not burn due to the sugar.  Thanks to Wendy, I have never once burnt my jam with her tip to add sugar only when the pineapple mixture has almost dry up after the first round of boiling and simmering.

04. Core or no core?

Lastly, some recipes suggest to discard the tough core of the pineapple, and only use the juicy part to make the jam.  That may be true for making spread where you want the jam to be as jelly smooth as possible.  But for pineapple tarts, not only do I like the jam sticky, I like it fibrous as well, as evident in the photo of the end product above.  So I use the core and all, hand grated with the largest size hole on my Daiso grater, instead of the food processor way, to produce jam with a more fibrous texture.  So if you find my jam texture too tough to your liking, either omit the core in your cooking, or use food processor to blend the fruit into a finer texture.

Do you have any other tips to share?

pineapple jam 002

pineapplejam 001

PINEAPPLE JAM
ADAPTED FROM : TABLE FOR 2 OR MORE & TRAVELLING FOODIES

2 fresh pineapples (skin, "eyes" removed)
2 cinnamon sticks
5 cloves
½ star anise
150g-200g raw sugar
2-4 tablespoons lemon juice

METHOD

01. Grate pineapples including the fibrous cores using a grater with a relatively large size hole.

02. Cook the grated pineapple pulp, cinnamon sticks, cloves and star anise in a wide mouth, non reactive cooking pot till the mixture boils.  Turn down the heat to medium and let it simmer and the liquid will start to evaporate.

03. Once the runny mixture has been reduced to a thick consistency, add sugar and lemon juice, amount depending on how sweet/sour your pineapple is, and how sweet/sour you want your jam to be.  This addition will turn the sticky jam into a runny mixture again, continue cooking at medium heat to let the liquid reduce for a second time, stirring all the time with wooden spoon to prevent the sugar/jam from getting burnt.

04.  When the liquid has almost dry out, turn up the heat, this time to caramelize the jam and turn the pale yellow mixture into golden yellow paste.  Remove from heat when you are happy with the color/texture of the jam, and let it cool completely.  Do note that the jam will dry up further during the cooling stage.

Kimchi Spaghetti

kimchi spaghetti 001 kimchi spaghetti 002

This kimchi pasta sauce is even easier to make than the usual tomato sauce, as it requires no simmering.  I pan fried some erynglii mushrooms to replace the meat in the original recipe, and cook everything under 20 minutes.  That’s my kind of instant noodles!

KIMCHI PASTA
ADAPTED FROM : NO RECIPES
INGREDIENTS
SERVING : 1


100g uncooked spaghetti
2 pieces eryngii mushrooms
1 tablespoon olive oil
¼ small yellow onion, chopped
½ cup chopped kimchi
1 teaspoon gochujang/korean hot pepper paste
1 tablespoon hot water
optional for garnishing : black sesame seeds and coriander leaves

METHOD

01. Cook spaghetti, al dente style, according to package instructions, drain and set aside.  I usually dump the cooked pasta back in its cooking pot that has been drained of liquid but still hot enough to keep the pasta warm.

02. Clean and pat dry eryngii mushrooms.  Slice each mushroom, cross section, into 4 pieces.  On a heated pan, place the mushroom slices and cook over medium heat.  Liquid will soon be released from the mushrooms as you cook, keep cooking till the liquid evaporates and when the bottom of the mushroom turns slightly charred, flip and repeat on the other side.  Remove from pan, set aside.  Wipe the pan dry, and use the same pan to cook the kimchi pasta next.

03. To make kimchi pasta sauce, heat olive oil in the pan, add chopped onions and cook till them turn soft and translucent.

04. Add chopped kimchi, and cook till fragrant.

05. Mix gochijang with hot water to dilute the sticky paste.  Pour in the mixture into the kimchi sauce.  Stir around to mix well.  If the kimchi sauce is on the dry side, add one or two tablespoons of water.

06. Add in the cooked spaghetti, and stir around to coat the pasta with the sauce well.

07. Transfer to serving plate, top with pan fried mushroom slices, and garnish with a dash of black sesame seeds and coriander leaves.  Enjoy!