Kaleidocycle

kaleidocycle // mono+co kaleidocycle // mono+co

A Kaleido-what?

While making the popup card yesterday, we stumbled upon another great paper craft on the same site to make this toy.  I can’t explain how the thing works, see here for yourself.  The printable template is there too.  Just print it out, give yourself 10 minutes to sort the instructions out, and then impress the kids with it.

Pixelated Popup Card

pixelatedpopupcard // mono+co

A last minute Father’s Day card made with instructions from here.  The template prints on an A4 paper to make 2 cards.  Neon colors are still a huge trend, so I printed mine on neon pink paper.  It’s a bit tricky to cut and score the template, so I did most of the work, but once the popup step is completed, the rest is free for the kids to design and create their one-of-a-kind Father’s Day Card.

And if you are adventurous enough, there is another 8-bit “space invader” and “skull” pop up tutorial on the site too!

.EAT // Classic Butter Cake

classicbuttercake1 classicbuttercake2 classicbuttercake3
This recipe does not belong to my grandma, but someone else’s 79-year-old grandma, who was featured in The Sunday Times few weeks back.  I made a mental note to keep this recipe, and managed to find an online version of it here.  I love collecting grandma/auntie/mother-in-law’s recipes!

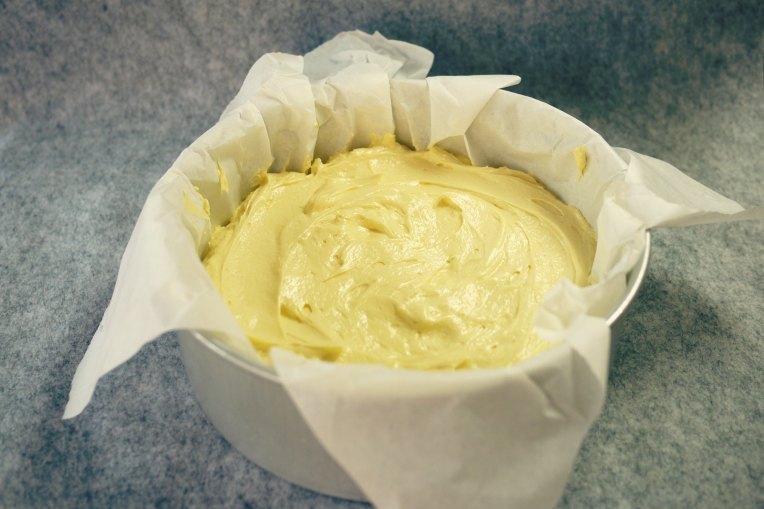
The original recipe makes four 20cm cake.  I found the cake a bit flat when I followed the recipe last week.  So yesterday I halved it, less an egg and baked it in a 20cm x 7cm tall round pan to make one cake.

The best form of complement for this cake is an empty pan on the kitchen counter by late morning today.   The Big Man who usually shuns sweet stuffs has gobbled a few slices for breakfast already.  The little ones could not resist the temptation for a butter-cake-with-hot-Milo supper last night….

CLASSIC BUTTER CAKE
// Adapted from : Soshiok.com

INGREDIENTS
250g salted butter, soften at room temperature
1 cup fine sugar
1/4 teaspoon vanilla extract
5 eggs
1 cup self raising flour, sifted

Oven Temp : 150C
Bakeware : 20cm x 7cm (Height) Round Pan

1. Preheat the oven to 150C.
2. In an electric mixer on medium speed, cream the butter and sugar for about 10 minutes until well-mixed and fluffy. Leave the mixer on medium speed for the next two steps.
3. Add the vanilla extract.
4. Crack the eggs in, one at a time.
5. Add the self-raising flour in two batches at low speed. Run a spatula along the side of the bowl to make sure all the flour is blended properly. You should get a smooth and creamy batter.
6. Pour batter into baking pan.
7. Place the tins in the preheated oven to bake for about 50 minutes.
8. Insert a toothpick or knife into the middle of each cake. If it comes out clean, the cakes are ready. Cool them in the baking tins for about 15 minutes on a rack.
9. Take the cakes out from the tins and serve. If not consumed immediately, keep the cakes in air-tight containers and refrigerate.


DIY Envelope Liners

envelopeinserts // mono+co envelopeinserts // mono+co

Followed these instructions to make DIY envelope liners: a simple and low cost way to decorate my otherwise cheap and plain “$1-for-20” white envelopes.  Had extra pattern papers for lining the smaller brown ones too!

And because I used budget envelopes (paper is of the thinnest quality, not Conqueror type) for this project, I could not disassemble the envelopes without tearing them up.  I overcome this problem by simply outlining the envelope with its flap up on the pattern paper, cut this out, and then trim 1cm away only around the flap border.  After that, Insert the liner into the envelope and apply glue on the underside of the pattern paper to secure.  It might not be as neat as if you were to following the original instructions, but hey, no one is going to disassemble the envelopes just to check either!

I find simple monotone pattern papers work best for this project.  You can print your own envelope patterns like these, or browse around here and here to download free paper patterns for personal use.