Green Monday : DIY Cotton Ironing Board Cover (No-Sew)

Green Monday : DIY Cotton Ironing Board Cover (No-Sew) // Mono + Co

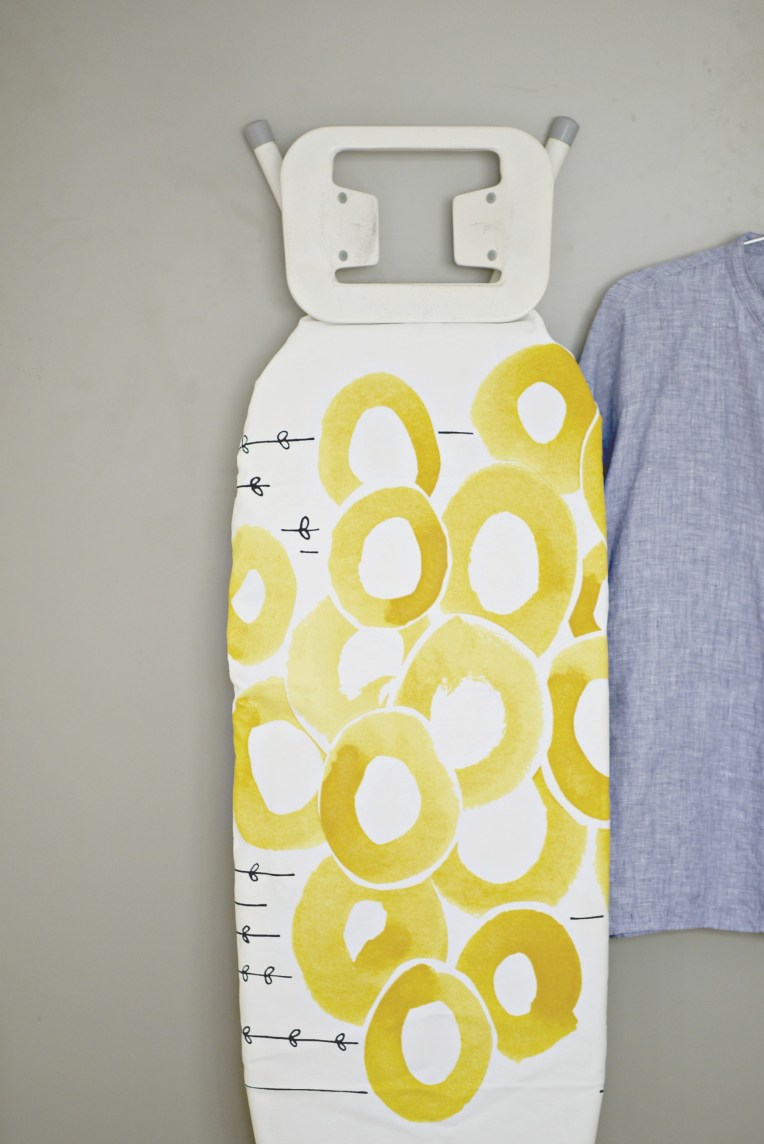
Sometimes, synthetic materials are so ubiquitous in our lives that I often overlook simpler/ natural alternatives until I ask myself if a DIY avenue is possible.  For all the countless ironing board covers that I have been replacing over the years, I always blindly pick one from the shelf pondering over only the size and pattern design but never the material composition.  There wasn’t much choices available at the supermarket where I usually buy my covers from and technology all seems to be pointing towards a shinier and easier-to-glide surface for a perfect press anyway.

Green Monday : DIY Cotton Ironing Board Cover (No-Sew) // Mono + Co

When the latest cover accidently got burnt by a wrong temperature setting (note to self: focus!) and let off a plasticky whiff, I started wondering if I should seek a better cover made of a thicker material with a higher heat resistance level.  I started recalling how my mom used to make us do our ironing seated on the floor without an iron board.  What lies underneath the garment is just a huge piece of heavy cotton canvas that has been folded multiple times to create a thick pad.  And after we were done, the canvas was stowed away nicely in the wardrobe, unlike the modern bulky standing iron board that sticks out like a sore thumb propped against one side of my bedroom wall.  I don’t intend to discard my ironing board since I have grown accustomed to doing my ironing while standing, but this brief reminiscence reminded me of a piece of cotton cloth that could be perfect for this DIY.

Green Monday : DIY Cotton Ironing Board Cover (No-Sew) // Mono + Co

The cotton cloth fits the dimension of the ironing board nicely, but I wasn’t in the mood to sew this by hand, yet.  Instead, I retain the damaged cover (a temporary pad since I find the cotton not thick enough) and start manoeuvring the cloth around to wrap the cover and the ironing board.  If you can make your own bed or wrap a present neatly, this should not be difficult.

Green Monday : DIY Cotton Ironing Board Cover (No-Sew) // Mono + Co Green Monday : DIY Cotton Ironing Board Cover (No-Sew) // Mono + Co Green Monday : DIY Cotton Ironing Board Cover (No-Sew) // Mono + Co

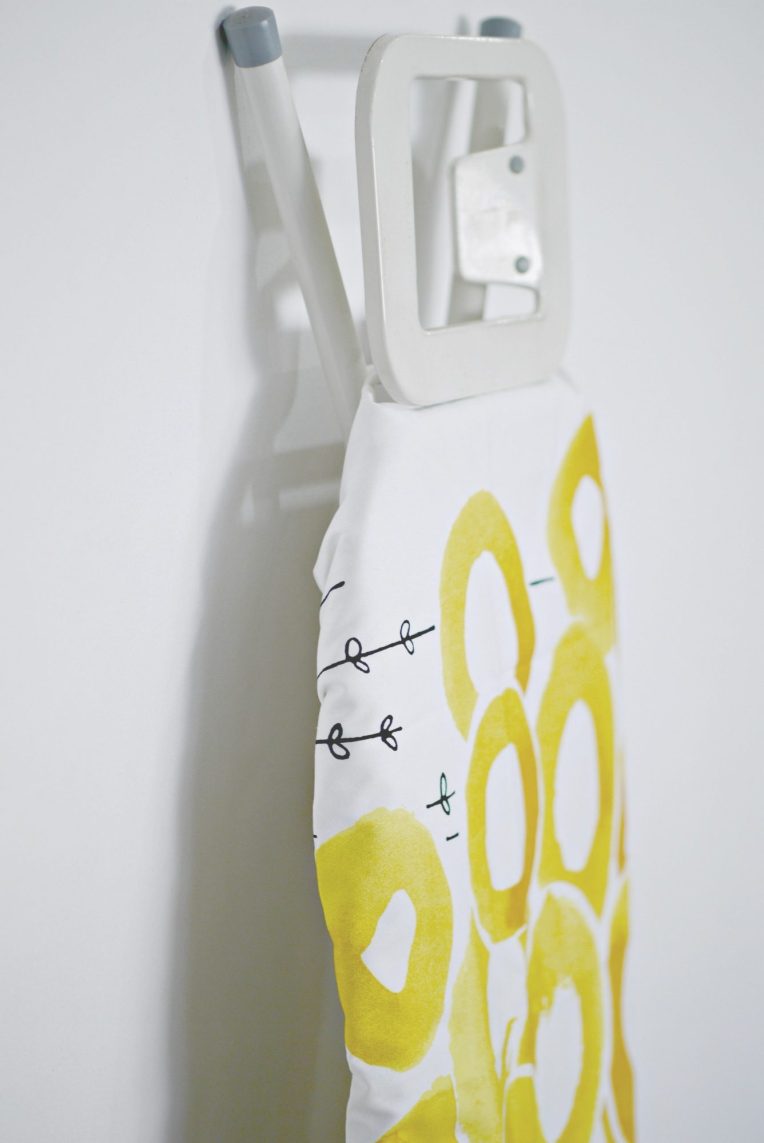
When it comes to the narrowest end of the ironing board, I can’t tuck in all the excess fabric without obstructing the folding parts of the the board for storage.  Instead, I used a hair tie to gather the bulk end tightly to keep this part of the board tapered and neatly so that the cover doesn’t move around when ironing.

Green Monday : DIY Cotton Ironing Board Cover (No-Sew) // Mono + Co  Green Monday : DIY Cotton Ironing Board Cover (No-Sew) // Mono + Co

I am working on part 2 of this DIY : finding a suitable padding material and putting everything together, sewn by hand. But if you are lucky enough to own a sewing machine, here are few links that will be useful:

Craftsy blog

The 36th Avenue

My Plastic Free Life

The Spruce

Save

Save

Save

Save

Save

Save

Cucumber Cold Soba Salad

Cucumber Cold Soba Salad // Mono + Co

The hot weather lately is becoming unbearable.  I decided to save myself from the hot kitchen by tossing a salad for lunch.  The only cooking involves boiling the soba, which only takes 4 minutes on the stove if you use an electric kettle to boil the water beforehand.

Cucumber Cold Soba Salad // Mono + Co

I halved the portion and dropped miso and tahini from the original recipe as I wanted a light clear dressing.  Instead of soy sauce, I seasoned the salad with liquid aminos, something I have grown to like with soba.  Rice vinegar provided a nice tangy finish to the dressing, I also added more sesame oil than the original recipe.

Cucumber Cold Soba Salad // Mono + Co Cucumber Cold Soba Salad // Mono + Co Cucumber Cold Soba Salad // Mono + Co


Cucumber Cold Soba Salad

adapted from cookie and kate

1 bunch of soba noodles
1 small japanese cucumber
1 stalk scallions, chopped 
1 stalk cilantro, chopped
1 tablespoon rice vinegar
1/2 teaspoon grated ginger
1 tablespoon liquid aminos
or, light soy sauce
1 tablespoon sesame oil
1 teaspoon red pepper flakes
1 tablespoon black sesame seeds

Cook soba according to instructions on the packaging.  Drain and rinse with cold water until the noodles are at room temperature.

To prepare Japanese cucumber, use a vegetable peeler to peel skin, use a knife and julienne the peel into thin strips.  Cube the rest of the cucumber and set these aside.

In a bowl, whisk to mix rice vinegar, grated ginger, liquid aminos, sesame oil and red pepper flakes.  Adjust according to taste.  Mix this dressing to coat the cooked soba noodles in a large bowl. Then toss in cubed cucumber and the julienned peels, chopped scallions and cilantro, and black sesame seeds. Adjust seasoning further to liking.

Serve immediately.

Save

Save

Save

Save

Save

Save

Save

Green Monday : DIY Bath/Foot Soak

Green Monday : DIY Bath/Foot Soak // Mono + Co

After a while, the habit of reading food ingredient label will automatically extend to the body care product section.  With more beauty trends focusing on naturally derived ingredients, I also started making some for my own use with very basic recipes starting with bath and body products.  It’s tempting to stock up on a variety of ingredients to keep up with the huge range of diy bath product recipes available online, but I am determined to stick to what I already have.  Apart from a few types of essential oils, sweet almond oil, and castile soap that I bought last year (Yes! All these lasted me that long!), I got the rest from my kitchen pantry: honey, baking soda, raw sugar, sea salt, coconut oil, oatmeal, apple cider vinegar, etc.  I am very tempted to buy some bentonite clay, but that will probably have to wait until I finish up my jar of store-bought clay mask.

I always tell my friends that they will get a lot more bang for their buck if they make home spa products at home.  Since I am making these products for my own use, chance are I will be super generous with the key ingredients such as honey or olive oil, food grade, no less and sometimes even organic.

I made this “Rosebuds + Himalayan Pink Salt + Epsom Salt” bath soak for a recent vacation and like it so much that I made more back home as a foot soak since I don’t have a bathtub. For this soak, I used a mix of Epsom salt and Himalayan salt, with more of the latter since it is the cheaper of the two.  The rose buds from floral tea section were honestly more for aesthetics purpose, to have an entire bathtub of water smell like rose tea, I will need way more than the 30+ buds that I have added here.  If you have a favorite essential oil that you like, add a few drops of that instead.  The addition of rosebuds is a nice touch if this is put together as a gift.

Green Monday : DIY Bath/Foot Soak // Mono + Co

This 300g bottle of bath/foot soak took me less than 5 minute to diy and cost less me than $2.  Make one for your regular home spa treat, or pack this in your luggage to soothe your aching muscles at the end of the day!

Here are some interesting links that I referred to when I decided on the Epsom and Himalayan salt mix, with some common precaution to note when taking bath soak:

// 2-salt combo mentioned here, here and here as a detox bath

// a pretty gift idea

// Epsom salt with baking soda, also for detox

// precautionary notes here state that Epsom salt are not recommended for patients with high blood pressure or severe varicose veins

// benefits of Epsom salt, and Epsom salt baths here

// or detox with just Himalayan salt

Save

Save

Save

Save

Save

Save

Save

Save

Save

Save

Save

Save

Simple Pleasures

Simple Pleasures // Mono + Co

// going bagless.

Simple Pleasures // Mono + Co Simple Pleasures // Mono + Co

// losing a jar lid to rust, but found a substitute almost immediately.

Simple Pleasures // Mono + Co

// plastic-free baking measuring tools.

Simple Pleasures // Mono + Co

// upcycled cologne bottles.

Simple Pleasures // Mono + Co

// we are ready.

Save

June Holiday Activities + DIY Natural Insect Repellent

June Holiday Activities + DIY Natural Insect Repellent // Mono + Co

The mid-year school holiday will start this weekend and there is no lack of outdoor activities on our sunny island, a great opportunity for the little ones at home to get connected with nature or outdoor sports.  I always fully embrace the idea of playing a local tourist at home as a frugal mom, so I have listed some events that have caught my eyes at the end of this post.

Let me first jump the topic to my homemade insect repellent as this is a must-have in my outdoor bag with the entire family being walking mozzie magnets.  To start, let’s find a spray bottle.

June Holiday Activities + DIY Natural Insect Repellent // Mono + Co

Remember these handy mosquito repellents that the schools and RCs distributed a few years back?  Check the expiry dates, they have probably passed their effective period.  But don’t throw them away yet, the spray bottles can be refilled with a homemade Deet-free natural version, recipes and instructions can be easily found online like this, this, this and this.

Most of these recipes require just 2 or 3 of the following ingredients.

++01. Essential Oil

An essential oil or mix that repels mosquitoes and bugs: choose from Citronella, Eucalyptus,  Tea Tree, Lavender, Peppermint, and Neem just to name a few.  My favorite combination is 70% citronella + 20% tea tree + 10% eucalyptus.  If you are new to essential oils, stick to Citronella and try it out before getting more.  Always, always dilute essential oils before use.

++ 02. Witch hazel, or distilled water.

Some recipes use only witch hazel, some mix equal part of witch hazel to water.  I choose the cheapest/convenient way, only boiled water that has cooled down.

++ 03. The optional ones:

// Vegetable glycerin as an emulsifier. I happen to have glycerin at home so I add it to my latest batch.  For some reason, this works much better than just essential oil diluted with water.
// A carrier oil like sweet almond to bind the repellent better to our skin.  I don’t usually a carrier oil, but an oil based repellent’s effectiveness will last longer without regular reapplication.  When I need something stronger and don’t have time to reapply the water base repellent every hour, I will make a rub-on repellent instead by adding essential oil directly to the carrier oil and store this a brown bottle, away from light.
// Vodka is sometimes suggested to be added as a preservative.  Since I don’t make the repellent spray in bulk, usually just enough for half a day outer activity, I don’t add it as well.

June Holiday Activities + DIY Natural Insect Repellent // Mono + Co

Now that the worry of getting bitten by bugs is out of the way, let’s run through to the outdoor activities for the coming school holiday:

+ Car Free Sunday on 28 May 2017.  Wake up early and kick off the school holiday the car-free way!

+ Pesta Ubin 2017: Happening since May 10, but there are still plenty of free activities being organized every weekend.

+ Nparks Concert Series in the Park at Fort Canning on 3 June.  It’s retro theme with music from the 60s to 90s this time.

+ DBS Marina Regatta from  1-4 June.  Interesting activities such as trying out dragon boating and participating in various fitness sessions are available with pre-registration required.

+ SPH Gift of Music at Singapore Botanic Gardens on 10 June featuring Singapore Chinese Orchestra.

+ Kranji Farmer’s Market on 11 June.  While you are there, take a self guided tour to explore the heritage trail that covers 14 historical and agricultural trail markers, such as Kranji War Memorial and Thow Kwang Industry that house the last dragon kiln in Singapore.

+ Gardener’s Day Out on 17 June at Hortpark.

+ Opera in the Park on 17 June at Singapore Botanic Gardens.

+ Weekends in the Park on 17 June at Pasir Ris Park.

+ Ecolife at Coney Island Park on 24 June , a guided tour with pre-registration required.

+ Istana Open House on Hari Raya Day 25 June.

Save

Save

Save

Save

Save

Save

Save

Save

Save

Save

Save

Save

Save

Cooked Rice Pullman Loaf

Cooked Rice Pullman Loaf // Mono + CoCooked Rice Pullman Loaf // Mono + Co

Leftover rice is quite common in my kitchen.  In fact, I will sometimes cook extra for dinner with the intent to turn them into a fast 5-minute fried rice the next day.  Boiling leftover cooked rice with water to make instant porridge is another great idea since the time taken for grains to turn soft is greatly reduced.

This white rice Pullman loaf recipe is a new keeper.  I simply altered a favorite taro bread recipe with leftover cooked rice, out from the oven came a light and fluffy loaf.

I will be baking another loaf later.  This time, I will be cooking the rice for making the bread first, preparing extra for dinner which will be kept warm in a thermal pot until meal time.

Cooked Rice Pullman Loaf // Mono + Co Cooked Rice Pullman Loaf // Mono + Co


Jasmine Rice Pullman Loaf

100g cooked white rice
240g plain flour
1 teaspoon instant yeast
2 tablespoons raw sugar
1 egg **
80g water ***
1/4 teaspoon sea salt
28g cold unsalted butter, cubed

** I used egg weighing 57g with shells
*** You may need more or less of the water stated in the recipe, depending on the flour type and hydration level of the cooked rice.

Blitz cooked rice with as little water as possible with a hand blender, just enough to make a smooth paste.  Add this paste to plain flour, instant yeast, raw sugar, beaten egg, and half of the water into a mixer bowl.  Start the mixer to knead with a dough hook attachment on the lowest speed (KA 1).  Slowly add the remaining water with the mixer running, when the ingredients come into a ball,  stop adding and turn off the mixer.  Let the dough rest for 15 minutes.

After 15 minutes, sprinkle the sea salt on the dough.  Start the mixer running on its lowest speed again to knead the dough for 1 minute, before adding cubed butter, one by one.  Knead until the dough reaches window pane stage, this is when the dough becomes very smooth and elastic, and starts to pull away from the sides of the bowl.  Remove the bowl from mixer, cover and bulk rise for 1 hour.

After an hour, the dough should rise and increase its volume, punch it down to release the gas, and transfer to a clean work top.  Flatten the dough to push out gas trapped inside the dough.  The dough is quite sticky, flour hands and worktop with flour to help with shaping.  Shape the dough into a log and place it in a greased bread tin, seam side facing downwards.  Let this sit in a draft-free place to rise for another 50-60 minutes.  When the bread has risen to the rim of the baking tin, brush some milk on the surface.

Bake in a preheated oven at 170C for 30 minutes.  Remove the bread from the pan immediately after baking, and let it cool on a rack completely before slicing or serving.

Store in an airtight container if not consumed immediately, to keep the loaf soft and the crumbs from drying out.

Save

Save

Save

Save

Save

Save

Save

Save

Sweet Milk Bread Loaf

Sweet Milk Bread Loaf // Mono + Co

This is baked with the same straight dough recipe that I use for making sugar topped pull apart buns.  Instead of baking in a rectangular cake pan, I divided the dough into 6 portions and arranged them in a bread tin to be proofed into a loaf.

Sweet Milk Bread Loaf // Mono + CoSweet Milk Bread Loaf // Mono + Co  Sweet Milk Bread Loaf // Mono + Co

The dough rose beautifully to reach the brim in less 60 minutes.  Simply adjust the baking time 5-8 minutes longer at the same oven temperature.

Sweet Milk Bread Loaf // Mono + CoSweet Milk Bread Loaf // Mono + Co  Sweet Milk Bread Loaf // Mono + Co

Save

Save

Green Monday : 327 Days Cotton Tote

Green Monday : 327 Days Cotton Tote // Mono + Co Green Monday : 327 Days Cotton Tote // Mono + Co

Being attractively simple in design, like a blank canvas, there is no lack of cotton tote bags with creative designs for sale in the market.  In fact, cotton tote bags are also popular as corporate gifts and event goodie bags.  So is it better for the environment with more people buying and switching to cotton bags?  It depends.  According to a study by UKEA, a cotton tote bag is more environmentally friendly than a plastic bag only if you use it more than 327 times, given that the carbon footprint emitted by the manufacturing process of a cotton tote is significantly higher than that of a plastic bag.  This means that even if I use the cotton bags every weekend for shopping, that is still only 104 uses/days in a year.  More than 3 years of uninterrupted weekend usage is required before the carbon footprint of the tote bag production can be offset and made comparable to a HDPE plastic bag.  I am not sure if the cotton bags can last that long, but as this article readily pointed out, the ironical thing about cotton totes is that ‘people don’t actually use them.’

Besides having quite a few that I use regularly for grocery shoppings, I also try to use the well-made cotton tote bags stamped with corporate logos more often than they sit in the storeroom.  This can be done by jazzing them up a little to look slightly less like a freebie and more like something from Etsy, with a few embroidery stitches here and some embellishments there.

Cotton tote bags function really well as a weekend carryall tote if you are blessed with a perfect size one like these below.  Luckily, this makeover project is not too tedious given the subtlety of the corporate logo.  I’m sure you can tell where the company logo used to be.  And I managed to keep the rest of the original silkscreen motifs intact which I like very much.  And off they go towards 327 days of usage, hopefully, more.

Green Monday : 327 Days Cotton Tote // Mono + CoGreen Monday : 327 Days Cotton Tote // Mono + CoGreen Monday : 327 Days Cotton Tote // Mono + CoGreen Monday : 327 Days Cotton Tote // Mono + CoGreen Monday : 327 Days Cotton Tote // Mono + Co

Save

Save

Save

Save

Save

Save

Save

Save

Save

Save

Save

Save

Save

Save

Save

Save

Save

Simple Pleasures

This post is inspired by a recent photo book I have read and re-read over the past week: HDB Homes of Singapore.  118 homes nestled in the heartlands are featured in this super thick (and 4.9kg-heavy) book by Japanese couple Tamae Iwasaki and Eitaro Ogawa.  While I have always been awed by beautiful HDB apartments featured in the local decor magazines, this book isn’t about glamorous interiors or stunning home makeovers.  Instead, the photographs bring these apartments to life by showcasing the real, surprisingly warm, and unedited state which homeowners live in, clutter and all.  And it’s hard not to fall in love with these every day yet unique homes.  Each featured unit and every photo come with a short narrative that the couple meticulously pens after talking to the homeowners to find out more about the stories behind themselves, their stage of life, their style, and even knick-knack items that filled and shaped the home.

I shall make an attempt to mimic this editorial style to feature a few easily-forgotten and underappreciated “spots” around my place that make it such a pleasure space to stay.  Shamelessly labeling this home #119 : Simple Pleasures.

Thanks for making me fall in love and appreciate my HDB home all over again.

// No west sun means cooler rooms to enjoy in the evening.
// 没有夕照的房间, 夜晚家里的温度舒服一些.

// The homeowner appreciates this generous outdoor laundry drying rack design that seems to have disappeared in the newer flats.  Solar power is free!
// 户外晾晒衣服的好处数不尽: 免费.环保.杀菌. 新一代的组屋快看不到了.

// Indoor greens, planted or drawn, are placed around the house for a soothing effect.
// 为空間或墙上增添一些绿意, 清爽过每天.

// The homeowner has a knack for diy decor items like this wool felt ball garland in the master bedroom.  “Wake up happy” is a very possible blissful dream every day.
// 屋主偏爱手作品, 主人房墙上的羊毛球串是其中之一. “每天开心地起床” – 简单且实际的幸福梦想.

// Another handmade wool felt ball garland, this one is a colorful version placed in the kids’ bedroom.
// 又一手作羊毛球串, 彩色的, 让孩子的房间明亮起来!

// Souvenirs from holidays are meant to be displayed, not kept deep inside the cabinet.
// 把出国买回来的纪念品摆出来, 藏起来的别买.

// The family’s eco + diy habit has spread to upcycling glass jars, plastic cups and containers, and paper boxes into decorative or useful items around the house.
// 这家人把环保, 手作, 和居家良品合为一体了.

// A super practical way to use the window grilles.  I spy a polar bear.
// 超级实际的窗口铁花. 看见北极熊在玩躲迷藏.

// A naturally bright and airy bathroom, keeping everything clean and fresh.
// 光线充足空气流通的浴室, 自然就会清新整洁.

// Colorful spot in the bathroom, one of the pails used to be a bath tub for the children when they were newborns.  Personal memorabilia! Can you guess which one?
// 多彩的浴室角落, 其中一个塑胶桶是屋主的小孩刚出世时用过的婴儿浴盆. 小朋友的个人纪念品! 猜得到是哪一个吗?

// Waste paper and newspaper recycling spot, neatly stacked up and bundled with paper strings.
// 整齐的纸张环保角落, 的确会让人更愿意分类,整理.

// Another colorful spot, the household waste sorting and recycling corner.  The homeowner revealed that she is gathering a set of sandcastle building tools by upcycling various plastic containers collected over the past few weeks.  She has so many different eco projects ideas!
// 又一个多彩的环保角落,  小小的垃圾分类回收区.  屋主透露这几个礼拜正在累积无法避免的塑胶包装材料, 把它们循环成堆沙城堡工具,模具.  全年都有不同的环保创意主題!


HDB Homes of Singapore is available at here and an exhibition titled HDB Homes Of Singapore: The Photo Exhibition by Keyakismos and Tomohisa Miyauchi is currently held at SPRMRKT till 27th June 2017.

Save

Save

Save

Save

Save

Save

Save

Save

Save

Save

Save

Save

Save

Save

Save

Save

Save

Save

Save

Save

Save

Save

Save

Save

Save

Save

Save

Save

Save

Save

Save

Save

Save

Save

Save

Save

Save

Save